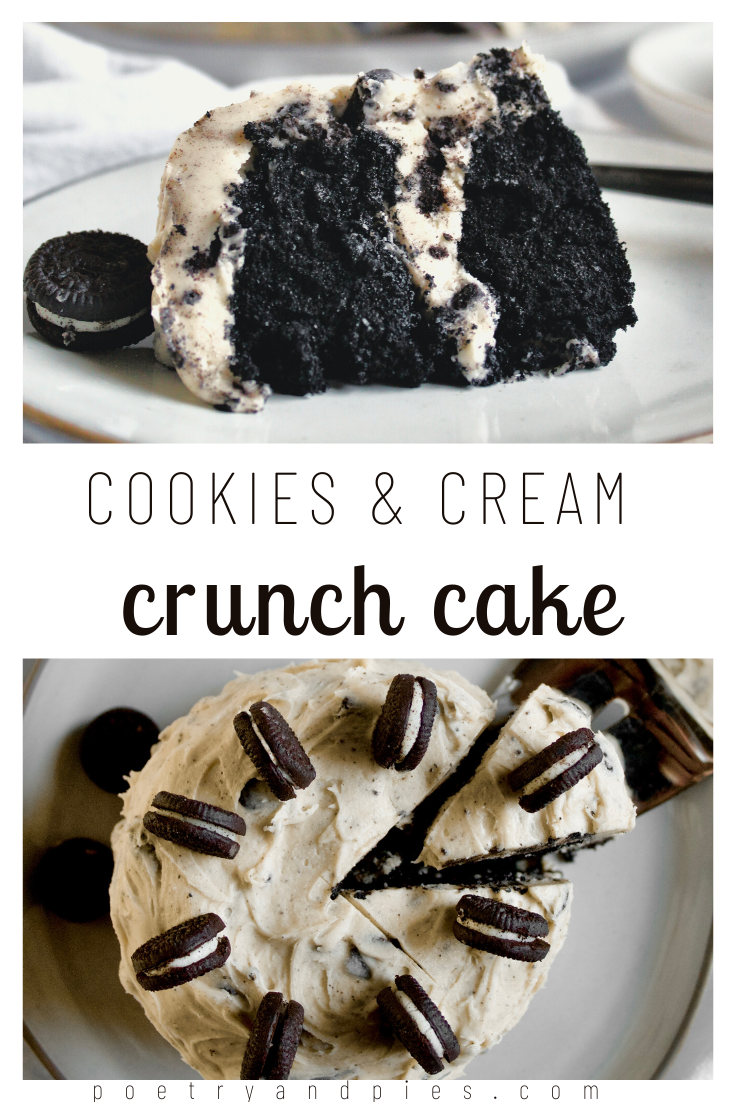
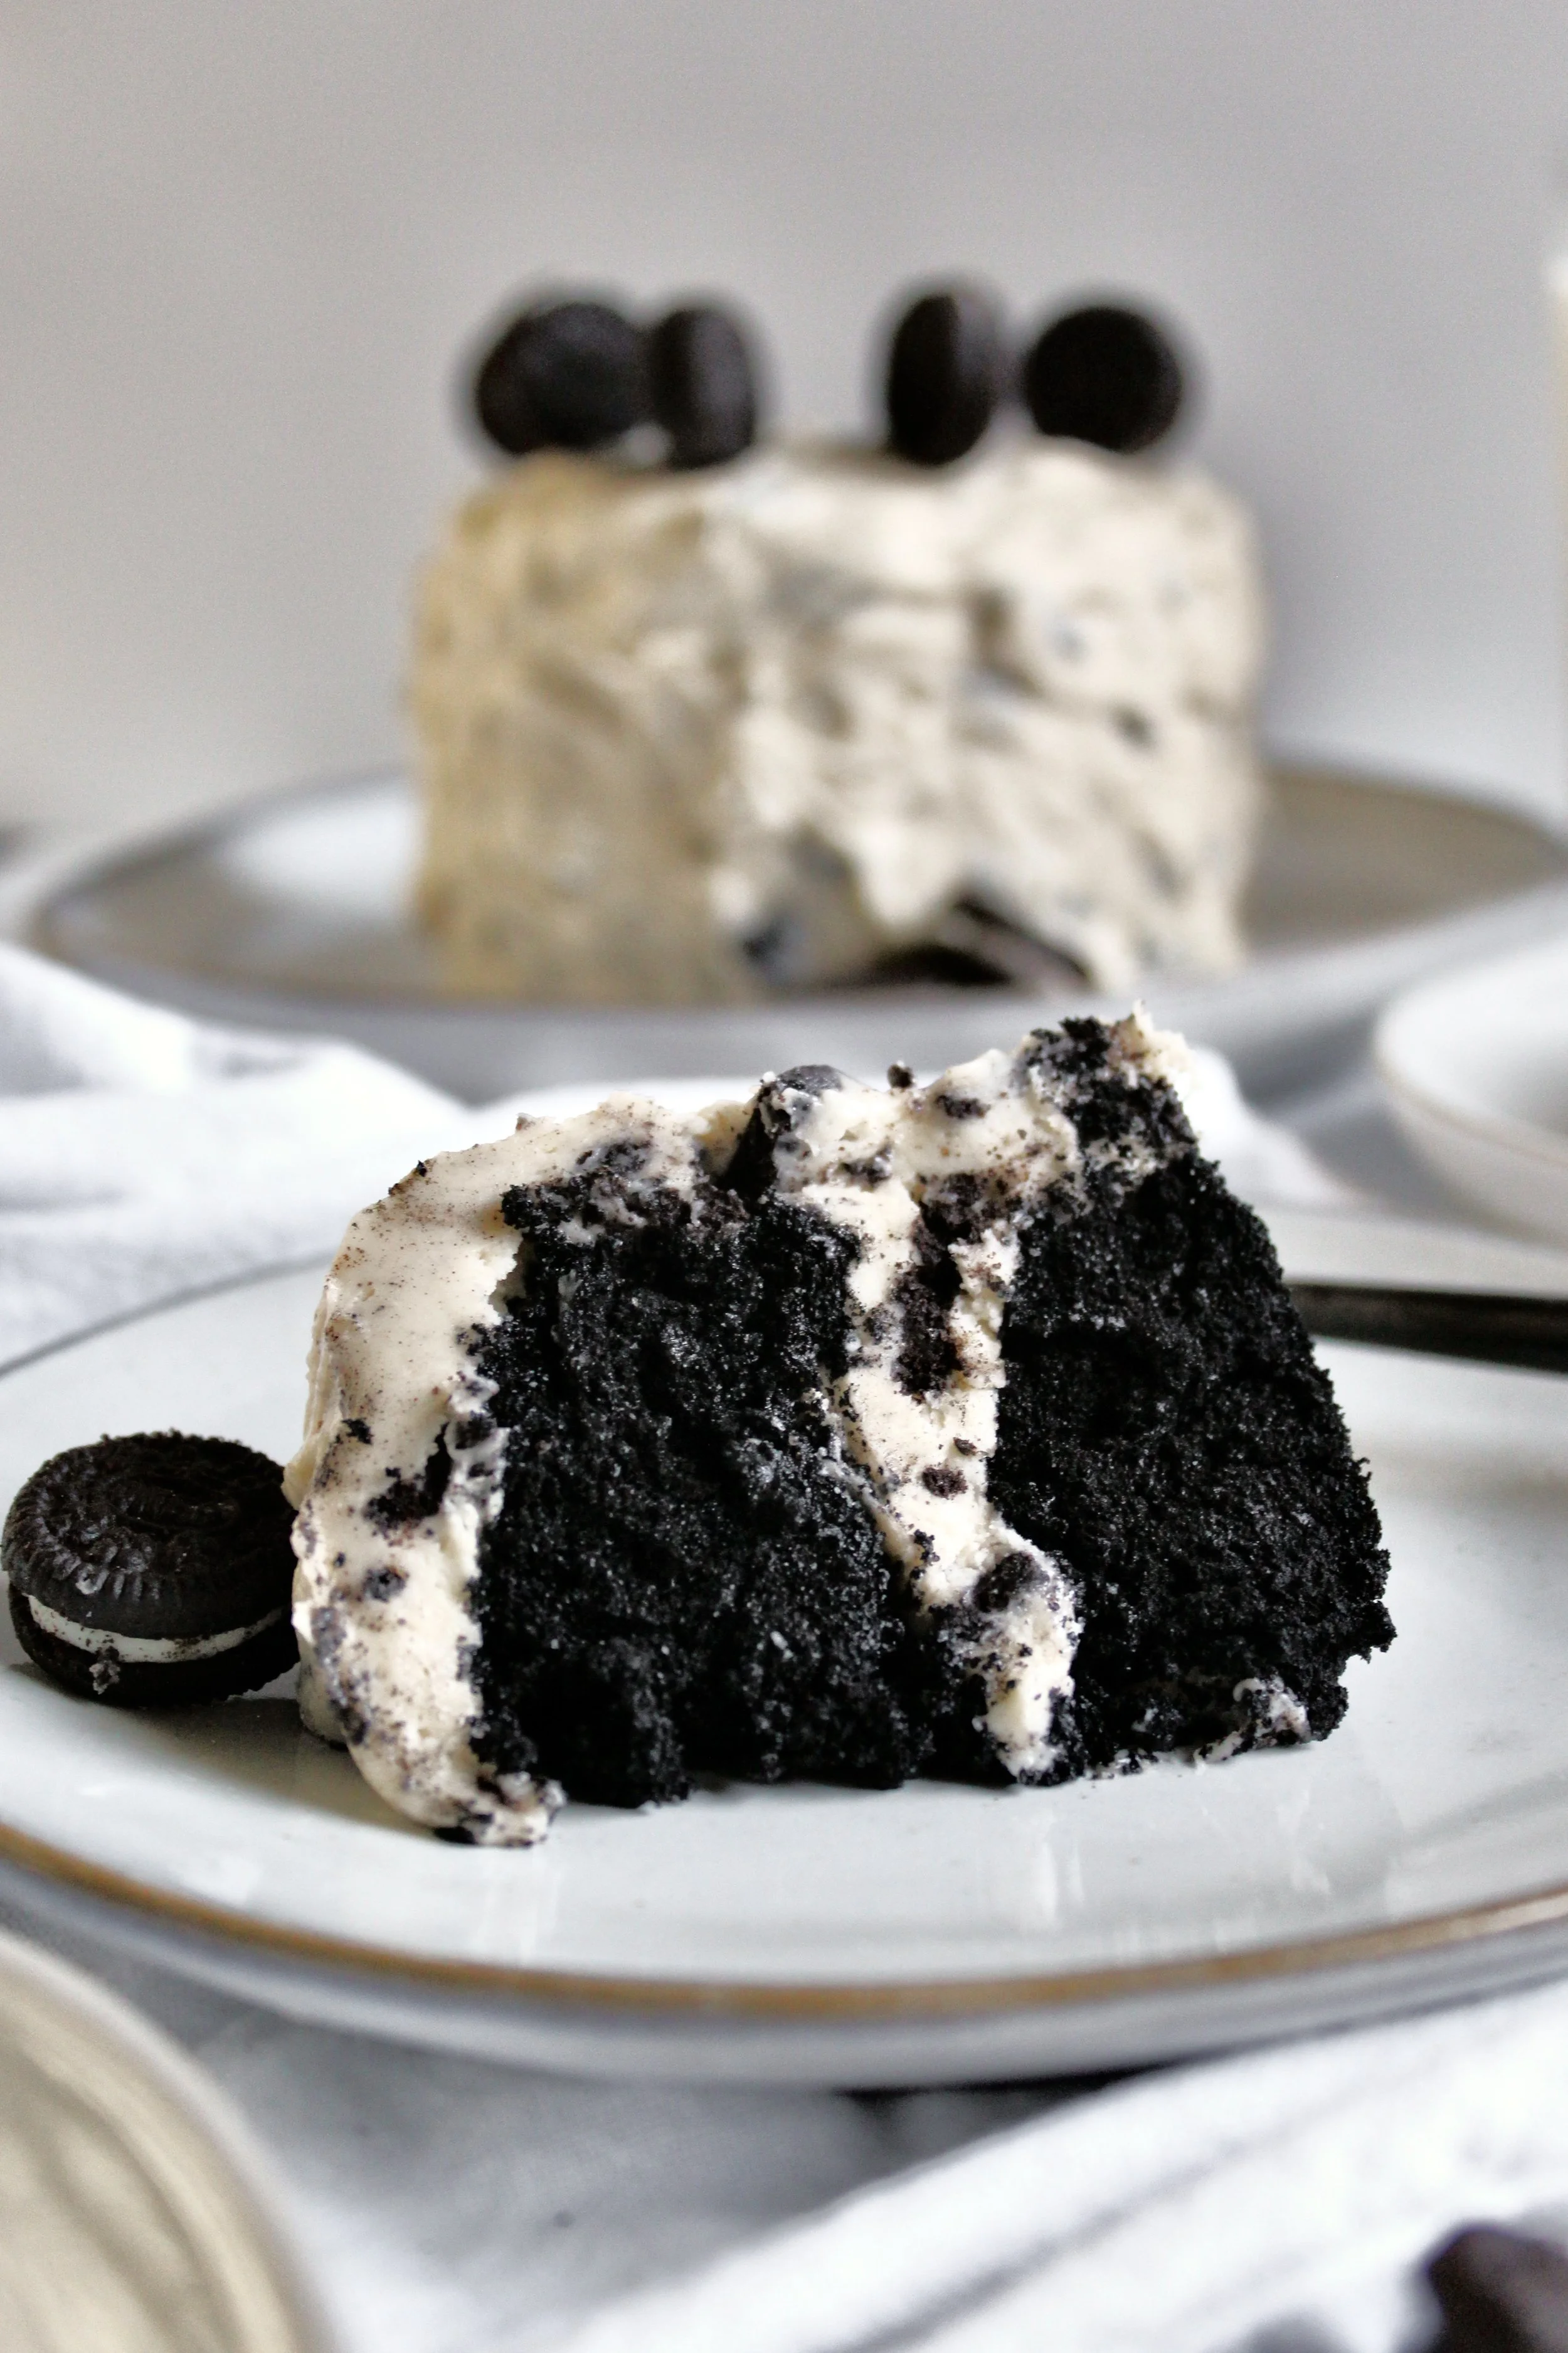
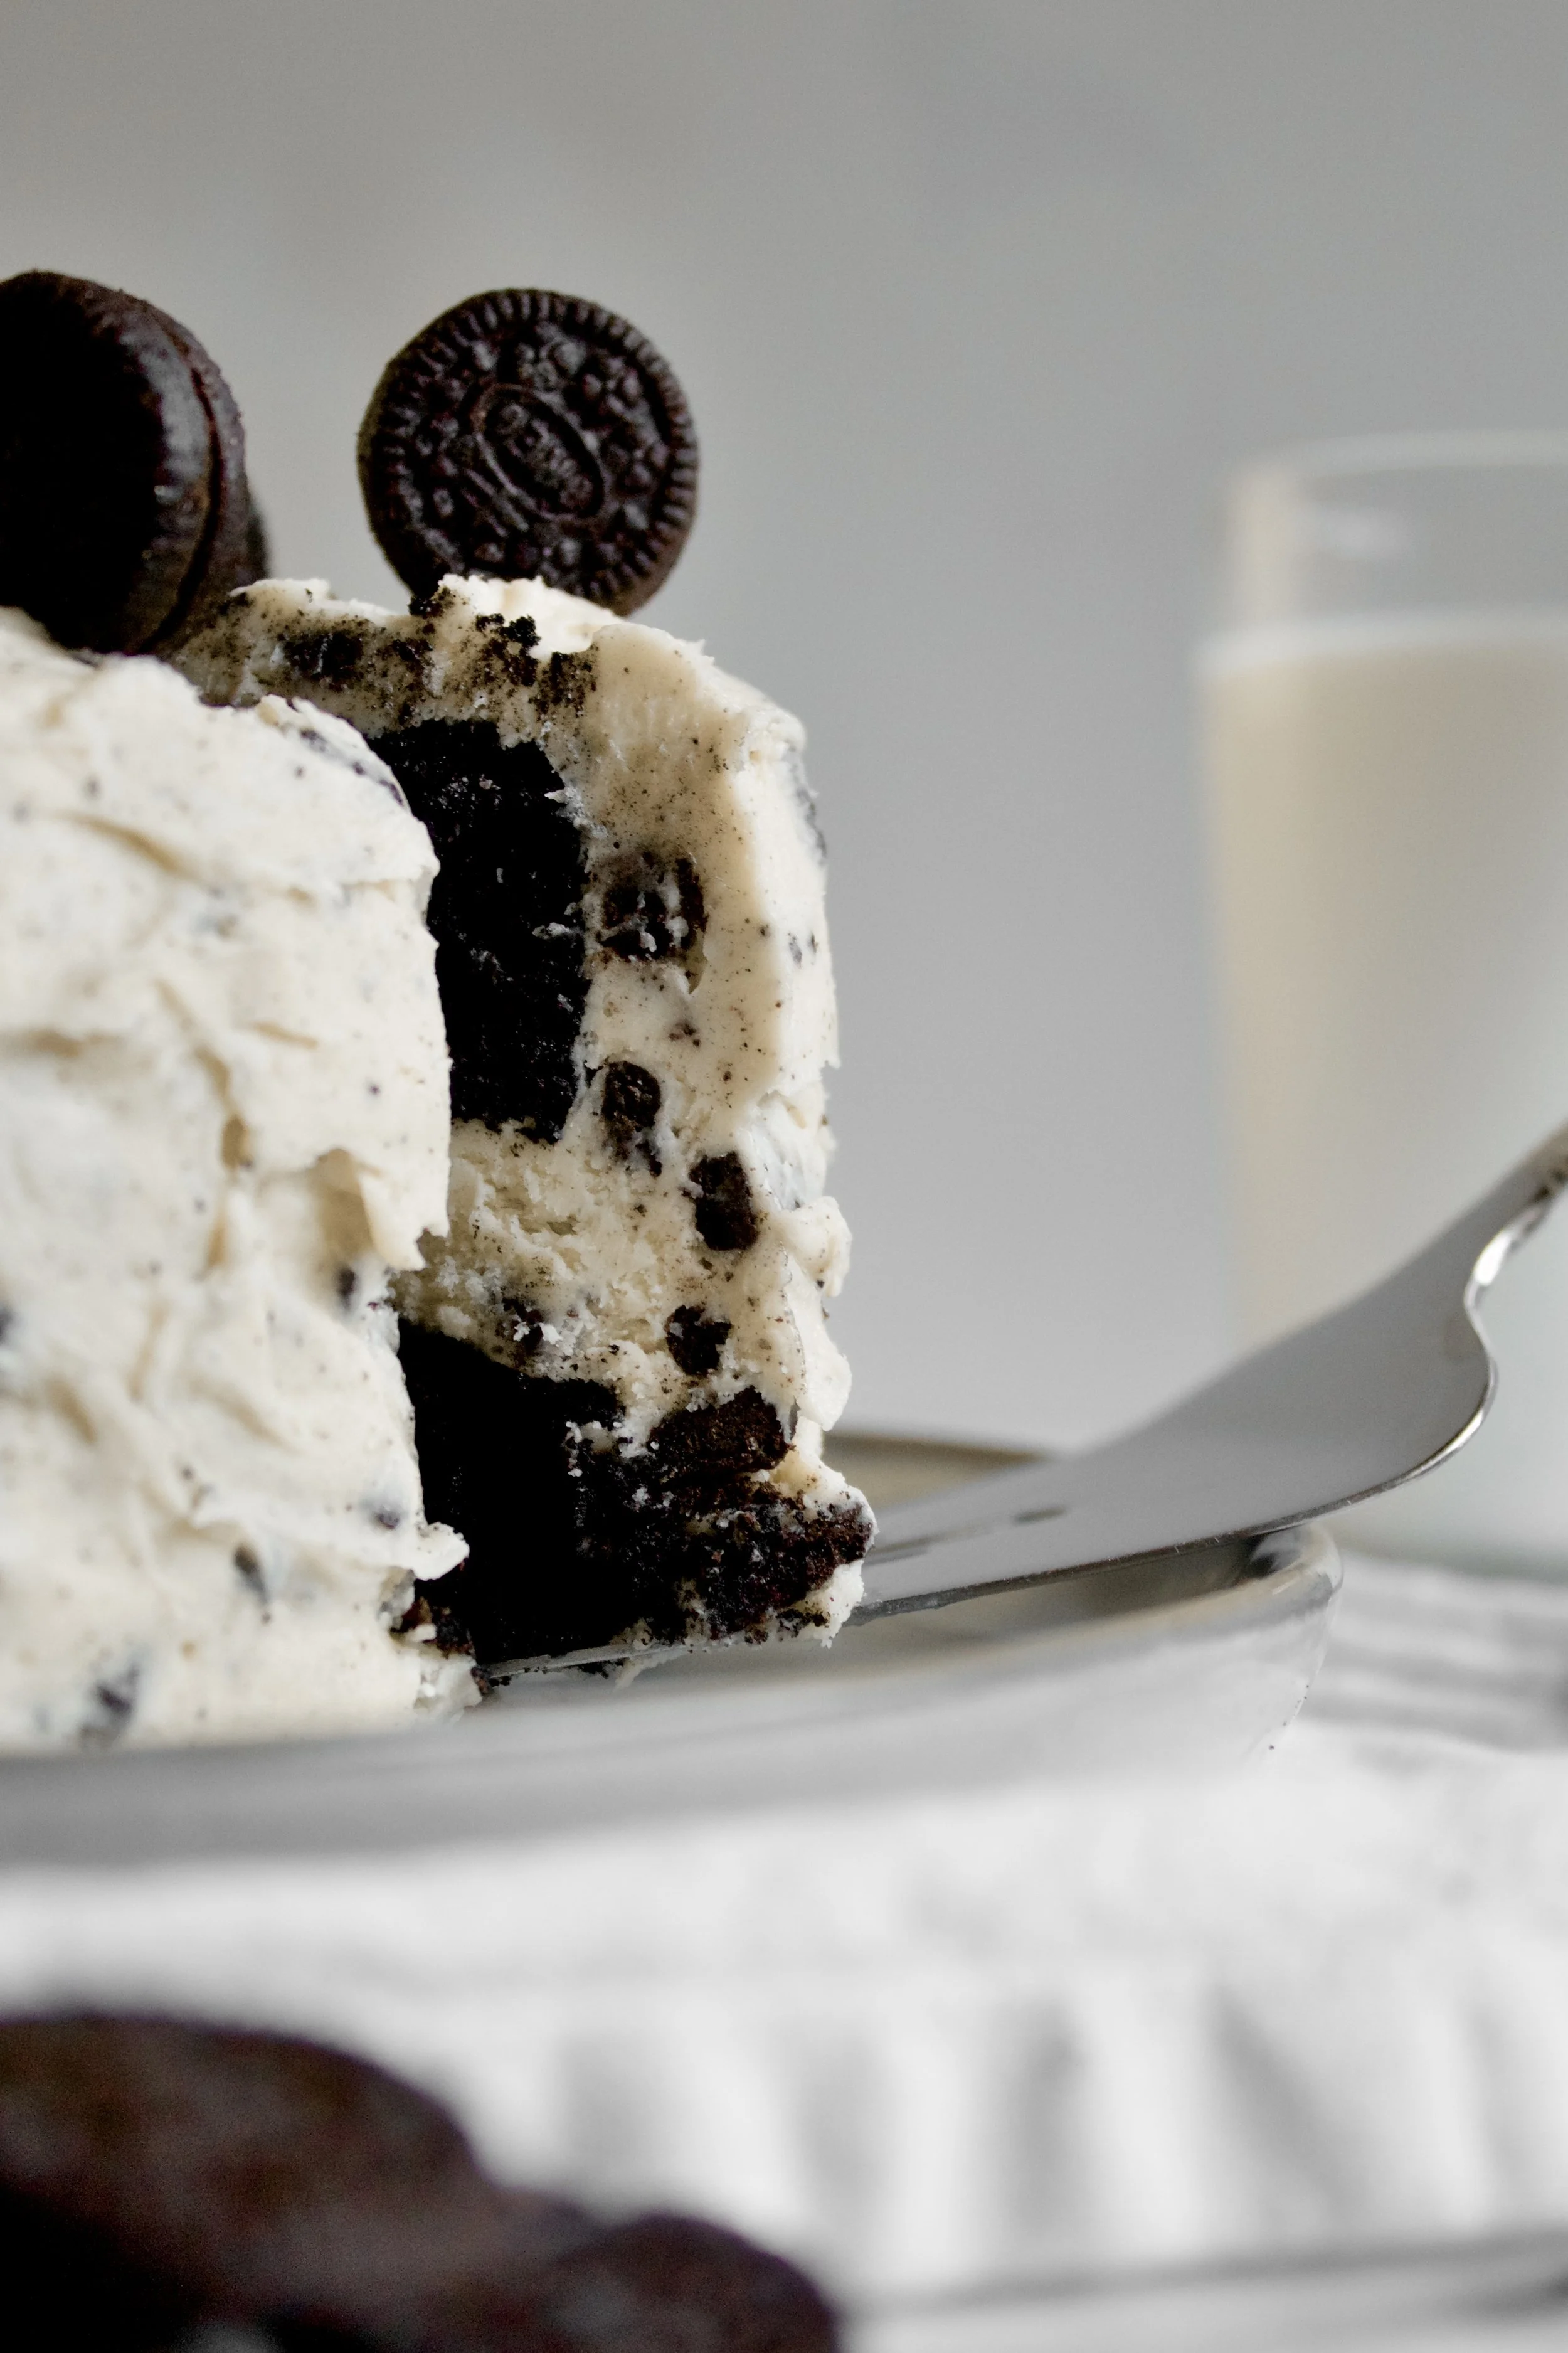
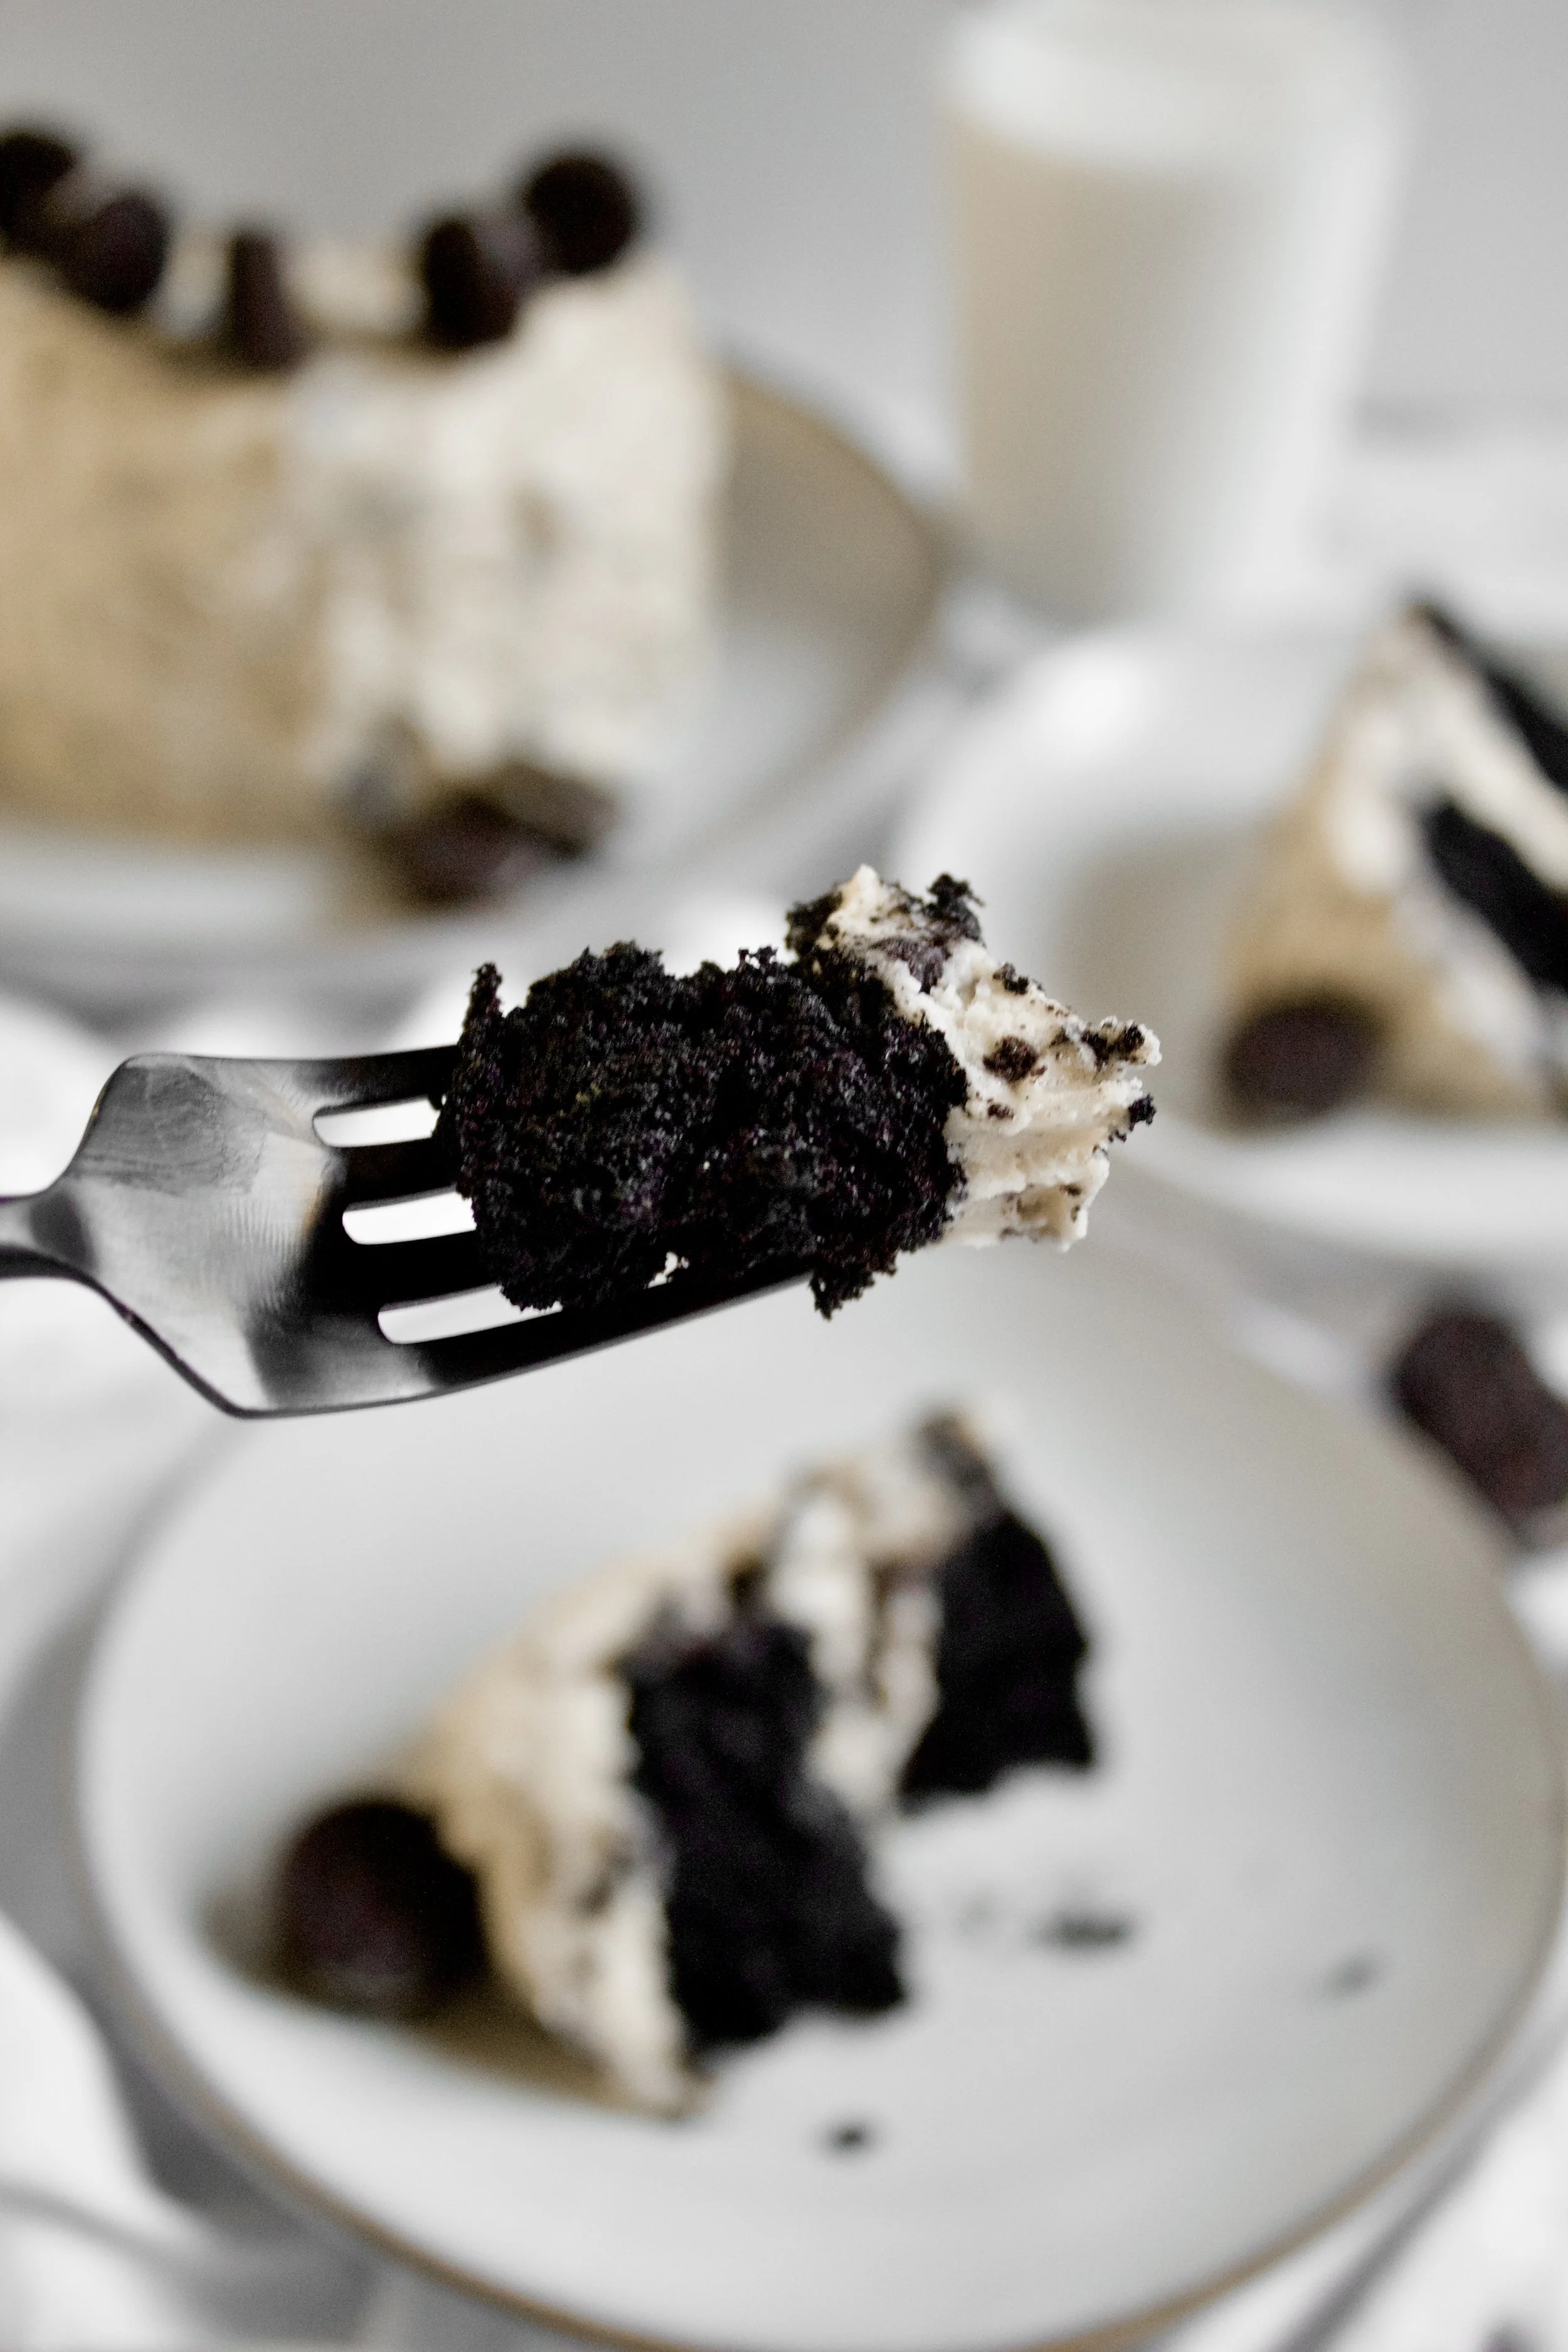
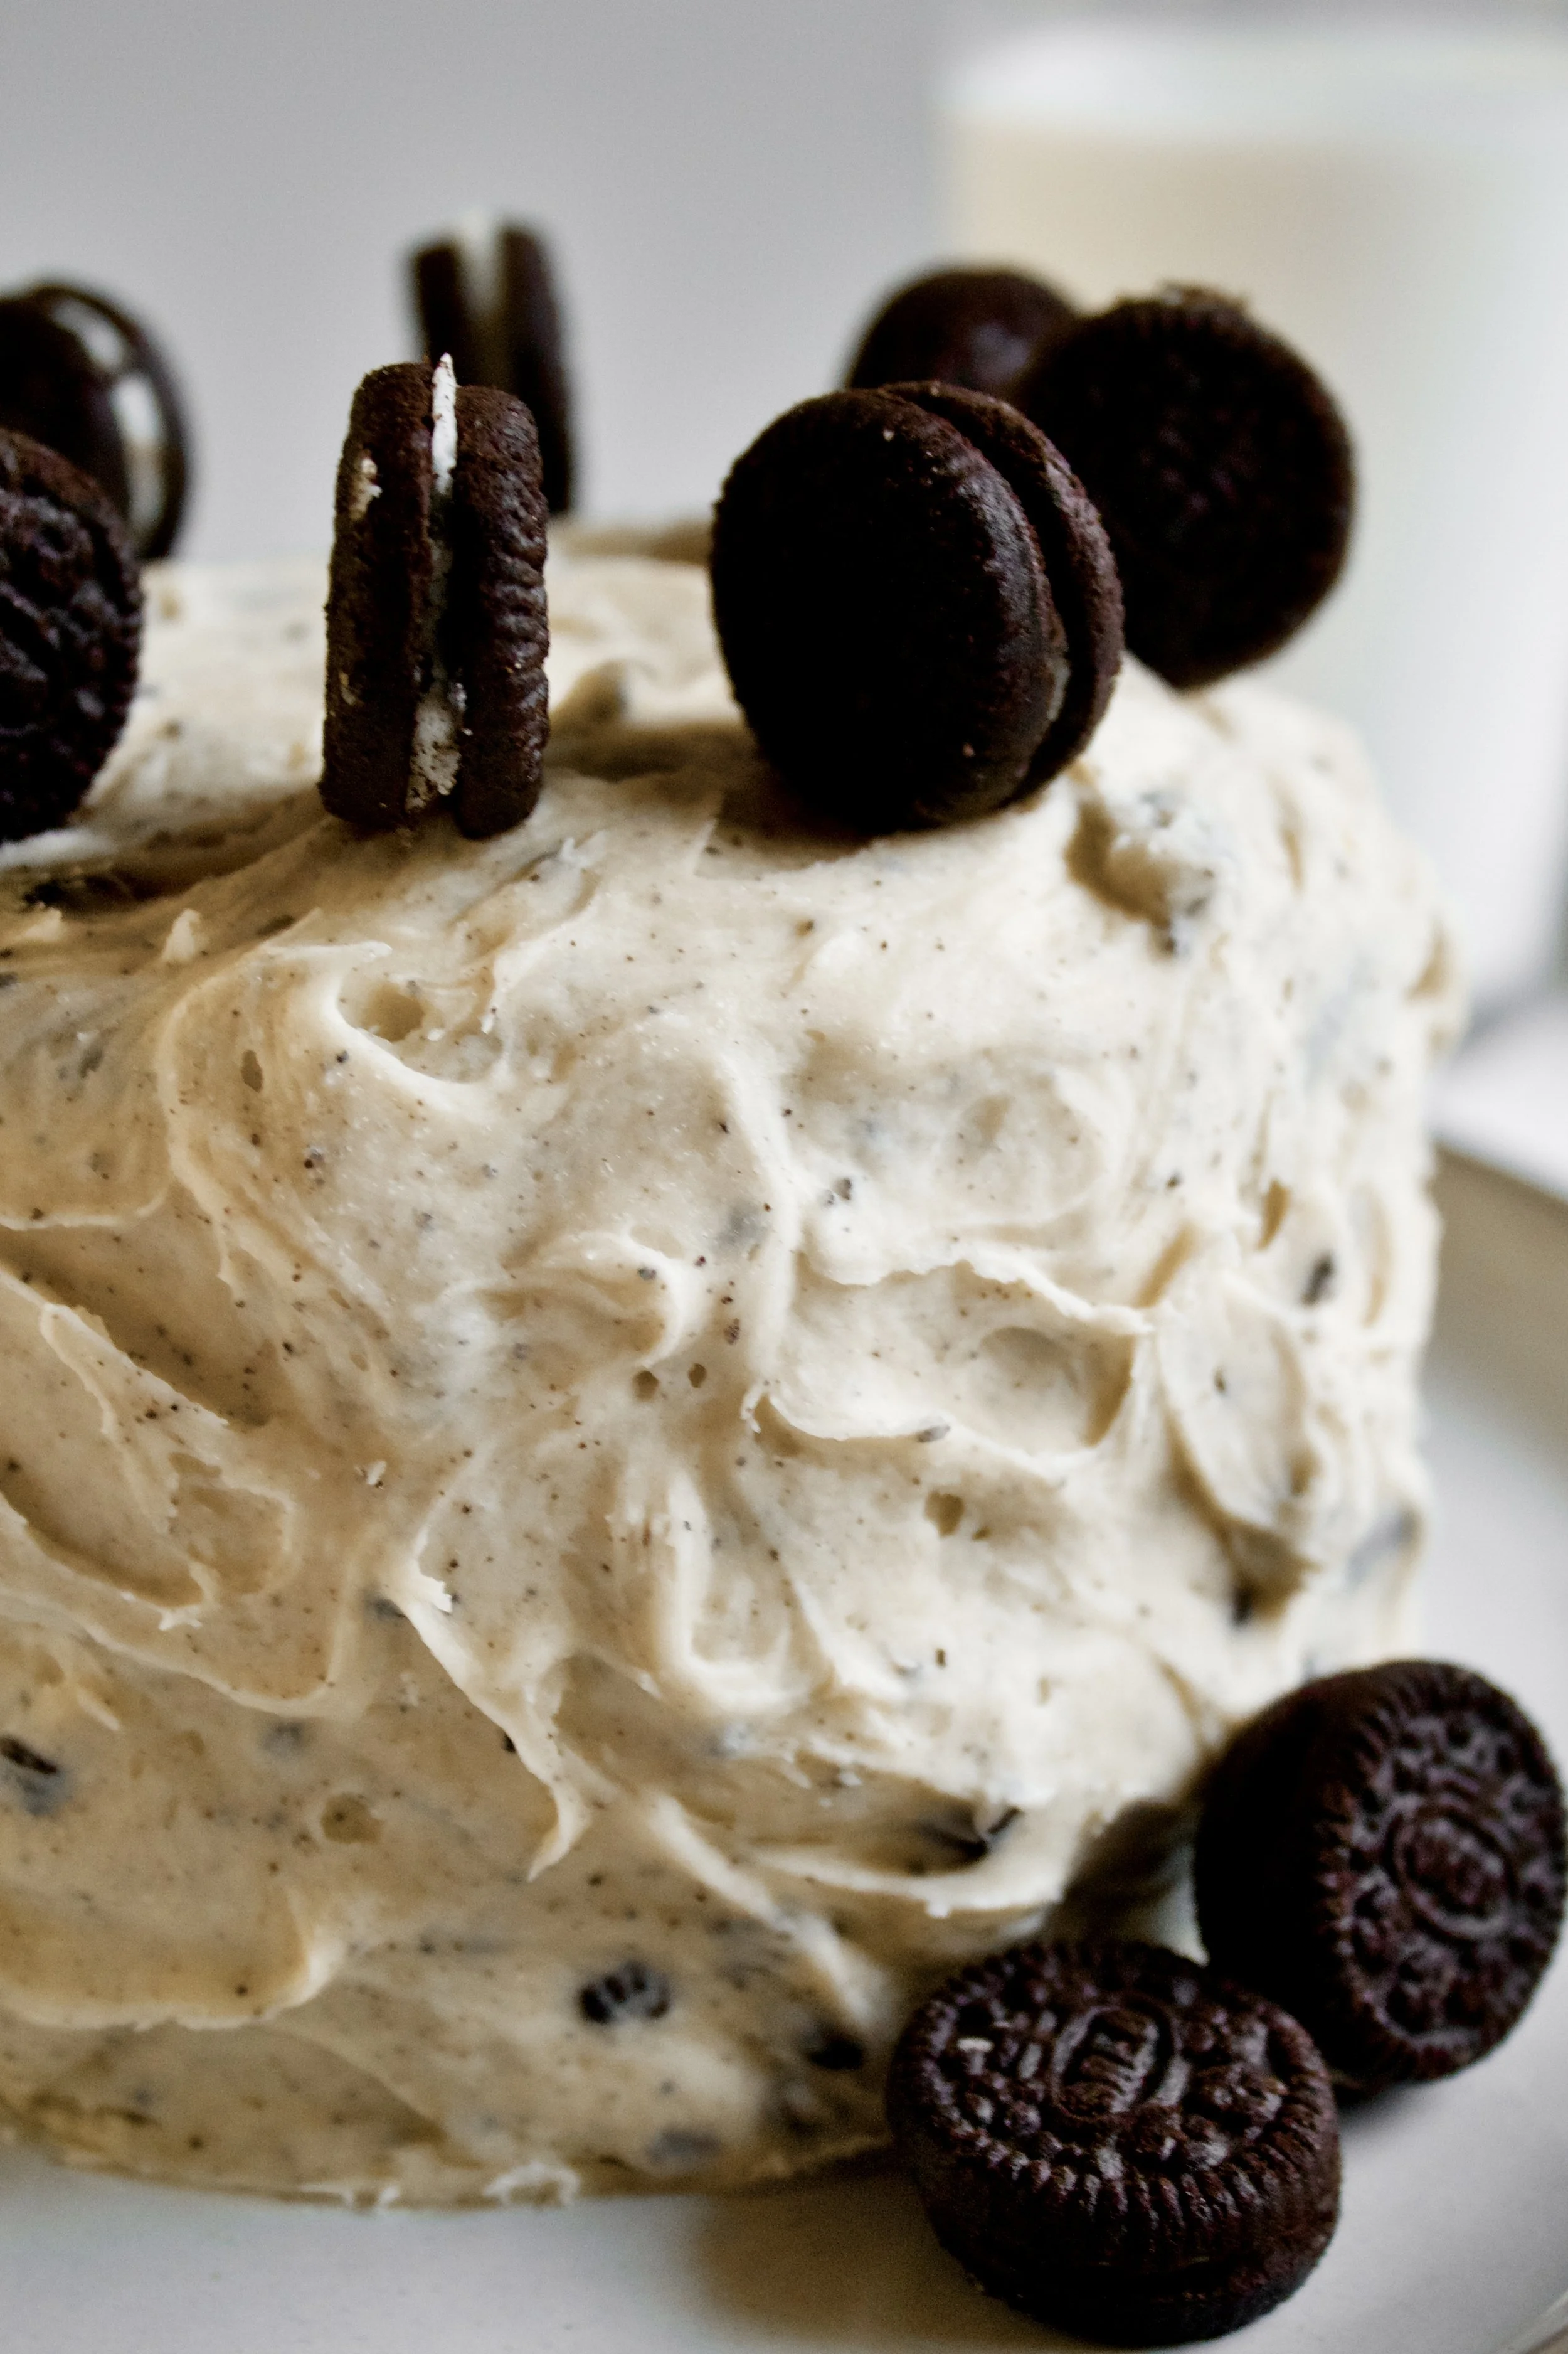
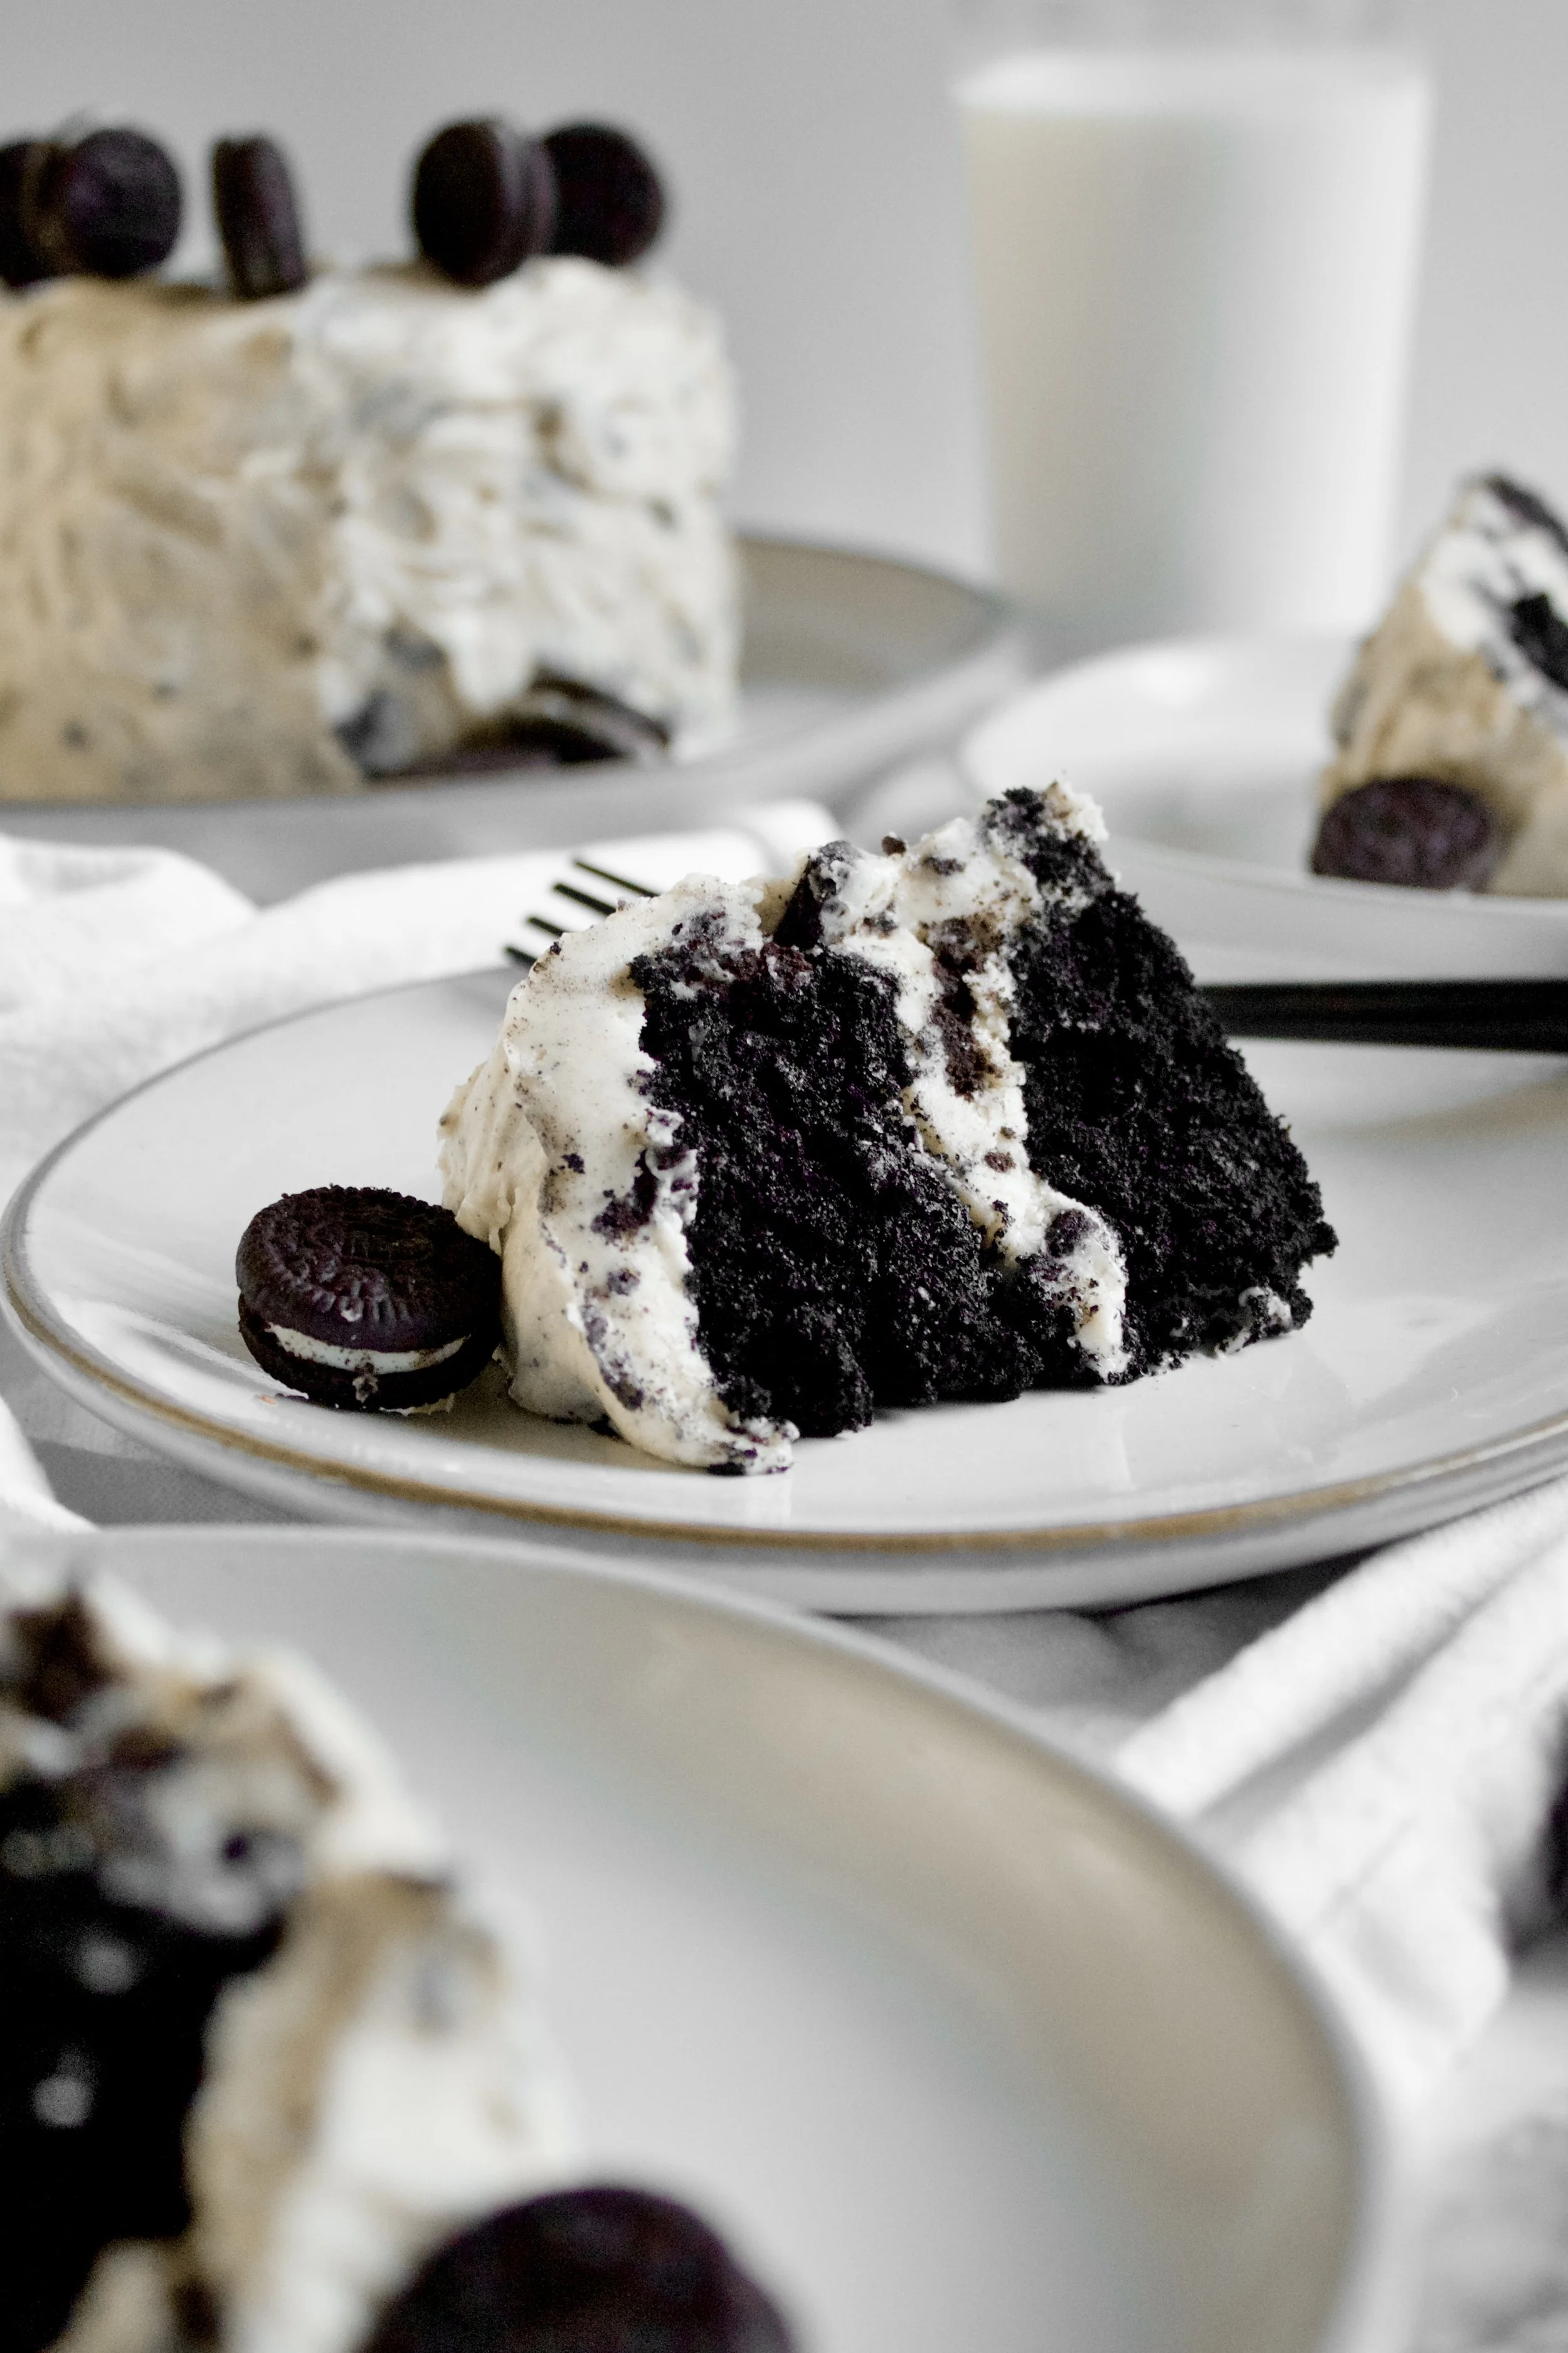
Cookies & Cream Crunch Cake
Fluffy and rich black chocolate cake layers frosted with marshmallow buttercream and crushed chocolate sandwich cookies. All of the flavors of cookies and cream in a cake—plus actual crushed cookies for a delicious crunch.
This post may contain affiliate links from which, at no additional cost to you, I may earn a small commission to keep this site running. Only products I myself would or do use are recommended.
Guys, I’m just a mess today. My daughter got sick yesterday, thanks to some expired juice, and this morning she was just a mess on our way out the door. Lots of tears. Thankfully, tickling still cheers her up. But I sure still feel about as weepy and distraught as she did.
But now my students are watching Tangled (don’t worry, it’s part of an academic unit on folktales) and the best Disney song ever came on and cheered me up. I actually walked down the aisle to “At Last I See the Light” at my wedding. #awww
I suppose you win some, you lose some.

Like this cake. (See? I had a baking point in mind there.) The flavors are delicious, but it did look a bit like a mess when I frosted it. I wanted actual crunch from the cookies. But it turns out that only slightly crushing your cookies is not a pretty look.
But wow does it taste good. The cake and frosting alone are one of my favorite combos. It tastes just like a chocolate sandwich cookie. I made cupcakes out of the pairing awhile back. And it’s also the base for my dark chocolate peppermint cake—modeled after the dark chocolate covered peppermint Joe Joe’s.
So when I decided to pair them up again, I wanted some texture. Really, it was all inspired by having leftover Oreos. I will guaranteed eat them all way too fast, so I decided to put them in a cake and share it. To save calories. Before eating cake…
Anyway, the combination was amazing. And there’s so much freedom in this cake. You can crush your cookies as small as you want, and you could even just do some sprinkled in the filling. Totally up to you!
Why this recipe works
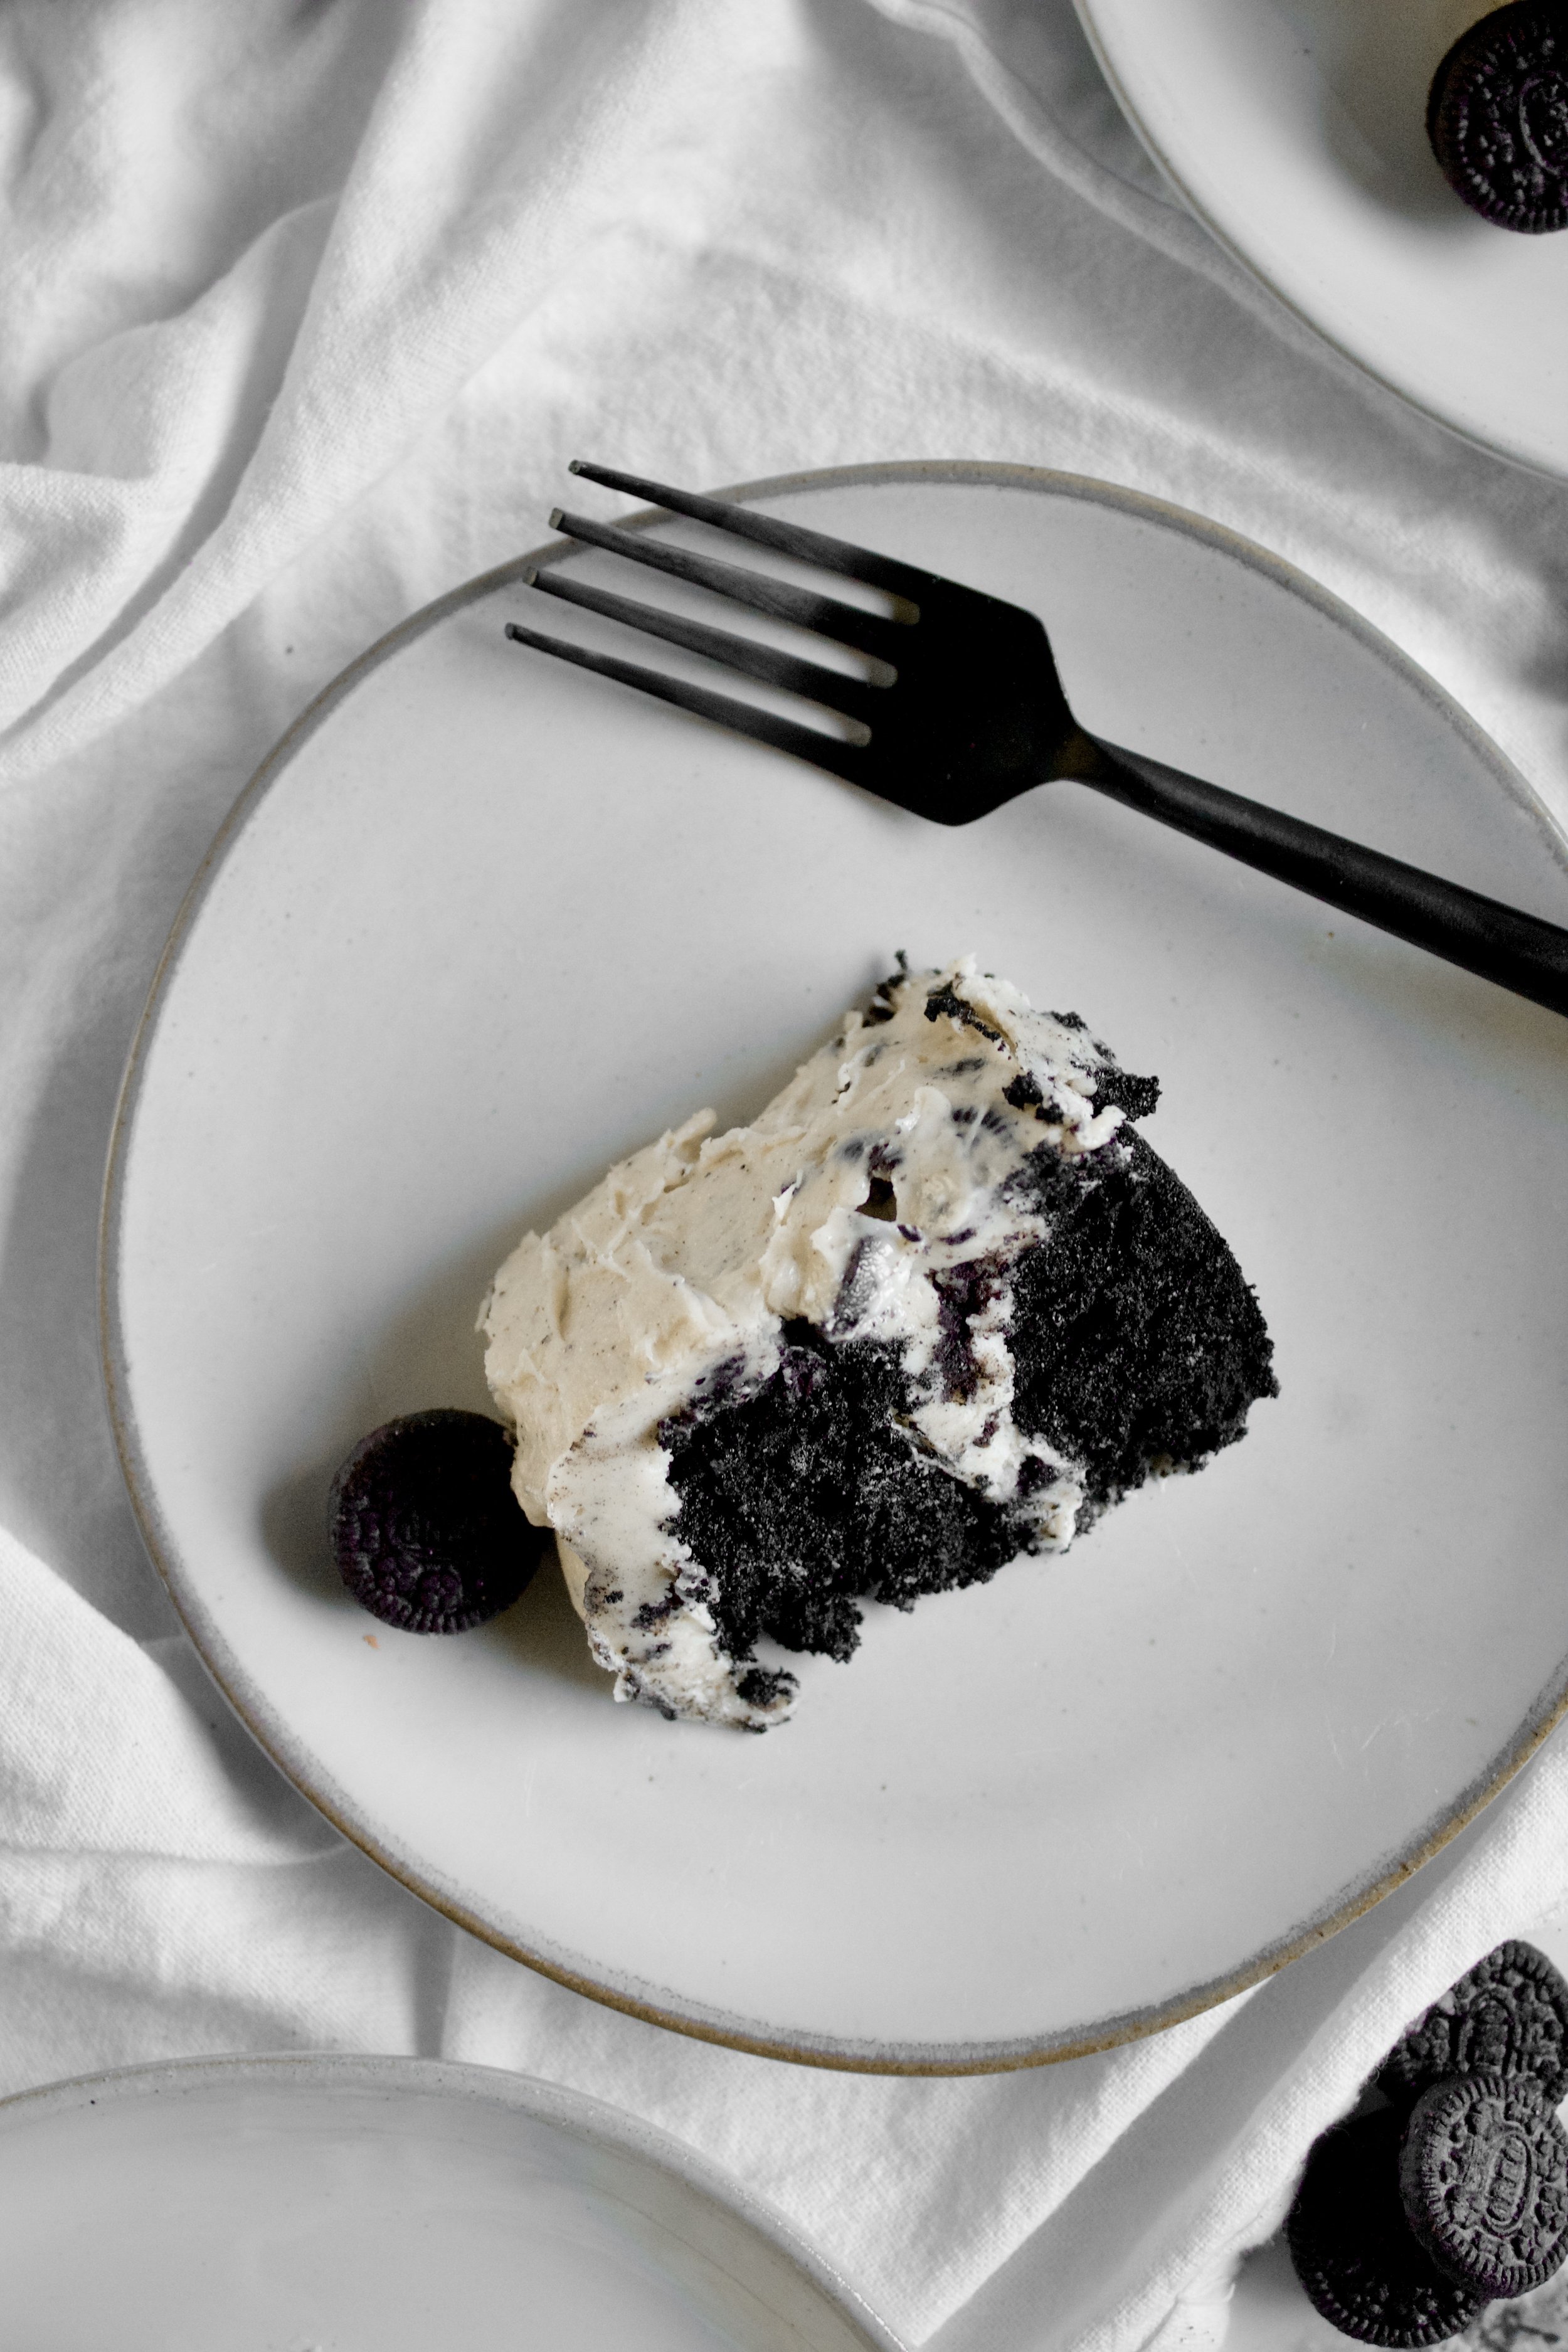
The black chocolate cake and the marshmallow buttercream are just divine in this cake. Black chocolate is somehow rich, dark and bitter, yet naturally sweet. I can’t quite describe it. It has this taste that I’m just obsessed with, and it really does taste like the chocolate part of an Oreo or similar cookie. Because those use black chocolate. Years ago, I adjusted my favorite chocolate cake recipe to use black chocolate. It uses a little less sugar, less oil, and an extra egg. Which may mean nothing to you, but the result is tons of flavor and a very fluffy cake. The sponge is one of my favorites.
The marshmallow buttercream is also one of my most popular recipes on this site, behind chocolate marshmallow buttercream. It’s packed with marshmallow fluff and has a flavor strikingly similar to a chocolate sandwich cookie. And it turns out so fluffy and smooth, if you add the fluff at the right time. Just be careful not to mix it too much, or it can go from perfectly smooth to gummy.
The addition of crushed cookies was a bit of a whim, but I’m so glad I did it. I’ve made this cake by fully crushing the cookies in a food processor, and it creates this lovely grey speckled color and gives the same cookies & cream taste. However, it lacks the crunch I wanted. So
Key ingredients
Flour. Always spoon then level flour, and never skip sifting! Trust me. The cake is just not as good without sifting with a fine mesh sieve.
Black cocoa. Again, be sure to sift this. Not a lot of stores carry this, but I buy mine here.
Sugar. This cake actually uses less sugar than most of my other cakes, but the black chocolate provides more than enough flavor to make it delicious.
Baking soda and powder. The combo helps create a great fluffiness in this cake.
Salt. Sea salt is ideal, but table will work, too.
Eggs. Use large, fresh, room temperature eggs.


Oil. I prefer avocado or grape seed, as they are the “healthy” oils with not taste and little color. Vegetable and canola work, too.
Buttermilk. I usually make my own by putting 1 tablespoon white vinegar in a 1 cup measuring cup then filling it with room temperature whole milk, stirring, and letting it sit for 5 minutes while I sift and whisk the dry ingredients.
Vanilla. Use pure extract! It just tastes better.
Hot coffee. I prefer blonde coffee in this cake, so that it helps bring out the chocolate flavor without adding any bitterness or coffee flavor.
Marshmallow buttercream. One of my favs! Just be sure you don’t mix it past getting it smooth and to the right flavor. The recipe calls for a double batch so you have plenty to frost a full 8” cake, but you can do a half batch if desired and have more of a naked cake.
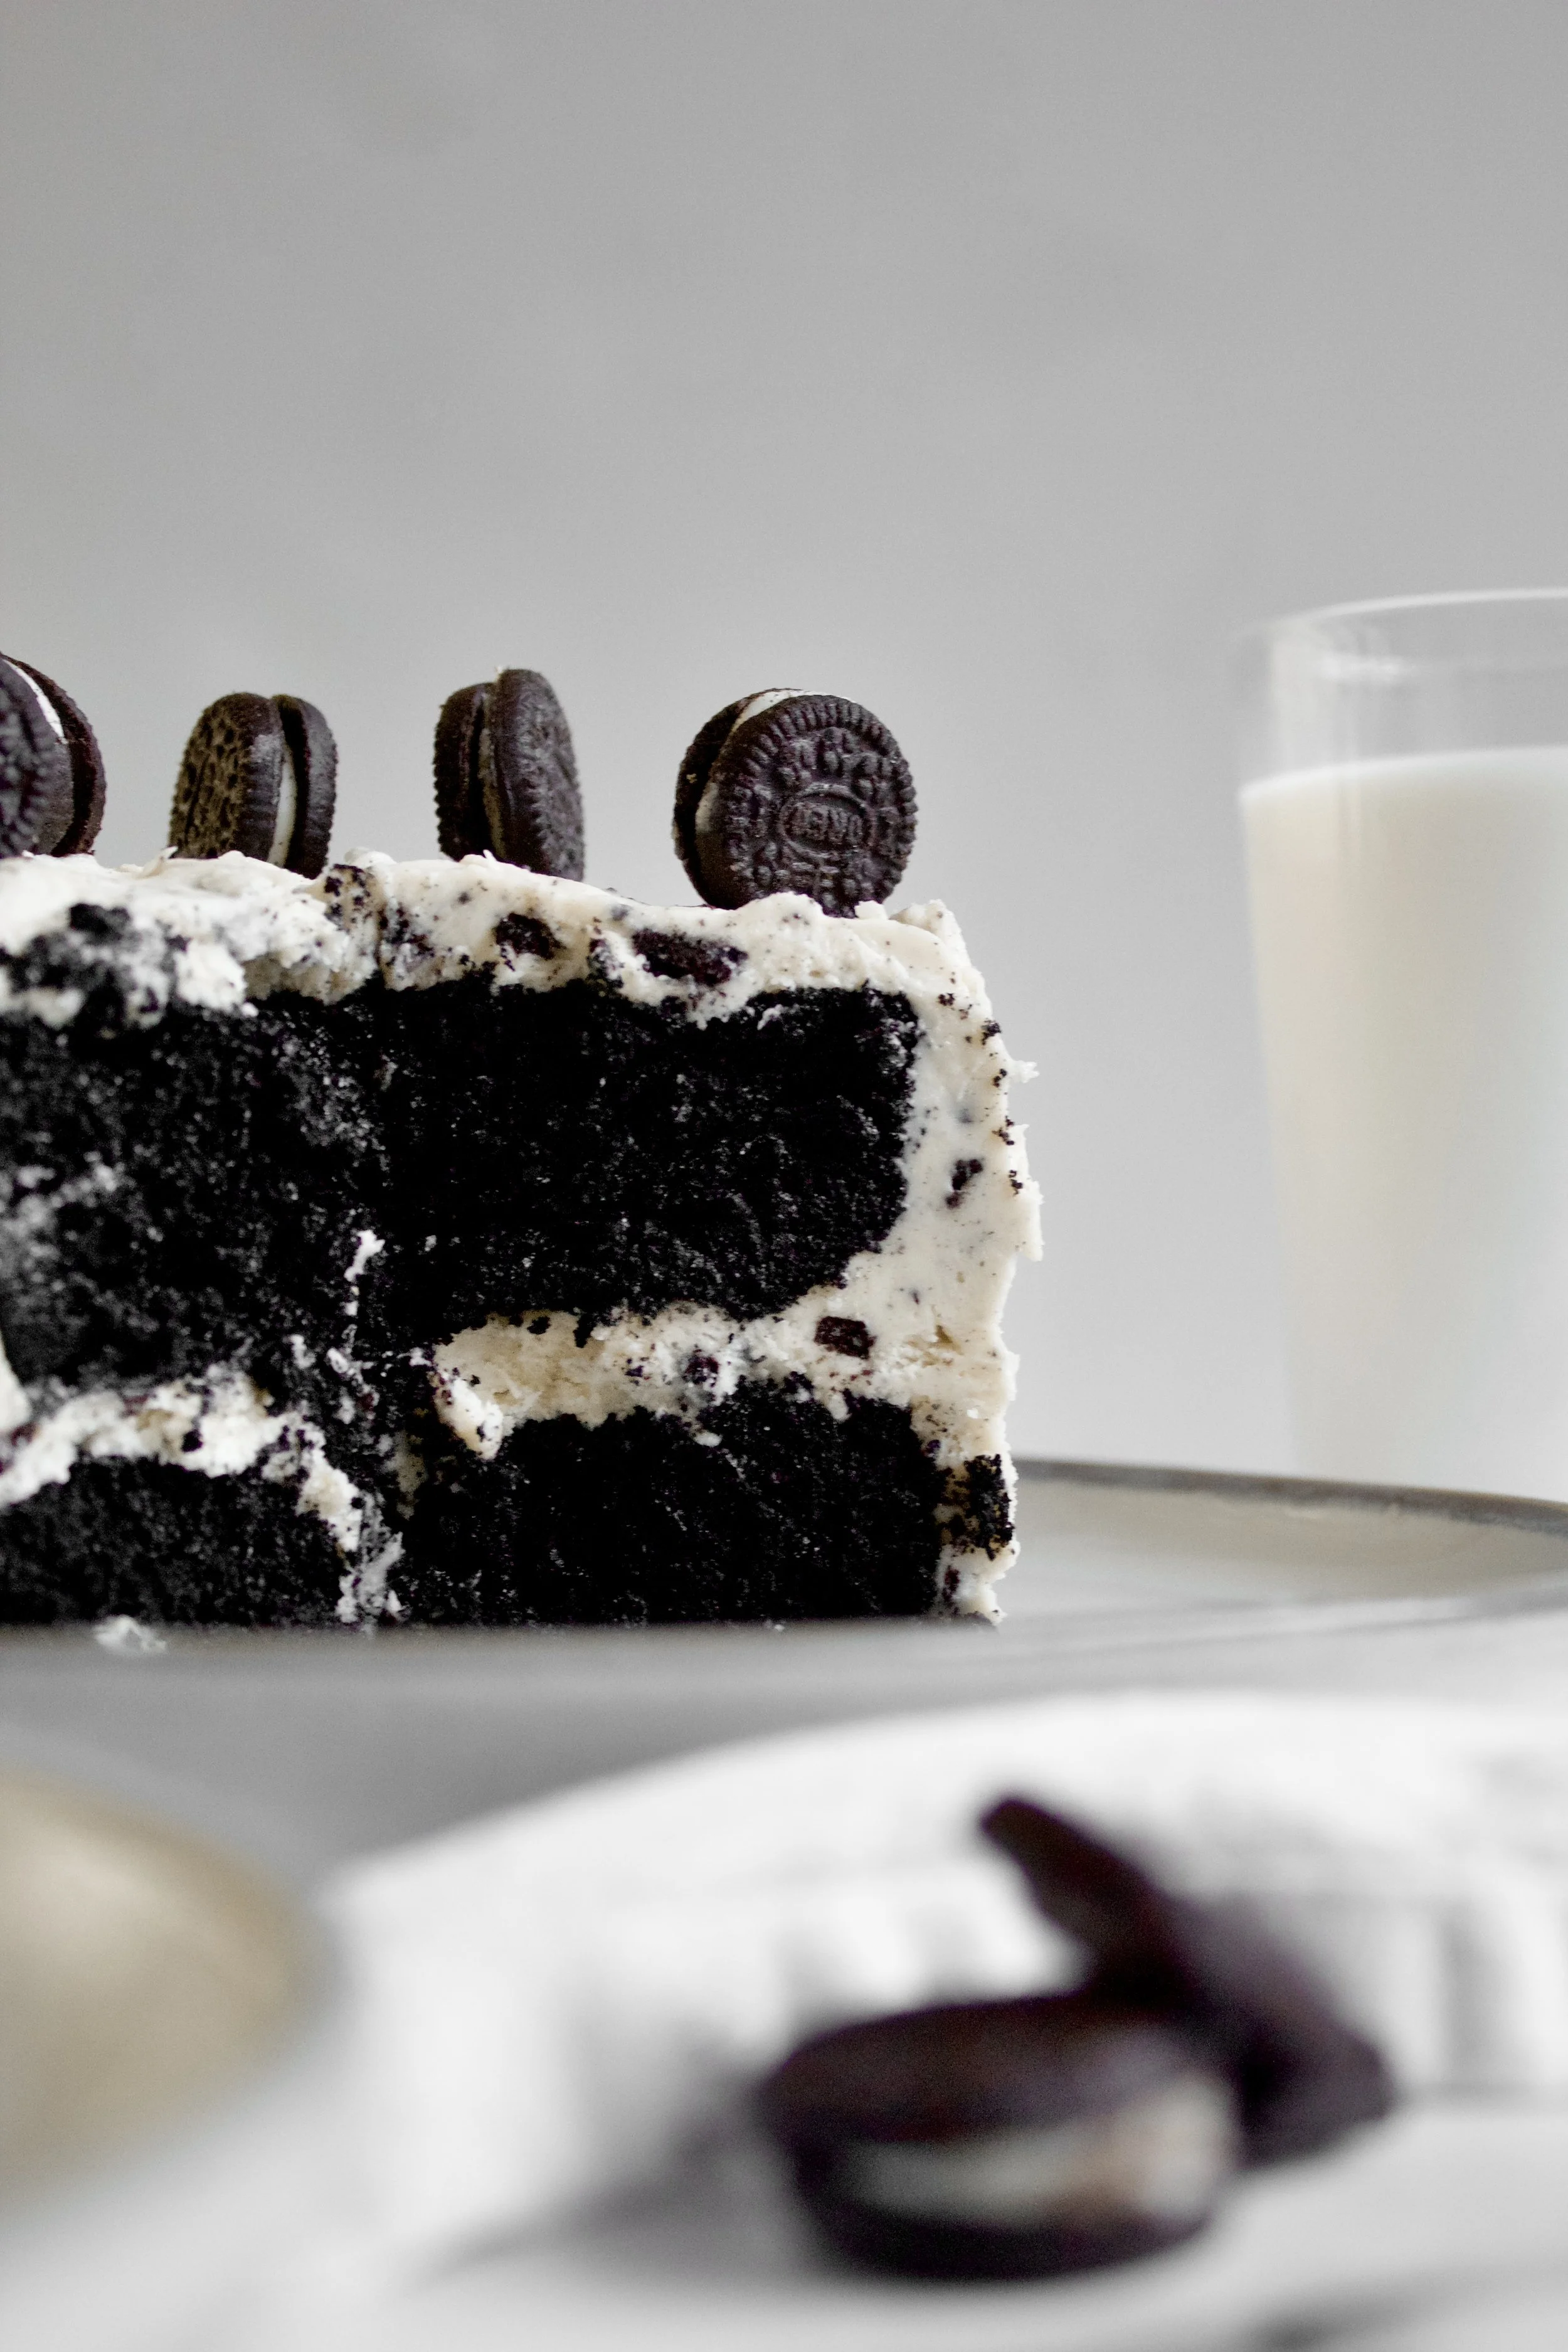
Crushed chocolate sandwich cookies. Leave these as big or small as you’d like. You can even use a food processor, but you’ll get more of a subtle texture than any actual crunch.
How to make a cookies & cream cake
1. Sift and whisk dry ingredients. I usually don’t sift the sugar because we use organic, which is larger grain. However, everything else must be sifted.
2. Combine eggs, oil, buttermilk, and vanilla. Whisk vigorously until well combined. You’ll know this is the case when the oil and eggs are emulsified, meaning everything is one homogenous color and texture.
3. Slowly whisk in hot coffee. Pour slowly with one hand and whisk vigorously with the other. It can help to have a bowl that stays put for this, as I’ve nearly whisked mine off the counter before.
4. Slowly stir wet ingredients into dry. Use the paddle attachment on low and pour slowly—taking about 30 seconds or so to combine. Scrape the bowl before continuing (or use a paddle attachment with a rubber scraper built in—they’re life-changing!).
5. Beat on medium for exactly 2 minutes. No more, no less. Beat on just under medium if your paddle has the built-in scraper


6. Bake. Pour into prepared pans and bake 25-30 minutes, until a toothpick inserted in the middle comes out with just some moist crumbs—not fully clean (that means it’s slightly over baked). Check early, as baking times can vary by climate, elevation, and even ovens.
7. Make marshmallow buttercream. If you want a naked style cake or prefer less frosting, you can halve the recipe (so make a single batch of my original recipe).
8. Stir in crushed cookies. If you pulse them in a food processor, you can mix them in using the stand mixer on low.
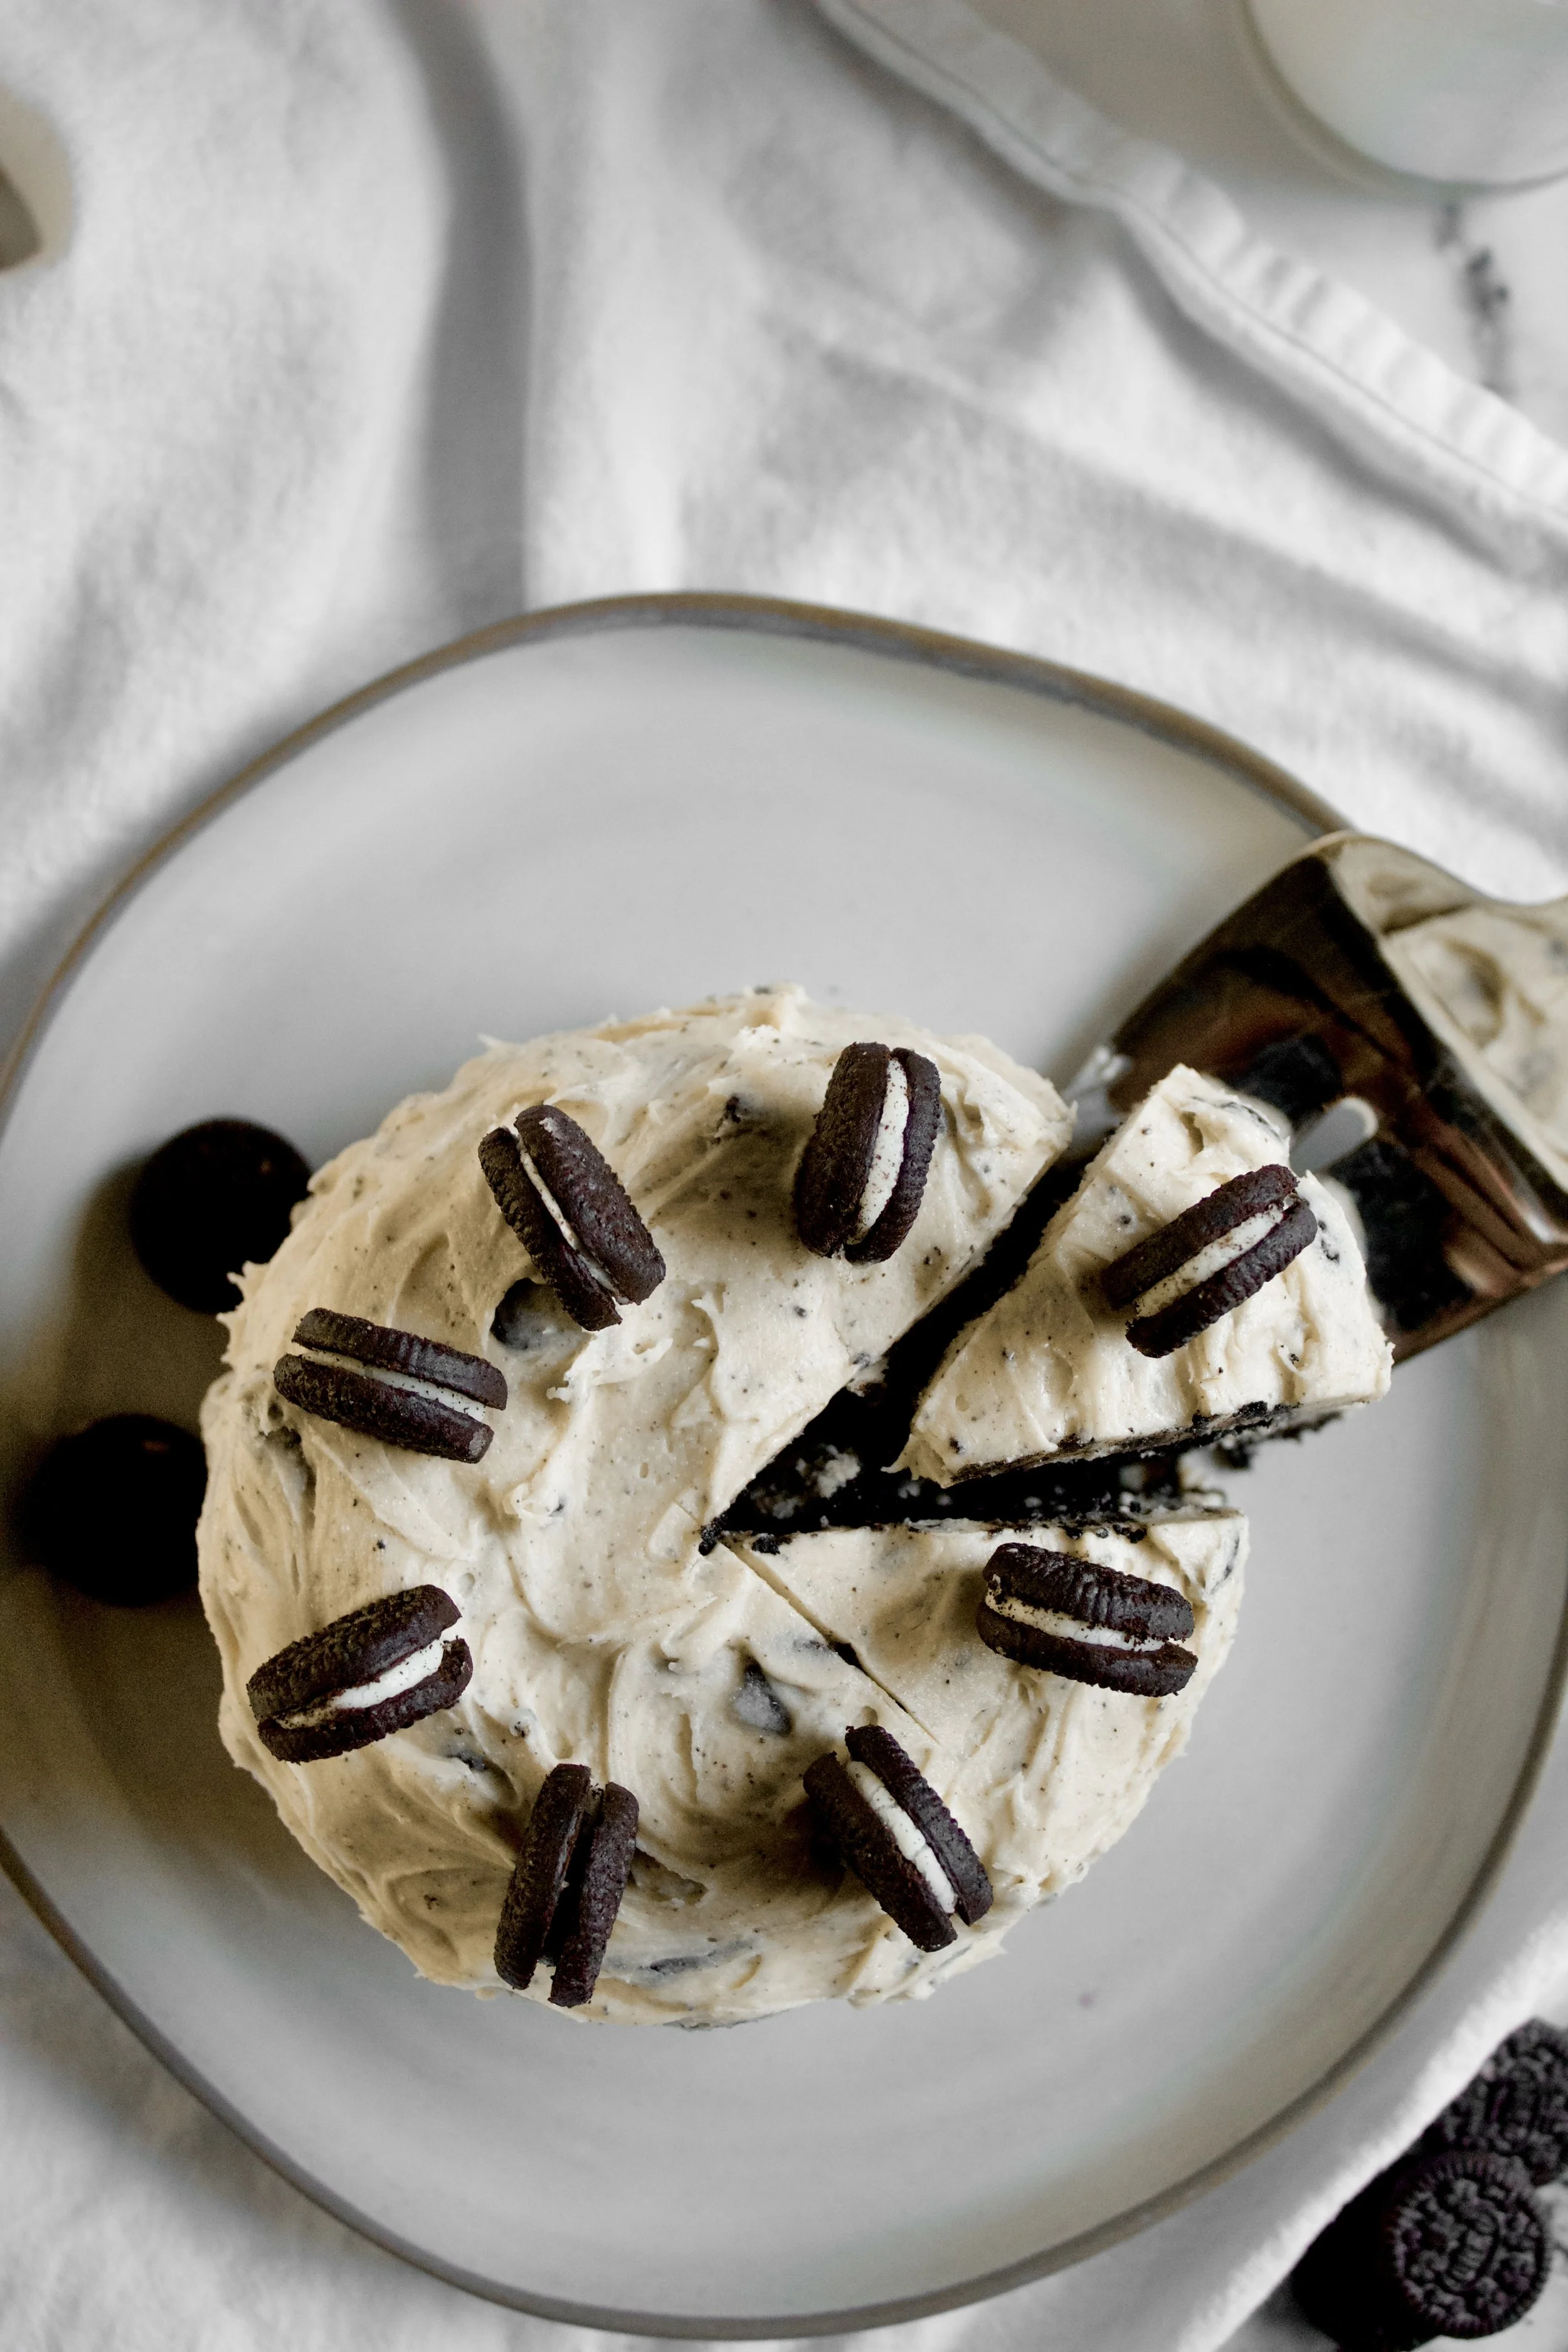
9. Frost cake. You can add some crushed cookies to the filling or top—whatever your heart desires!
Enjoy!


Tips and FAQ’s for this recipe
Make homemade marshmallow fluff ahead of time
You can use store bought or homemade marshmallow fluff in the frosting. If you make homemade, you can store it on the counter for up to 2 weeks, well-sealed (sounds crazy, I know). It only takes about 10-15 minutes, but the time can add up, so I usually make it the day ahead. Since you add it at the end of making the buttercream, just liked you would for the jarred kind, this works well so you don’t have to pour it into a bowl, clean the mixer bowl, then start on the butter and sugar portion all after you’ve just baked a cake.
Can I omit the cookies?
Sure! That would basically be a cake version of my cookies & cream cupcakes. You could also omit the cookies from inside the frosting and simply sprinkle some inside and on top of the cake. It’s very flexible.

Do I crush the whole cookie?
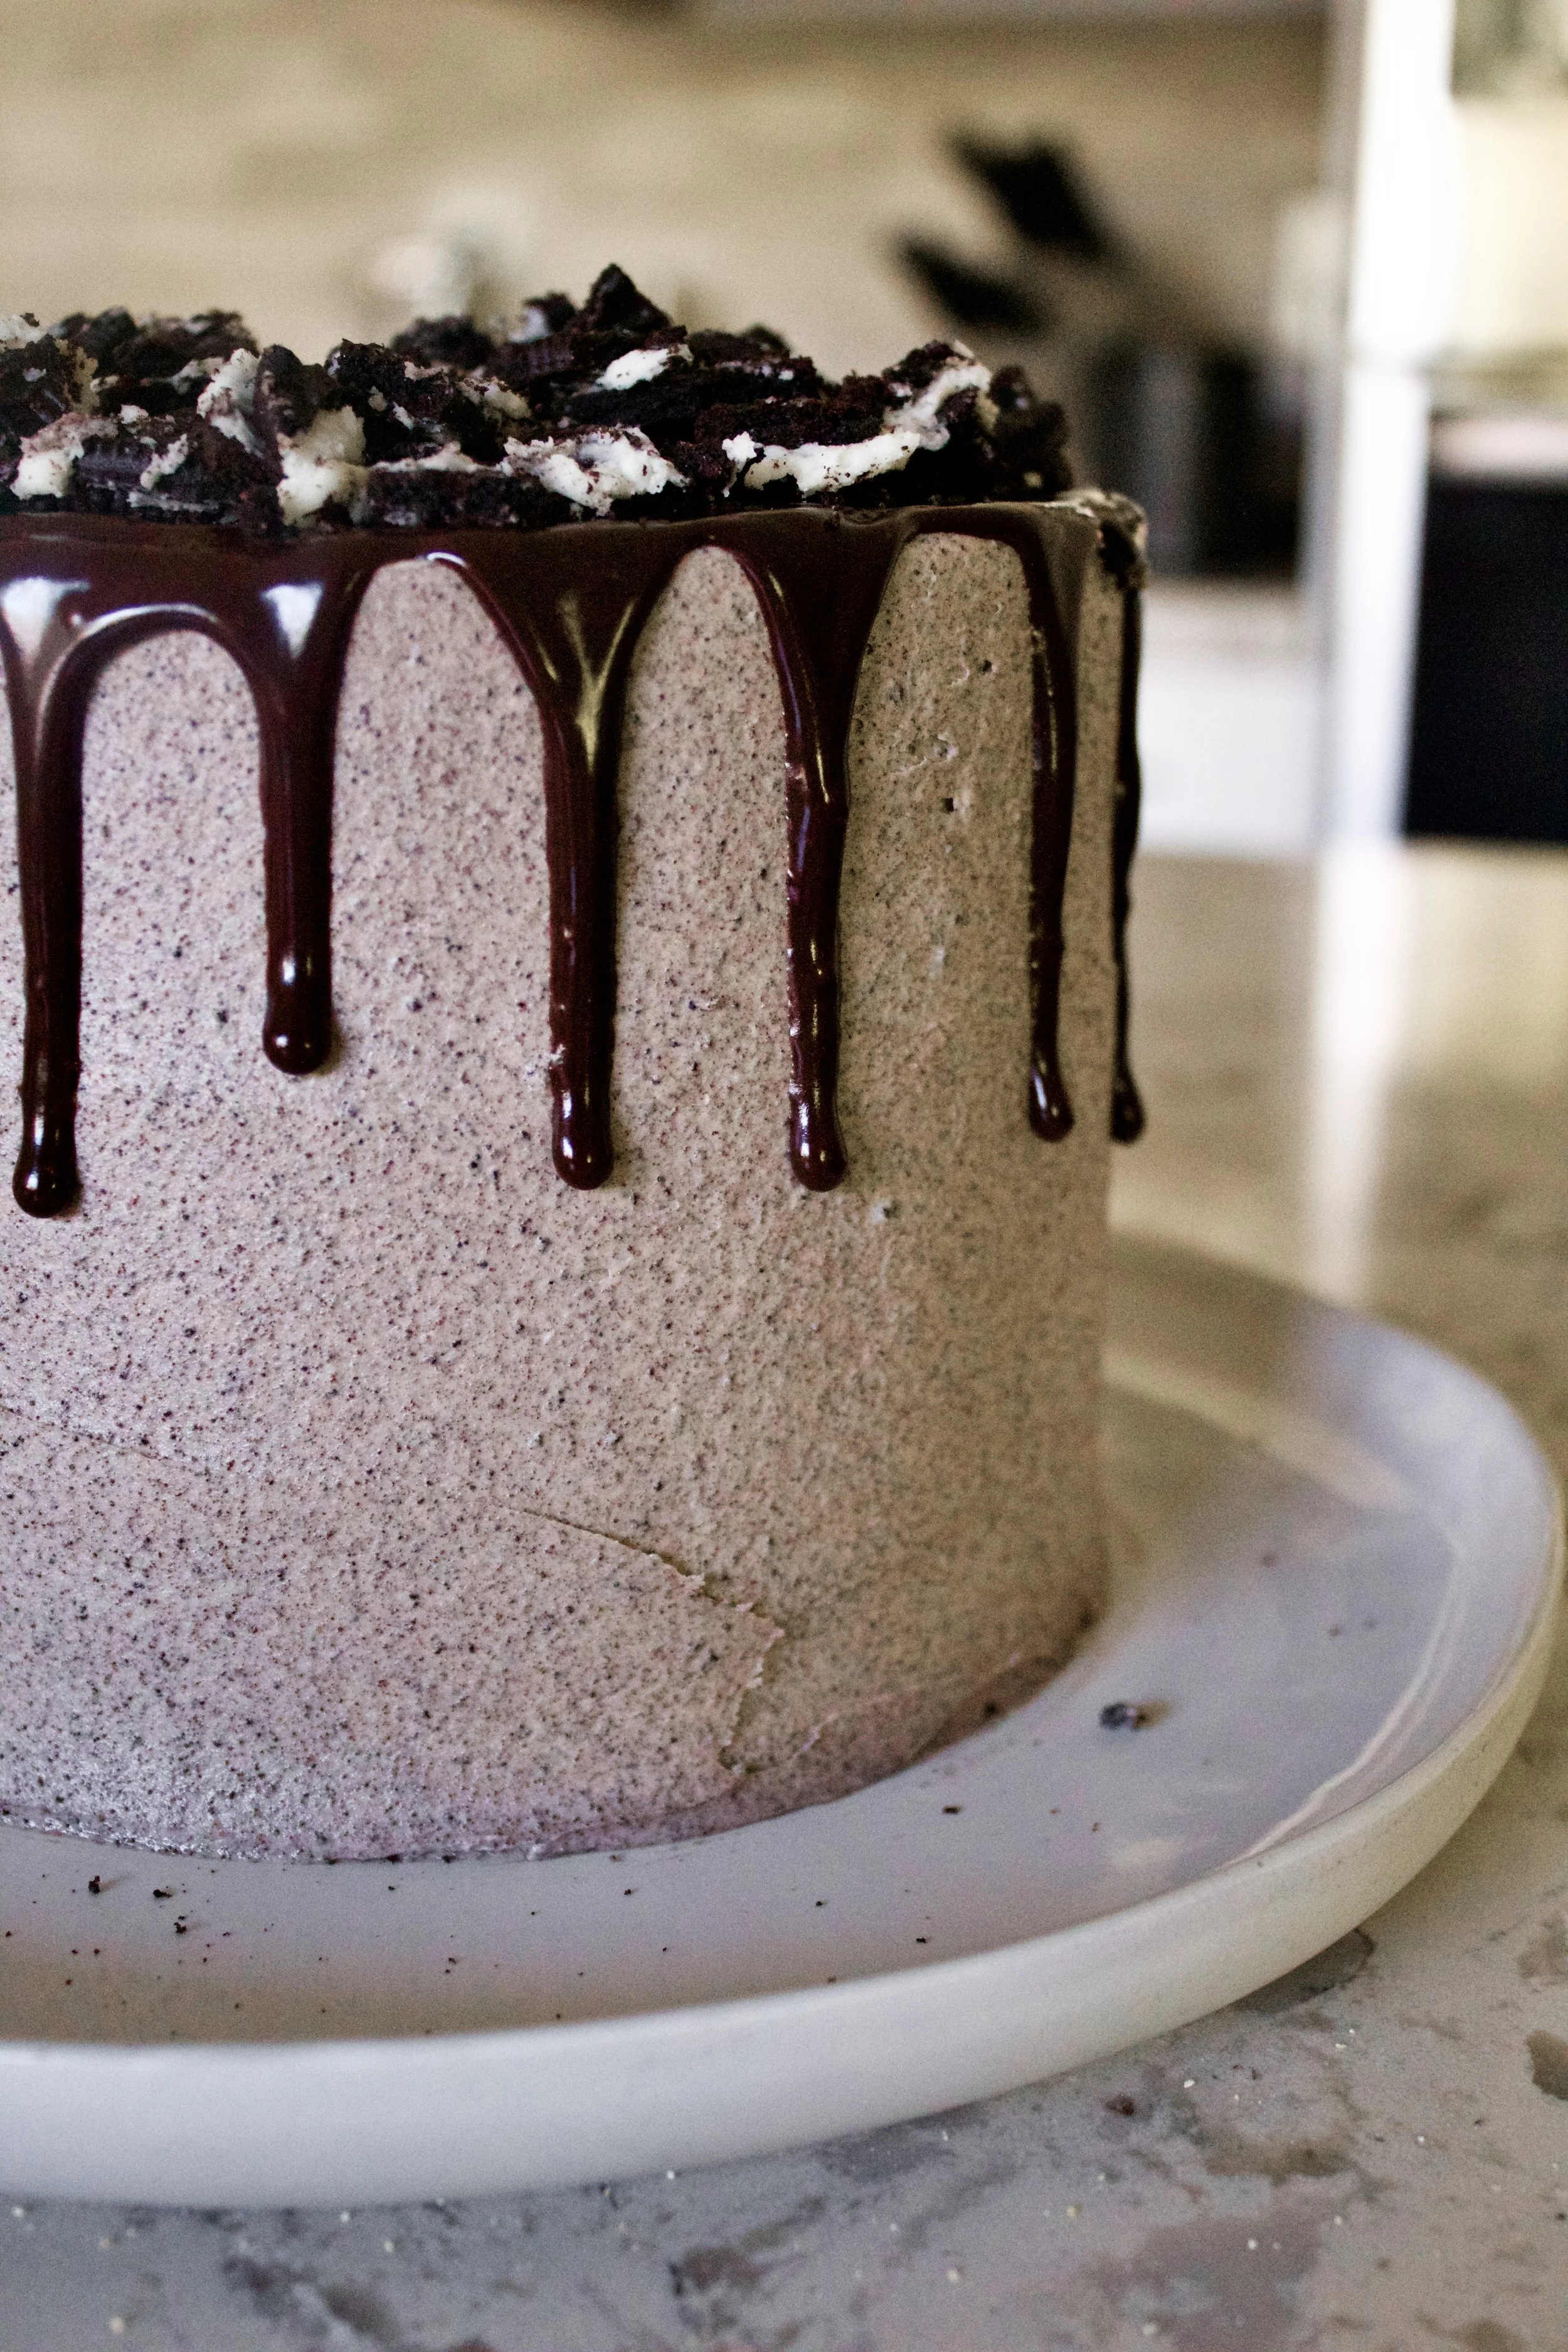
Yes! You can crush the whole cookie, regardless of what size you make the crumbles. No need to scoop out the filling. And, as I said, you can pulse the cookies in a food processor and get more of a cookie powder or leave some bits a little larger (not super large) to get more of a crunch, like I did. Below is a picture of when I’ve made this same cake with fully ground cookies (and ganache drip, because why not??).
Where do I get black cocoa?
I order mine online here. I bake with it quite frequently and this this bag lasts me several months at least. I’ve seen it in some specialty stores, but not ones I go to regularly, so ordering it is my preferred method.
My cake tools
Here are my must-have tools I use for making this cake. Affiliate links provided.
Mesh sieve (because sifting is KEY for a fluffy cake)
All-rubber spatula (this makes scraping the bowl easier as the batter and frosting doesn’t get all over a wooden handle!)
Silicone liners for 8” cake (or for 6” cakes)
8” aluminum cake pans or 6” aluminum cake pans (I’ve found nonstick doesn’t bake as evenly)
Offset spatula for frosting the cake
Cookies & Cream Crunch Cake
- prep time: 45-50 minutes (includes homemade marshmallow fluff in the frosting)
- bake time: 25-30 minutes
- total time: 1 hour, 20 minutes (plus at least 30-60 minutes for cake to cool)
servings: 12-16
Ingredients:
for the black chocolate cake
- 1 ½ cups (350g) granulated sugar
- 1 ⅔ cups (226g) flour, spooned then leveled and sifted
- ¾ cup (75g) black cocoa powder, spooned then leveled and sifted
- 2 teaspoons (8g) baking powder
- 1 teaspoon (5g) baking soda
- ½ teaspoon (3g) sea salt
- 3 eggs, room temperature
- 1 cup (236g) buttermilk, room temperature*
- ⅓ cup (108g) avocado oil (can sub vegetable, grape seed, or canola oil)
- 1 tablespoon (13g) pure vanilla extract
- 1 cup (240g) hot, light roast coffee (or hot water)
for the buttercream (this is a double batch–halve if you want a thinly frosted or naked cake)
- 2 cups (454g) unsalted European style butter, softened
- 1 batch marshmallow fluff (or two 7oz jars store bought marshmallow cream)
- 4-6 cups (520-780g) powdered sugar
- ¼ teaspoon sea salt
- 1 tablespoon (13g) vanilla extract
- optional: heavy whipping cream (about 1-2 tablespoons, or as needed)
- about 1 cup (270g) crushed chocolate sandwich cookies (about ½ a box of Oreos)
Instructions:
make the black chocolate cake layers
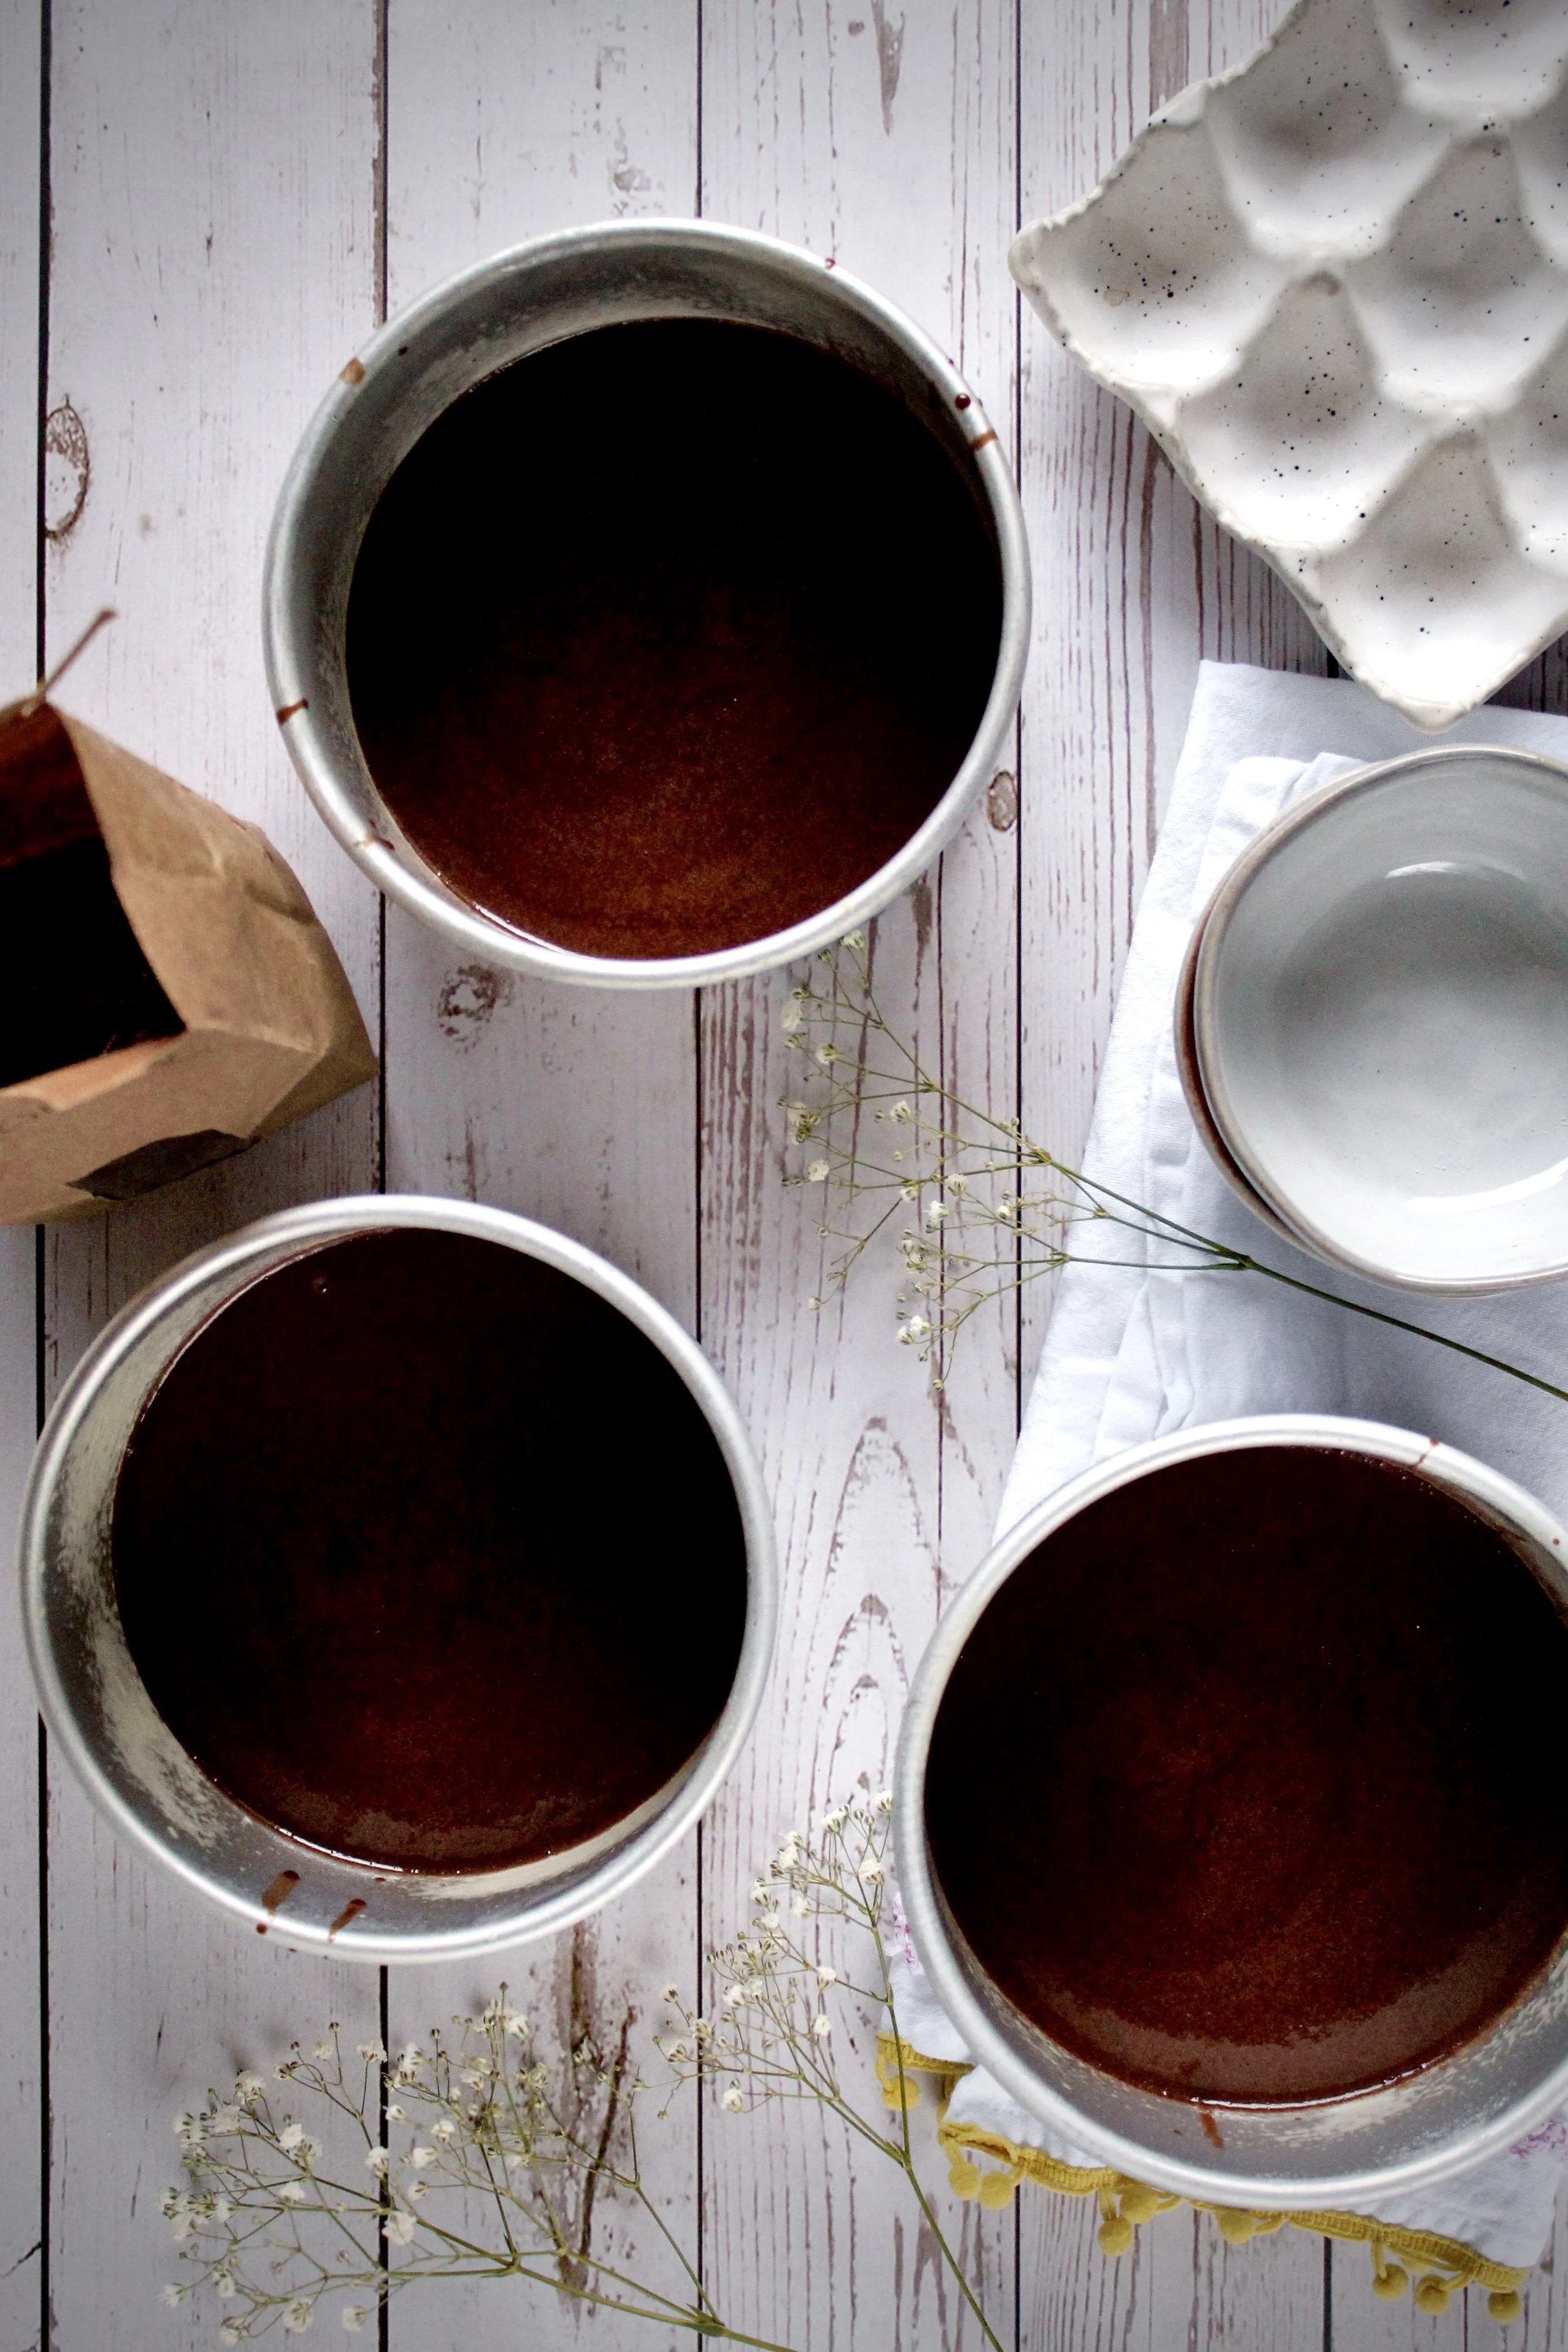
- Preheat your oven to 325F/165C. Lightly grease and flour two 8” or 9” cake pans or three 6” cake pans (or use baking spray) and line the bottom with parchment paper or silicone baking mats. This is also a great time to set your coffee to percolate (unless using hot water or espresso and hot water, which is what I do).
- Whisk together the sugar, flour, cocoa powder, baking powder, baking soda, and salt in the bowl of your stand mixer or a large mixing bowl, sifting everything but the sugar (unless yours is fine enough to sift--go for it!). Set aside.
- In a separate medium mixing bowl, whisk the eggs, buttermilk, oil, and vanilla together until well-blended and fully emulsified, about 1 minute.
- Very, very slowly stream the hot coffee or water into the wet ingredients, whisking vigorously and constantly as you pour to avoid scrambling the eggs. Feel free to do this in segments if it’s easier. If you do scramble some of the eggs, you can run the mixture through your fine mesh sieve to remove the cooked egg bits.
- Using the paddle attachment, turn your stand mixer to low (or use a hand mixer) and slowly pour the wet ingredients into the dry. This should take about 30 seconds or so. The batter will clump up then thin out. Once you’ve poured all the wet ingredients, immediately turn off the mixer. Scrape down the bottom and sides. Beat on medium for exactly 2 minutes (set a timer).
- Evenly divide batter between the prepared cake pans.
- Bake for 25-30 minutes, until a toothpick inserted in the middle comes out with just a few moist crumbs (ideally not fully clean, as this could mean they’re over baked). Check early and rotate halfway if not using convection. Be sure to check each pan separately, as one might bake faster than the other.
- Let cool 5-10 minutes in the cake pan then remove to a cooling rack to cool completely.
make the buttercream
- While the cake layers cool, make the marshmallow buttercream. (Optional: you can also make the buttercream ahead of time, chill it, then let it come to room temperature on the counter for 1-2 hours while you make the cake, just be sure to give it a good stir if it was refrigerated longer than overnight.)
- If using homemade marshmallow fluff, make that first. You can immediately start on the buttercream once the fluff is done, but remove it to a separate bowl to cream the butter.
- In the bowl of your stand mixer fitted with the paddle attachment or in a large mixing bowl using your hand mixer, cream butter on high until smooth, about 1 minute.
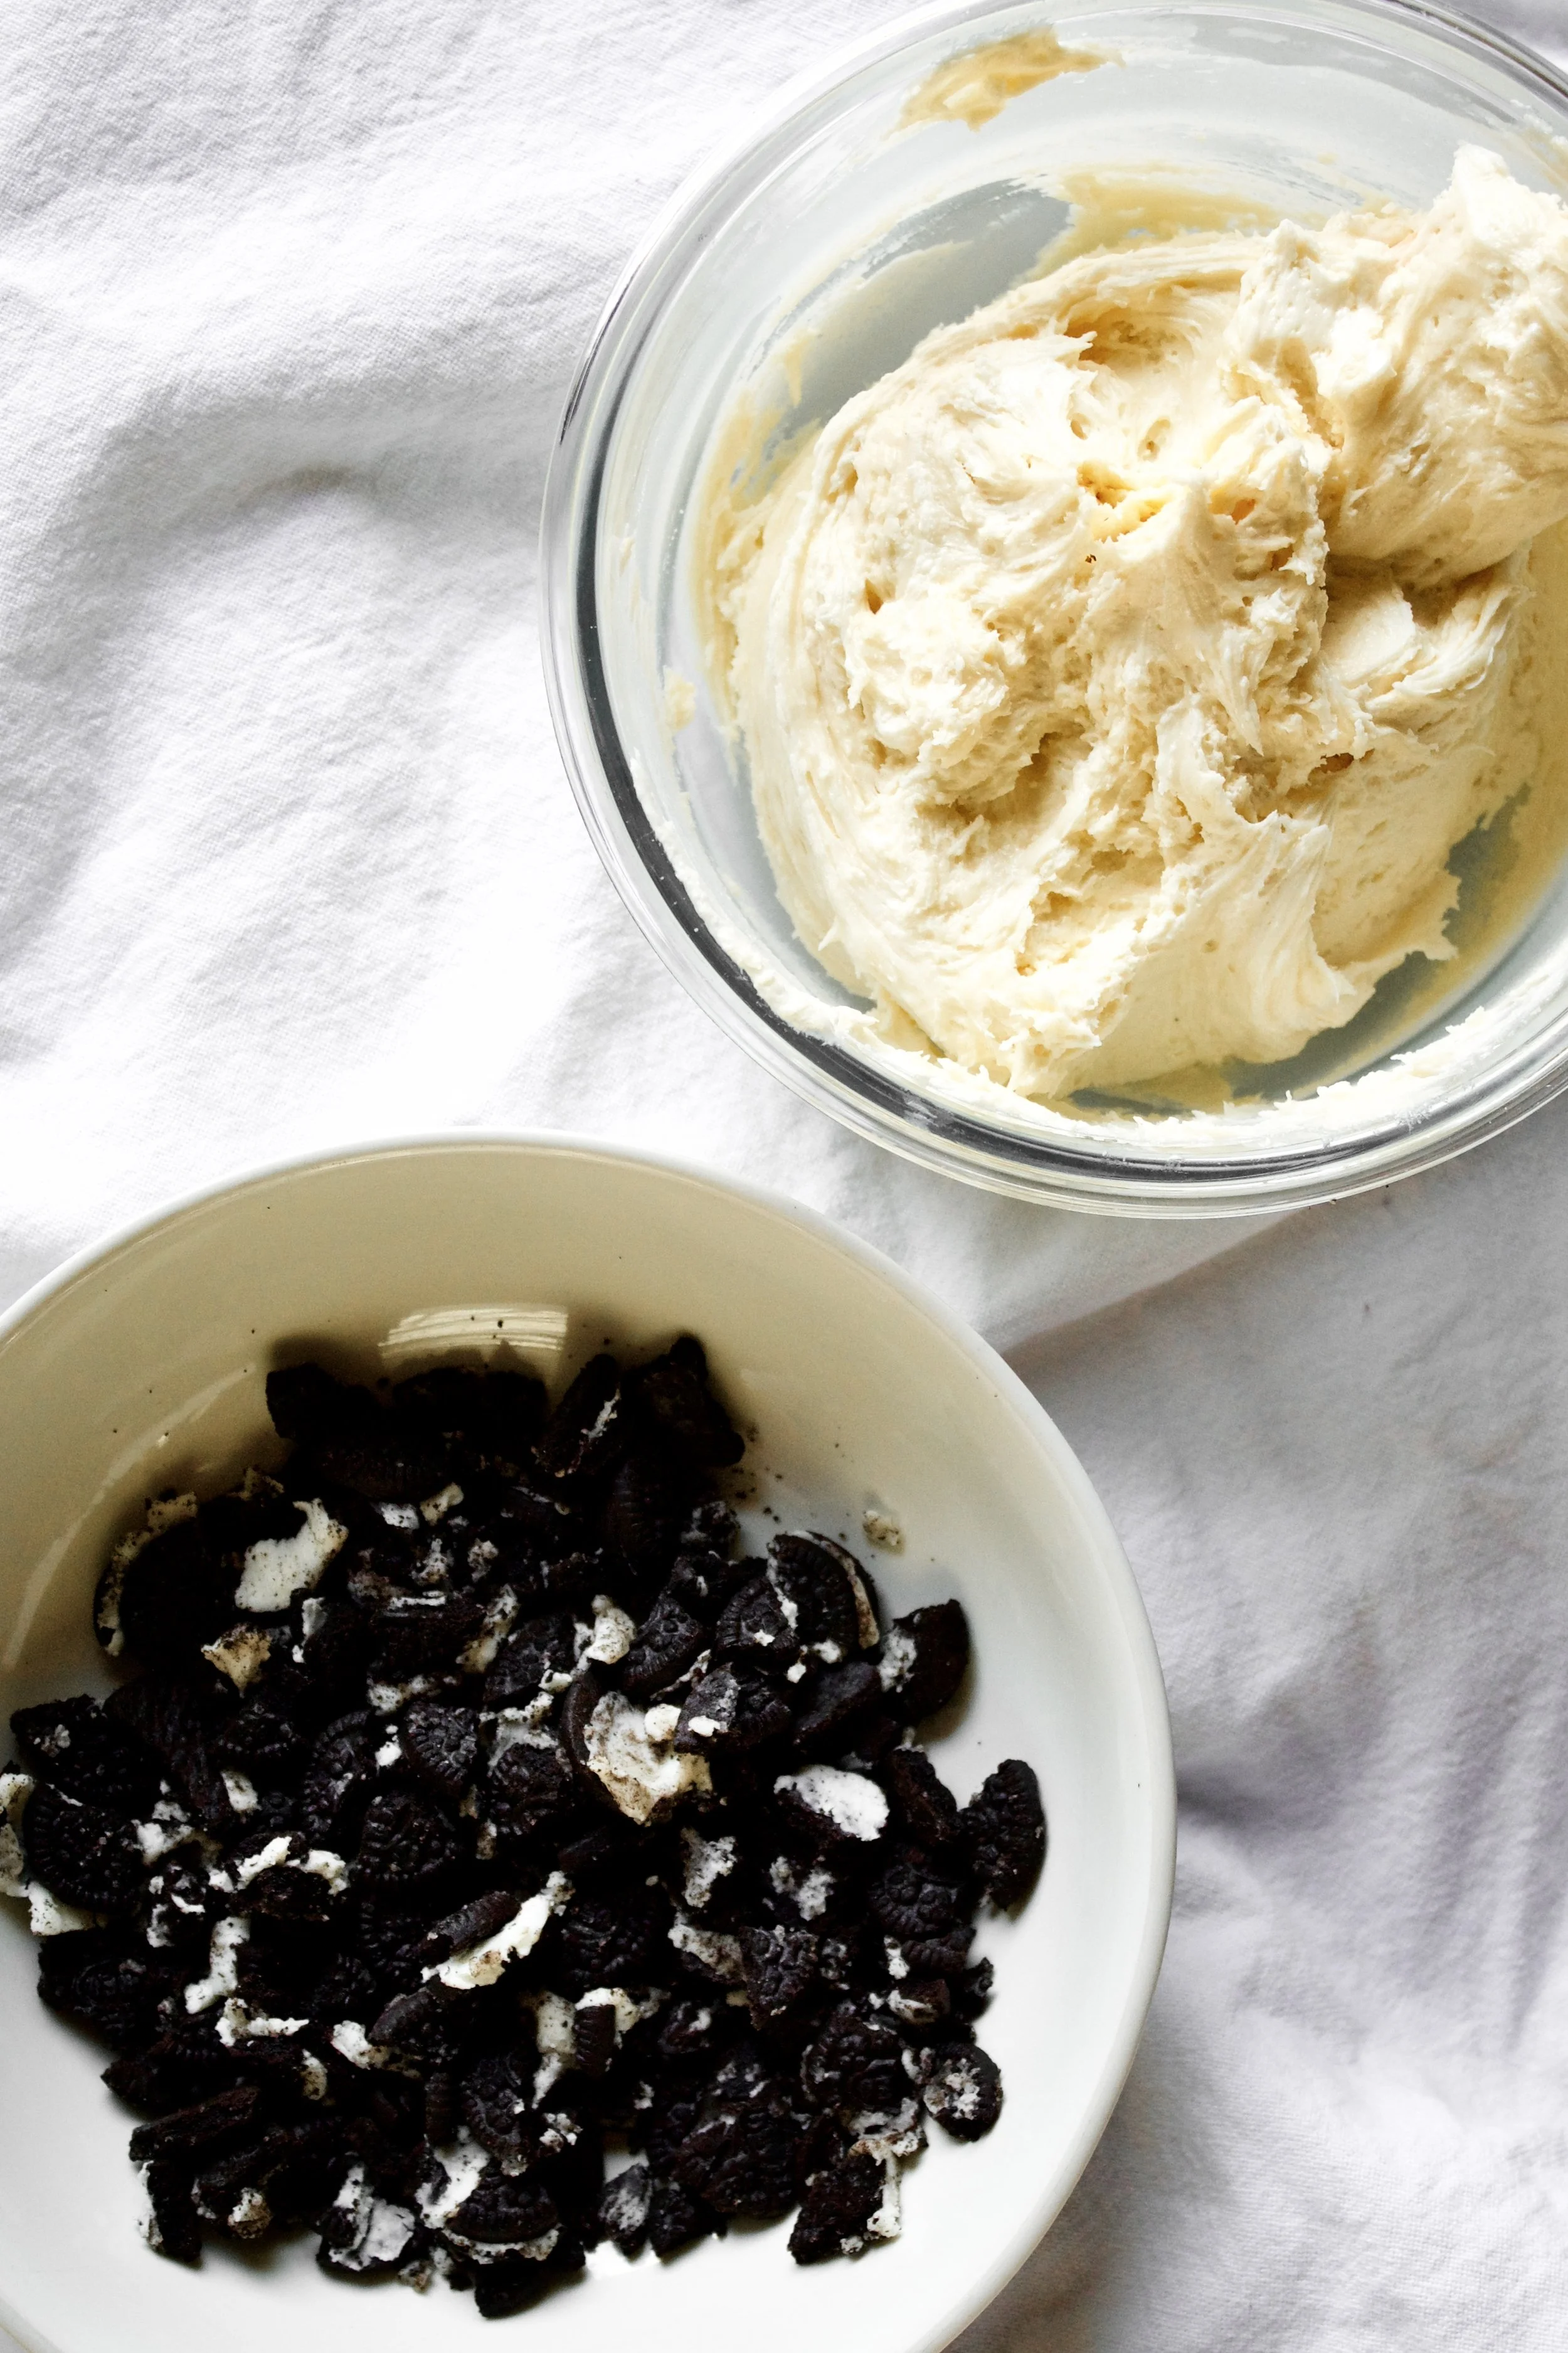
- Scrape bowl with a rubber spatula then add in powdered sugar, 1 cup at a time. Blend on low then slowly increase speed to high and mix until smooth before adding more. After 4 cups, scrape the bowl, then add the marshmallow fluff. Mix on high until well-blended, about 30-60 seconds. Add the salt and vanilla and mix on high for about 30 seconds until well-blended.
- At this point, taste to see if it needs more sugar–but remember that the cookies will add sweetness as well. If needed, add 1-2 more cups, in ½ cup increments, until the taste is to your liking. If it’s sweet enough but not holding its shape like in the photos, refrigerate 10-20 minutes after the next step. If it's too thick, add small splashes of heavy cream (this isn't very common in my experience, but in cold weather might happen).
- Crush the chocolate sandwich cookies to desired size (no larger than pea sized-ish). Stir into the finished buttercream. If using smaller pieces, you can stir using the stand mixer, on low.
- Assemble the cake. Cut any domed tops off the cake layers. If desired, you can cut each cake layer in half, to get more frosting, but I think it’s perfect with just 2 layers. Fill and frost the cake to desired thickness. You can optionally sprinkle some larger pieces of crushed cookies on top of the frosting in the filling. If desired, decorate with more crushed or whole cookies (I used minis!).
Enjoy! If not serving right away, store in an airtight container until ready to eat. Cake will last for 3-5 days. Cut cakes will last longer if you place a piece of plastic wrap right along the cut edges and seal it by pressing it into the buttercream along the edge, then store the whole cake in an airtight container.
*You can make your own buttermilk by adding 1 tablespoon white vinegar with enough room temperature whole milk to equal 1 cup total. Stir and let sit 10 minutes while you prep the rest of the ingredients.
Note about the buttercream: this makes a rather soft buttercream, which is only a problem in warm climates/homes or if traveling with the cake. In that event, freeze the finished cake for 1 hour before traveling.