
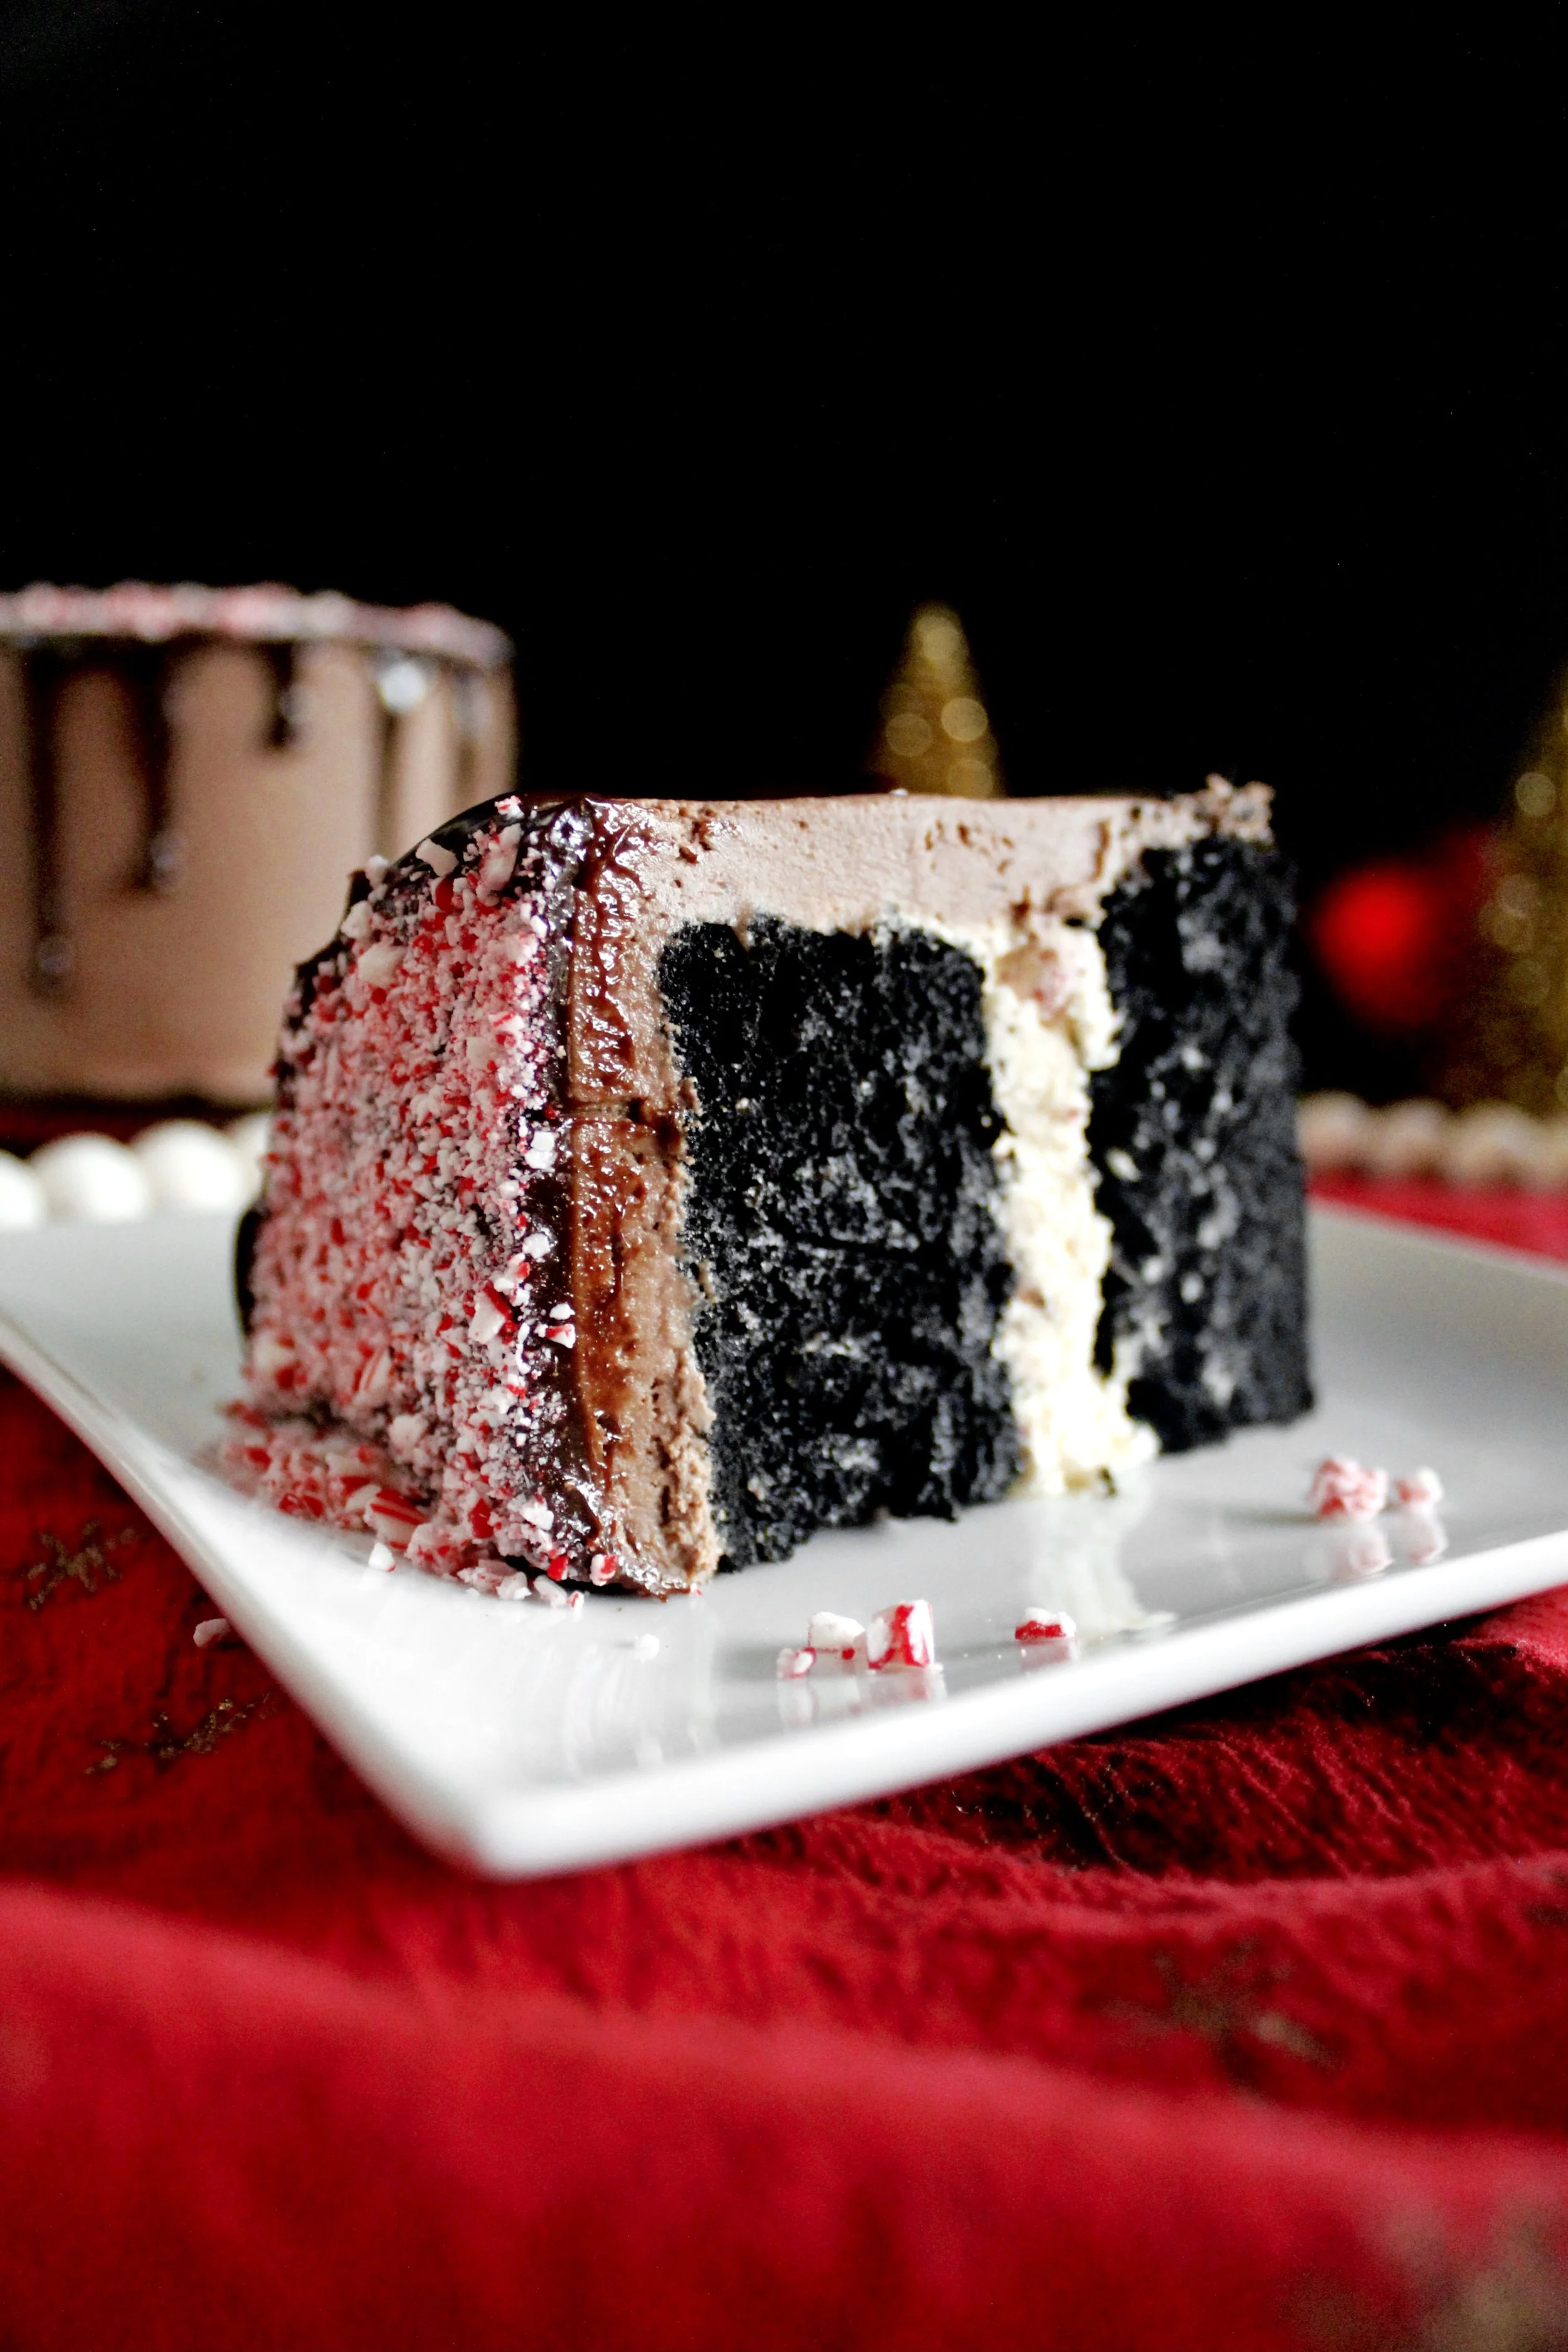
Dark Chocolate Peppermint Cake
Black chocolate cake layers filled with marshmallow buttercream and crushed candy canes then frosted with chocolate marshmallow buttercream and topped with dark chocolate peppermint ganache. This cake tastes just like the Dark Chocolate Peppermint Joe Joe’s at Trader Joe’s and will make your holidays festive and delicious!
This post may contain affiliate links from which, at no additional cost to you, I may earn a small commission to keep this site running. Only products I myself would or do use are recommended.

Is it too late to share Christmas recipes? Given that it’s like two days until Christmas and everyone probably already has their menus planned? Whatevs. I’m sharing a Christmas cake today. It’s been a hectic...week since school got out. And I had to make a choice to prioritize my own mental health and wellbeing. It made me realize two things:
One, moms really are the ones who sacrifice their own wellbeing to make Christmas magical. I have this thing about watching Christmas movies leading up to Christmas. With a toddler, I basically can only do that during naps or during my morning workout. Both of those sacred “me” times have been devoted to some Christmas errand or obligation or prep work for several days now. But it’s what moms do, right?

Two, I reminded myself that the perfect dessert or craft or experience or anything isn’t going to be perfect for anyone if I’m not taking care of myself. My mood impacts my whole family. And when I push myself past my limit (usually because I’m trying to make everything perfect), I fall apart. So I’m picking and choosing what I manage to get done. And I’m prioritizing my own Christmas cheer. Otherwise, I’ll have none left to spread.
Thank you for coming to my TED Talk.

Oh, speaking of Ted, anyone watch Ted Lasso?? We’re finally almost done with season two. We promised to watch it with friends and actually held to that promise, despite each of us being busy for literally two months running. But we’ve been making time for each other and have nearly caught up and it makes me so happy.
Which may sound random (and I’m laughing to myself right now thinking of the “story” haters who might be reading and thinking, “Why, oh why, is there NOTHING about a recipe yet?”), but Ted’s journey through mental health really resonated with me and has had me thinking about my own mental health this week.
Anyway, cake.
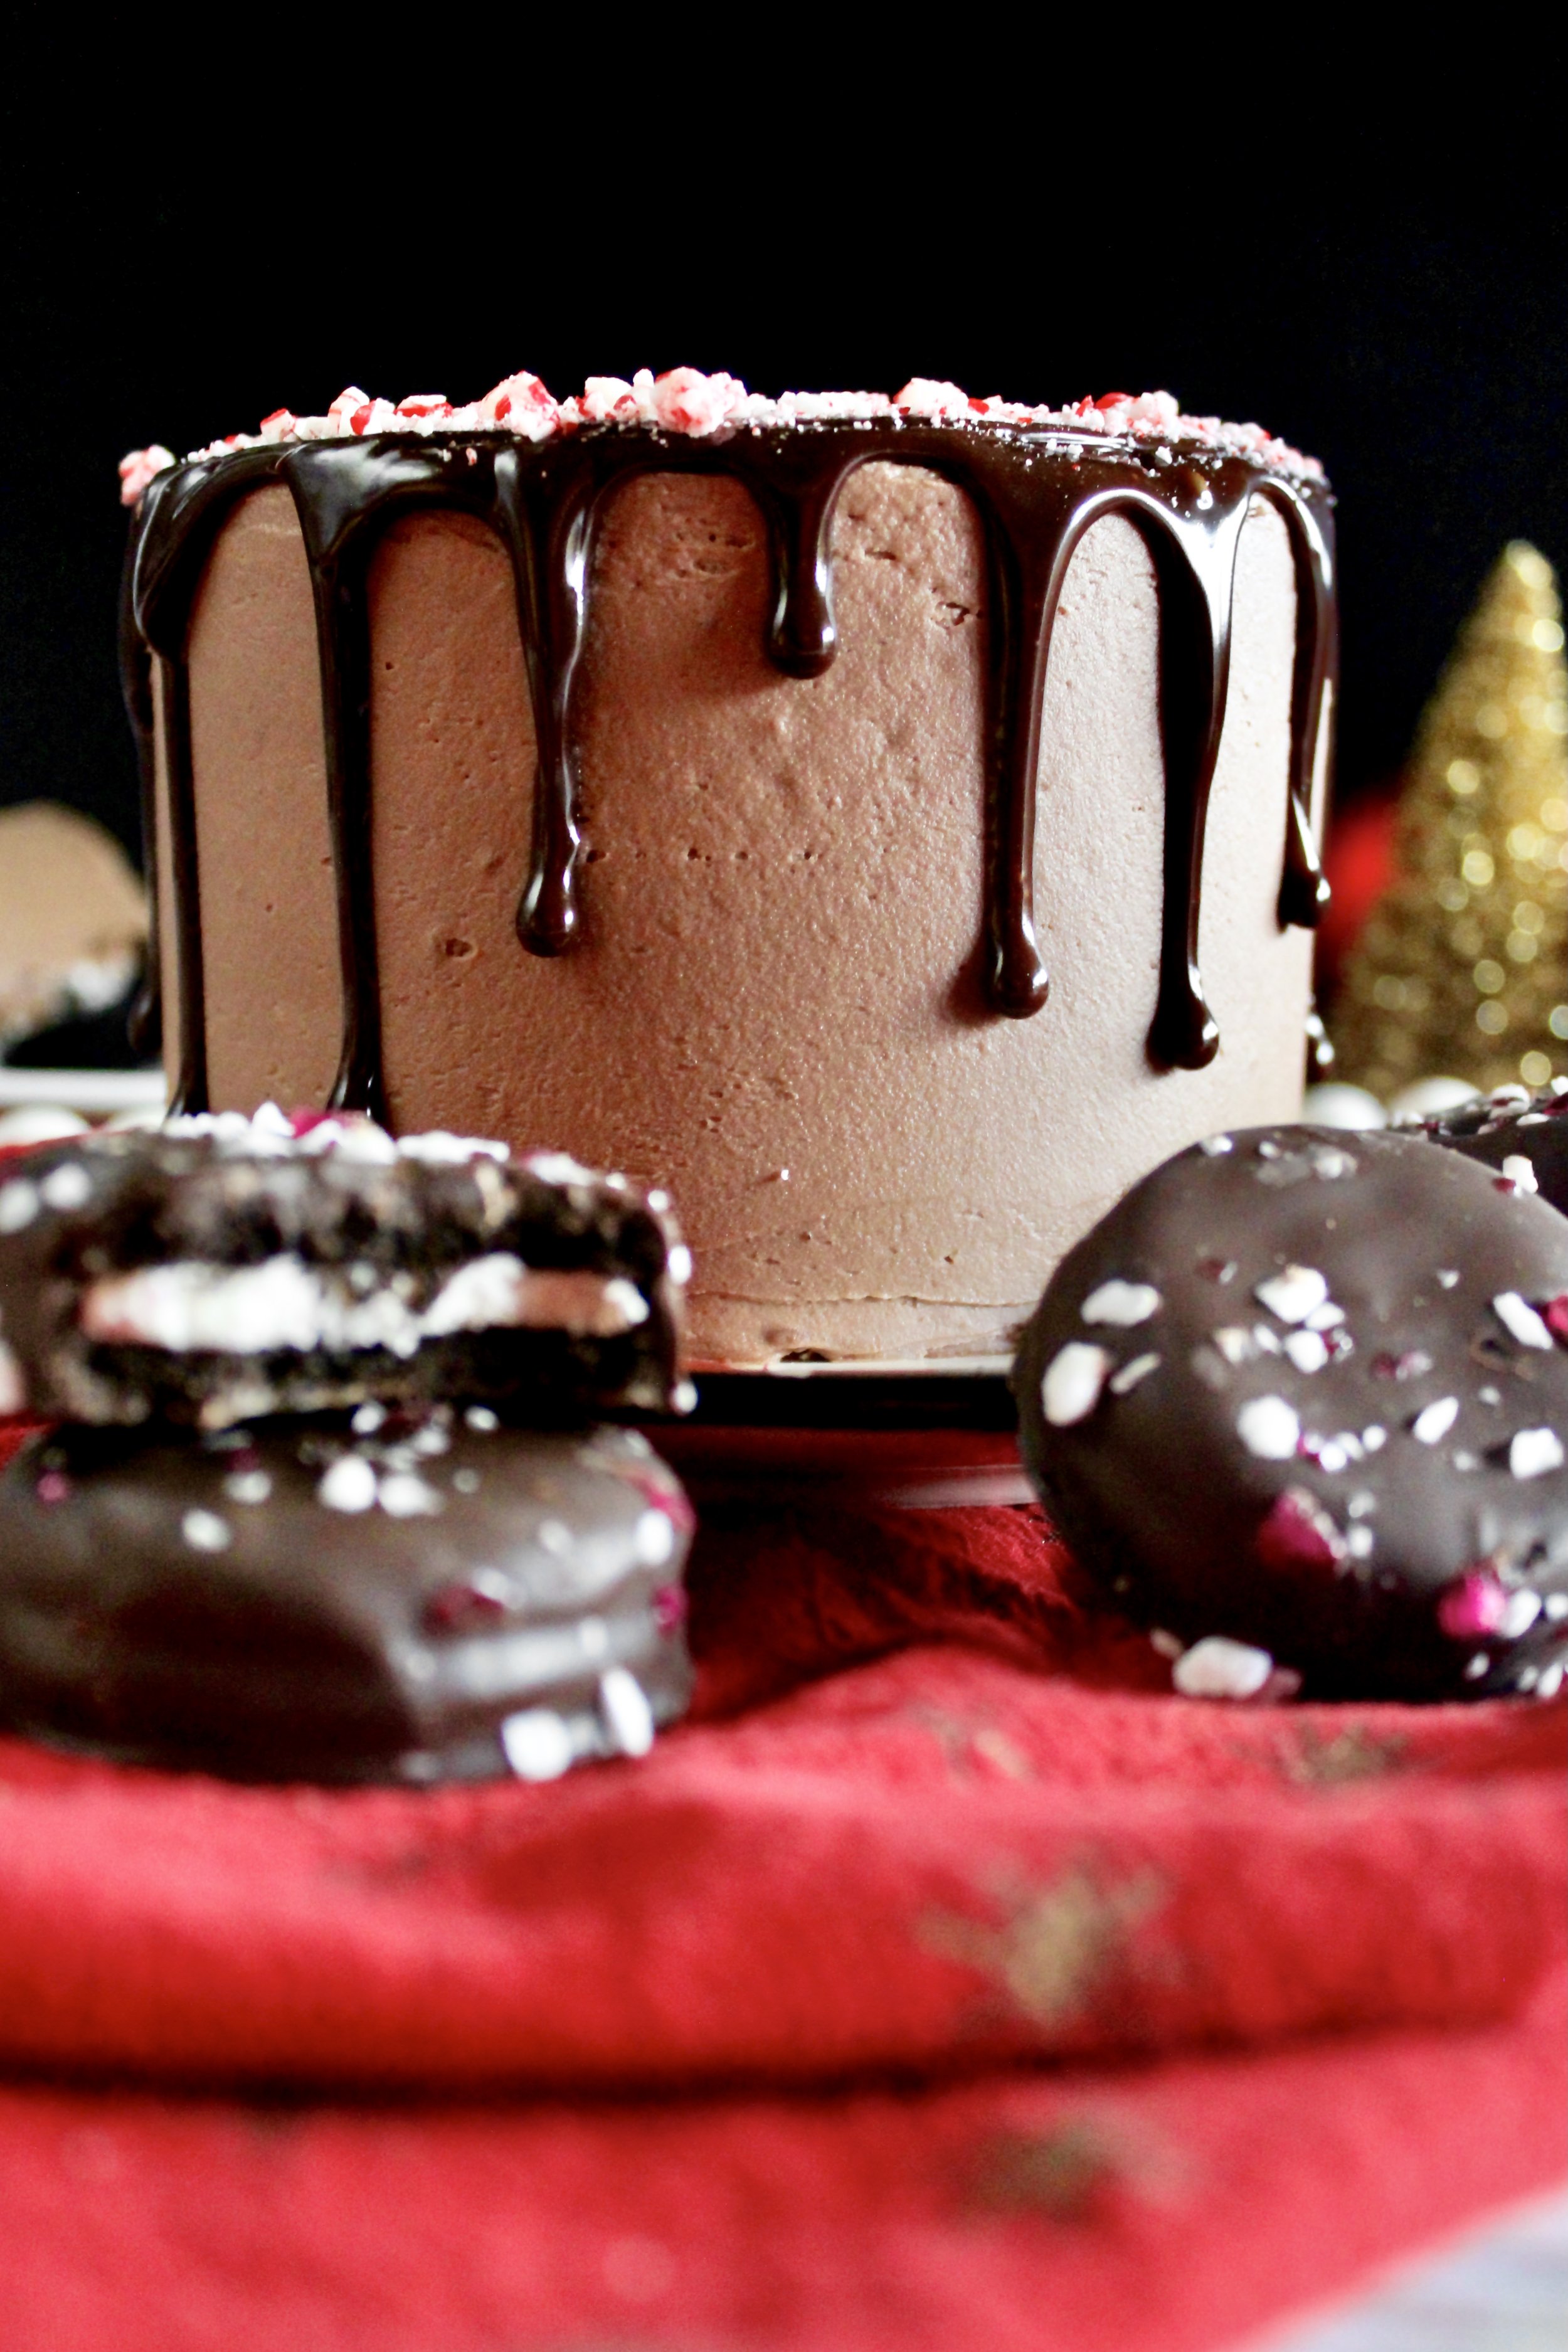
This cake is inspired by one of my favorite things that Trader Joe’s sells: their Dark Chocolate Covered Peppermint Joe Joe’s. It’s their Peppermint Joe Joe’s dipped in peppermint ganache and sprinkled with candy canes. It’s just so amazing.

Why this recipe works
The cake layers are so light and fluffy yet they hold their own with a softer frosting, which I used here. Plus, the combination of black chocolate in the cake and marshmallow buttercream in the filling creates the perfect cookies and cream flavor. I tried to stick to the original Joe Joe makeup, filling it with non-chocolate buttercream and only using candy canes to get the peppermint flavor in there.


The outer frosting is where I took some liberties, since it might be overkill to frost a cake in peppermint ganache (although…keep an eye out for that next year because I just changed my mind typing that sentence). I added peppermint to the ganache as well as more candy canes on top, to keep things as authentic as possible.
But what really works are the flavors. It really does have that dark chocolate peppermint cookies and cream flavor. It’s quite a cake, but it is SO worth the effort!

How to make dark chocolate peppermint cake
Make the cake.
1. Sift and whisk the dry ingredients. Sifting is a must!
2. Whisk the wet ingredients, except for coffee. Whisk well, until the oil and egg have emulsified (i.e. playing nice and are well-blended).
3. Slowly whisk in the coffee. Do this as slowly as you can, whisking as quickly as you can. If you think you scrambled some egg, run it through your mesh sieve before continuing.
4. Slowly add the wet to the dry ingredients. Stop when all the wet ingredients are added and scrape the bowl.


5. Beat on medium for exactly 2 minutes. Exactly 2 minutes! I always set a timer and stick to it. It’s weirdly a key step here.
6. Bake. Watch carefully so you don’t overbake the cakes.
Make the frostings
7. Beat the butter and sugar. Be sure it’s light and fluffy and well-blended.
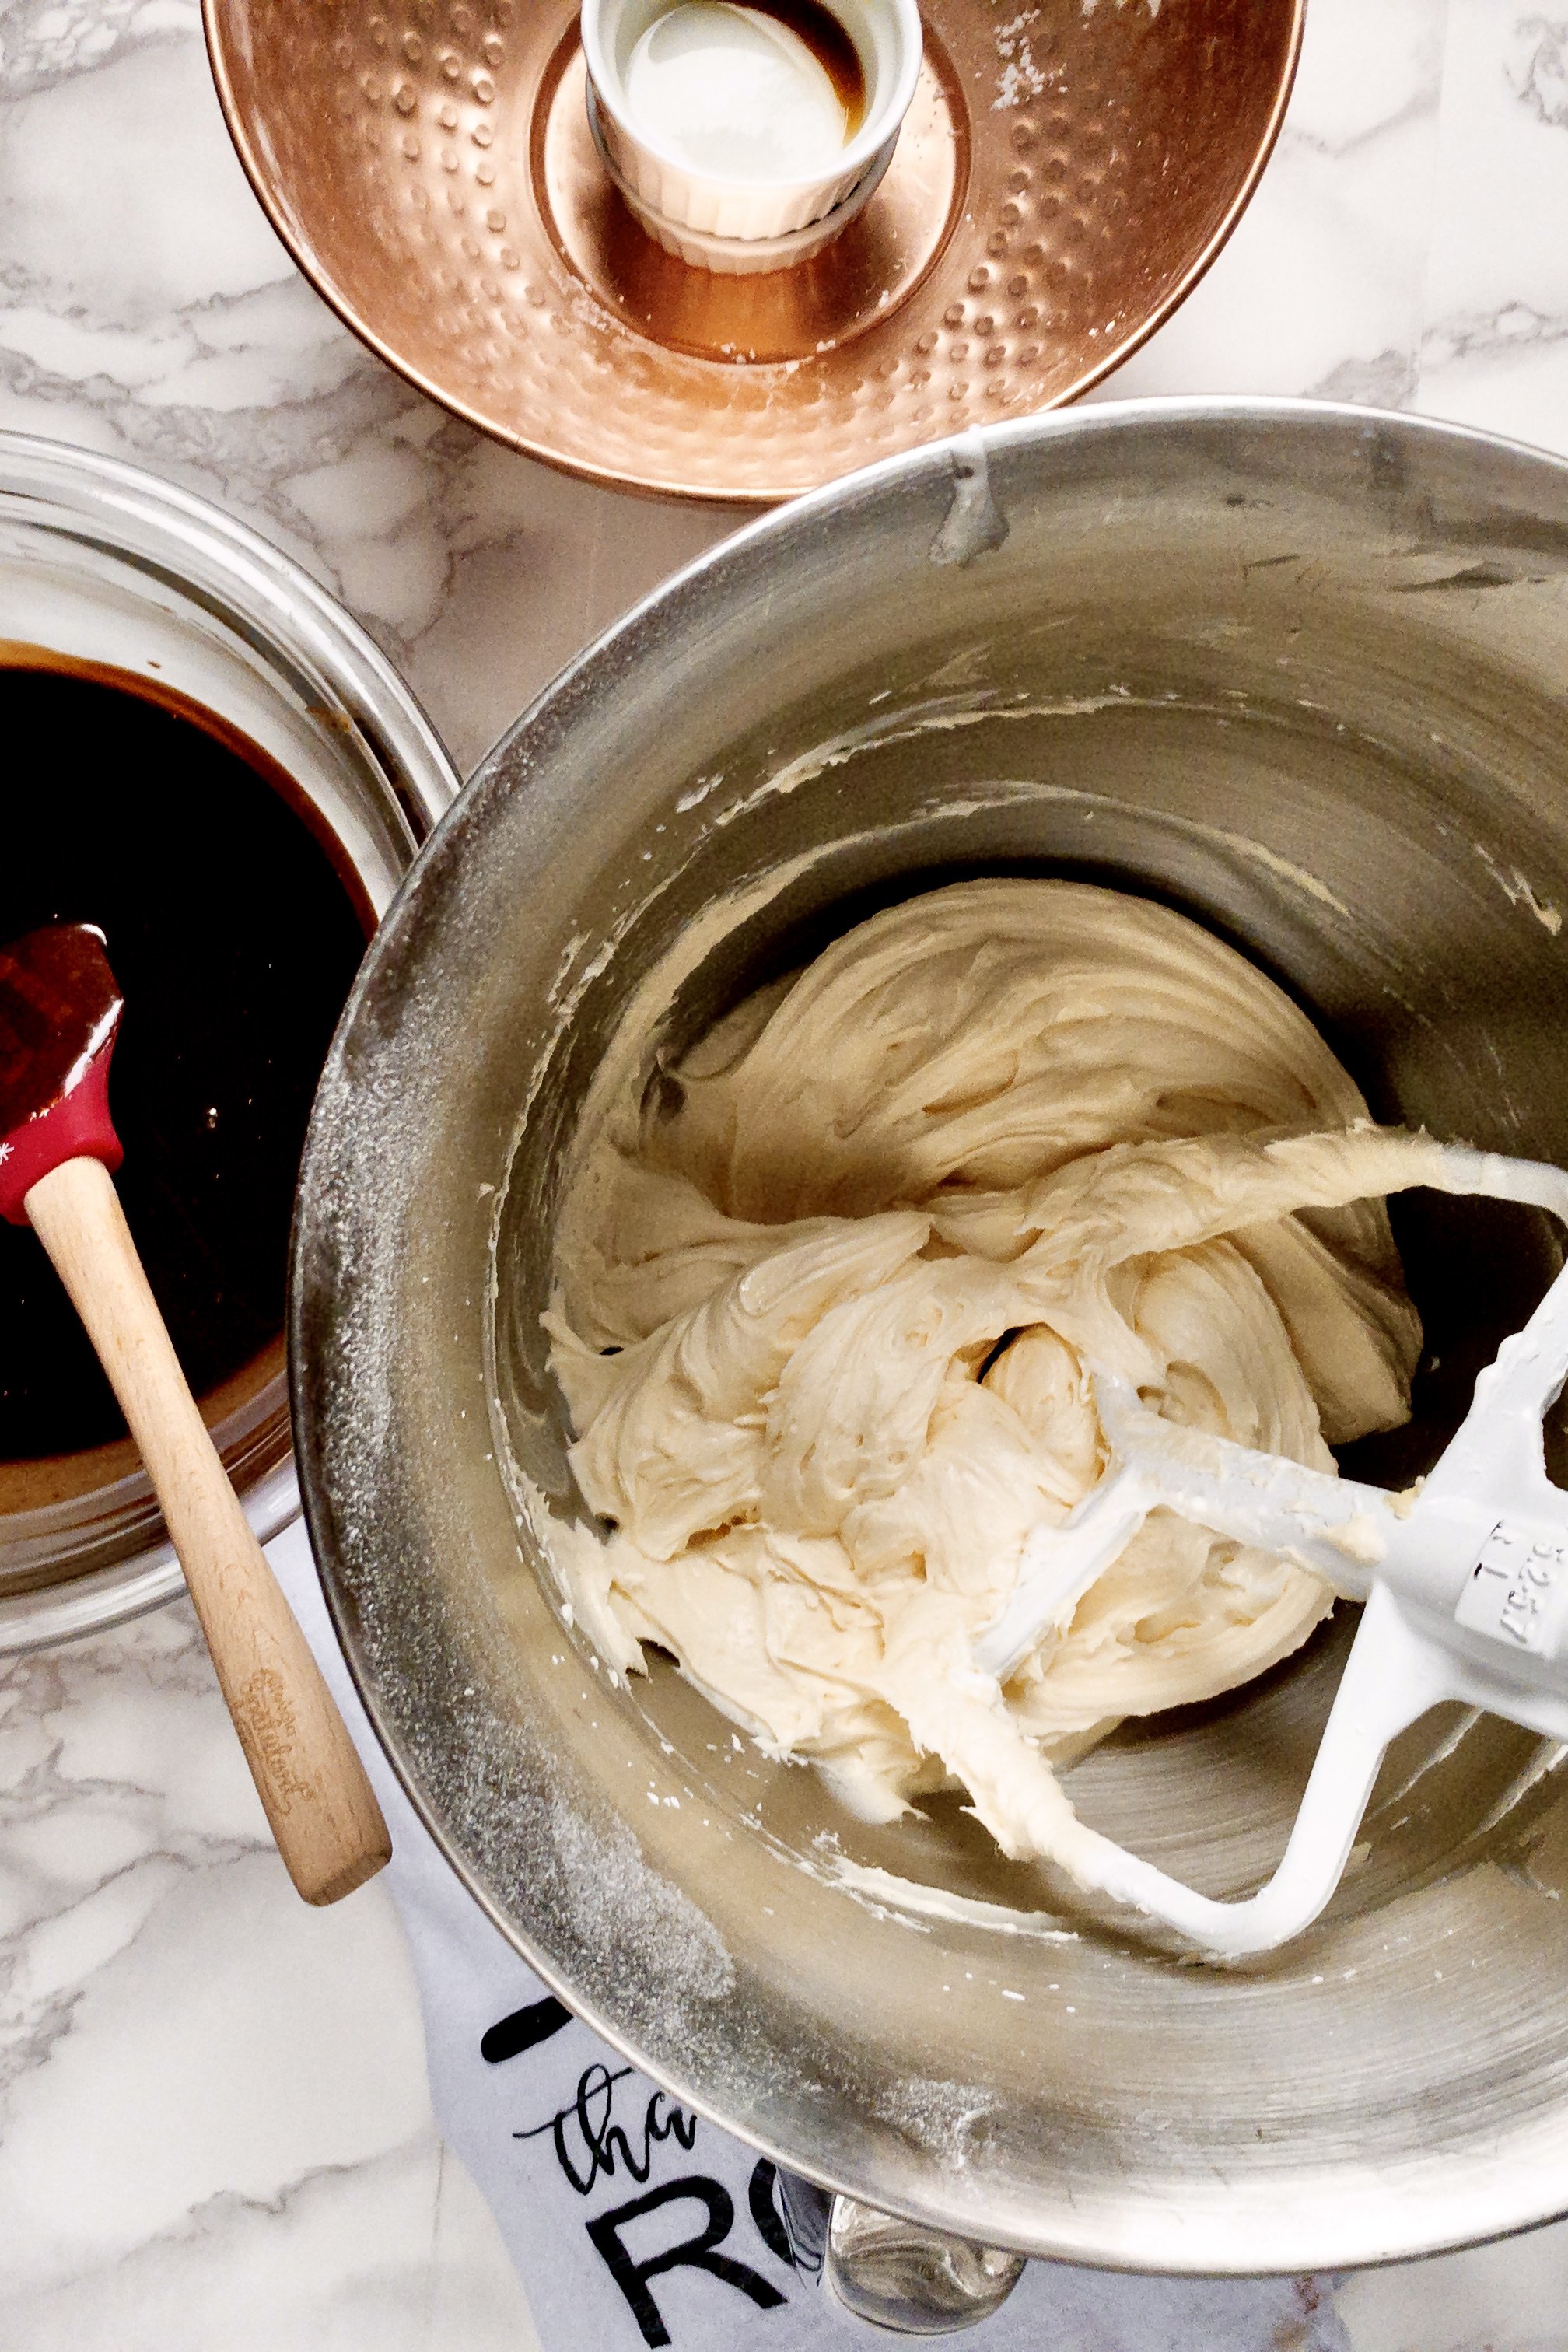


8. Add the marshmallow fluff and vanilla. Don’t mix too much after adding the marshmallow.
9. Reserve some for the filling, then add in the chocolate. The recipe gives an option for using cocoa powder instead of ganache, depending on if your climate is warm or you’ll be traveling with the cake.


Assemble the cake
10. Fill the cake with the reserved frosting and crushed candy canes. You can buy crushed candy canes, but I usually make my own by putting them in freezer safe bags (usually two layers) then going to town on them with my rolling pin. It helps keep the anxiety in check. :)
11. Frost with the chocolate frosting. Chill it for at least 20 minutes (freezing is even better).
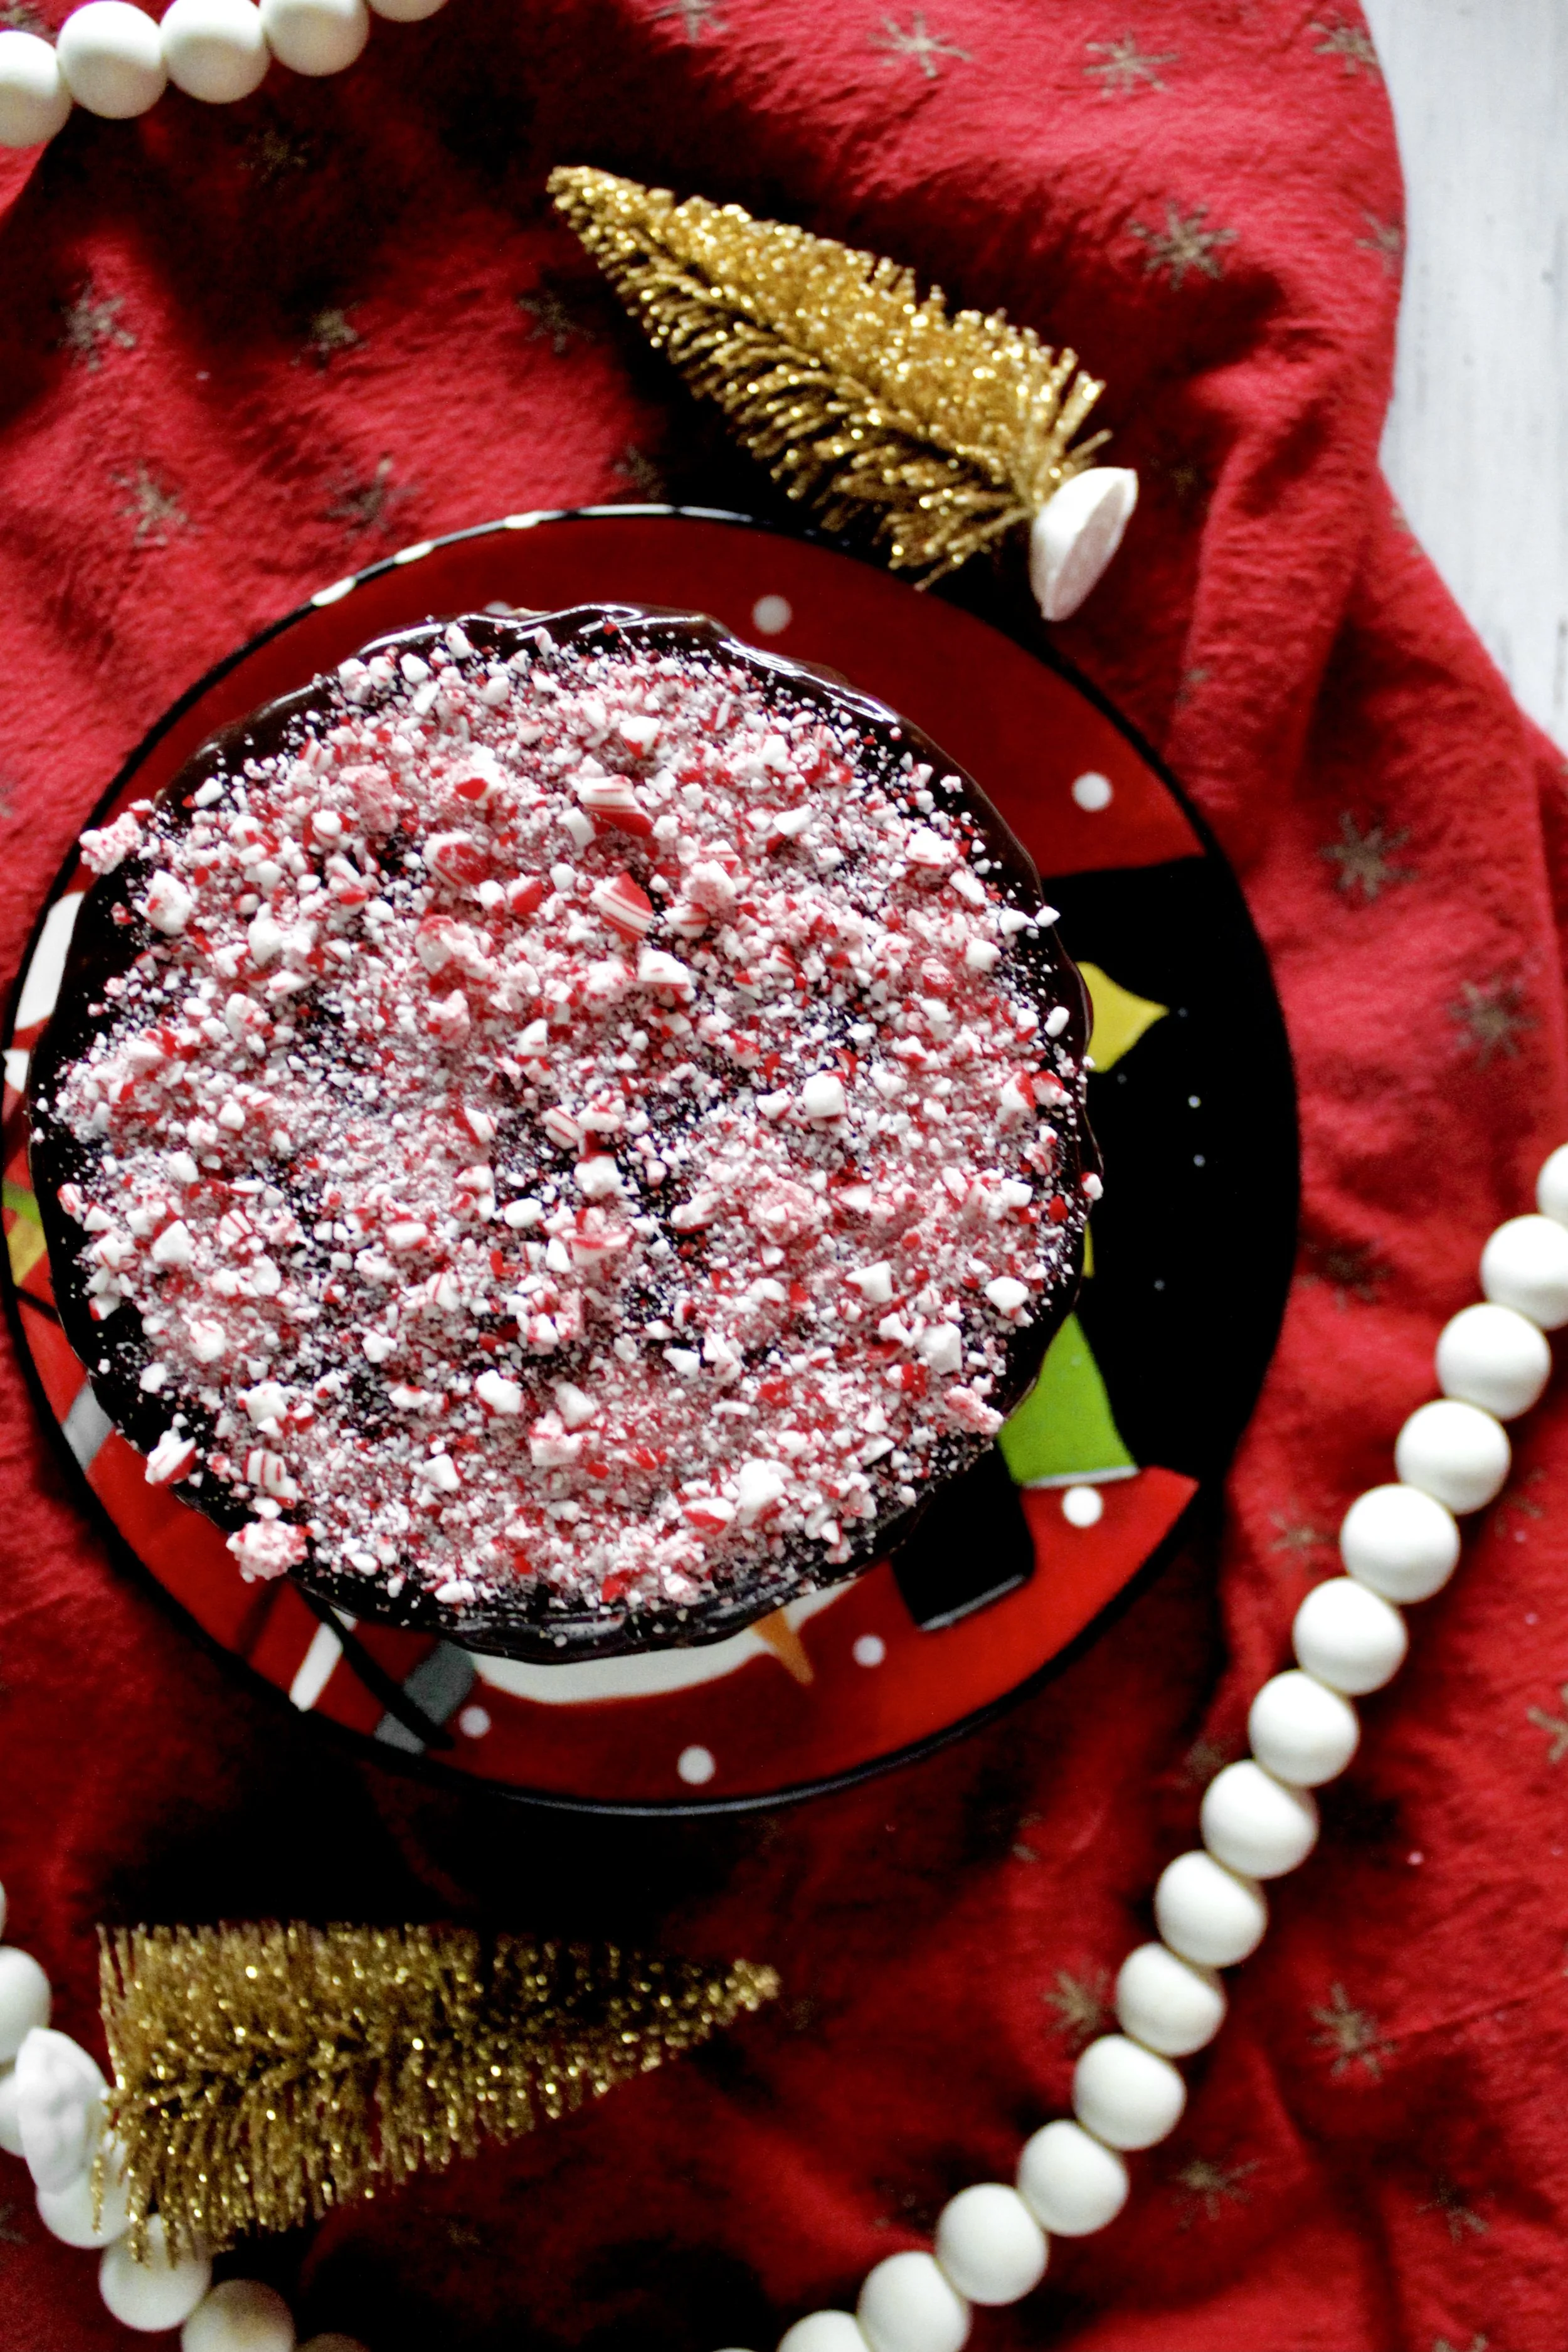
12. Make the peppermint ganache and drip on the cake. Check it on an overturned cup to be sure it drips down slowly—not so slowly that it goes nowhere (that means it’s too cold) but not so fast that it runs all the way to the bottom of the cup (it’s too warm and will melt the frosting).
Top with more candy canes and enjoy!

Tips and FAQ’s for this recipe
Split up your work!
I highly suggest making the cake and crushing your candy canes ahead of time. You can wrap the cake layers in a double layer of plastic wrap and leave them on the counter overnight or freeze them up to 2 months. I don’t suggest refrigeration, as this is actually more likely to dry the cake out. You can make the ganache ahead, too, then warm it up by placing it in a cup of hot water (don’t submerge the lid). The frosting can be made the day before, covered tightly, and left on the counter. However, I don’t suggest making it any further in advance. While it technically can be refrigerated or frozen (as most frostings can be), in cold weather it tends to become difficult to get smooth once it’s been brought back to room temperature and re-whipped (which you have to do with this one to get it nice and soft again).
Where do I get black cocoa?
I order mine online here. I bake with it quite frequently and this this bag lasts me several months at least. I’ve seen it in some specialty stores, but not ones I go to regularly, so ordering it is my preferred method.

Can I add peppermint to the cake or frostings?
Honestly, I wouldn’t. You need a lot of peppermint to compete with the black chocolate flavor, so I’d save that for the candy canes and ganache. There’s plenty of peppermint pop in both of those, but if you’re worried there won’t be enough flavor, you can add some extract to the frosting when you add in the vanilla (about 1 teaspoon) or just to the outer frosting, when you add the melted chocolate (or cocoa powder).
Can I make this a non-holiday cake?
Yes! Just leave out the candy canes in the filling and omit the peppermint extract from the ganache and you have an amazing dark chocolate cookies and cream cake. The cake uses the same type of cocoa in an Oreo or Joe Joe cookie, and the filling is made to mirror the filling in those cookies as well. The outer frosting and ganache simply take it to the next level of dark chocolate yumminess!

My cake tools
Here are my must-have tools I use for making this cake. Affiliate links provided.
Mesh sieve (because sifting is KEY for a fluffy cake)
All-rubber spatula (this makes scraping the bowl easier as the batter and frosting doesn’t get all over a wooden handle!)
Silicone liners for 8” cake (or for 6” cakes)
8” aluminum cake pans or 6” aluminum cake pans (I’ve found nonstick doesn’t bake as evenly)
Offset spatula for frosting the cake
Dark Chocolate Peppermint Cake
- prep time: 50-60 minutes
- bake time: 25-30 minutes
- total time: 1 hour, 30 minutes (plus at least 30 minutes for the cake to cool)
servings: 12-16
Ingredients:
for the black chocolate cake
- 1 ½ cups (350g) granulated sugar
- 1 ⅔ cups (226g) flour, spooned then leveled and sifted
- ¾ cup (75g) black cocoa powder, spooned then leveled and sifted
- 2 teaspoons (8g) baking powder
- 1 teaspoon (5g) baking soda
- ½ teaspoon (3g) sea salt
- 3 eggs, room temperature
- 1 cup (236g) buttermilk, room temperature*
- ⅓ cup (108g) avocado oil (can sub vegetable, grape seed, or canola oil)
- 1 tablespoon (13g) pure vanilla extract
- 1 cup (240g) hot, light roast coffee (or hot water)
for the buttercreams (you’ll reserve some for the filling, making two types of buttercream)
- 4 ounces (113g) baking chocolate, chopped, or chocolate chips (see note)
- 3 ounces (85g) heavy whipping cream
- 2 cups (454g) unsalted European style butter, softened
- 1 batch marshmallow fluff (or two 7oz jars store bought marshmallow cream)
- 4-6 cups (520-780g) powdered sugar
- ¼ teaspoon sea salt
- 1 tablespoon (13g) vanilla extract
for the peppermint ganache drip
- 6 ounces (170g) dark chocolate, chopped (or chocolate chips)
- 4 ounces (113g) heavy whipping cream
- ½ teaspoon (1g) peppermint extract
to assemble
- crushed candy canes (or you can make your own)
Instructions:
make the black chocolate cake layers
- Preheat your oven to 325F/165C. Lightly grease and flour two 8” or three 6” cake pans (or use baking spray) and line the bottom with parchment paper or silicone baking mats. This is also a great time to set your coffee to percolate (unless using hot water or espresso and hot water, which is what I do).
- Whisk together the sugar, flour, cocoa powder, baking powder, baking soda, and salt in the bowl of your stand mixer or a large mixing bowl, sifting everything but the sugar (unless yours is fine enough to sift--go for it!). Set aside.
- In a separate medium mixing bowl, whisk the eggs, buttermilk, oil, and vanilla together until well-blended and fully emulsified, about 1 minute.
- Very, very slowly stream the hot coffee or water into the wet ingredients, whisking vigorously and constantly as you pour to avoid scrambling the eggs. Feel free to do this in segments if it’s easier. If you do scramble some of the eggs, you can run the mixture through your fine mesh sieve to remove the cooked egg bits.
- Using the paddle attachment, turn your stand mixer to low (or use a hand mixer) and slowly pour the wet ingredients into the dry. This should take about 30 seconds or so. The batter will clump up then thin out. Once you’ve poured all the wet ingredients, immediately turn off the mixer. Scrape down the bottom and sides. Beat on medium for exactly 2 minutes (set a timer).
- Evenly divide batter between the prepared cake pans.
- Bake for 25-30 minutes, until a toothpick inserted in the middle comes out with just a few moist crumbs (ideally not fully clean, as this could mean they’re over baked). Check early and rotate halfway if not using convection. Be sure to check each pan separately, as one might bake faster than the other.
- Let cool 5-10 minutes in the cake pan then remove to a cooling rack to cool completely.
make the buttercreams
- While the cake layers cool, make the marshmallow buttercreams. You will remove some plain marshmallow buttercream before adding the ganache, resulting in a filling that’s just like the one in the Dark Chocolate Covered Peppermint Joe Joe’s.
- If using homemade marshmallow fluff, make that first. You can immediately start on the buttercream once the fluff is done, but remove it to a separate bowl to cream the butter.
- Make the buttercream ganache (separate from the drip ganache). Combine the chocolate and heavy cream in a heatproof bowl. (See note about using just chocolate to make a sturdier frosting. This will hold up fine indoors but may get fairly soft in direct sunlight or a warm house). Bring 1-2” water to a boil in a small to medium saucepan that can hold the bowl on top in such a way that all or almost all of the ingredients are over the water and not over the stove. Once the water boils, turn down the heat to medium low or low and place the bowl over it. You want it to stay simmering without getting too hot. Stir constantly with a rubber spatula until the chocolate is mostly melted. Remove from heat and stir or whisk vigorously until it is all melted and smooth. Return to heat if some chunks remain, but don’t worry if the color looks a little streaky (usually only noticeable in a glass bowl). It’s best not to overheat the chocolate because it will become grainy and separated. Set aside to cool slightly, about 20 minutes.
- In the bowl of your stand mixer fitted with the paddle attachment or in a large mixing bowl using your hand mixer, cream butter on high until smooth, about 1 minute.
- Scrape bowl with a rubber spatula then add in powdered sugar, 1 cup at a time. Blend on low then slowly increase speed to high and mix until smooth before adding more. After 4 cups, scrape the bowl, then add the marshmallow fluff. Mix on high until well-blended, about 30-60 seconds. Add the salt and vanilla and mix on high for about 30 seconds until well-blended.
- At this point, taste to see if it needs more sugar. If so, add 1-2 more cups, until the taste is to your liking. If it’s sweet enough but not holding its shape like in the photos, refrigerate 10-20 minutes.
- Remove about ⅓ of the frosting (a little more of you’re cutting the cake layers in half) to a separate bowl, to be used in the filling.
- Pour the cooled ganache (or cocoa powder–see note below) into the remaining ⅔ buttercream and mix on low until well-blended, about 30 seconds. Scrape the bowl then mix again on low for a few seconds, just to make sure it’s fully incorporated. If it’s too thin, refrigerate for 10-20 minutes while you assemble the cake.
frost the cake
- Cut any domed tops off of the cake layers. (Save these in a bowl to eat with leftover frosting!) If desired, cut each cake layer in half with a serrated knife. Spread a layer of plain marshmallow buttercream on the bottom layer of cake. Sprinkle liberally with crushed candy canes (you can make your own by placing some unwrapped candy canes in two layers of freezer safe plastic baggies then whacking them with a rolling pin or meat tenderizer until crushed).
- Continue this process until all layers of the cake are stacked. Stir any remaining plain buttercream into the chocolate (optional).
- Spread a thin layer of chocolate marshmallow buttercream on the cake then chill 5-10 minutes. Frost to desired thickness, trying to get it roughly straight and smooth. There’s no special trick to this, just patience and practice.
- Chill the fully frosted cake at least 20 minutes (or freeze, if you have room in the freezer).
decorate the cake
- While the cake chills/freezes, make the peppermint ganache. Place all of the ingredients in a heatproof bowl. Bring 1-2” water to a boil in a small to medium saucepan that can hold the bowl on top in such a way that all or almost all of the ingredients are over the water and not over the stove. Once the water boils, turn down the heat to medium low or low and place the bowl over it. You want it to stay simmering without getting too hot. Stir constantly with a rubber spatula until the chocolate is mostly melted. Remove from heat and stir or whisk vigorously until it is all melted and smooth. Return to heat if some chunks remain, but don’t worry if the color looks a little streaky (usually only noticeable in a glass bowl). It’s best not to overheat the chocolate because it will become grainy and separated. Set aside to cool slightly, until the cake is nice and firm.
- Place the peppermint ganache in a squeeze bottle or piping bag with a very small hole cut open. It should feel just slightly warm to the touch. You can test if it’s ready (not too hot, not too cold) but testing a drip on a cup or even your finger. You want it to not burn and not drip straight down right away–you want it to take a little bit of time to drip down the cake so it turns out just right.
- With the tip of the squeeze bottle held just above the very edge of the cake, begin to slowly squeeze the ganache out of the bottle, rotating the cake as you go. You want to stop and let a little extra squeeze out every inch or so, to create the drips. Just let gravity do its thing by squeezing some extra–you don’t need to try to drag the bottle down the side of the cake. If it’s dripping too fast, let the ganache cool a little longer. If it’s refusing to drip at all, place the bottle in a cup of hot water (don’t let the lid become submerged) until it softens a bit. Continue dripping and rotating until you’ve gone all the way around the cake. Feel free to go back and add in drips to any bare areas. Drizzle more ganache on top and spread evenly with an offset spatula.
- Sprinkle with more crushed candy canes. Chill the cake for 5-10 minutes, to set the ganache, then store at room temperature until ready to eat.
Enjoy! If not serving right away, store in an airtight container until ready to eat. Cake will last for 3-5 days. Cut cakes will last longer if you place a piece of plastic wrap right along the cut edges and seal it by pressing it into the buttercream along the edge, then store the whole cake in an airtight container.
Notes:
*You can make your own buttermilk by adding 1 tablespoon white vinegar with enough room temperature whole milk to equal 1 cup total. Stir and let sit 10 minutes while you prep the rest of the ingredients.
Note about the buttercream: this makes a rather soft buttercream, which is only a problem in warm climates/homes or if traveling with the cake. In that event, sub 2-4 tablespoons cocoa powder for the ganache (chocolate chips and whipping cream).
