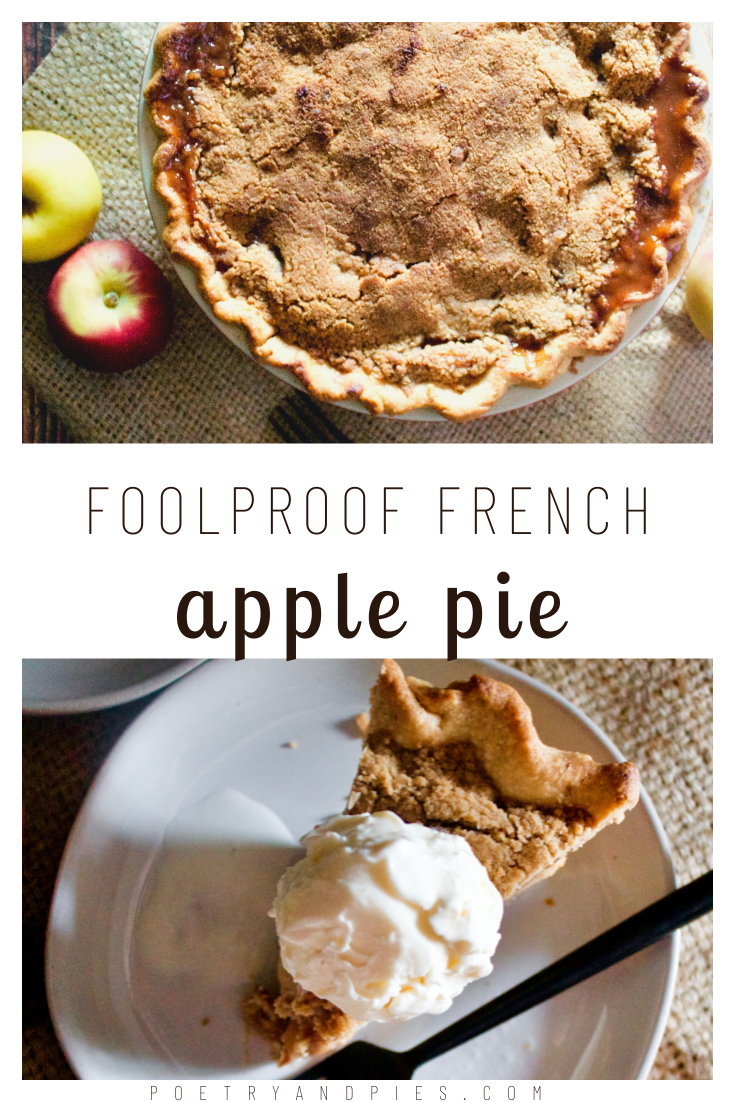
Foolproof French Apple Pie
Perfect apple pie with a crispy, crumbly topping and flaky crust that slices perfectly—no collapsing or soupy pies here! Plus, the use of brown sugar and extra cinnamon pack this pie with so much flavor. You will win any gathering with this foolproof French apple pie!
This post may contain affiliate links from which, at no additional cost to you, I may earn a small commission to keep this site running. Only products I myself would or do use are recommended.

This pie is very special to me. One, it’s the first time I made an apple pie that came out well and I was able to photograph. I’ve made many successful apple pies but never had a chance to get a good photoshoot in with them.
But more importantly, it was therapeutic and even healing for me to make this pie. I made it with my daughter on her birthday. It was one of the first times I’d baked since my brother passed away in early September. For a while, I honestly didn’t know if I’d be able to make apple pie ever again. It was his all time favorite dessert. I was worried apple pie (and even apple desserts in general) would be too hard to make or eat ever again.
But somehow I felt closer to him with this pie. I think I did him proud with it, especially teaching his niece to make it, too.

Why I love this recipe
Beyond the story above, I have always loved this apple pie recipe for several reasons. First, my foolproof classic pie crust (which I used this time) and my foolproof brown sugar all-butter pie crust are both…foolproof. You’re guaranteed a flaky sturdy crust each time. Just be sure to use plenty of flour and flip/rotate the crust as you roll it out and don’t skip the freezing (of the unfilled crust) and chilling (of the filled pie)!
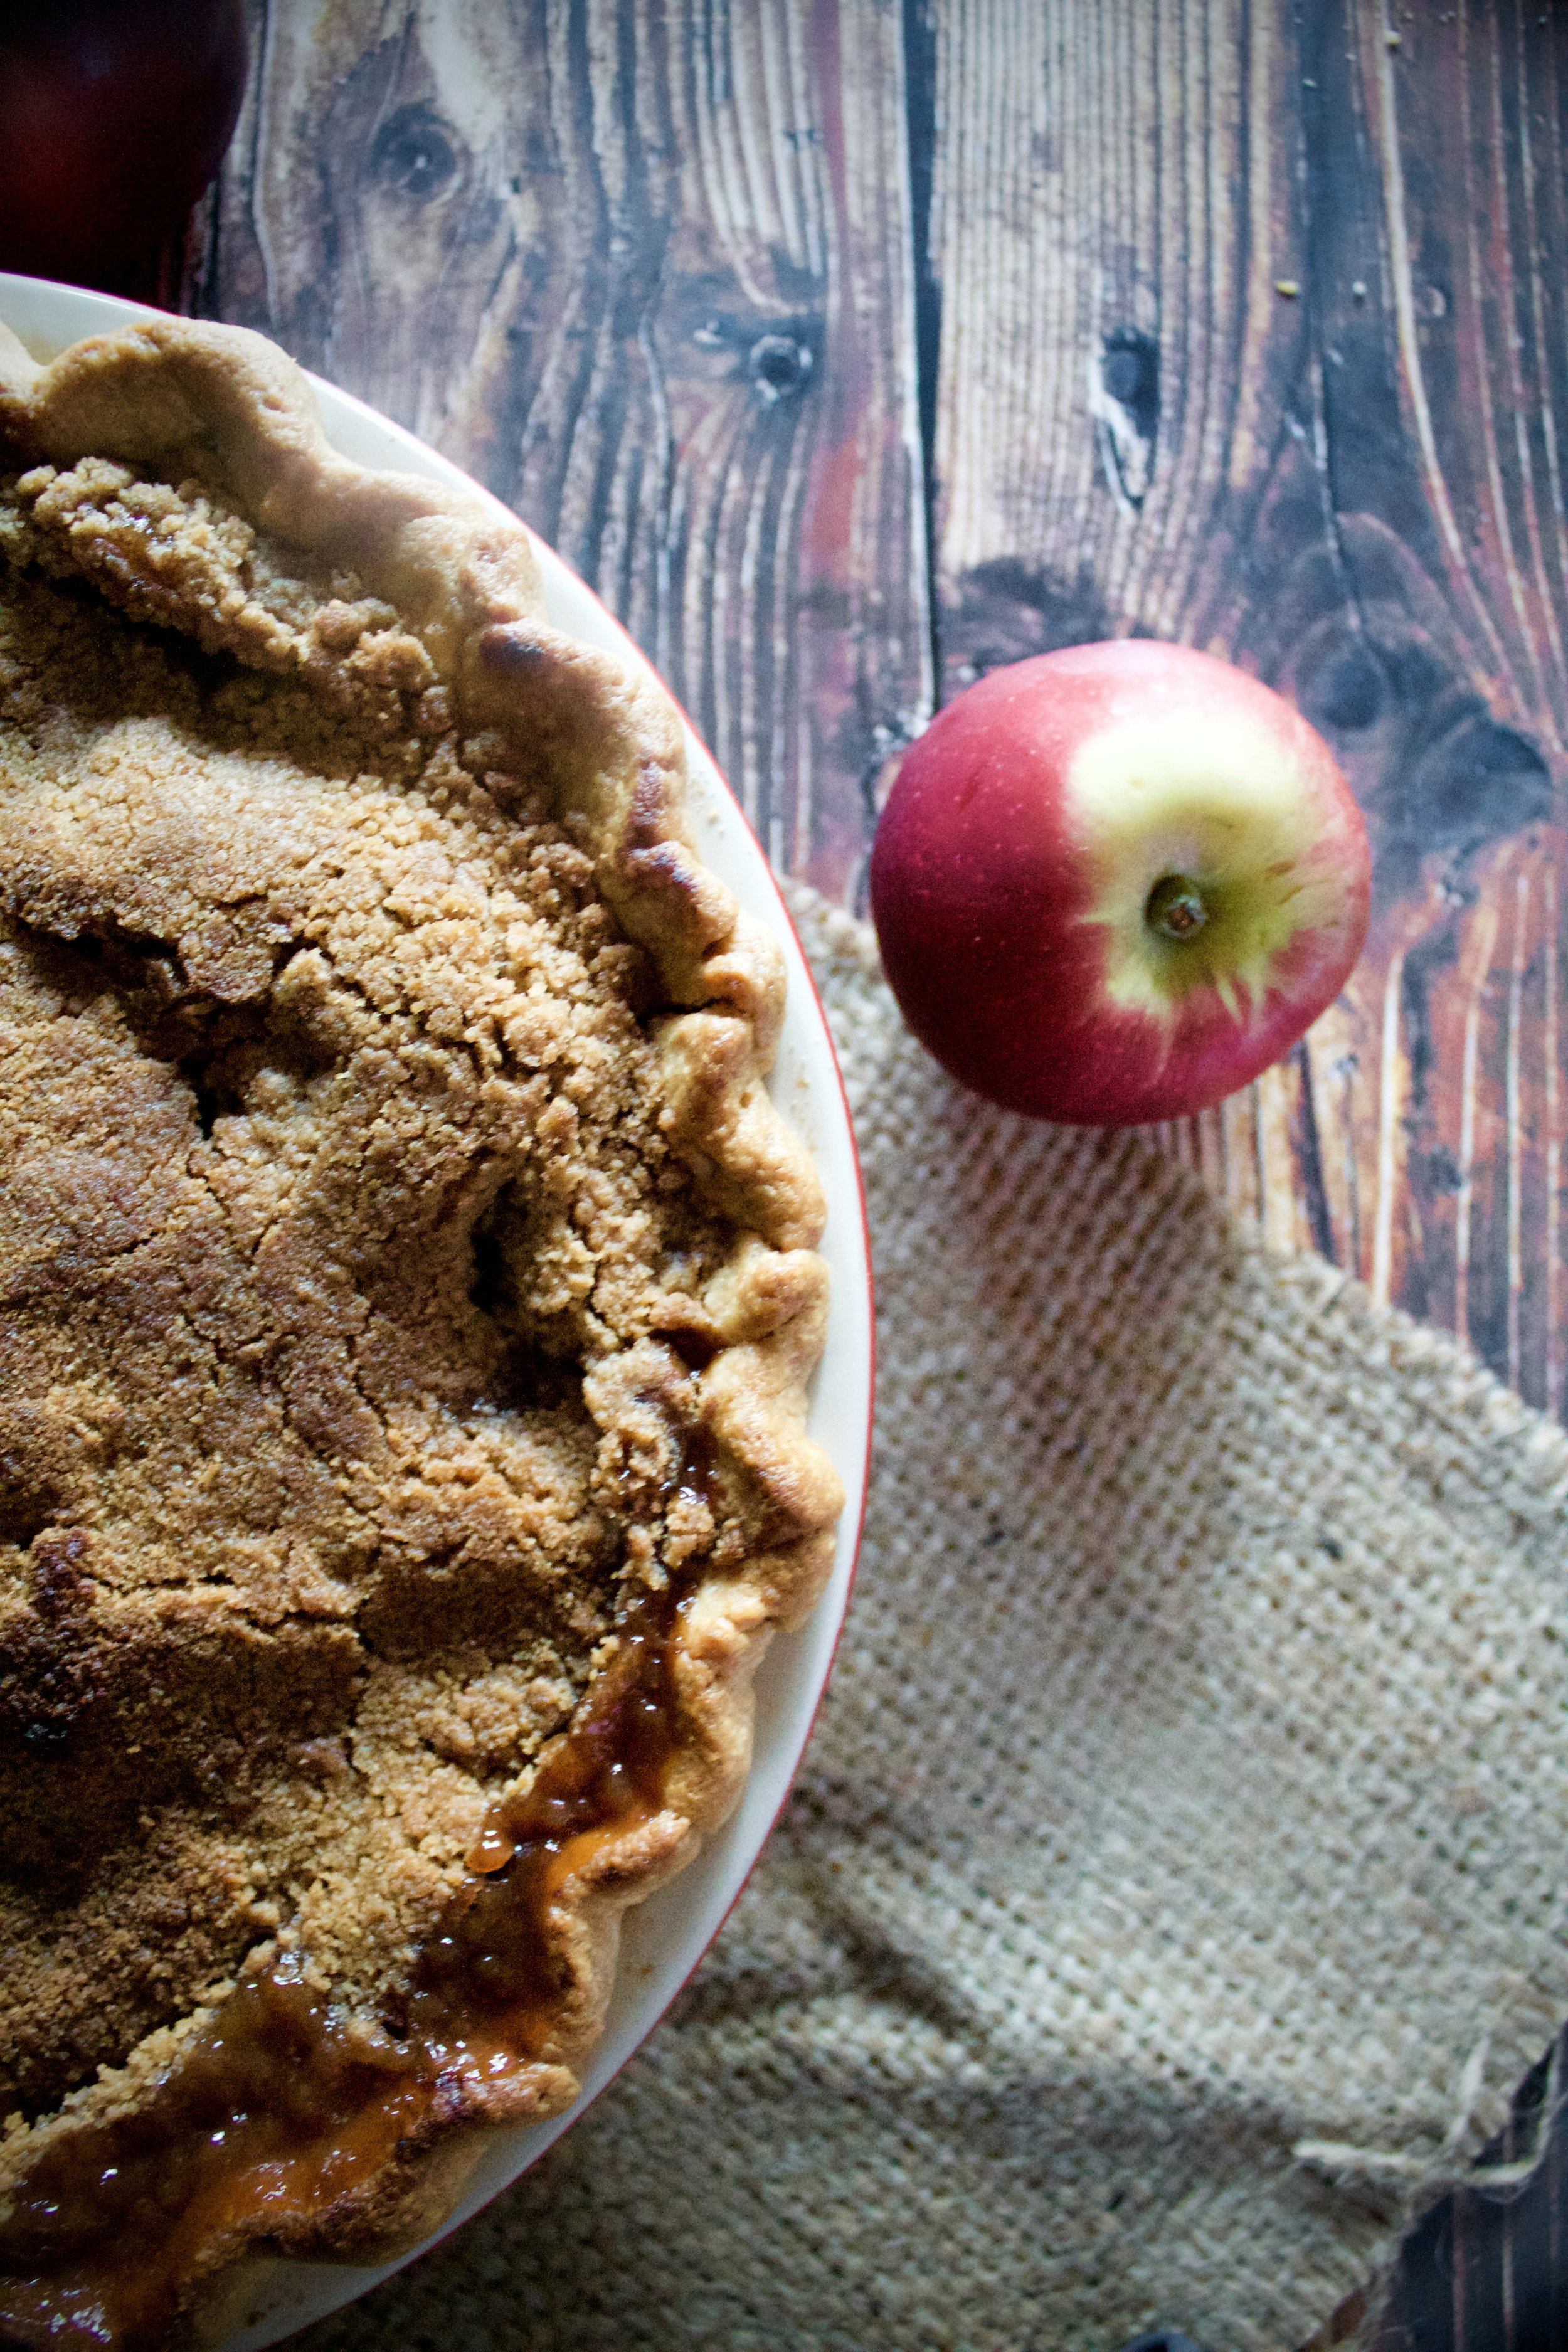
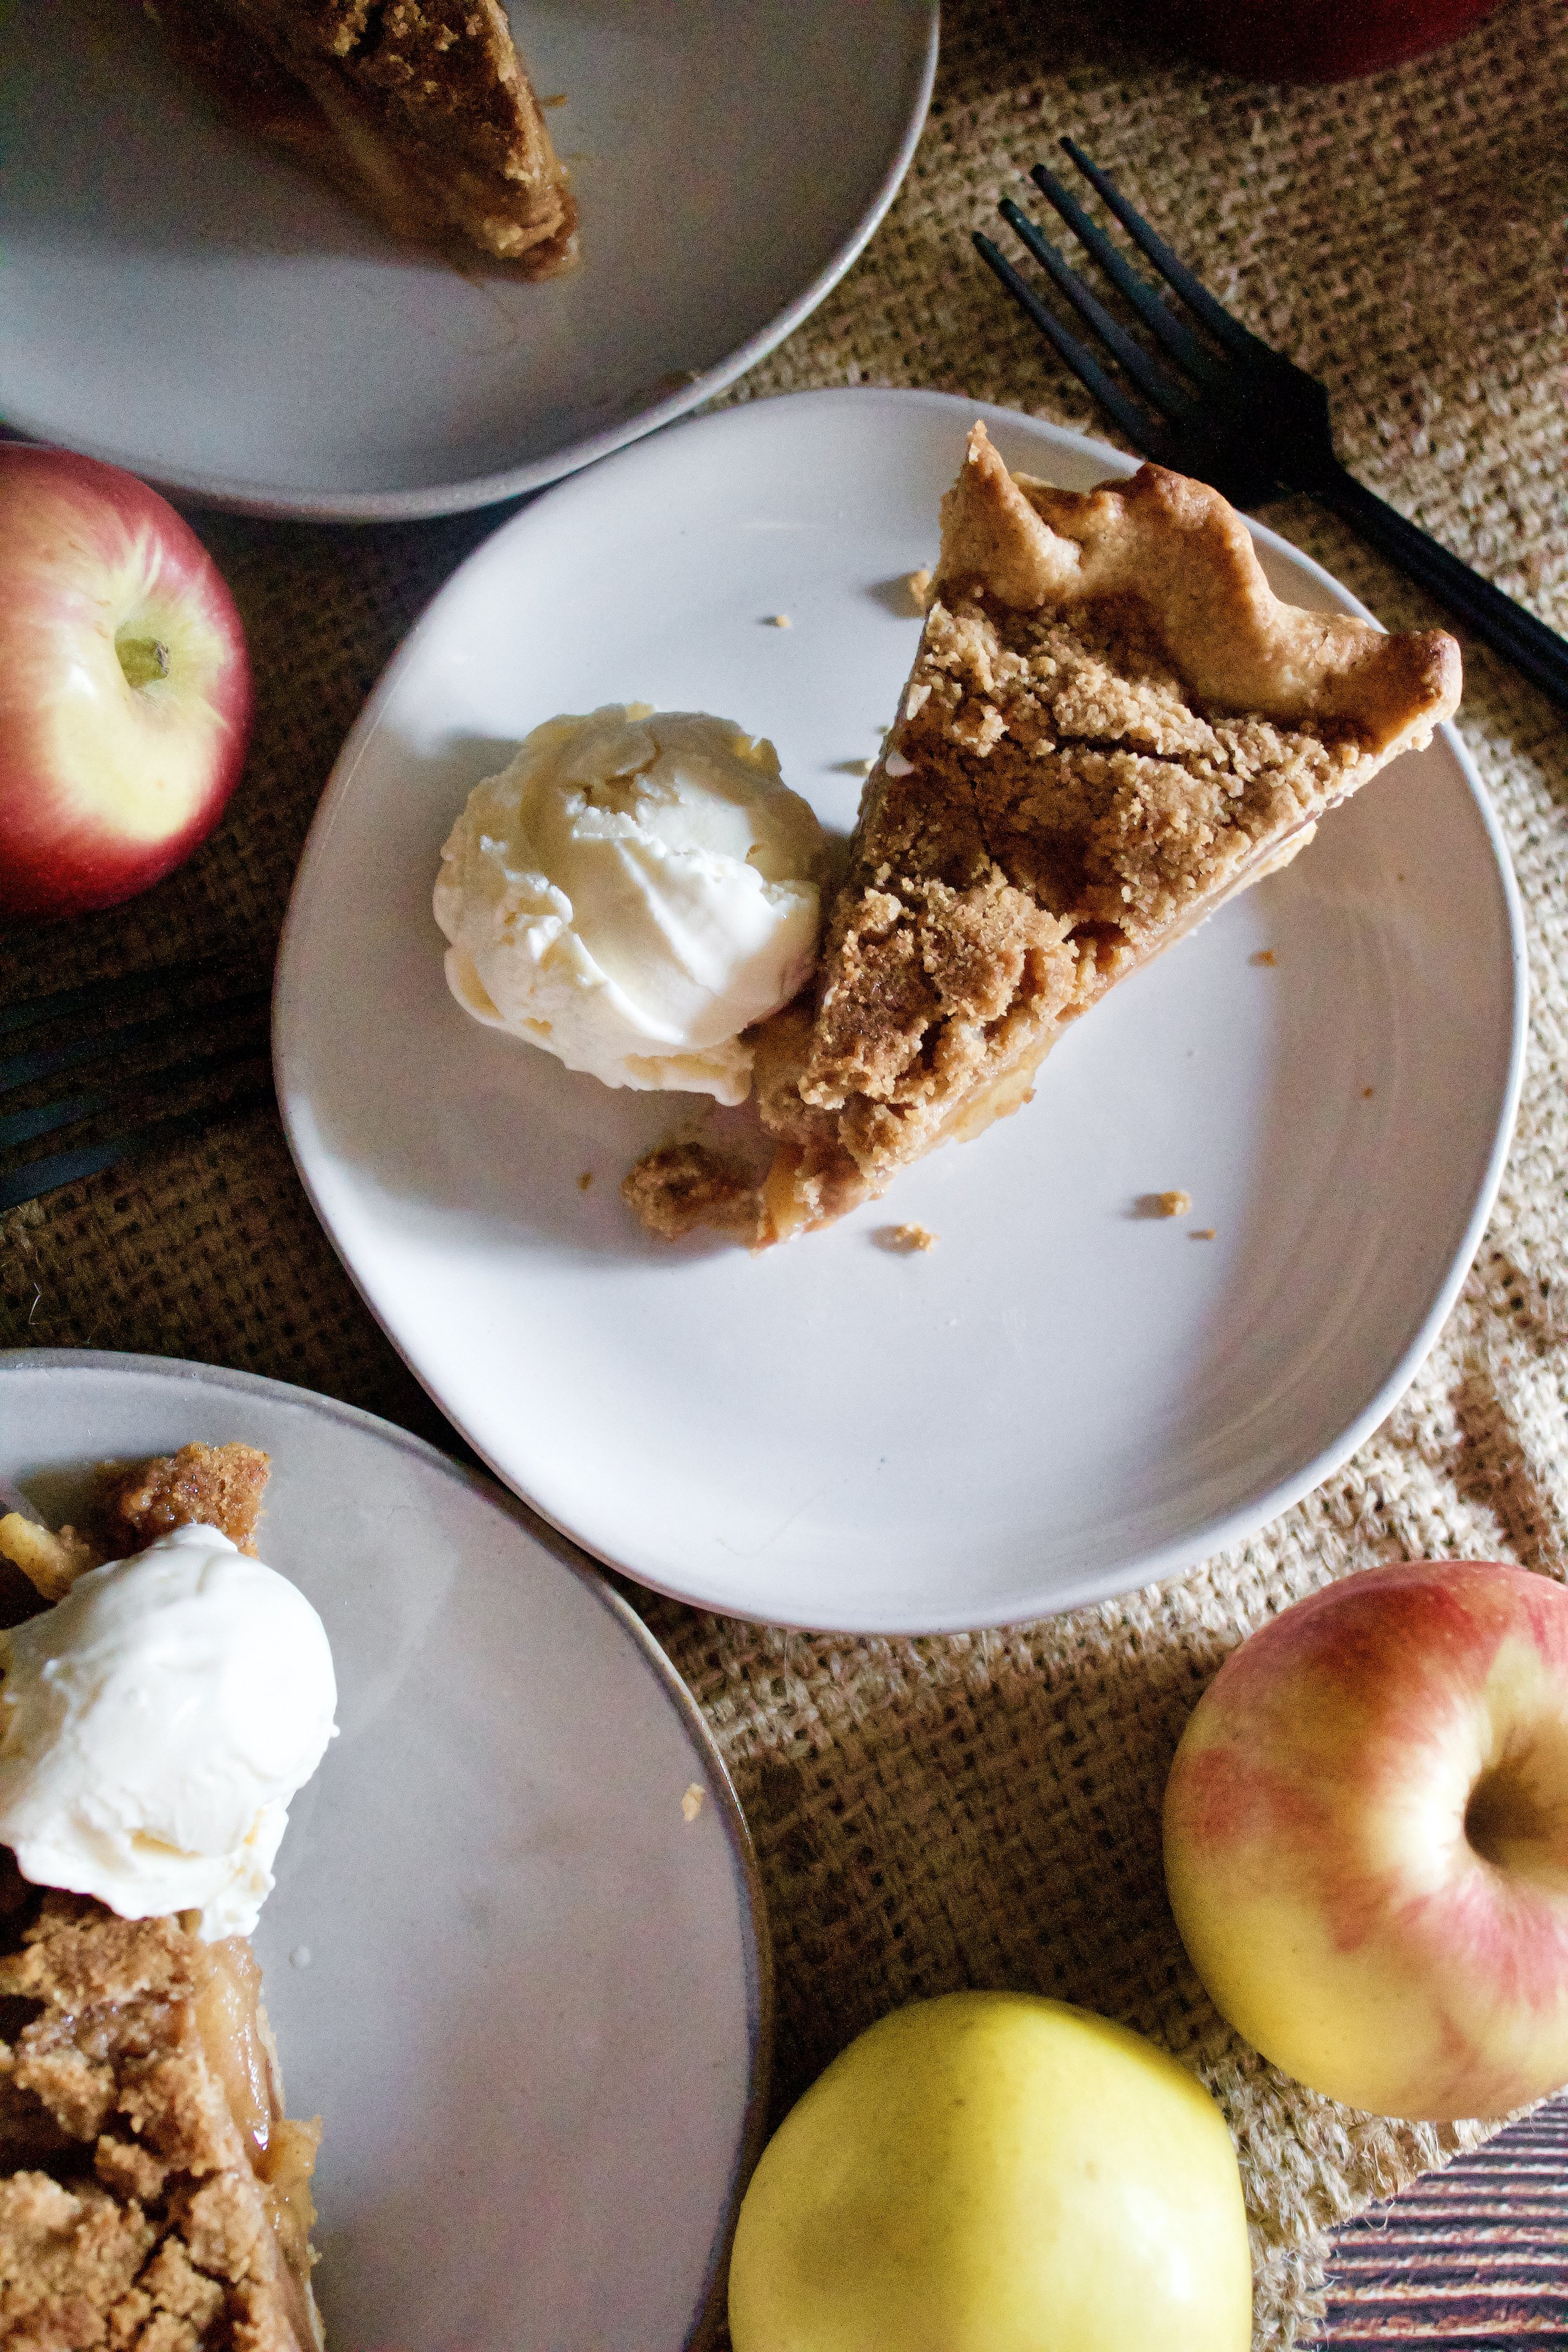
The filling is perfect. Slicing and carefully layering the apples keeps it from falling apart when sliced. There’s minimal liquid, so you don’t get a soupy mess. Instead, the apple juices and the flour work together to create a sturdy caramel-y sauce around the apples.

One key is letting the pie cool completely before slicing. Cutting into it while it’s still warm will cause that soupy mess everyone’s always trying to avoid. The filling won’t be set and the crust will turn chewy if it’s still warm, so be sure to wait until the pie pan is cool to the touch.
Finally, that topping! French, Dutch, streusel—whatever kind of apple pie you want to call it, this one uses brown sugar and extra cinnamon to make the most delicious topping!

Key ingredients
Pie crust. Obviously. You can use your favorite recipe or store bought, but my favs are classic and brown sugar butter.
Flour. Be sure to spoon and level so you don’t pack it in and have too much.
Brown sugar. Most people use granulated, but I love the flavor of using brown sugar!
Cinnamon. I always use extra.
Butter. Try to use European style, as it has less water.

Apples. I used Jonagold and Ruby Jonathan (so a bit tart, a bit sweet). I suggest using a variety of apples to get a well-rounded flavor.
Vanilla. Not necessary, but it’s just enough to make a really great flavor.
Lemon juice. This helps prevent the apples browning.

How to make foolproof French apple pie
1. Make and roll out the crust. I suggest making the crust ahead of time (make a double batch so your next pie is ready to go!). Roll it out, line the pan, then freeze it while you make the filling and topping.
2. Slice the apples and mix the filling. Set this aside so the juices begin to release.
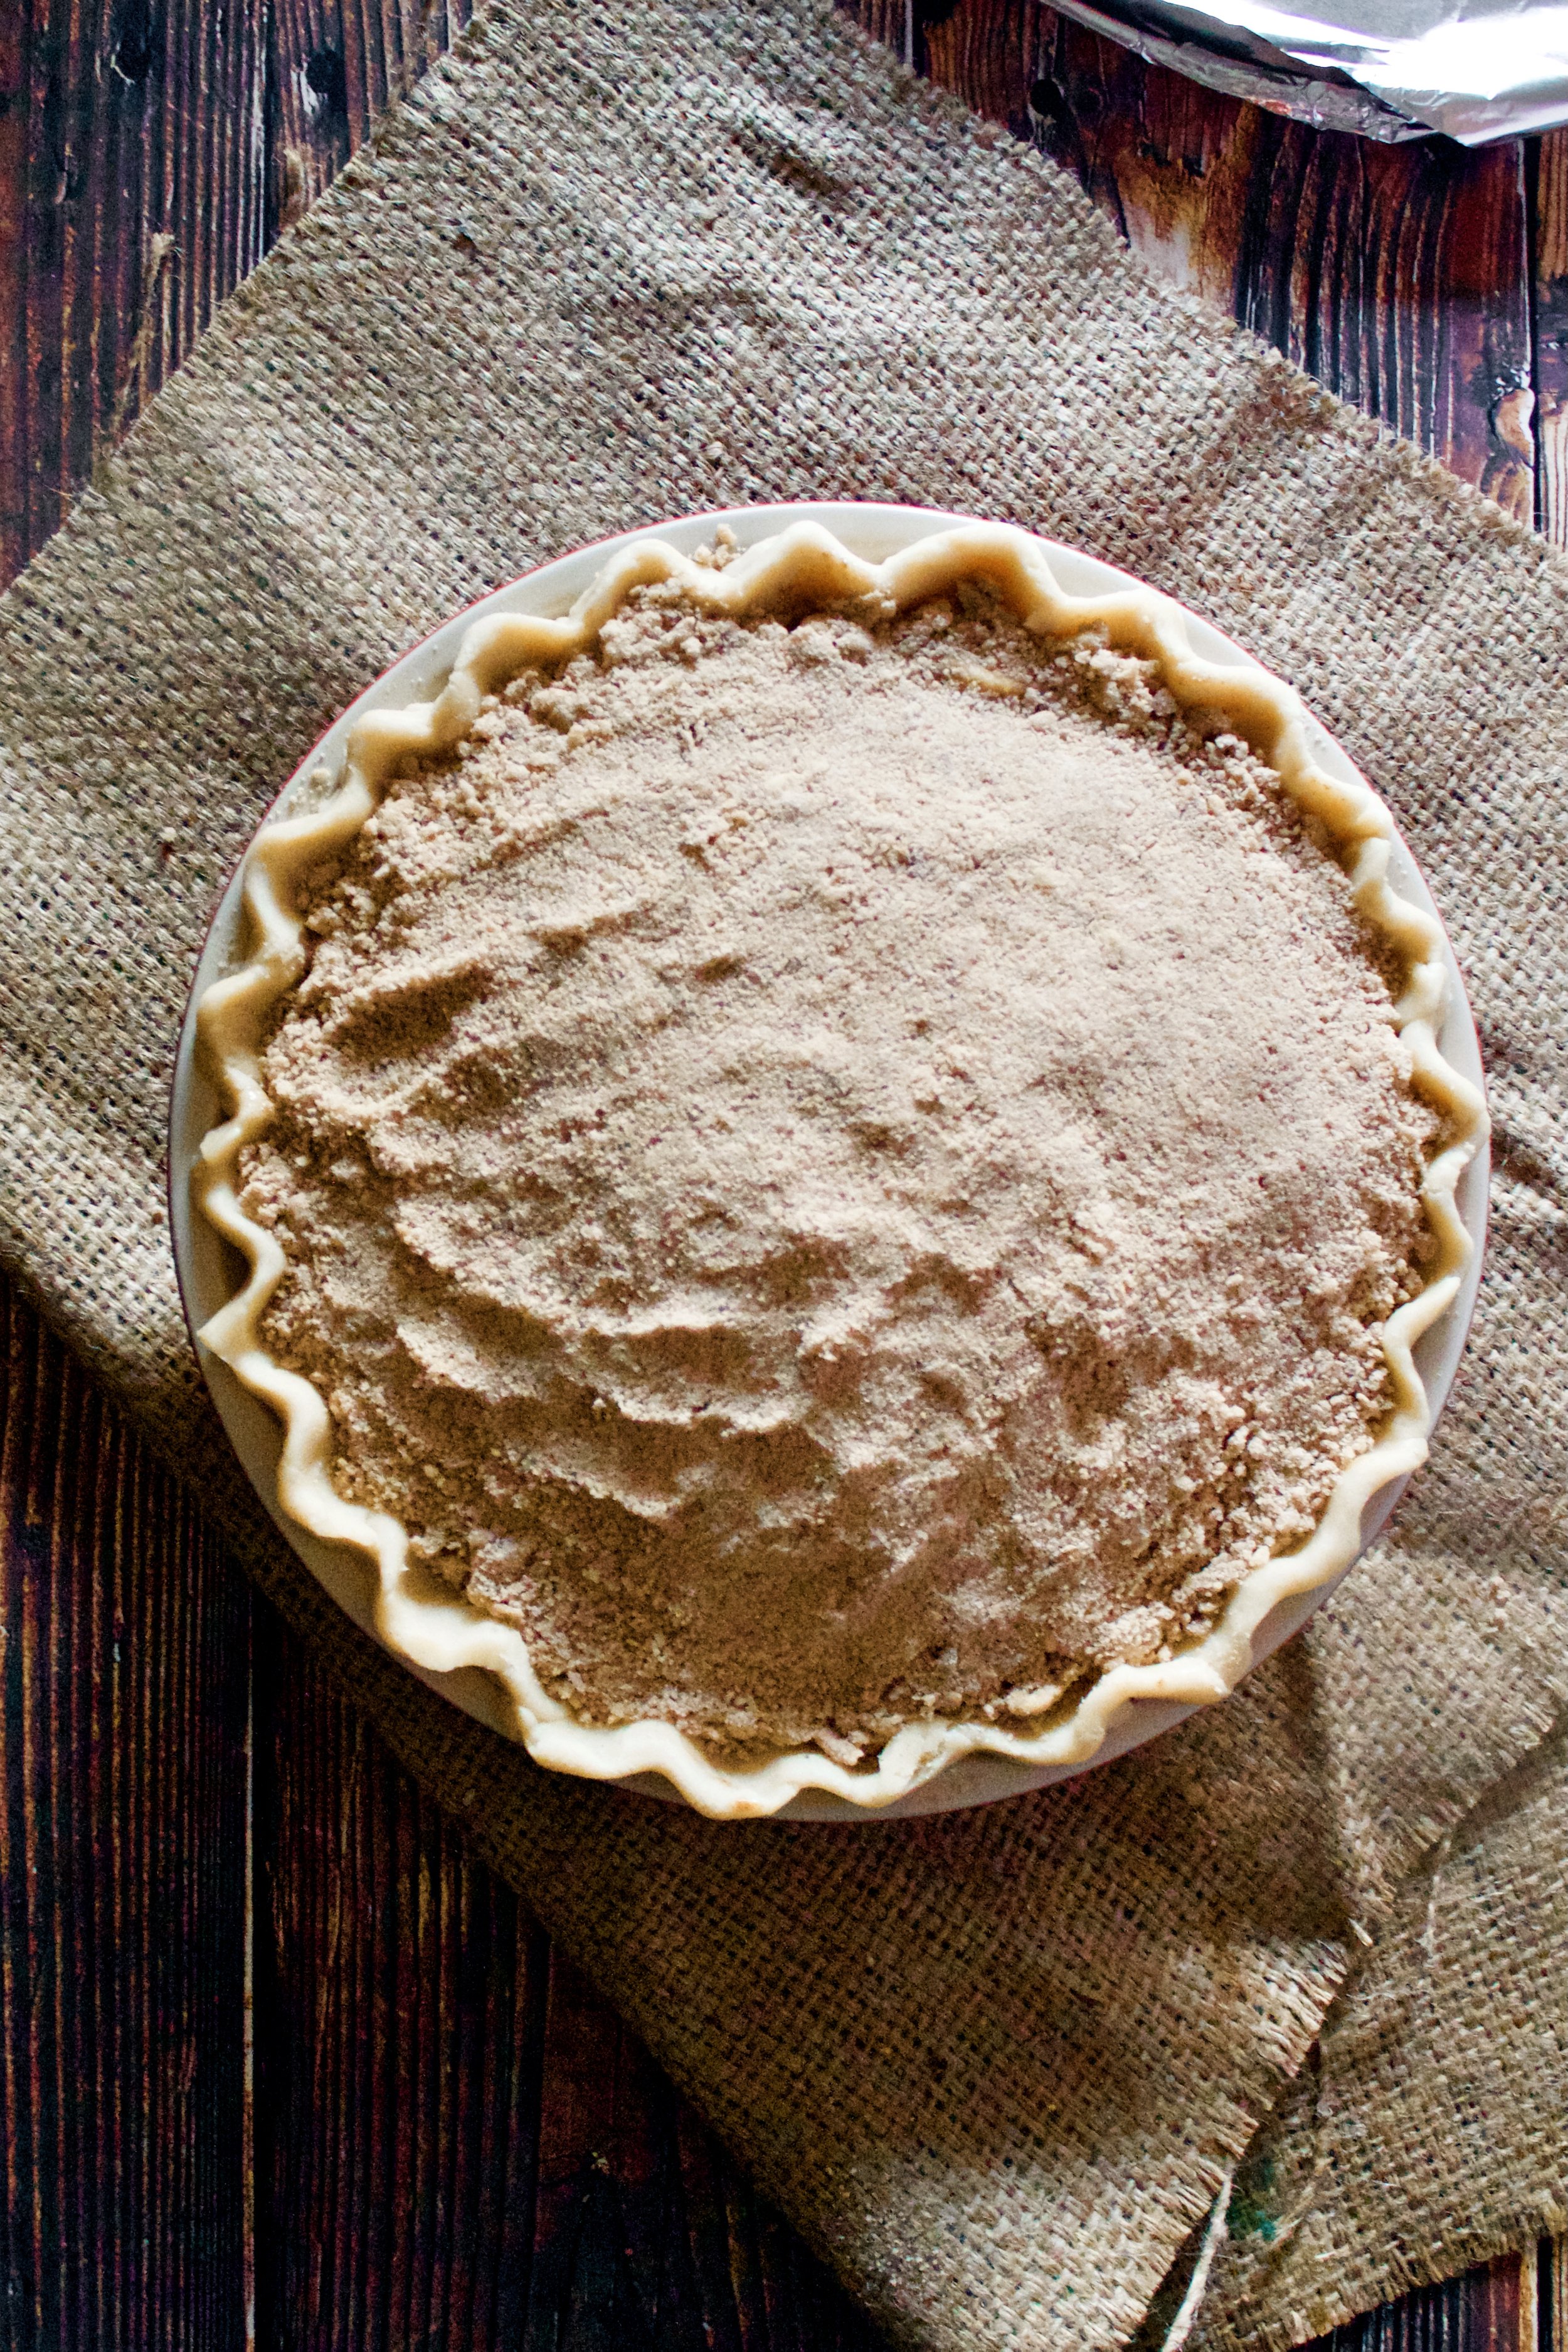
3. Make the streusel topping. I always use my hands, since the freezing will re-chill the butter anyway. However, it is messy, so a pastry blender works, too.
4. Fill and top the pie. Make sure the apples form a rounded dome that sticks up a little above the lip of the pie pan, since they lose volume when they bake.


5. Freeze for 30 minutes. I don’t know the exact science, but this is a game changer with fruit pies.
6. Bake until it bubbles nicely. You want to see bubbles pretty much all around the pie, and the juices should look thickened.
7. Cool completely. Slicing too soon will make a soupy, chewy pie, so be patient!
Enjoy!


Tips and FAQ’s for this recipe
Use a pie pan to measure your apples
It’s usually best to slice the apples after the pie crust is already freezing. However, if you have two pie pans of similar size, use one for the crust and use the other the gauge how many apples you’ll need. You want them to form a rounded pile in the pan, not just touch the top, since they’ll lose about 1/4 of their volume as they bake. This is always better than me telling you to have however many cups, since each pie pan and each bag of apples is different.

Don’t skip freezing and cooling
Freezing the unfilled pie crust sets it so it bakes up nice and flaky instead of mushy a the filling melds with it. Freezing the whole, filled, unbaked pie has some sort of magic that always works on pies for me. The crust never falls or buckles, yet it’s always nice and flaky. Finally, letting it cool sufficiently is so, so important. The filling will turn soupy and the crust will turn chewy if you slice it too soon, so be patient! One trick I have is making a little extra filling and topping and making a mini pie or mason jar trifle style pie to snack on (a must if the pie will be a gift and you don’t get any!).

What kind of apples should I use?
Your favorite! I used Jonagold and Ruby Jonathan. We discovered them at a little barn in Apple Hill a few years ago (how quaint is that??). I like that Jonagold are tart and Ruby Jonathan are a little sweeter, but neither are mealy. Whatever type you pick, try to use at least two different varieties and make sure they’re new so they don’t turn mealy.
Can I make this ahead of time?
Yes! There are two ways you can make this ahead of time:
Unbaked pie: Follow directions up to step 8. Freeze the pie until ready to bake, covering it after it has frozen solid. Bake as directed, but be aware that it may require longer at the 350F/175C stage.
Baked pie: Fully bake the pie and let cool. Once completely cooled, baked pies can last for 2 days on the counter (I suggest putting it in a cake caddy or pie caddy) or 3-4 days in the fridge, loosely covered with foil. Reheat at 350F/175C for about 30 minutes.

My pie tools
Here are my must-have tools I use for making pie crusts. Affiliate links provided.
Vegetable peeler (for the crust and the apples)
Pastry blender or food processor
Pie pan (Emile Henry has become my favorite!)

Foolproof French Apple Pie
- prep time: 25-30 minutes
- freeze time: 30 minutes
- bake time:
- total time:
servings: 8-12
Ingredients:
- one pie crust (classic and brown sugar butter are my favorites)
for the brown sugar cinnamon topping
- 1 cup (136g) flour
- ⅔ cup (133g) packed brown sugar (sub granulated if you want a lighter color)
- 1 tablespoon (6g) ground cinnamon
- ½ cup (113g) cold salted butter, cut into cubes
for the filling
- 4-5 pounds apples
- 1 tablespoon (13g) lemon juice
- 1 teaspoon (4g) vanilla extract
- 1 tablespoon (6g) ground cinnamon
- ½ cup (100g) packed brown sugar
- 2 tablespoons (17g) flour
- 1 tablespoon (14g) cold salted butter, cut into small pieces
Instructions:
- First, make the pie crust (unless using store bought). My favorites are this foolproof classic crust or this brown sugar all-butter crust. I suggest making a double batch a few days ahead. You can freeze one disc for later! Once the crust is ready to use, sprinkle a clean surface or pie mat with flour. Begin rolling the crust out, being sure to go over it in a variety of directions while also flipping and rotating it and sprinkling more flour as needed. This will help it roll out evenly and also keep it from sticking the mat. If you notice the edges cracking, cup your hands around it to smooth out the edges.
- Roll the crust to be a few inches larger than your pie pan (I usually do 12” for a 9” pan). Once it’s ready, sprinkle a little bit of flour on the bottom of your pie pan. Gently roll half of the crust onto the rolling pin and transfer it to the pan. Gently lift the sides and ease them into the pan so it is flush with the bottom and edges. Avoid pressing it into the pan, as this can cause sticking. Leave a ½ inch overhang and trim the rest. Fold the overhang under itself then form the edges as desired (I like to use the knuckle of my index finger on one side and my index finger and thumb from the other hand to create a scalloped edge, but a fork is usually the easiest one to do!).
- Freeze the crust while you make the filling and topping.
- Make the filling first. Peel, core, and slice the apples into ⅛ to ¼ inch thick slices. If you have a second pie pan (that’s roughly the same size as the one you’re using), the best thing is to place the sliced apples into it until you have a rounded pile that fills the pan. This way you end up with the right amount of apples.
- In a medium to large mixing bowl, combine the sliced apples with all of the other filling ingredients except for the butter. Do this gently. Let sit on the counter while you make the topping.
- Make the topping. In a medium bowl, whisk together the flour, sugar, and cinnamon. Add the butter and use a pastry blender or your fingers to cut it into the flour. You want all of the flour to be coated and mixed into the butter, but you don’t want to create a paste. If it’s too sandy, you can form it into larger chunks when you sprinkle it on the pie.
- Stir the apples again then pour carefully into the pie crust, making sure the apples all lay flat then drizzling the juices evenly over the top. Dot with the tiny pieces of butter.
- Sprinkle the topping evenly over the apples, pressing it in gently and forming into bigger pieces if you’d like a more crumbly looking pie (my toddler didn’t care so we skipped that step). If desired, you can brush the crust with milk or a whisked egg, but I never do and have never had complaints!
- Freeze the whole pie for 30 minutes while you preheat the oven to 400F/200C.
- Place pie on a foil lined baking sheet. Bake at 400F/200C for 20 minutes then turn oven down to 350F/175C. Bake another 30-40 minutes, until the filling bubbles and looks thickened. The time it takes for this can vary by climate and oven, so check your pie a little early but also don’t worry if it takes a little longer than 40 minutes. If the edges begin to brown too quickly, tent loosely with foil (or use a crust protector).
- Let the pie cool at least 2-3 hours, or until the pan is cool to the touch on the bottom. Cutting it sooner will create a soupy filling and chewy crust, so be patient!
Enjoy!
Leftovers will last, covered, for about 2 days on the counter and 4-5 in the fridge.
See notes for making pie ahead of time.