
Apple Pie Cake
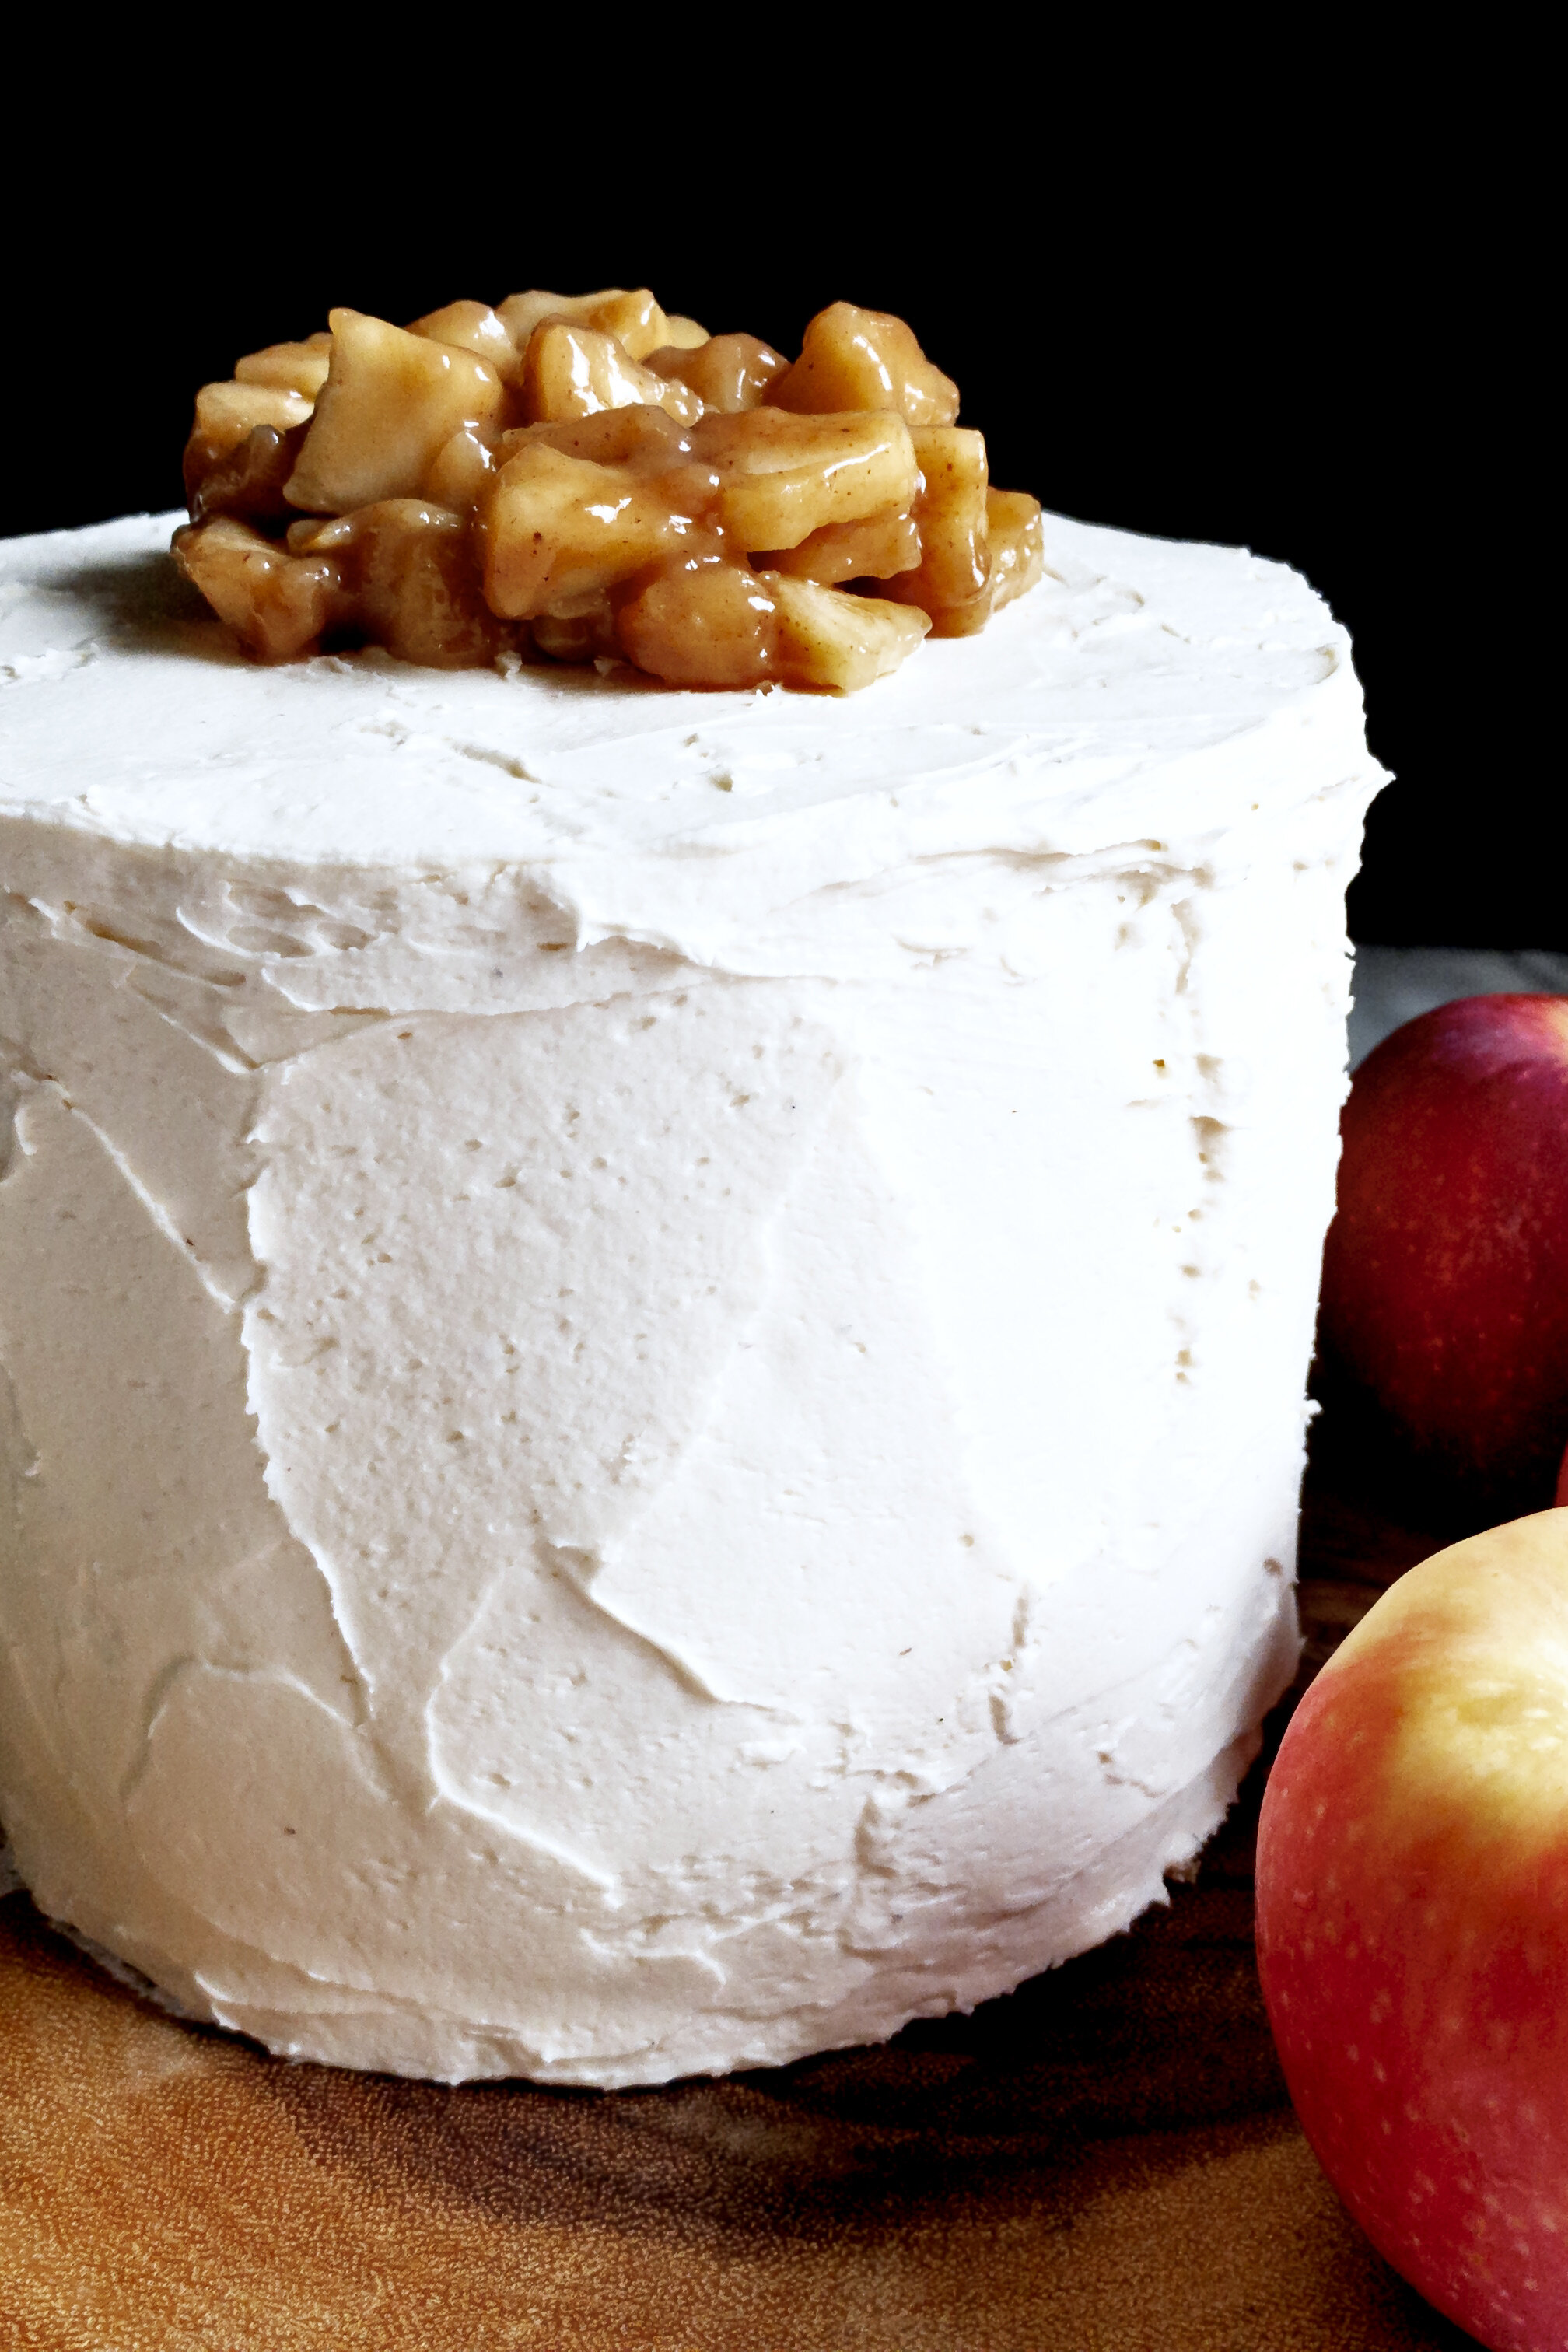
Apple pie in a cake. Seriously. Fluffy cinnamon spice cake layers filled with crisp apples in a caramelized bourbon and apple cider filling all surrounded by a sweet, slightly salty, perfectly whipped and creamy vanilla bean frosting. One of my favorite cake creations since…ever.
This post may contain affiliate links from which, at no additional cost to you, I may earn a small commission to keep this site running. Only products I myself would or do use are recommended.

I’ve dreamed up many a cake before. Some turn out well and become favorites, some are okay and I never really feel the urge to make them again. This cake was great. More than great. It was amazing. I literally just finished my last piece tonight and I’m already really sad about it.

The fluffy brown sugar spice cake is the perfect base here. It’s complementary without overpowering the other elements. The apple pie filling is one of my favorites that you can use in just about anything. It’s smooth without being runny—ideal for cakes and pies alike. And that buttercream. Light and fluffy, full of vanilla flavor, creamy like a scoop of ice cream on a slice of warm apple pie. I knew I wanted a vanilla bean frosting to imitate an apple pie à la mode, and this frosting came through. The vanilla bean paste and vanilla extract plus the whipping stage are all key in attaining that flavor and texture.

Altogether, this cake is a keeper. In fact, it’s an inspiration for future recipes, so be on the lookout! Yay!

How to make apple pie cake
Make this pre-cooked brown sugar bourbon & cider apple pie filling ahead of time. You’ll need at least a few hours for it to cool and set, so plan ahead. I like to make it a day or two ahead, as it keeps for a couple weeks in the fridge (longer in the freezer—but you must use freezer bags and not jars, unless you want to clean up glass from among your frozen foods like I did 🙄😩).

Next, make the fluffiest brown sugar cake ever! It’s really simple. Start by sifting and whisking together your dry ingredients. Sifting is key to getting the right texture.

Next, cream the butter and sugar for 2-3 minutes until light and fluffy.

Then add your eggs, one at a time, then vanilla and beat until fluffy. At this point, it’s a lot like making cookies, only with different ratios.

Then you’ll alternate adding the flour and milk. Total, it’ll be 5 additions, beginning and ending with flour (so: flour, milk, flour, milk, flour). Don’t worry if it looks a little separated after adding your milk. The flour and final quick whip (my very unofficial term for turning up the mixer to high for just a few seconds) will help it come back together.

Bake for 20-30 minutes (closet to 20 for three 6” pans, closer to 30 for two 8” or 9” pans).

Once the cakes have cooled, make the most amazing whipped sea salt vanilla bean buttercream.

Assemble by spreading a thin layer of frosting on the first cake layer. Then create a dam of piped frosting around the edge.

Next, spread some chilled, set apple pie filling inside that ring of frosting.

If you made three 6” cakes, repeat this step on the second layer. If you made two 8” or 9” cakes, you can slice each in half and actually get three layers of filling, which is probably a solid idea. Just be sure to chill for a few minutes before adding the next layer of cake so that protective ring of frosting can hold up under that weight.

Once the final layer is on, spread a thin crumb coat and chill for 10-15 minutes.

Spread one final layer of frosting (as thick or thin as you’d like—but don’t skimp, as this is part of what makes this cake so good). Dollop some apple pie filling on top for good measure (and cause it looks rustic).

If you’ll be eating it within a few hours, you can leave it out. Otherwise, refrigerate it until about an hour before serving. Store leftovers in the fridge with a piece of plastic wrap touching the cut sides plus more to cover the cake (or in an airtight cake holder—but still protect those cut sides with plastic wrap). Refrigeration will cause the cake to be dense, but leaving it out even just 30 minutes will soften it right back up.
Enjoy!

Tips for this recipe
Use room temperature ingredients
This method of cake making really depends on ingredients that will blend nicely in the time specified. The only way for that to happen is to have room temperature ingredients, which will absorb, blend, fluff, and/or emulsify easily.

Don’t skimp on the flavors
I use more cinnamon, vanilla, and sometimes sea salt than most bakers. No one has ever told me my dessert is too spicy, vanilla-y, or even salty (I won’t serve it if it’s too salty, which sometimes happened in my early days of baking 😩)
Make your own apple pie filling
Yes, you can sub store bought. But it won’t be nearly as good. Homemade allows you to get a slight crisp on the apples as well as create a nice caramel-bourbon flavor instead of the plain sugar and subtle cinnamon taste of the stuff in a can. Plus, you can control the thickness of the filling sauce, making it more suitable for a cake filling.

Dice apples a little smaller
I knew this filling was for a cake, so I went with roughly 1/4 inch dices for my apples. If I’m making a pie, I’ll slice the apples thinly and do everything else the same way. But for something like cake filling, dicing is ideal to help create the right texture and help you cook the apples to the right crispness.

My cake tools
Here are my must-have tools I use for making this cake. Affiliate links provided.
Reusable silicone piping bags to pipe the dam of frosting (These are super easy to clean—just turn inside out, wear like a mitten, and wash! I stand mine like a cone hat on my tea kettle to dry.)
Silicone liners for 8” cake (or for 6” cakes)
8” aluminum cake pans or 6” aluminum cake pans (I’ve found nonstick doesn’t bake as evenly)


Apple Pie Cake
- prep time: 30-40 minutes (can make the filling and frosting ahead of time)
- cook time: 20-35 minutes (depending on pan size)
- total time: 45 minutes (plus cooling and assembly time)
Servings: 12-16 (makes three 6” layers or two 8” to 9” layers)
Ingredients:
half a batch brown sugar bourbon & cider apple pie filling
for the brown sugar spice cake:
- 2 cups plus 2 tablespoons all-purpose flour, sifted
- 2 teaspoons baking powder
- ½ teaspoon ground sea salt (kosher salt)
- 1 tablespoon ground cinnamon (can reduce if you only want a hint)
- dash each of ground nutmeg, cloves, and ginger (or to taste--I like 3 dashes ginger)
- 1 ½ sticks (6 ounces or ¾ cup) unsalted butter, softened
- 1 cup packed light brown sugar (can sub dark, but it will make the cake denser)
- ½ cup granulated white sugar
- 3 large eggs, room temperature
- 1 tablespoon pure vanilla extract
- 1 cup whole milk, room temperature
for the whipped sea salt vanilla bean buttercream:
- 1 ½ cups (12 ounces) room temperature, unsalted, European style butter
- 4-6 cups powdered sugar, to taste (sift before adding if your sugar looks lumpy or you live in a humid climate)
- 1 teaspoon vanilla bean paste
- 1 tablespoon pure vanilla extract
- ¾ teaspoon fine ground sea salt
- 2-4 tablespoons heavy whipping cream (optional--use as needed to smooth frosting)
Instructions:
- Make the apple pie filling ahead of time, at least 2 hours in advance, so it can chill and set in the fridge.
- Make the cake. Preheat the oven to 350. If your oven bakes fast/hotter than normal, you may need to reduce this to 325. Lightly grease and flour three 6” or two 8” or 9” cake pans and line with parchment paper or silicone cake liners (my fave!). If you make two 8” or 9” layers, I suggest cutting each in half after they cool to make room for more filling!
- Sift then whisk together the flour, baking powder, sea salt, cinnamon, and spices. Whisk until the mixture is evenly light brown from the spices. Set aside.
- In the bowl of a stand mixer fitted with the paddle attachment (or a large mixing bowl using a hand mixer), beat the butter on high for about 30 seconds, until smooth. Add the brown sugar and white sugar and beat on high until light and fluffy, about 2-3 minutes. Scrape the bowl halfway through.
- Add the eggs, one at a time (or see my note if you forget and add them all at once), beating on medium until well-combined and scraping the bowl between each addition. Add the vanilla and beat on medium again until fully combined. If needed, beat on high for a few seconds just until smooth (room temperature ingredients help it come together more easily).
- Add ⅓ of the flour mixture and mix on low until combined. Then, add ½ the milk and beat on low until combined. Don’t worry if it looks a little separated. Continue this process, adding another ⅓ of the flour, then the rest of the milk, then the rest of the flour, mixing just until combined each time. After it’s all added, scrape the bowl then turn the mixer to high for just a few seconds to help smooth it out. Don’t mix it too long. It doesn’t have to be silky smooth, just not separated or curdled looking (it’s not curdled, it just does that sometimes, especially depending on temperatures).
- Divide evenly between your cake pans and smooth the top with a spatula. Bake for 20-25 minutes if using 6” pans and 25-30 minutes if using 8” or 9” pans, or until a toothpick inserted in the middle comes out clean. Check early, though, as ovens and climate can drastically alter bake time. Cool in the pans for at least 5-10 minutes then remove to a cooling rack until completely cool.
- While the cakes cool, make the frosting. Simply beat the butter, add the powdered sugar one cup at a time (it really makes a difference to help it blend perfectly). Scrape the bowl after every other addition. After adding 4 cups powdered sugar, scrape the bowl again and add the vanillas and sea salt and beat until smooth. Taste. Add up to 2 more cups powdered sugar if needed, or splashes of heavy whipping cream to smooth it out. Don’t let it get too loose, as the whipping will help smooth it out and make it more spreadable. Once the taste is good, beat for 3-5 minutes on high. Then, stir well for about a minute by hand (I suggest a rubber spatula) to release the air bubbles.
- Assemble the cake. Place one layer of cake on a cake board or plate on a spinning cake stand (or a regular one). Spread a thin layer of frosting then pipe a dam/ring of frosting around the very edge of the cake layer. Spread a few spoonfuls of apple pie filling inside this ring. Add the next cake layer and repeat this process, chilling as needed to prevent the layers slipping or tilting. Once the top layer is added, spread a thin crumb coat around the cake (I like to pipe this on then smooth it out to prevent crumbs getting into the big bowl of frosting). Chill for at least 10 minutes to set. Frost to desired thickness then chill again. You can spread some apple pie filling on top like I did for some pizzazz. Yeah, I sound like I’m 80. No shame.
Enjoy!
If serving within a few hours, you can leave it on the counter. Otherwise, refrigerate until about an hour or two before serving (it will taste best if it’s come to room temperature). Leftovers should be covered with plastic wrap touching the cut section of the cake plus more to cover the whole cake (or in a cake container--but keep the cut sides touching plastic wrap) and refrigerated. For leftovers, I suggest slicing a piece and letting it sit out at least 30 minutes to let it return to room temperature. Cake layers, filling, and frosting can all be made ahead. See individual posts for details on storing to preserve freshness.

