
Brown Sugar All Butter Pie Crust
Flakey all butter pie crust with the caramel-y hint of brown sugar to go perfectly with a wide variety of pies. This crust uses two methods for blending your butter to ensure you have structure and flakey layers. Best of all, it’s not complicated and requires no special skills or equipment!
This post may contain affiliate links from which, at no additional cost to you, I may earn a small commission to keep this site running. Only products I myself would or do use are recommended.
I feel like I’ve been posting a lot of pies lately. In particular, I’ve shared a few (or is it several now?) pie crusts in 2021 already. But this is my year of pie. So with each pie I’ve set out to try something new with both the filling and the crust.

Only this crust isn’t new to me. It’s actually one of my favorites that I’ve been making for a few years. I’ve finally tweaked it to perfection—in taste, structure, and ease of making.
That’s the crazy thing about pie and tart crusts. There’s so much to consider: type of crust, types of fat and liquid, method of blending it all, and overall flavor. It’s a bit overwhelming for something that takes so long to make and might not even turn out right.

That’s why I’ve experimented and poured my literal blood, sweat, and tears into figuring out how to make pie crusts that I know will turn out well. No guesswork for you—just good pie.
How to make brown sugar all butter pie crust
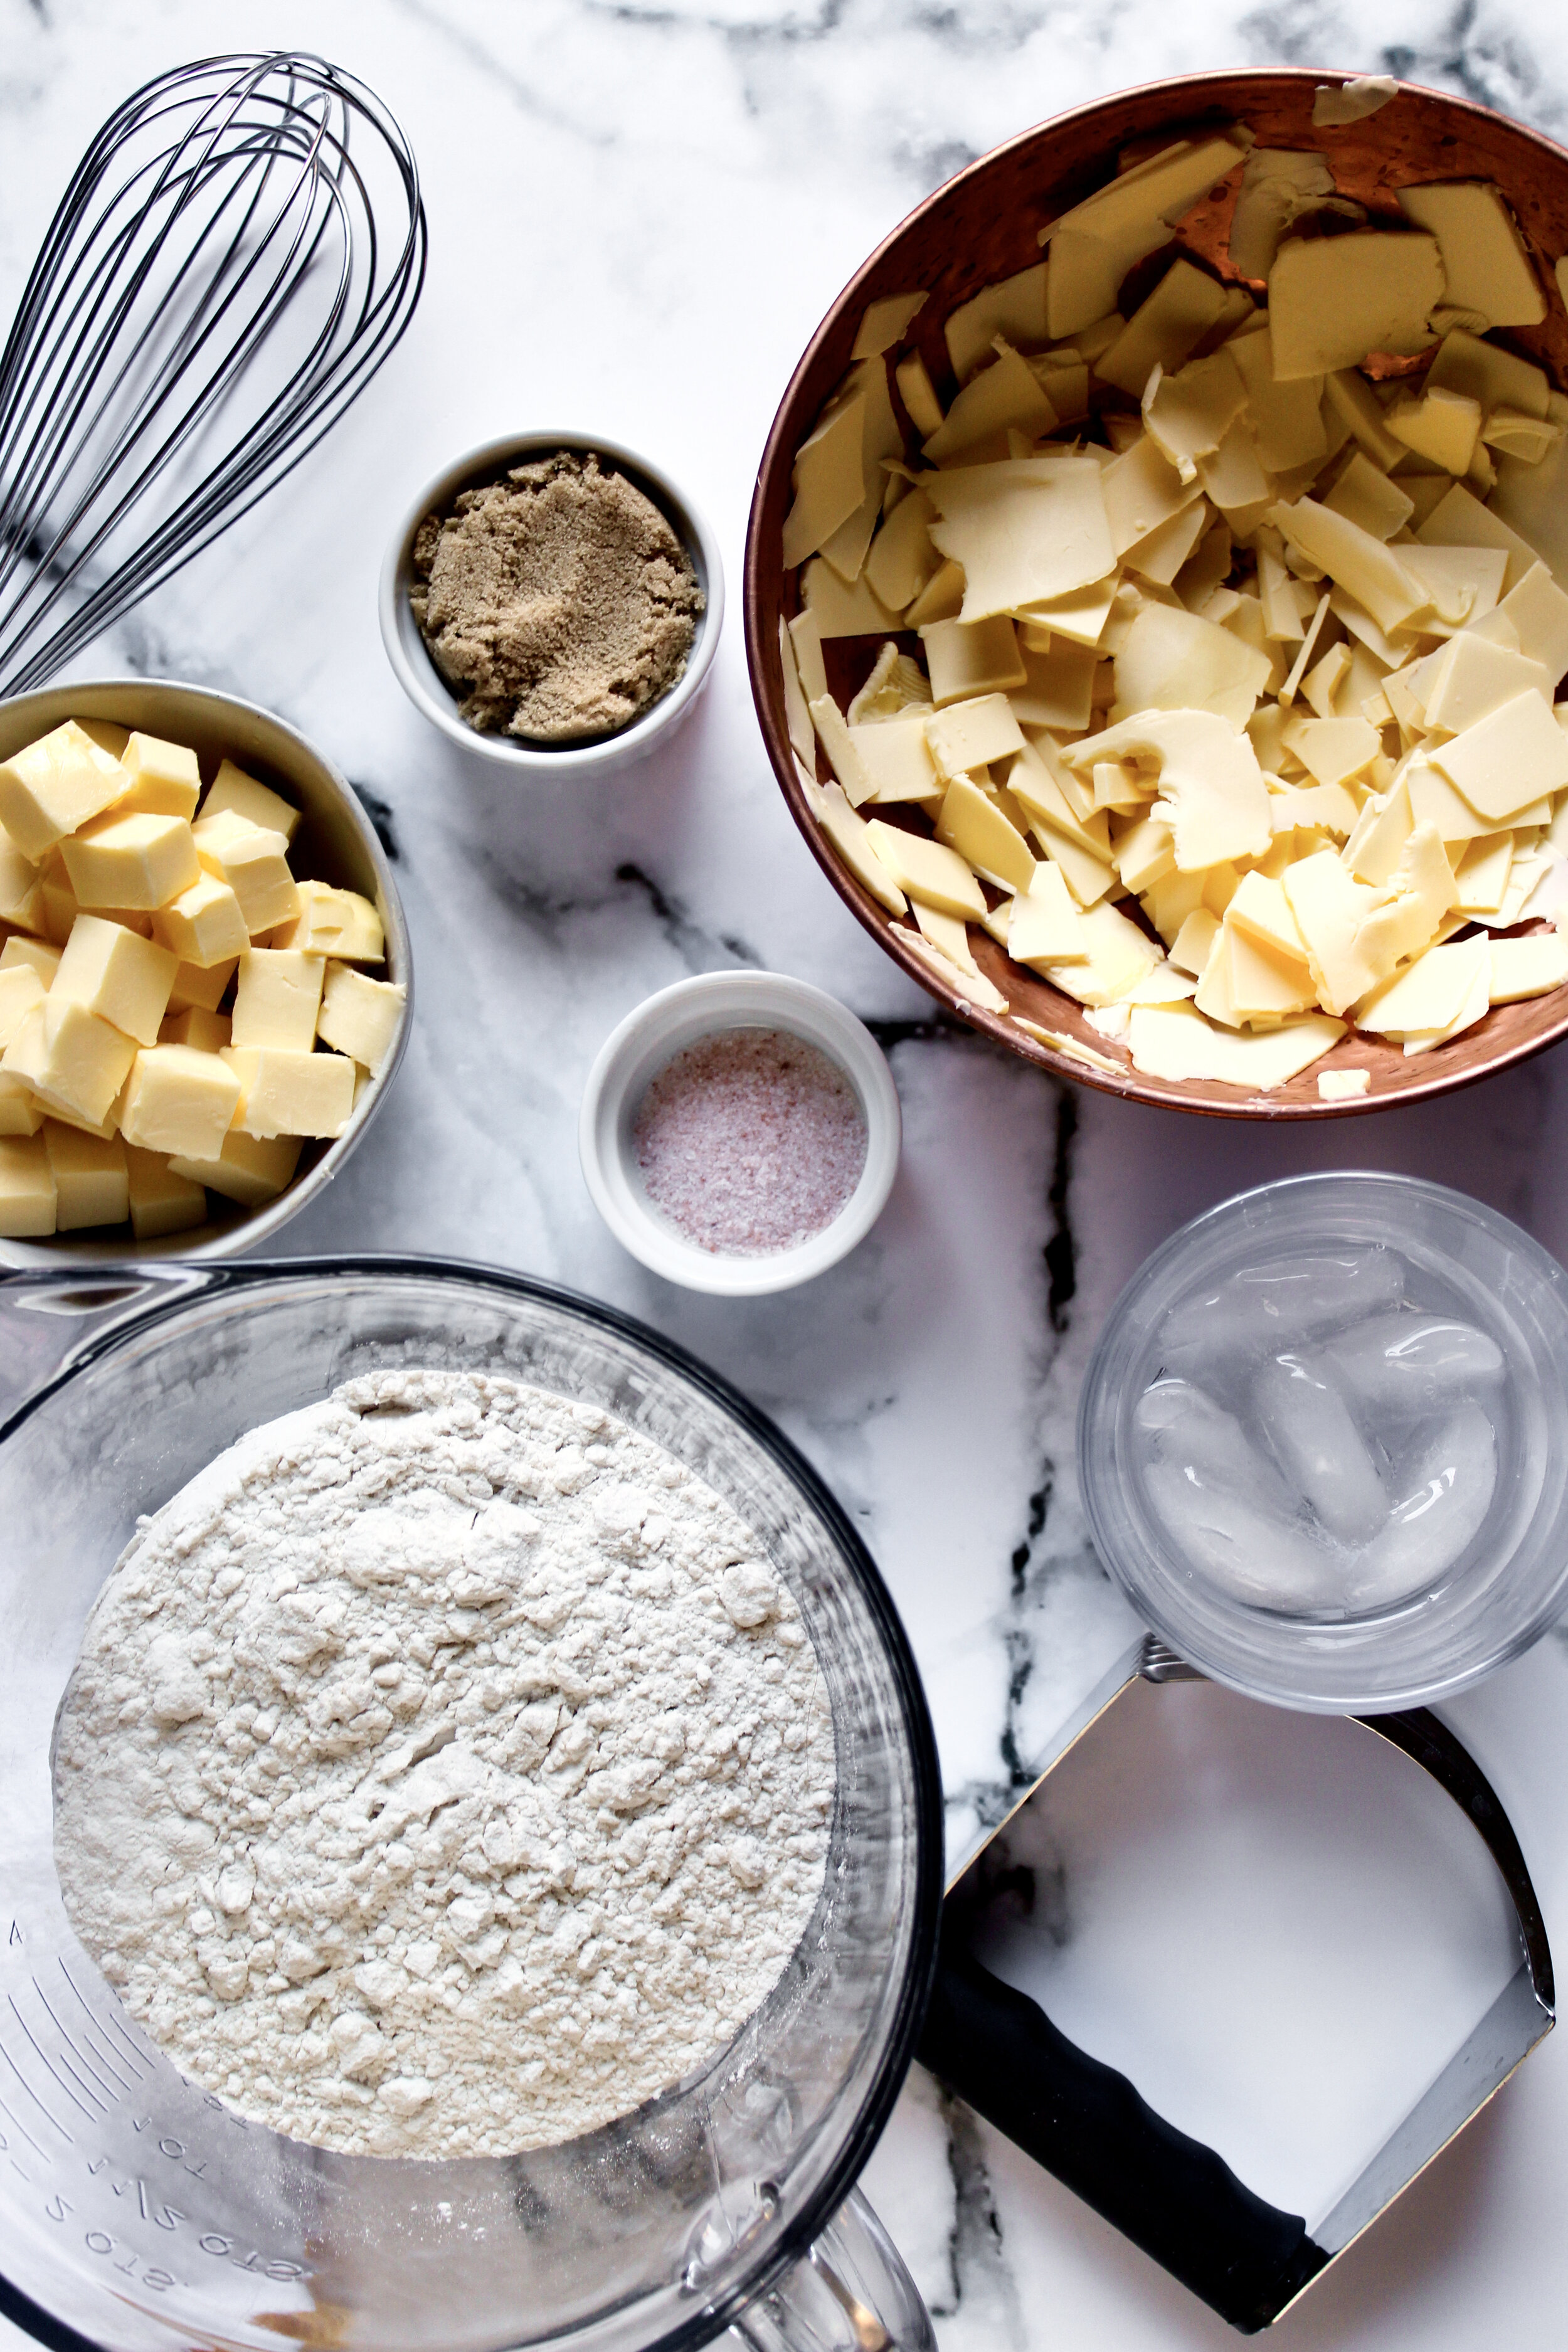
Prep your butter—cube some and chill it then grate or peel the rest and freeze it.
Mix your dry ingredients.
Cut in your cubed butter until sandy.
Toss in your frozen butter.
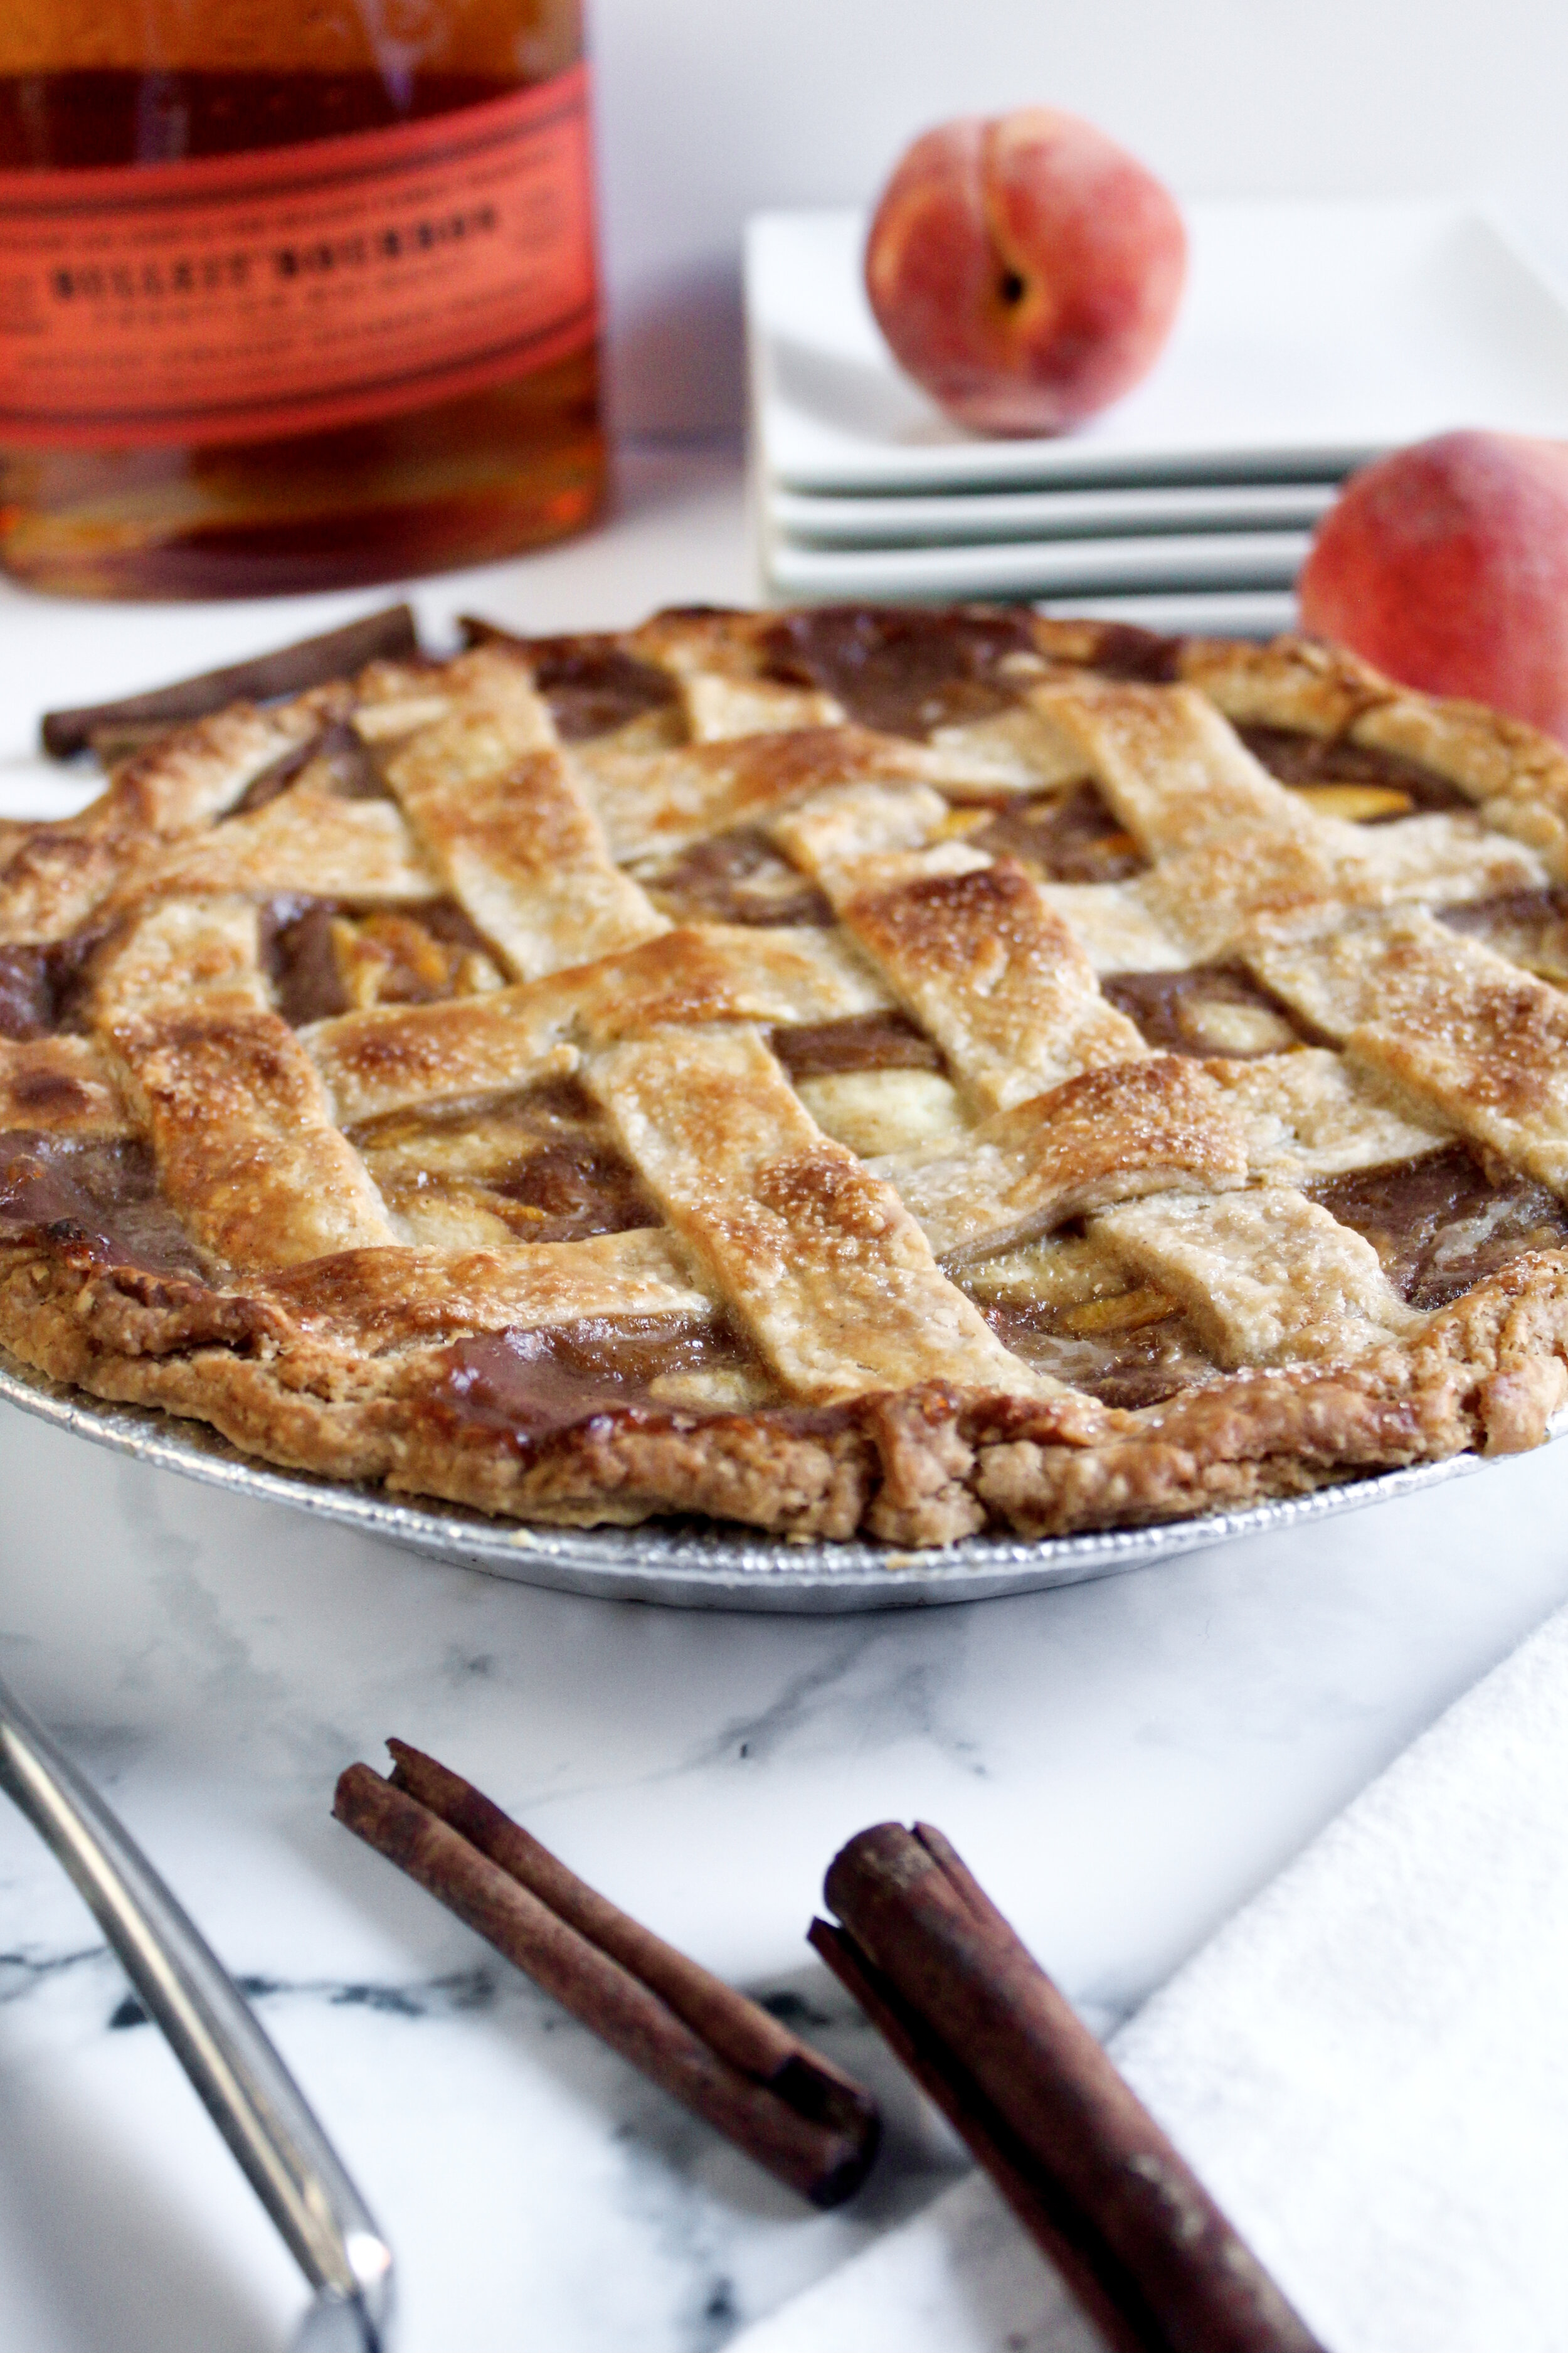
Stir in your ice-cold water. Or try bourbon! It goes well with the brown sugar!
Form into a disc and chill.
Roll out and line your pie pan.
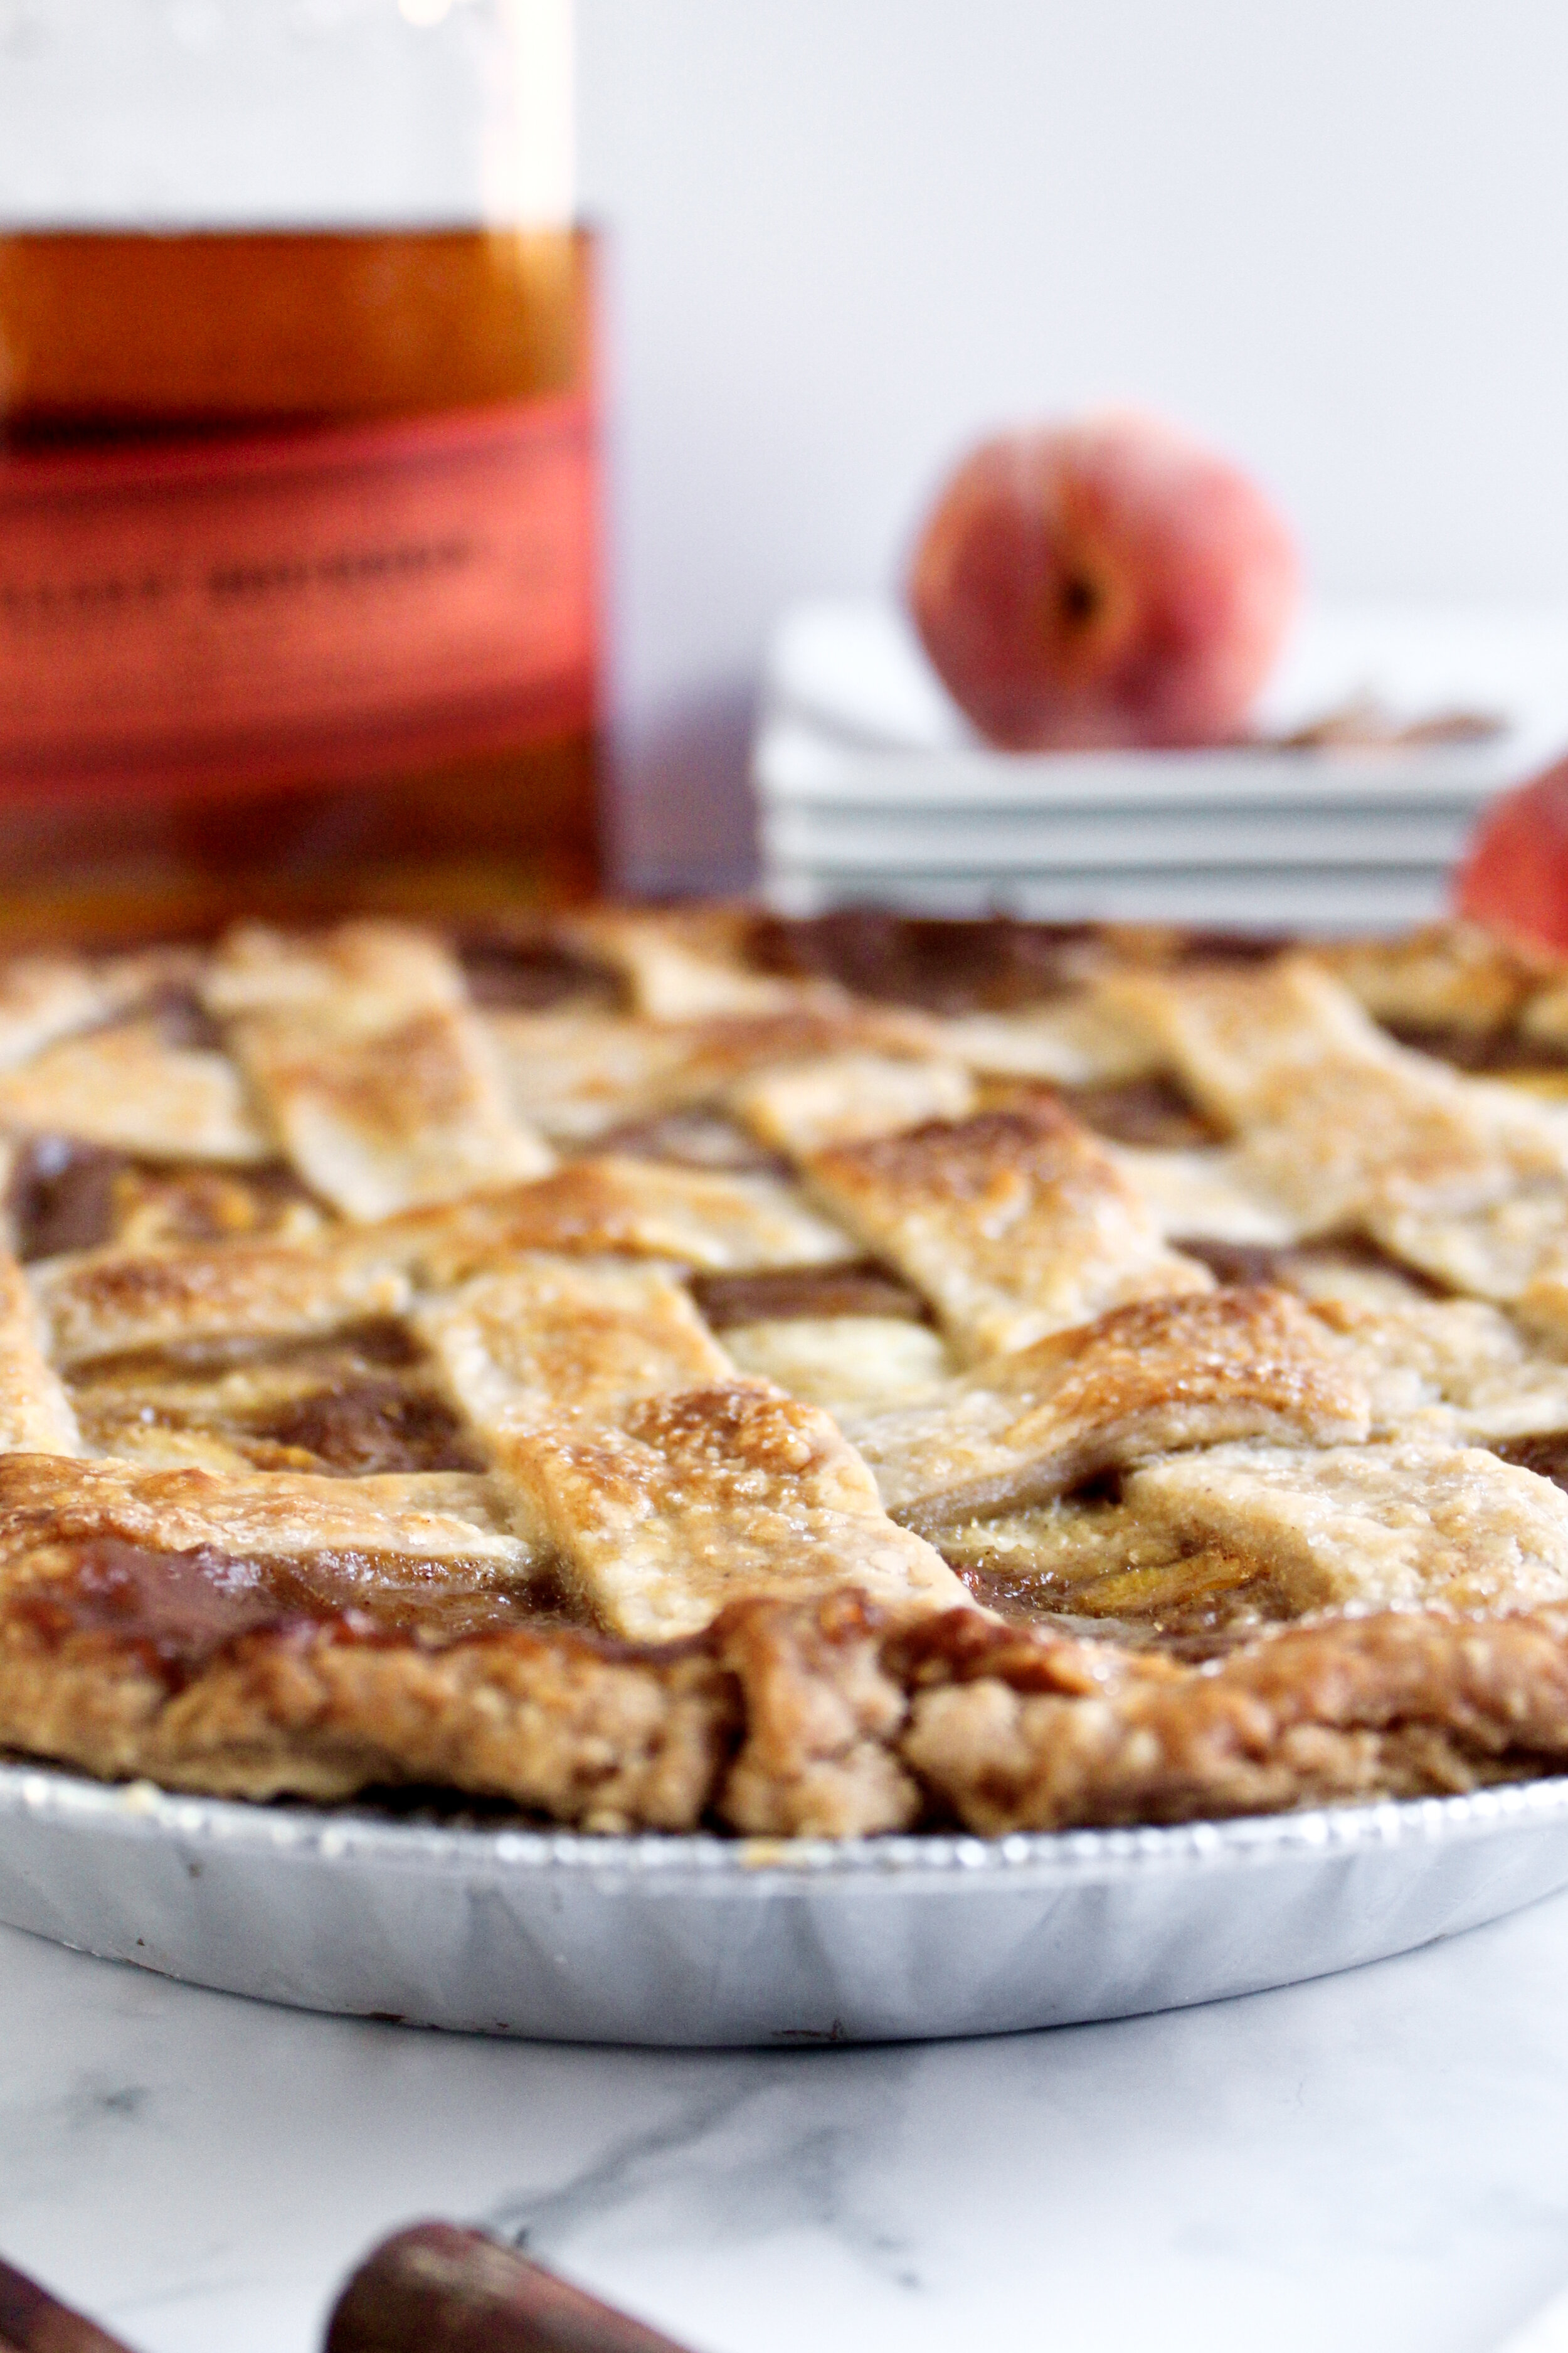
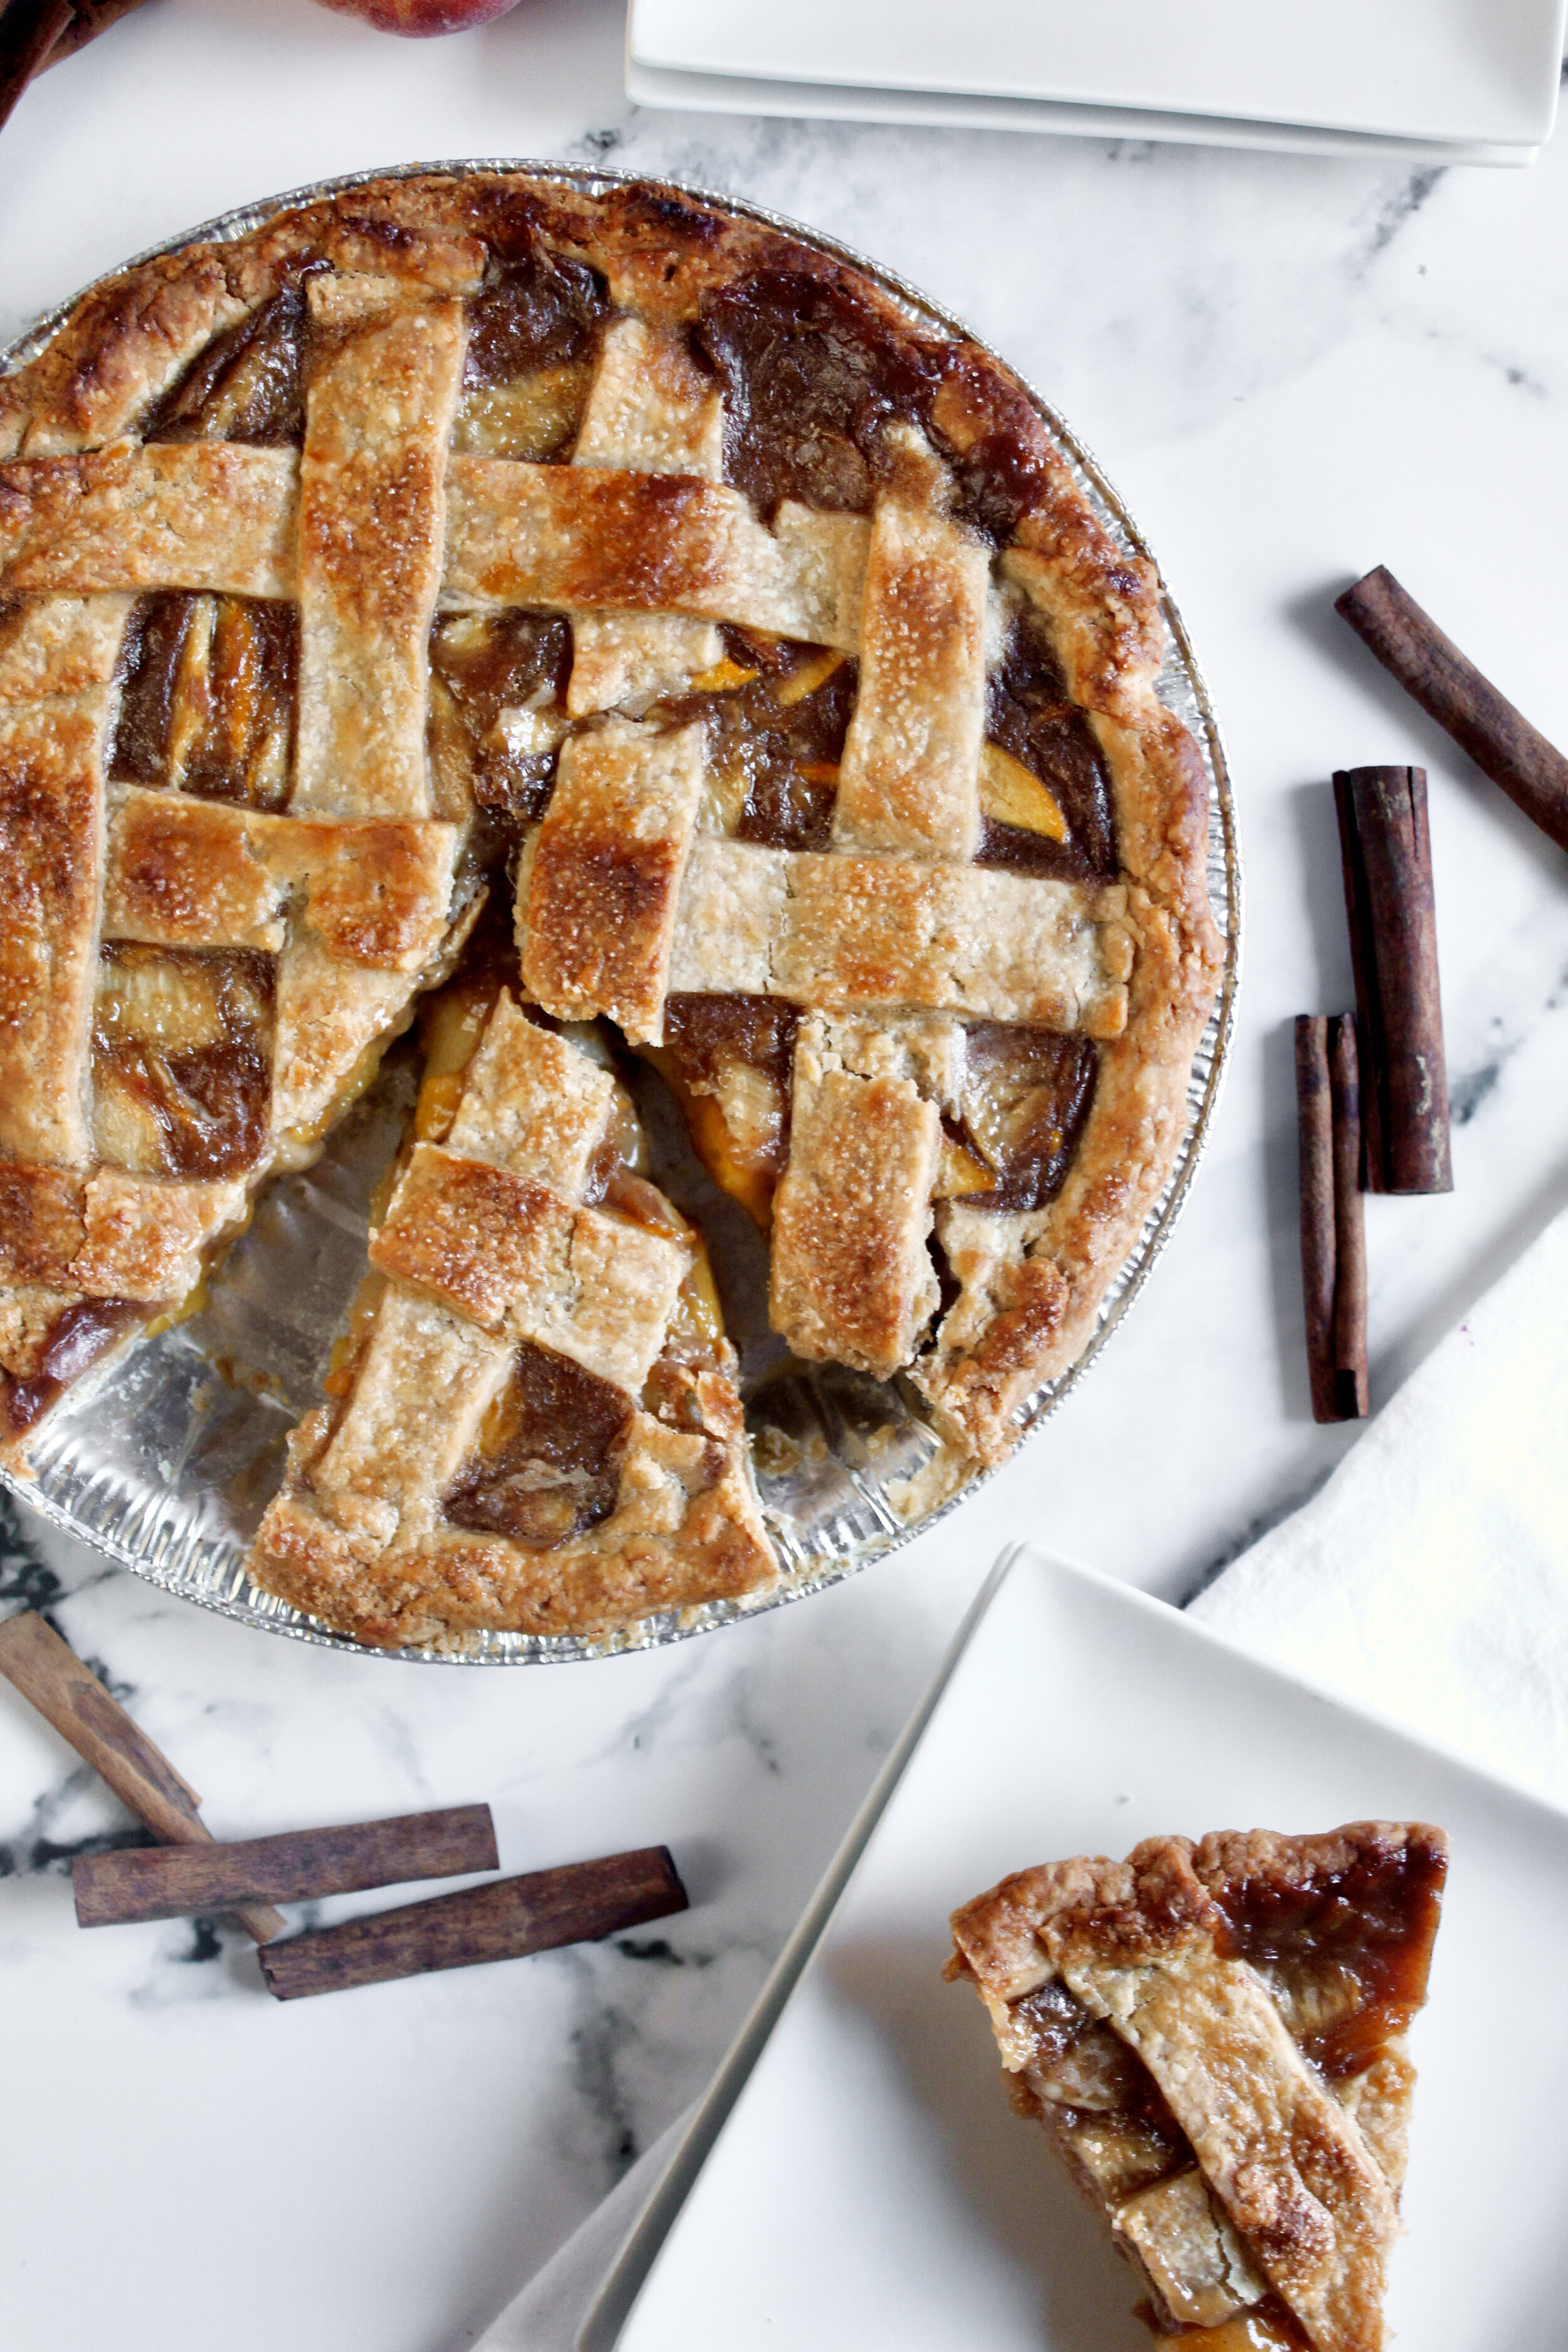
Freeze for 30 minutes! Freeze an empty crust if pre-baking (i.e. blind baking) or freeze a filled crust, including lattice or top crust, if using.
Bake. Keep an eye on it and tent with foil (or use a pie crust shield) if the edges brown too quickly.
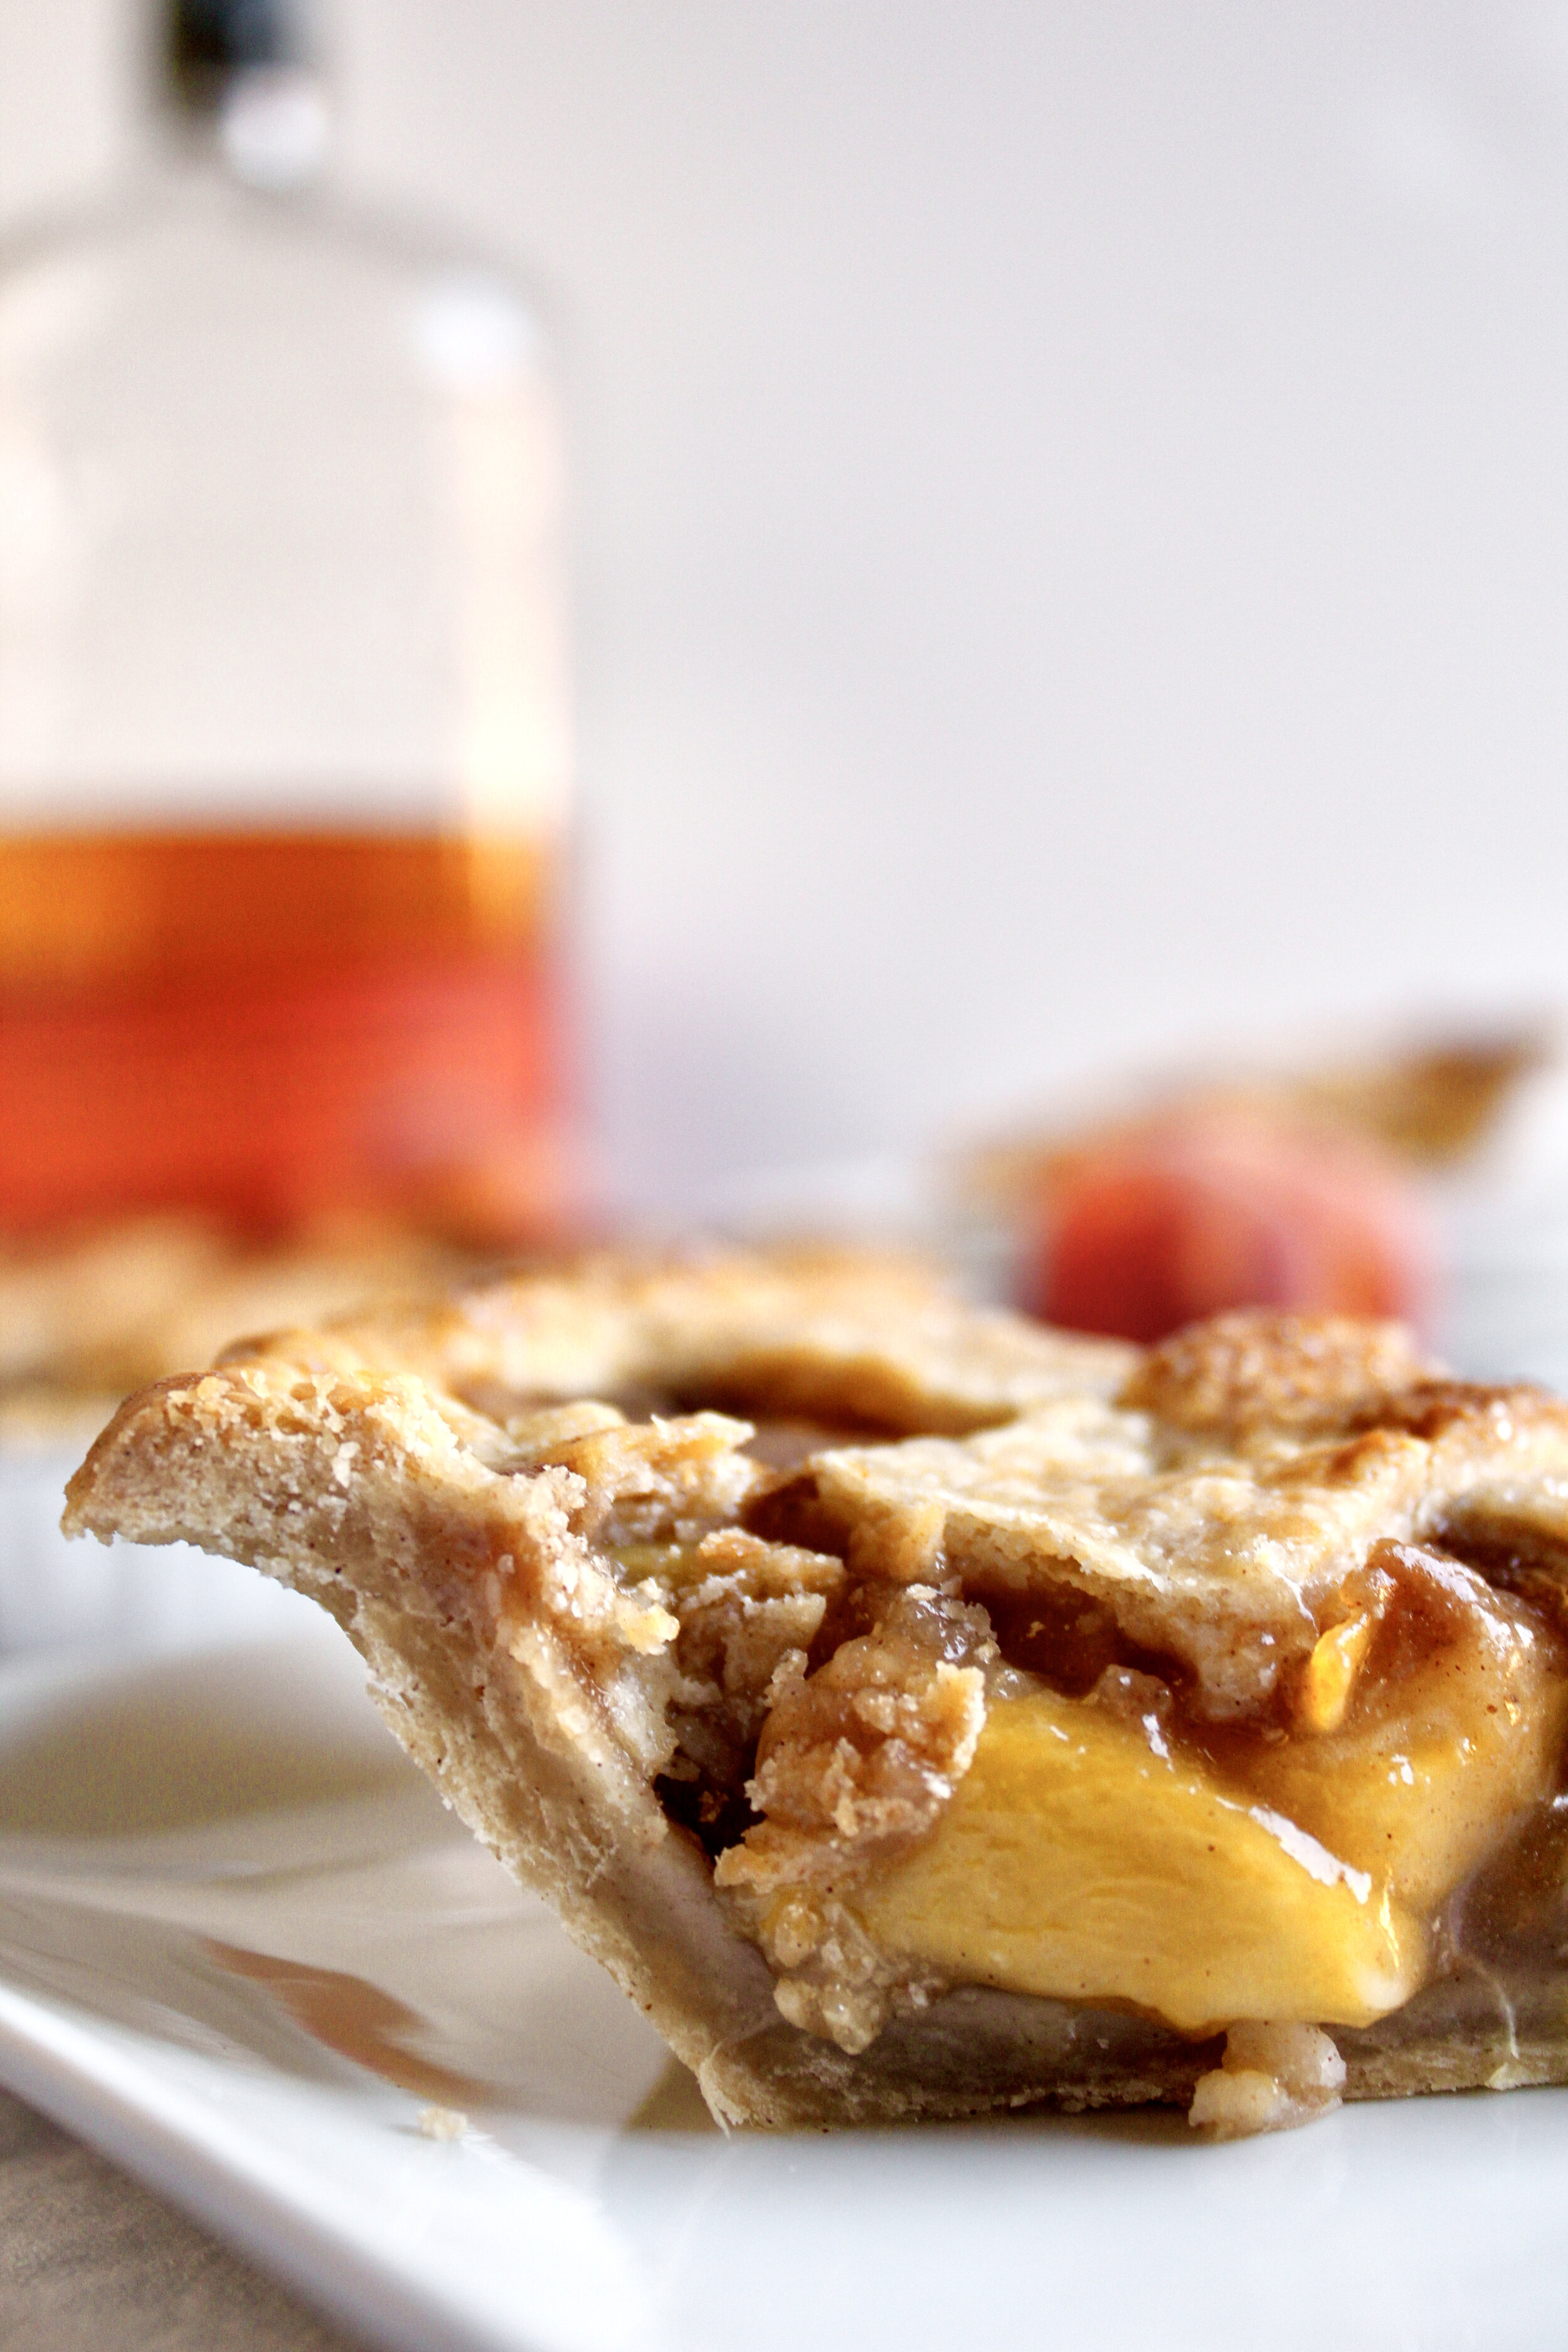
Let cool before serving. This is KEY to prevent a runny pie.


Tips and notes for this recipe
Measure flour carefully
Why lie? I don’t always weigh my ingredients. But I’m starting to trend that way and have noticed a positive difference in my baking. If you don’t have a kitchen scale, just be sure you measure the flour by gently spooning it into the measuring cup then leveling it off quickly with the straight edge of a knife. I’ve tested it and tend to always get within a few grams of the expected weight each time.
Don’t overwork the dough
Don’t you hate when recipes say this? Mix until fully blended. Don’t over mix. But how do I know when it’s done? In addition to the two methods for mixing in the butter, another reason this recipe works so well is that you gently toss in the cold water (like tossing a salad, but with your hands). As you do this, you’ll start to notice that the dough can clump together when gently pressed. This means you’re done mixing.

Trim and shape the edges carefully.
First, leave that extra overhang! This is a BIG reason why my past pies have failed. I used to never leave enough crust on the edge to fold it over on itself. The result is a light, thin edge that gets pulled into the pie pan as it bakes. Second, be sure whatever shape you’re making (this is so NOT my skillset) is resting on that lip of the pie pan, not above the sloped side of the pie crust or over the edge of the pan. It’ll just collapse on itself or fall over the side.

Don’t skip the chilling
Yes, pie crust is notoriously time consuming. But most of that time is spent waiting for a crust to chill or freeze. You let the discs chill before you roll them. You let the crust (or filled pie) freeze before baking/pre-baking it. And you must let the pie cool before serving. Trust me. This is more about the filling than the crust, but many pie troubles happen because a pie wasn’t cooled before cutting. The crust can turn chewy and the filling will almost always run right under the crust and turn it soggy. So trust me: let your pie cool before cutting and serving.
My pie making tools
Here are my must-have tools I use for making pie crusts. Affiliate links provided.
Vegetable peeler or cheese grater
Pastry blender or food processor
Pie pan (Emile Henry has become my favorite!)

Brown Sugar All Butter Pie Crust
- prep time: 10-15 minutes
- chill time: 1 hour, 30 minutes
- total time: 1 hour, 45 minutes (plus bake time, varies by recipe)
servings: 8-12 (for one 8” to 10” pie; see note for lattice or double crust)
Ingredients:
- 1 ⅓ cups (181g) flour, plus more as needed
- 1 teaspoon cinnamon (optional)
- 1-2 tablespoons (13-26g) brown sugar
- ¼ teaspoon (2) finely ground sea salt (or ½ teaspoon table salt)
- 10 tablespoons (147g) unsalted European butter, chilled and divided
- 3-6 tablespoons (30-60g) iced water (can sub vodka or bourbon)
- optional: 1 egg and/or 1 tablespoon milk (for brushing the crust--eggs create a shiny crust, milk creates a golden matte crust, and using neither is more rustic)
- optional: 1 tablespoon sugar (for finishing a lattice or double crust
Instructions:
- First, prep your butter. Dice 6 tablespoons of it and put in the fridge. With the other 4 tablespoons, you want to get long, thin strips one of two ways. You can use a vegetable peeler to shave super thin squares of the remaining butter from the end (not lengthwise) or a cheese grater to create shredded strips of butter. Spread these pieces on a cookie sheet and freeze at least 10 minutes.
- Blend your flour, brown sugar, salt, and cinnamon (if using) in a large mixing bowl. If your sugar is raw or large-grain (such as organic sugar), you may want to pulse it a few times in a food processor.
- Add the chilled butter to the flour. Using a pastry blender (or your hands or a food processor), cut in the butter until it is a sandy texture. Note: if you used a food processor in this step, be sure to dump everything into a mixing bowl for the rest of the steps.
- Add in the frozen butter. Toss gently to coat. Break up any pieces that stuck together.
- Sprinkle water (or vodka or bourbon), one tablespoon at a time, over the dough. Gently stir in a tossing motion (avoid pressing the dough down too much), until blended after each addition. A lot of the butter will naturally break up as you do this, but if it’s staying in large squares or clumping, you’ll want to break those up as you go so you don’t have dozens of large pieces. Also, be sure to toss well before adding more water, so that you don’t add too much. Rarely do I need all 6 tablespoons (usually only if it’s really dry out).
- Once the dough can stick together when pressed against the side of the bowl (don’t wait for it to come together--check as you are tossing in the water), pour out onto a clean surface and gently shape into a 6” disc. Use the edge of your hand to get smooth sides. Wrap well in plastic wrap and chill at least 1 hour, or up to 2 days. (You can also freeze it up to 1-2 months, depending on your freezer.) Note: if making a lattice or double crust, make two discs, one slightly larger than the other.
- When ready to use, lightly flour a clean work surface or rolling mat. Sprinkle a little more flour over the top. Begin rolling out the dough, rotating the rolling pin as you go. I like to imagine it’s a clock and I need to roll it over every hour—so top down is 12 and 6, left right is 3 and 9, etc. Roll it out to be about 3 inches bigger in diameter than your pie pan (e.g. 12” for a 9” pan).
- Be sure to flip and rotate the dough every so often, sprinkling a tiny bit more flour as needed to 1) keep it from sticking and 2) ensure you’re rolling evenly. I tend to roll the bottom left too thin and the top right too thick. Rotating balances this out.
- If any bits of the edge crack or break, gently press them back together with your hands. Roll about half of the crust onto the rolling pin then gently slide it over the pie pan until centered. Gently lift the edges of the crust and press it into the pan. You want about ½ inch of overhang, so trim anything beyond that. Tuck the overhang under so that the edge is flush with the pie pan. Shape the edges as desired.
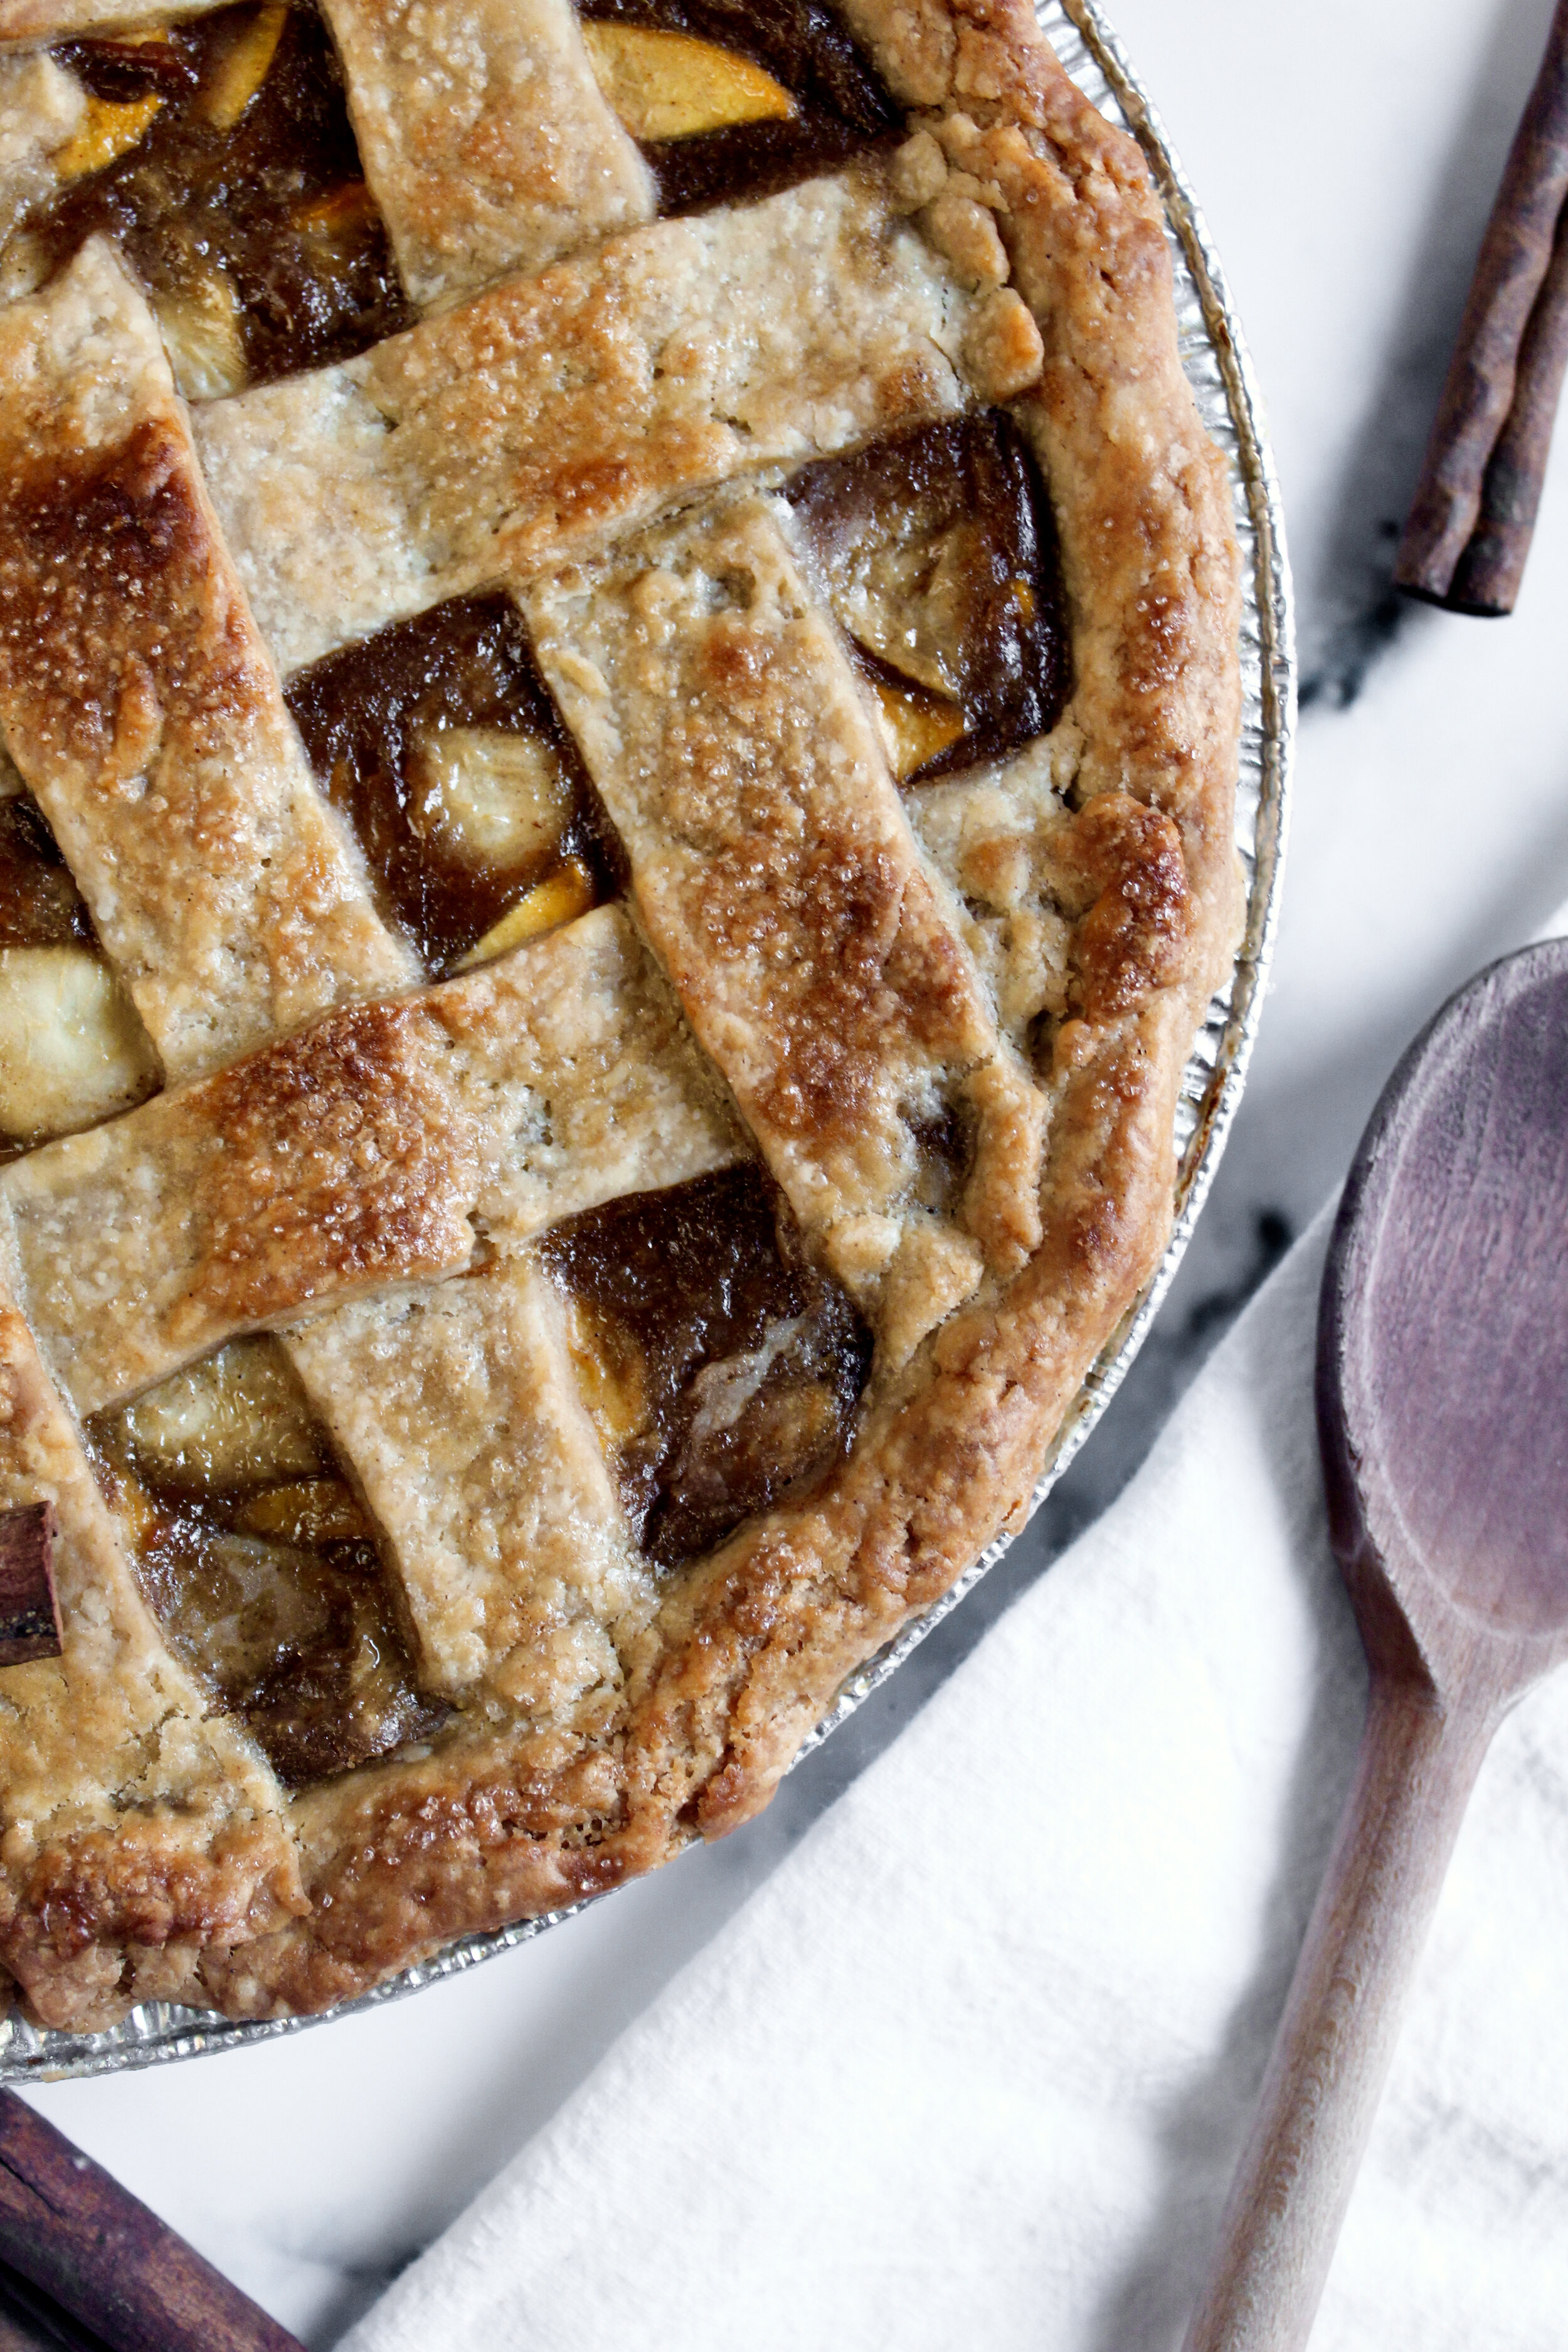
- Note: if making a lattice or double crust, roll the smaller disc out to just slightly larger than the pie pan. For lattice, cut into 1” strips. Once the pie is filled, weave as desired** then crimp the edges together with the bottom crust and shape the edges. For a double crust, gently place over slightly mounded filling, crimping with the bottom crust and shaping the edges. Cut at least 4 slits in a concentric pattern. For both options, brush with a wash of 1 egg whisked with 1 tablespoon of milk or even just milk and sprinkle with sugar (optional). Do this before freezing in the next step.
- Freeze crust (empty if pre-baking or filled if doing a classic pie) for 30 minutes.
- If pre-baking or par-baking the crust, line with a double layer of foil (criss cross each layer so there’s enough to cover all edges). Loosely fold it over the edge of the pan without sealing it in. Fill the pan with rice or beans or pie weights. Rice is my favorite. Bake on a parchment lined cookie sheet for 25-30 minutes at 400 (or as directed by your recipe). If par-baking, you can fill it at this point then finish baking. If fully pre-baking, remove the rice and foil and bake another 10-15 minutes, until the bottom begins to look golden. Let cool before filling, unless otherwise noted by your recipe.
- If baking with the filling (such as a fruit-filled pie), bake at 400 on a foil lined baking sheet for 20 minutes then turn oven down to 375 until crust is golden brown and the filling bubbles (or as directed by your recipe). Watch carefully and tent loosely with foil or use a pie crust shield if the edges begin to brown too quickly.
- Let cool completely (usually 2-3 hours minimum) before cutting.
Enjoy!
*For a lattice or double crust, double the recipe.
**There are several videos online of how to weave a lattice crust. One day, when I’m better at doing them, I’ll make a video for you!
