
Foolproof Classic Pie Crust
Flaky pie crust that is consistently delicious and cooperative. No more praying to the pie gods or wondering why pie crust has to be so difficult—this is honestly the go-to crust that won’t fail you and, more importantly, won’t frustrate you.
This post may contain affiliate links from which, at no additional cost to you, I may earn a small commission to keep this site running. Only products I myself would or do use are recommended.

Confession: I’m mad at pie right now.
Not a specific type of pie. Not a particular pie I made. I’m just plain mad at the baking genre of pie.
I’ve spent years trying to perfect pie crust. What I really want is a very good, very reliable, no-fuss pie crust that also uses ingredients I can feel good about. Good in terms of being natural and also fancy. What can I say, I’m human. Sometimes it comes out perfectly. Sometimes it falls into the pie pan while baking.

Usually, it turns out perfectly when it’s just for my family or a very small gathering.
And usually, it collapses on itself when I’m making it for a holiday or other large gathering. And especially so if I’m trying to get a good photo of it.

So in my “year of pie” I decided to start at the beginning, with the first crust recipe I ever made—the one I always used until I tried to branch out and try new things that resulted in fierce anger at the world of pie. Sorry, I forgot to breathe for a second while thinking about all my recent pie fails... So, yes, this is a classic pie crust recipe your grandma may have used. It works. It’s reliable. It really is foolproof.

Why this works
So many components go into pie crust. Type of fat(s). Ratio of fat to flour to liquid. Method of blending. Additional mix-ins. Seriously, the combinations are endless.
One reason this recipe works is because it uses two types of fat: butter and vegetable shortening. While I don’t love the idea of using shortening, there isn’t much in here, and it’s not like I’m eating a whole pie by myself every day. The two fats have different melting points, which helps create a flakier crust.

The second reason this recipe works is the method of combining the fats. First, you coat the flour in the shortening until it’s sandy then toss it with long, thin squares of frozen butter. Coating the flour first helps prevent gluten from forming—which prevents a shrinking or chewy crust. But everyone knows you need those long bits of butter for a flakey crust. Freezing the butter helps it retain its shape as you mix everything, leading to that flakey crust.

Finally, freezing the crust before baking ensures that your pie doesn’t lose its shape and that the butter doesn’t melt too quickly in the oven.
Bonus, it’s easy! You can just use a pastry blender to get the shortening to a sandy texture (although a food processor or your hands would work). Then you use a vegetable peeler to create thin pieces of butter that freeze then toss in with the flour. Finally, you just stir in the water, so there’s no risk of over-mixing!
Together, this all creates a sturdy crust that still has those gorgeous flakes and that delicious texture.

How to make foolproof classic pie crust
First, mix your dry ingredients.

Blend in cold shortening with the flour until sandy.

Add frozen butter peeled into thin squares and strips with a vegetable peeler and toss to combine.

Gently stir in cold water.

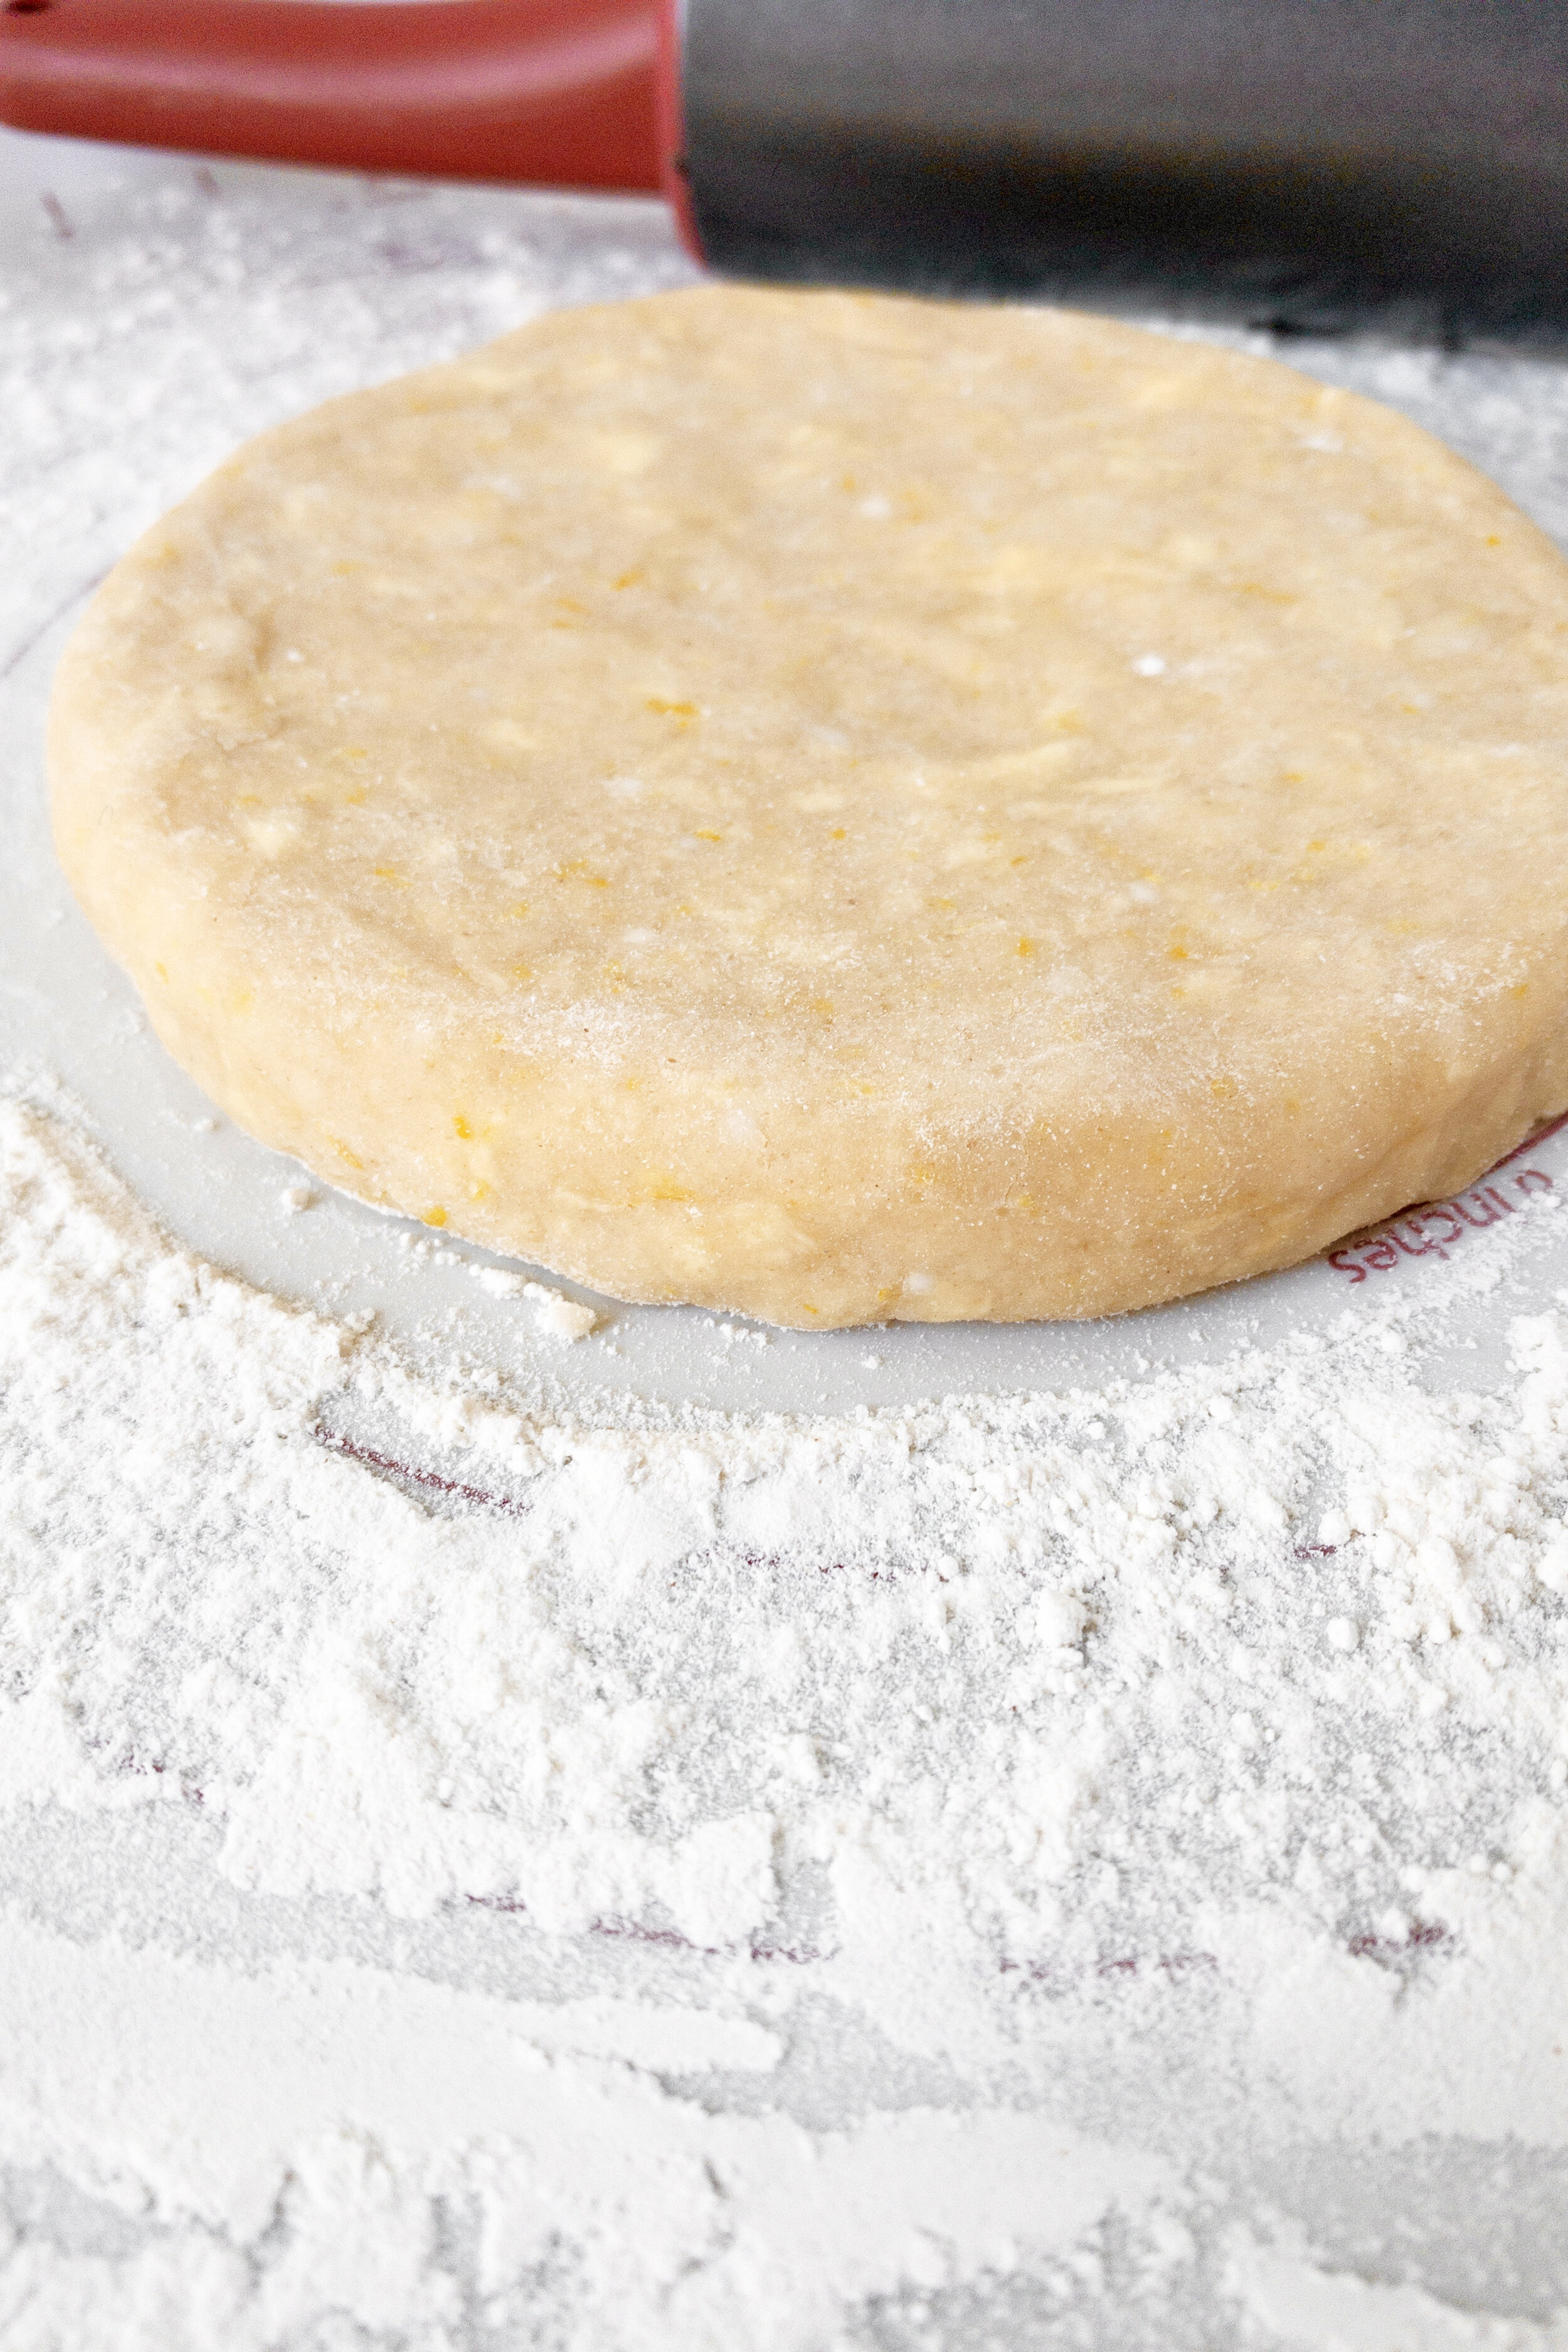
Form into a disc, wrap, and chill.

Roll out.

Line your pie pan.

Shape your edges.

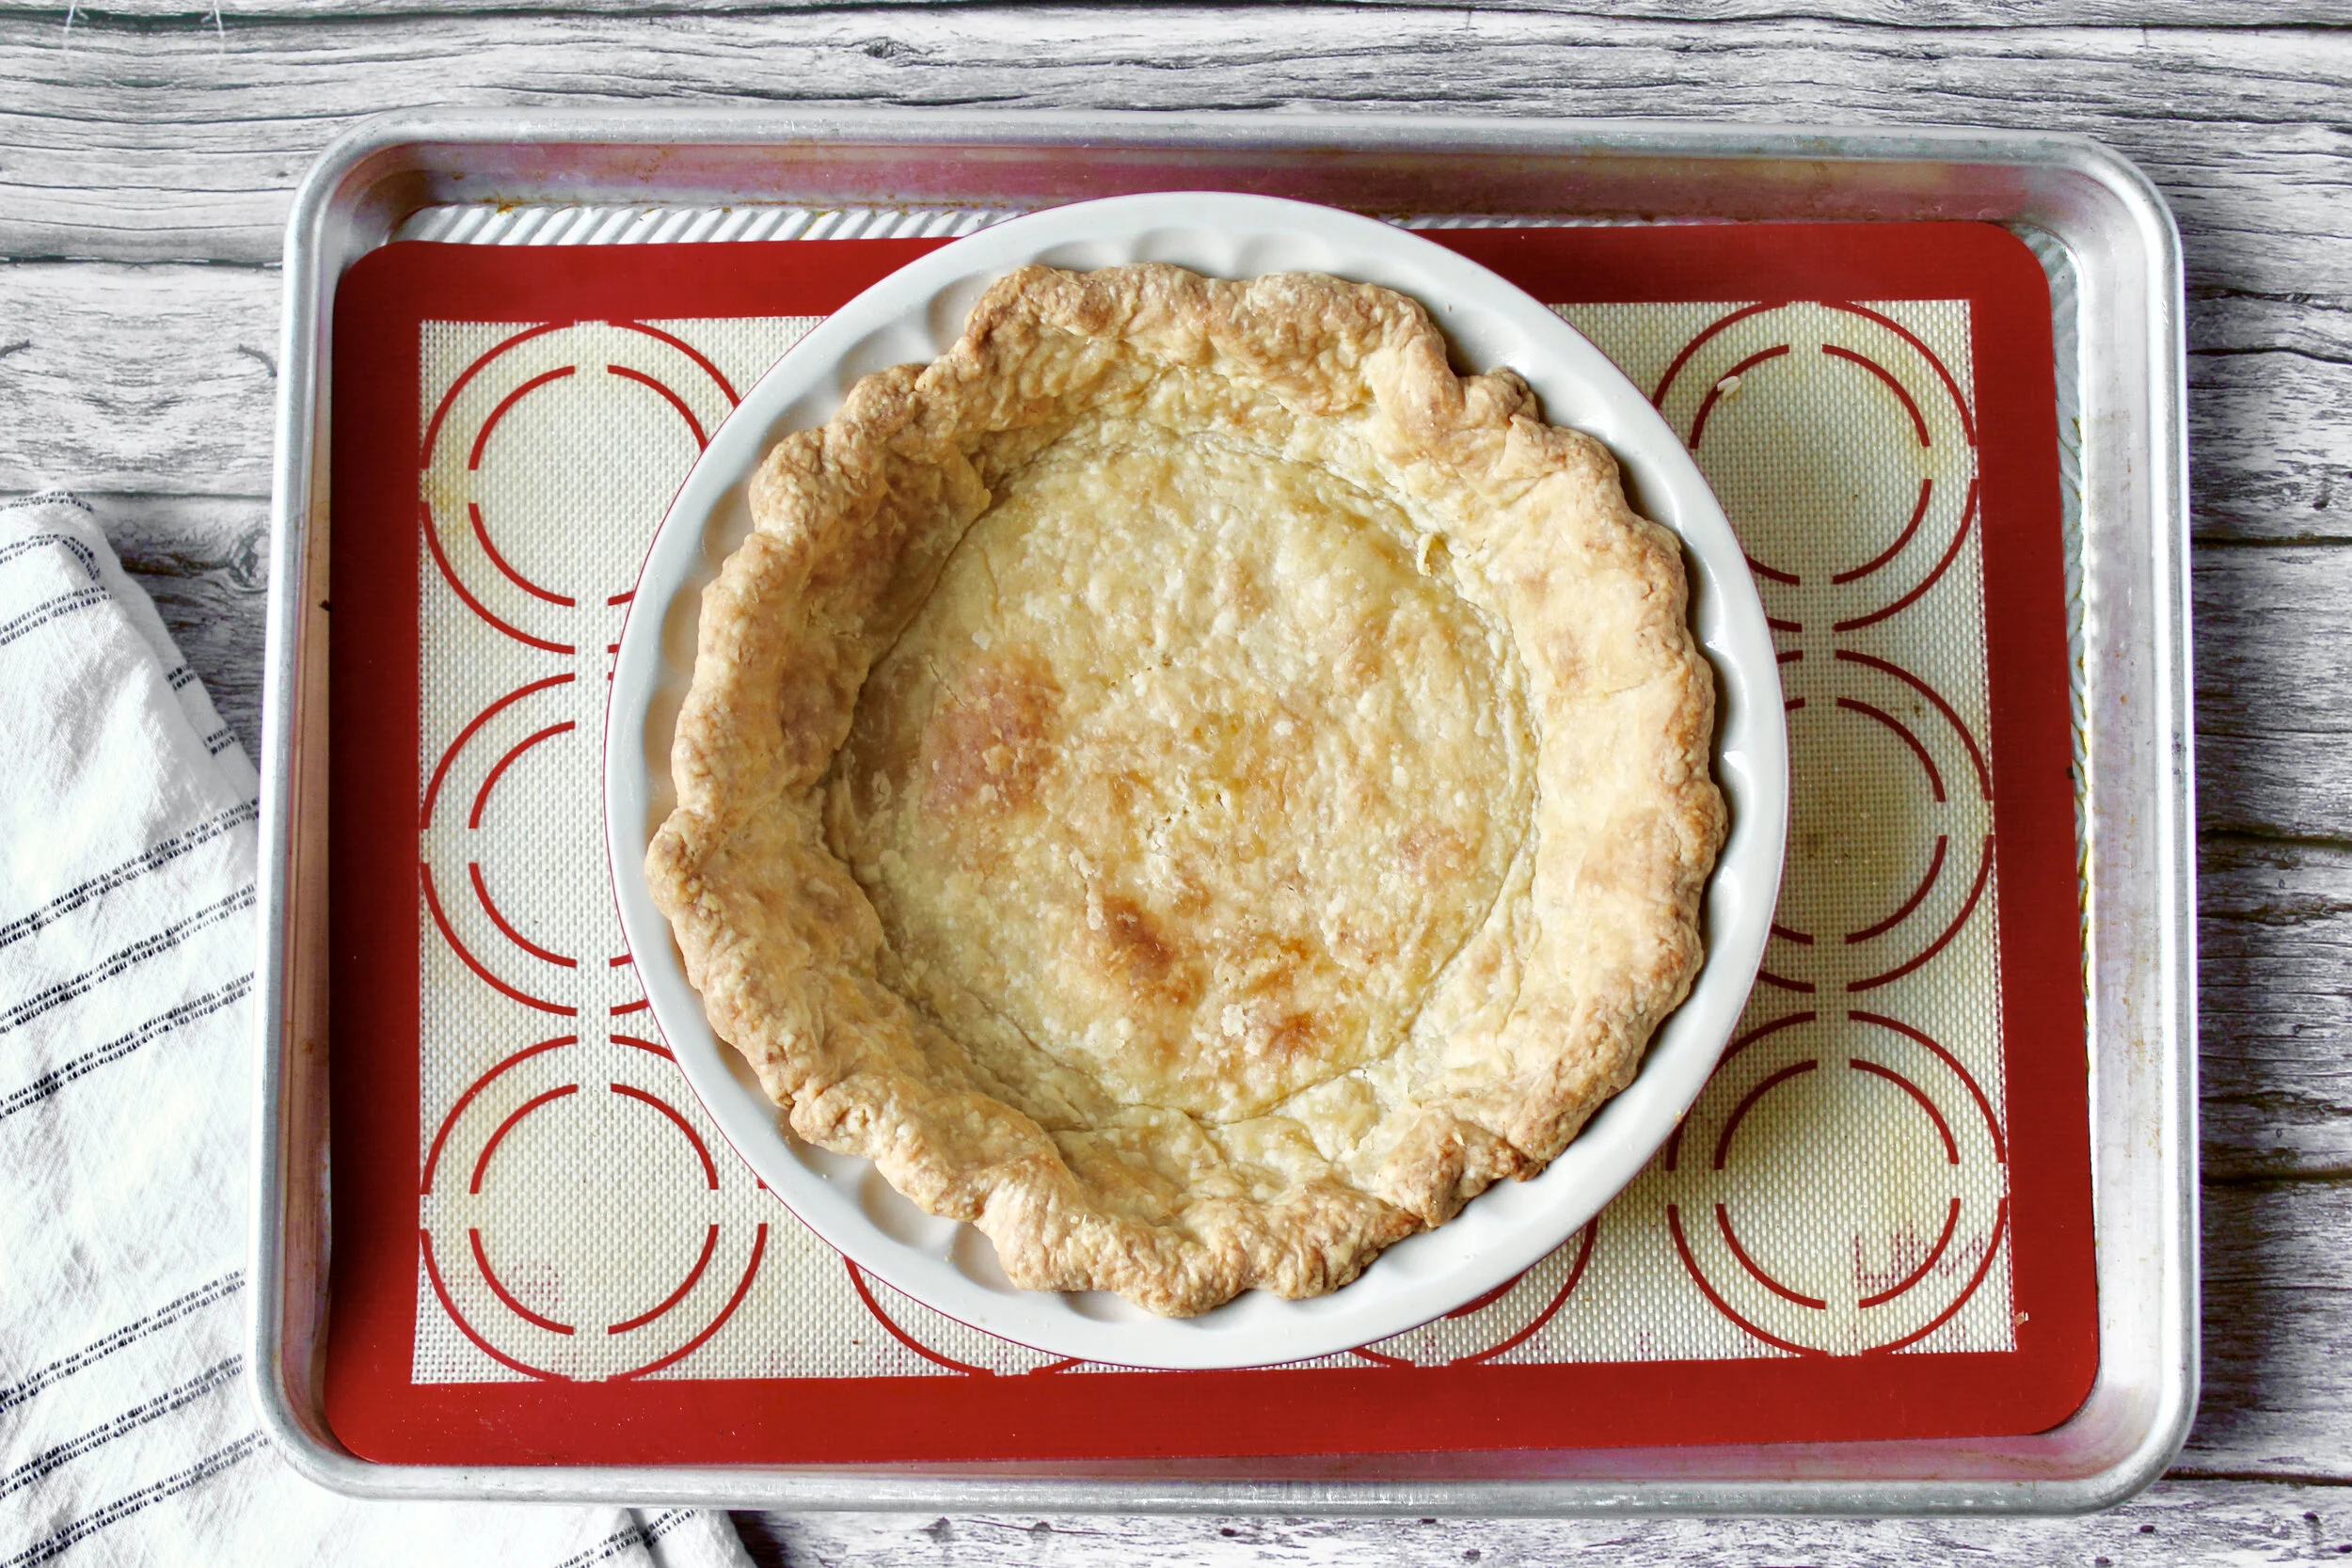
Freeze, line with foil, fill with rice or pie weights, then blind bake. (If not pre- or par-baking, fill with pie filling, freeze, then bake).

Easy peasy.
Tips and notes for this recipe
Weigh your flour or gently spoon then level
This is the tip I wish I’d known a long time ago. Weigh your flour! If you just dig into the flour with a measuring cup, you will end up with too much—because you packed it in. One of the first ways to alleviate pie frustration is to ensure you have the right amount of flour, so it’s important to either weigh it or gently spoon it into the measuring cup then level it off with a knife.

Peel chilled butter
The whole idea of peeling butter is weird, I know. But I’ve learned the hard way that it’s easier to peel the butter if it’s cold but not frozen. It also helps to take more butter than you need, make a notch with a knife at your “stopping” point, then peel to there. That way, you have extra butter to hold onto as you peel and don’t nick your fingers.
Peel butter from the end
Again, this is a very weird term. But bear with me! I’ve tried this a few ways and trust me—peeling from the end instead of trying to get strips along the length of the butter is best. You’ll end up with super thin squares as well as some thin strips (because this isn’t a perfect science and your peeler won’t just make perfectly even squares every time). When you toss those with the flour then stir in the water, some of the squares will break up into smaller bits, which is perfect. You want some variety to the sizes of butter pieces.
Double for lattice or double crust
This is pretty obvious. I used to do a 1 1/2 recipe for lattice, but I’ve found it’s just plain easier to double a recipe for a lattice and have a little extra. For a lattice crust, you’ll want to cut 1” strips and weave it then crimp the edges with the bottom crust and shape. For a double crust, gently place it over your slightly mounded filling, crimp the edges with the bottom crust and shape. Cut at least four concentric slits in the crust. For both options, brush with an egg wash of 1 egg whisked with 1 tablespoon of milk (or just brush it with milk—my favorite). Optionally, you can sprinkle with sugar.

Optional variations:
While this is perfection on its own, I have a few variations that I love.
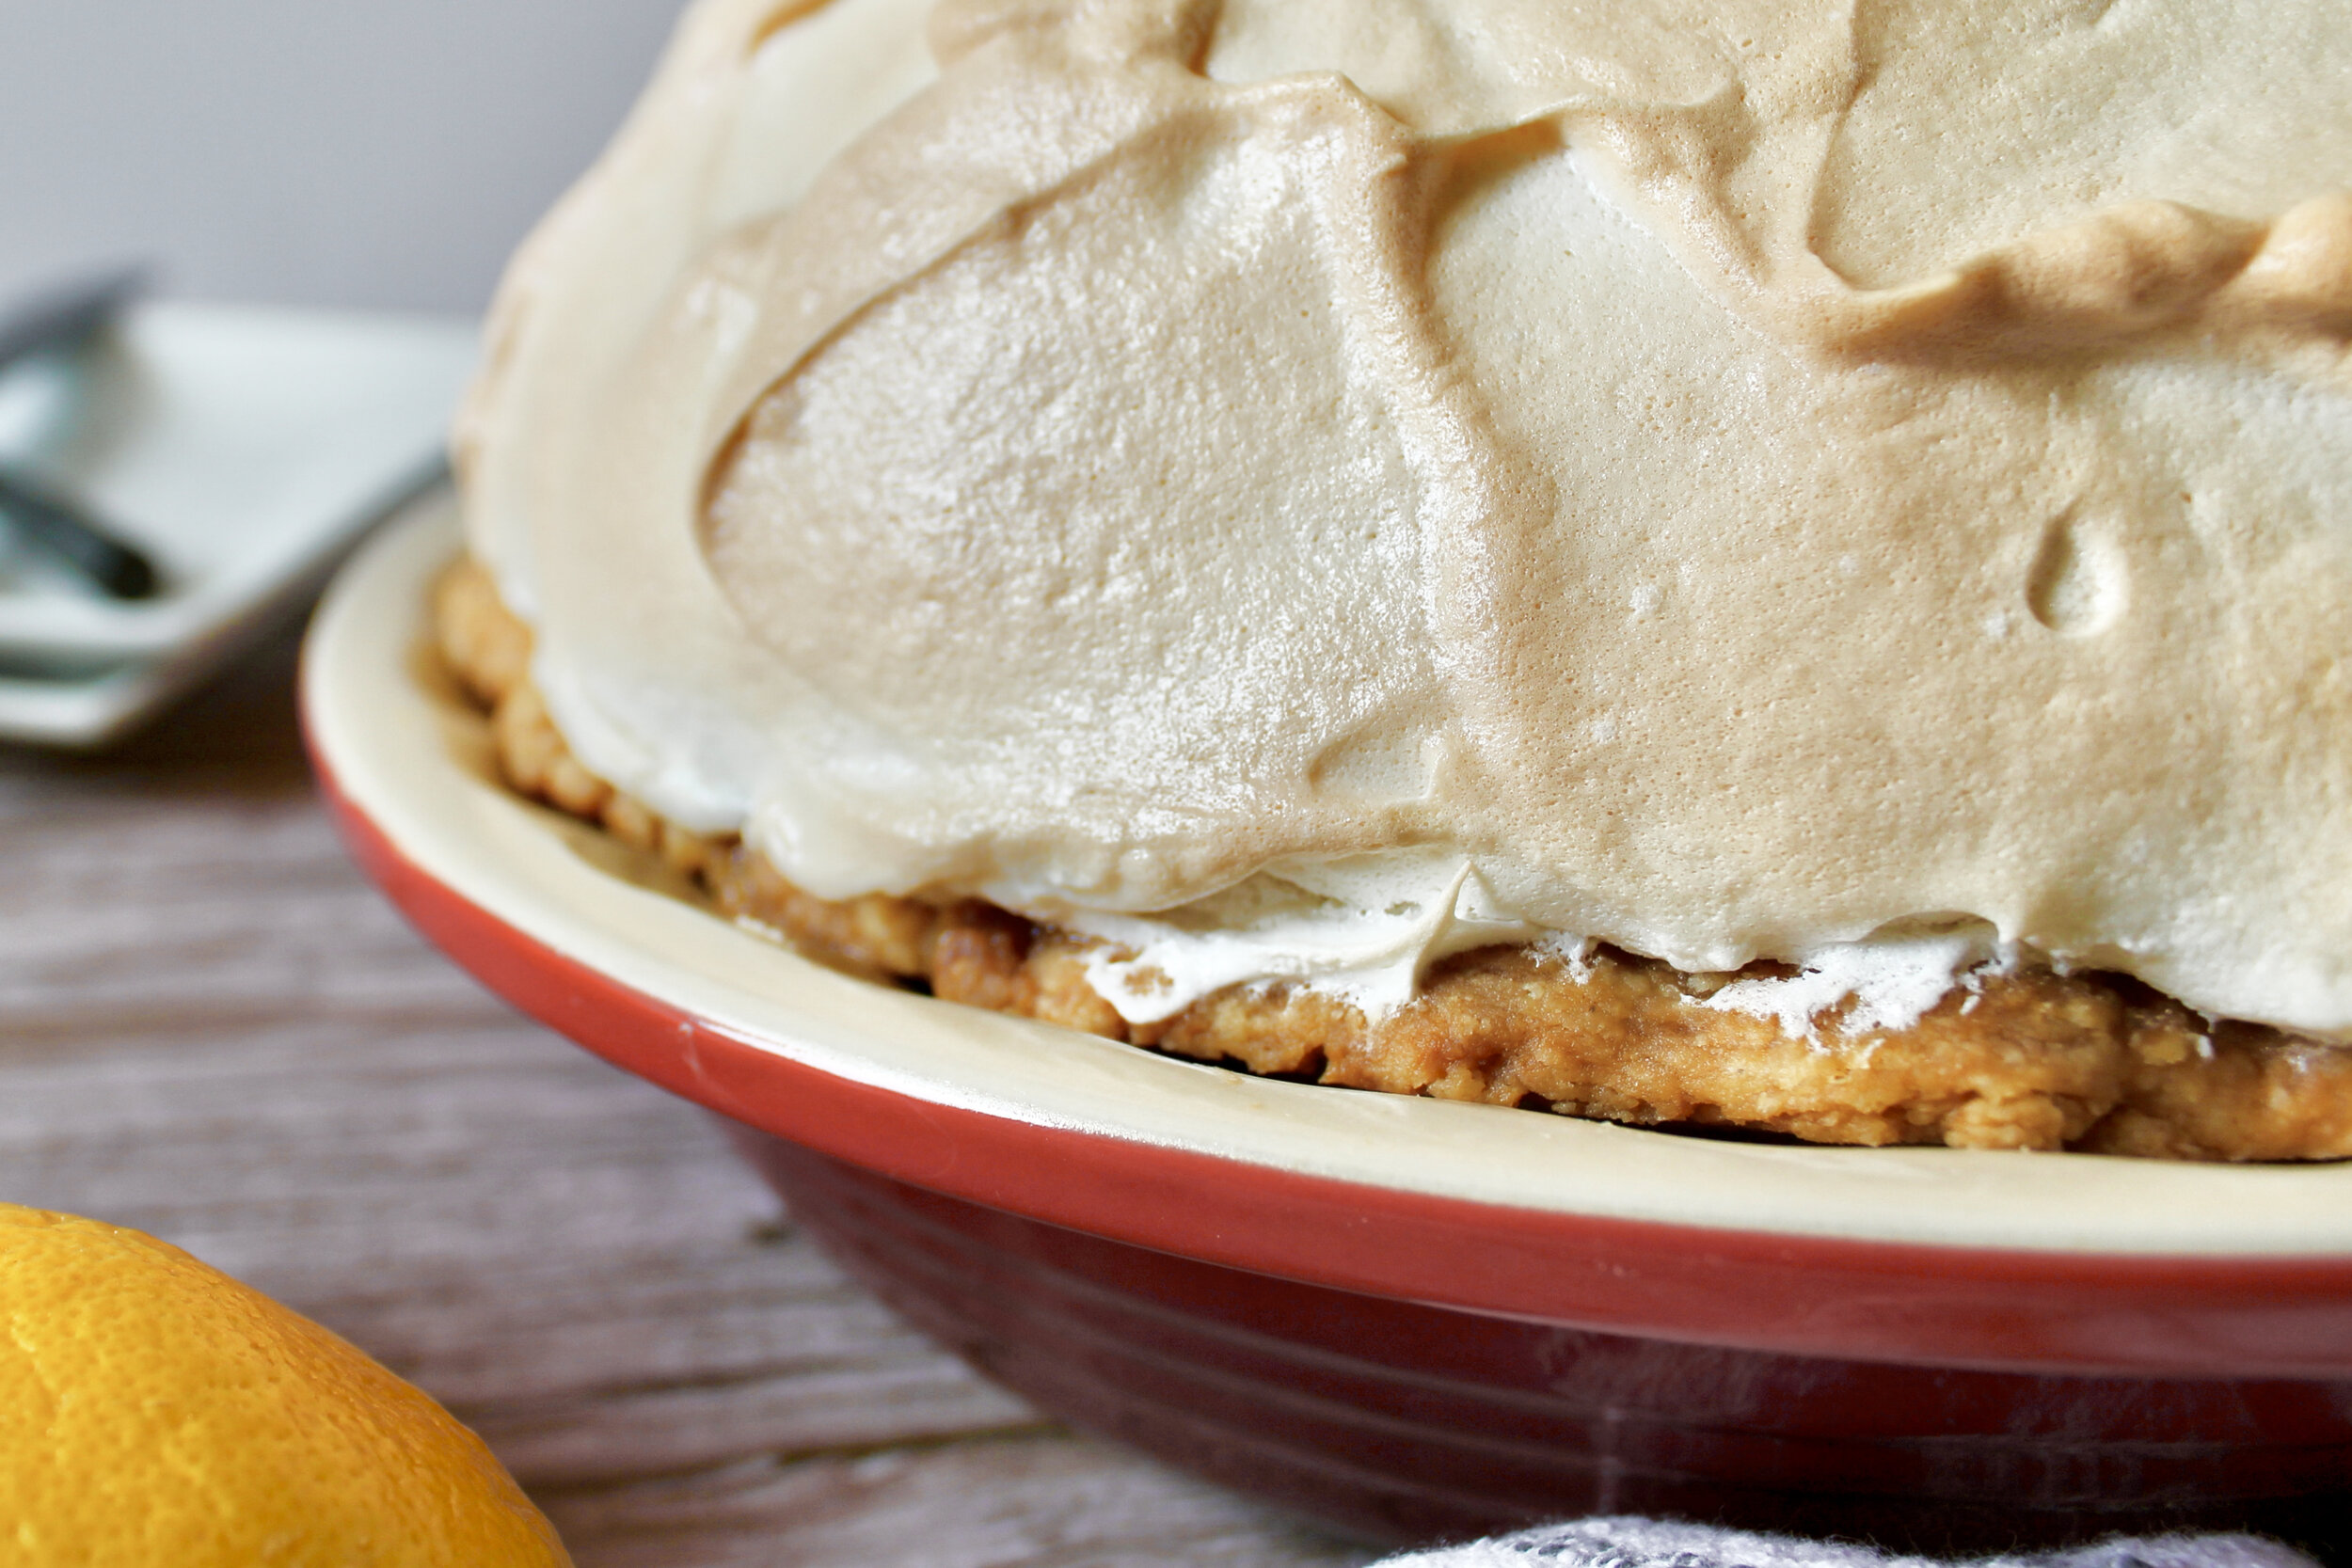
Lemon: add 1 tablespoon finely grated lemon zest with the flour
Cinnamon brown sugar: substitute brown sugar for sugar and add 1/2 tablespoon ground cinnamon with the flour; also consider sprinkling a cinnamon sugar mixture over the egg wash
Savory: omit the sugar and add 1 tablespoon chopped thyme/rosemary


Foolproof Classic Pie Crust
- prep time: 10-15 minutes
- chill time: 1 hour, 30 minutes
- total time: 1 hour, 45 minutes (plus bake time, varies by recipe)
servings: 8-12 (for one 8” to 10” pie--see note for double or lattice crust)
Ingredients:
- 1 ¼ cups (170g) flour, plus more as needed
- 1 tablespoon (13g) sugar (optional)
- ¼ teaspoon (2) finely ground sea salt (or ½ teaspoon table salt)
- 4 tablespoons (46g) vegetable shortening, diced and chilled
- 6 tablespoons (85g) unsalted European butter, chilled
- 3-6 tablespoons (30-60g) iced water or vodka
- see note for variation options
Instructions:
- First, prep your fats. Dice the shortening and put in the fridge. Use a vegetable peeler to shave super thin squares of the butter, peeling along the end (not lengthwise). Don’t worry if you don’t get a perfect square each time--it’s fine to have smaller pieces as long as they’re all nice and thin. Spread these pieces on a cookie sheet and freeze at least 10 minutes.
- Blend your flour, sugar, salt, and optional mix-ins in a large mixing bowl. If your sugar is raw or large-grain (such as organic sugar), you may want to pulse it a few times in a food processor.
- Add diced shortening. Using a pastry blender (or your hands or a food processor), cut in the shortening until it is a sandy texture.
- Add in the frozen, thinly peeled butter. Toss gently to coat. Break up any pieces that stuck together. Note: if you used a food processor in the previous step, be sure to dump everything into a mixing bowl for the rest of the steps.
- Sprinkle water, one tablespoon at a time, over the dough. Gently stir in a tossing motion (avoid pressing the dough down too much), until blended after each addition. A lot of the butter will naturally break up into halves or quarters of the squares you made as you do this, but if it’s staying in large squares, you’ll want to break those up as you go so you don’t have dozens of large pieces. Also, be sure to stir well before adding more water, so that you don’t add too much. Rarely do I need all 6 tablespoons (usually only if it’s really dry out).
- Once the dough can stick together when pressed against the side of the bowl, pour out onto a clean surface and gently shape into a 6” disc. Use the edge of your hand to get smooth sides. Wrap well in plastic wrap and chill at least 1 hour, or up to 2 days. (You can also freeze it up to 1-2 months, depending on your freezer.) Note: if making a lattice or double crust, make two discs, one slightly larger than the other.
- When ready to use, lightly flour a clean work surface or rolling mat. Sprinkle a little more flour over the top. Begin rolling out the dough, rotating the rolling pin as you go. I like to imagine it’s a clock and I need to roll it over every hour—so top down is 12 and 6, left right is 3 and 9, etc. Roll it out to be about 3 inches bigger in diameter than your pie pan (e.g. 12” for a 9” pan).
- Be sure to flip and rotate the dough every so often, sprinkling a tiny bit more flour as needed to 1) keep it from sticking and 2) ensure you’re rolling evenly. I tend to roll the bottom left too thin and the top right too thick. Rotating balances this out.
- If any bits of the edge crack or break, gently press them back together with your hands. Roll about half of the crust onto the rolling pin then gently slide it over the pie pan until centered. Gently lift the edges of the crust and press it into the pan. You want about ½ inch of overhang, so trim anything beyond that. Tuck the overhang under so that the edge is flush with the pie pan. Shape the edges as desired.
- Note: if making a lattice or double crust, roll out to just slightly larger than the pie pan. For lattice, cut into 1” strips. Once the pie is filled, weave as desired then crimp the edges together with the bottom crust and shape the edges. For a double crust, gently place over slightly mounded filling, crimping with the bottom crust and shaping the edges. Cut at least 4 slits in a concentric pattern. For both options, brush with a wash of 1 egg whisked with 1 tablespoon of milk or just milk.
- Freeze crust (empty if pre-baking or filled if doing a classic pie) for 30 minutes.
- If pre-baking or par-baking the crust, line with a double layer of foil (criss cross each layer so there’s enough to cover all edges). Loosely fold it over the edge of the pan without sealing it in. Fill the pan with rice or beans or pie weights. Rice is my favorite.
- Bake on a parchment lined cookie sheet for 30 minutes at 375 (or as directed by your recipe). If par-baking, you can fill it at this point then finish baking. If fully pre-baking, remove the rice and foil and bake another 10-15 minutes, until the bottom begins to look golden.
Enjoy!
- For a lattice or double crust, double the recipe.
