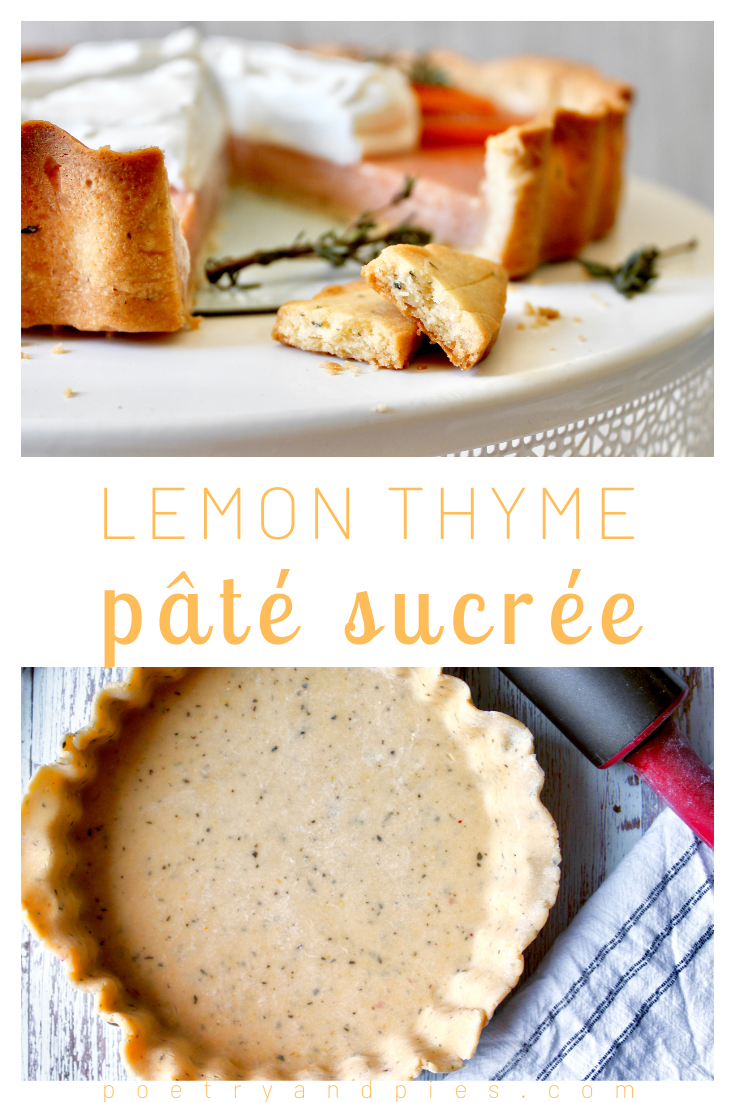
Lemon Thyme Shortcrust (Pâté Sucrée)
Buttery crust with a perfectly sandy texture, bursting with lemon and thyme. A little sweet, a little savory, this tart crust pairs well with a wide variety of flavors. Best of all, bake the trimmings as cookies because you will want to savor every last bit!
This post may contain affiliate links from which, at no additional cost to you, I may earn a small commission to keep this site running. Only products I myself would or do use are recommended.
Shortcrust? Tart crust? Pâté sucrée? Whatever it is, get in my belly! I’m embarrassed to admit I’ve never made a true shortcrust before. I usually do no-bake crusts when I make tarts, because it’s easier. If I’m gonna go to the trouble of chilling and rolling something out, I want the satisfaction of making a pie.
How naive I was.
Pâté sucrée is French for sweet pastry crust. It’s a lot like a pie crust, except you blend the butter up more and use egg yolk and cream for the liquid, instead of water. The result is a tender, crumbly, cookie-like crust. You still get some of those enviable layers, but it’s less stressful than pie crust. Yes, please.
While pie crust has the stress of using the right method in the right way plus making sure you don’t add too much or too little water (and the only way to really know is to bake a lot of pies until you just…know), pâté sucrée is straightforward. Mix exactly this much in exactly this way. It will always do what the recipe says it will. I like that about a dessert.

I’m still working on making 2021 my year of pie (I mean, Poetry & Pies should be good at making…pies). But I absolutely count pâté sucrée in the same category, because I learned so much about pies/tarts/crusts while making this. And because it’s amazingly delicious.
My favorite is that you can bake the extra dough as cookies. Good cookies. Cookies you’ll want more of. My daughter was over the moon about that.
How to make and roll out lemon thyme pâté sucrée
First, you want to wash your lemon and thyme to remove any dirt. I like to scrub my lemons with vegetable wash. While the thyme dries (you can’t really pat it down easily), dice up your butter then put it in the fridge to keep it nice and chilled.

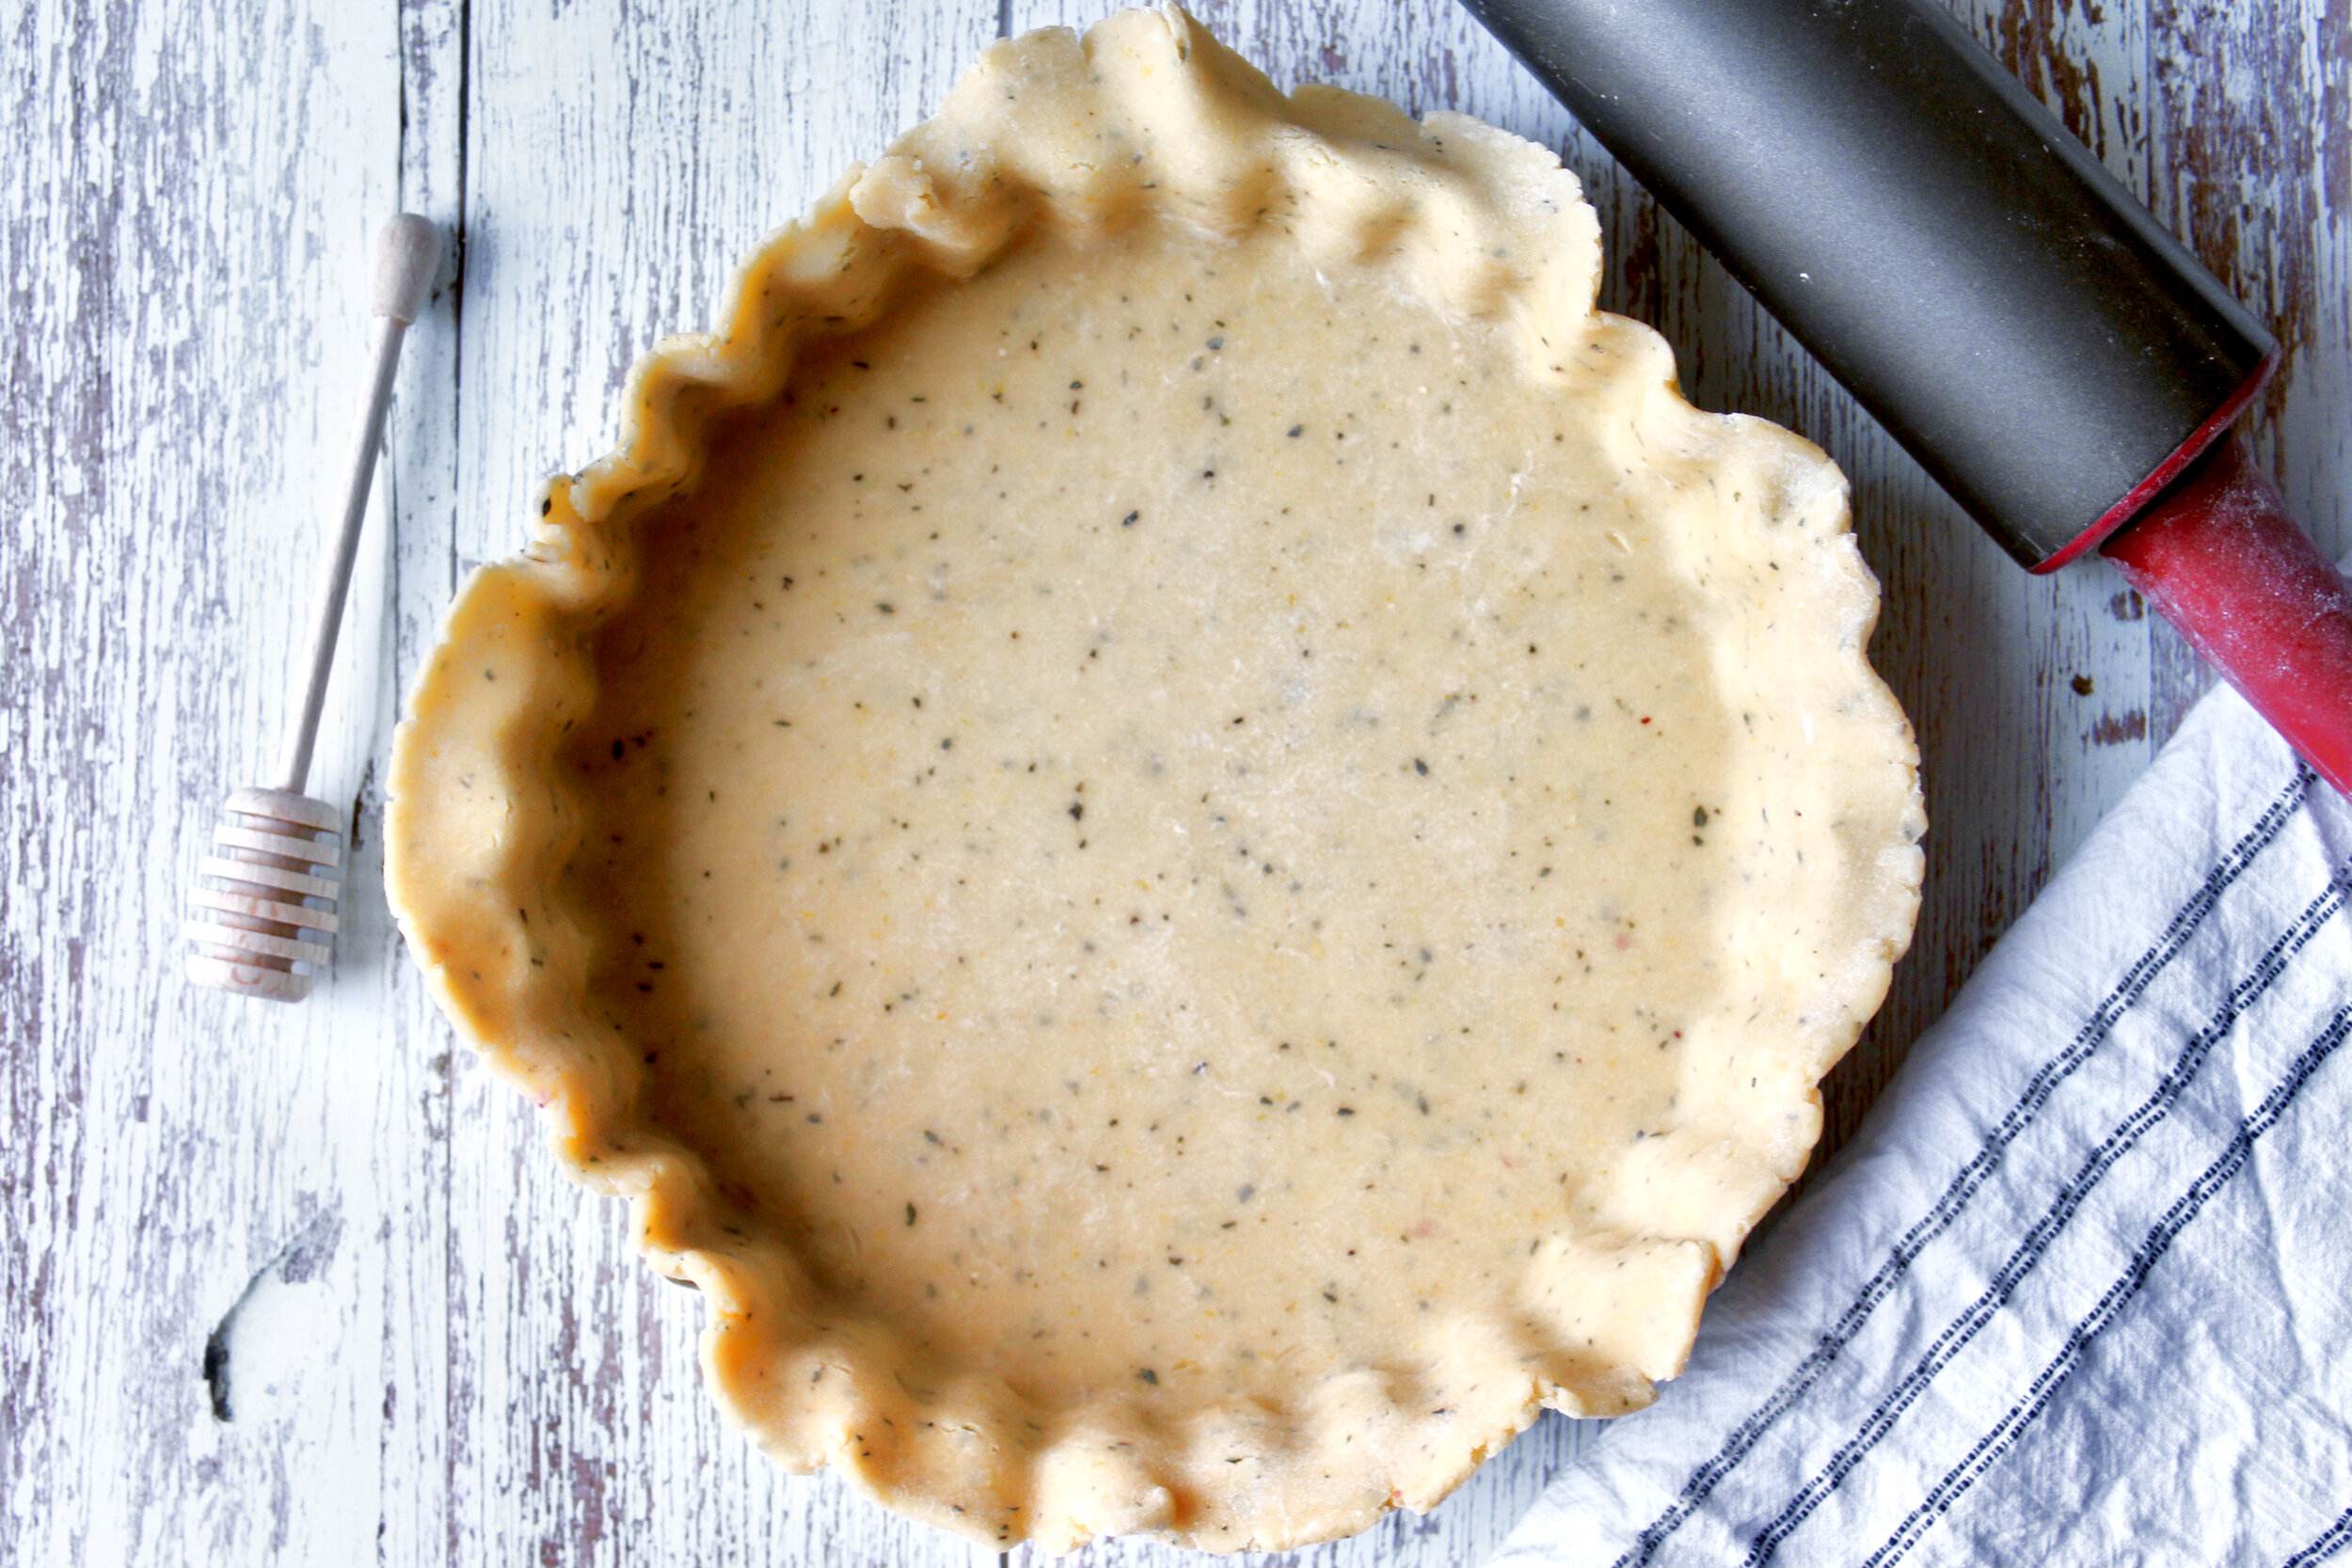
Zest your lemon (as finely as possible) and remove as much of the brown woody part of the thyme as you can. A few green stems is fine. Process those with your flour, sugar, and salt.

Add in the butter and pulse until a wet-sand texture, with some butter pieces a little smaller than peas and the rest is smaller and mixed in with the flour like wet sand.

Whisk the egg yolk, cream, and vanilla together then add to the processor. Pulse a few times, until it begins to clump together and pull away from the edge.

Dump out onto a piece of plastic wrap and pat into a 6” disc. If any flour was left in the corners of your food processor, sprinkle those over the dough before forming into a disc. Double wrap the disc and chill at least an hour, or up to 2 or 3 days. If you want to keep it longer, you need to freeze it then let it thaw in the fridge.

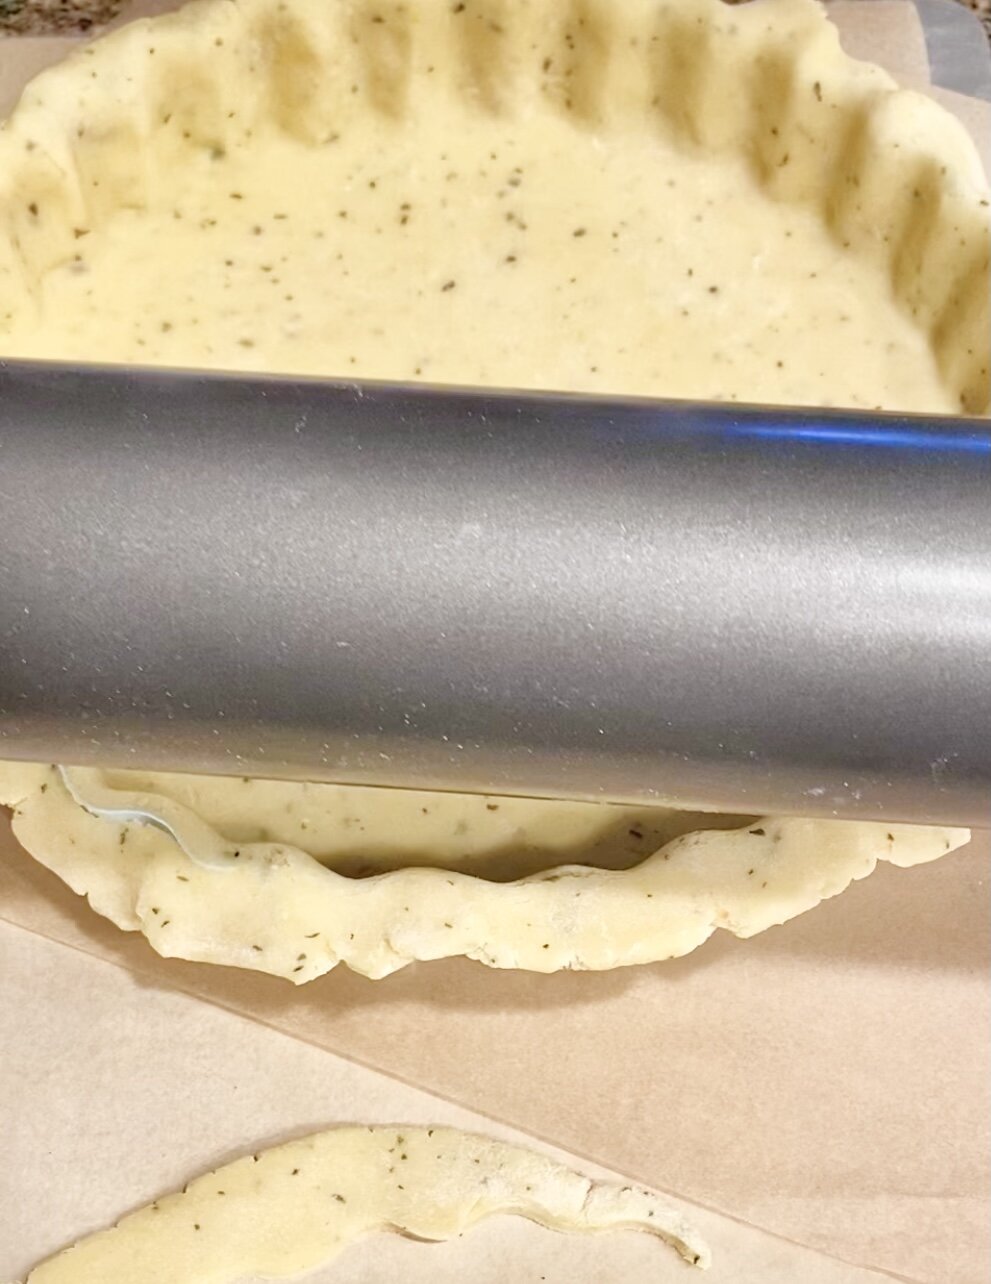
When ready to use, let the dough sit on the counter for 10 minutes, until a little pliable. Lightly flour a clean work surface or rolling mat. Sprinkle more flour over the top. Begin rolling out the dough, rotating the rolling pin as you go. I like to imagine it’s a clock and I need to roll it over every hour—so top down is 12 and 6, left right is 3 and 9, etc. Roll it out to be 2-3 inches bigger in diameter than your tart pan (e.g. about 12” or so for a 10” pan like mine).

Be sure to flip and rotate the dough every so often, sprinkling a tiny bit more flour as needed to 1) keep it from sticking and 2) ensure you’re rolling evenly. I tend to roll the bottom left too thin and the top right too thick. Rotating balances this out.
If any bits of the edge crack or break, gently press them back together with your hands. If the dough has become warm (room temperature), cover it with plastic wrap and refrigerate for 10-20 minutes (sliding it onto a cutting board or rimless cookie sheet helps).

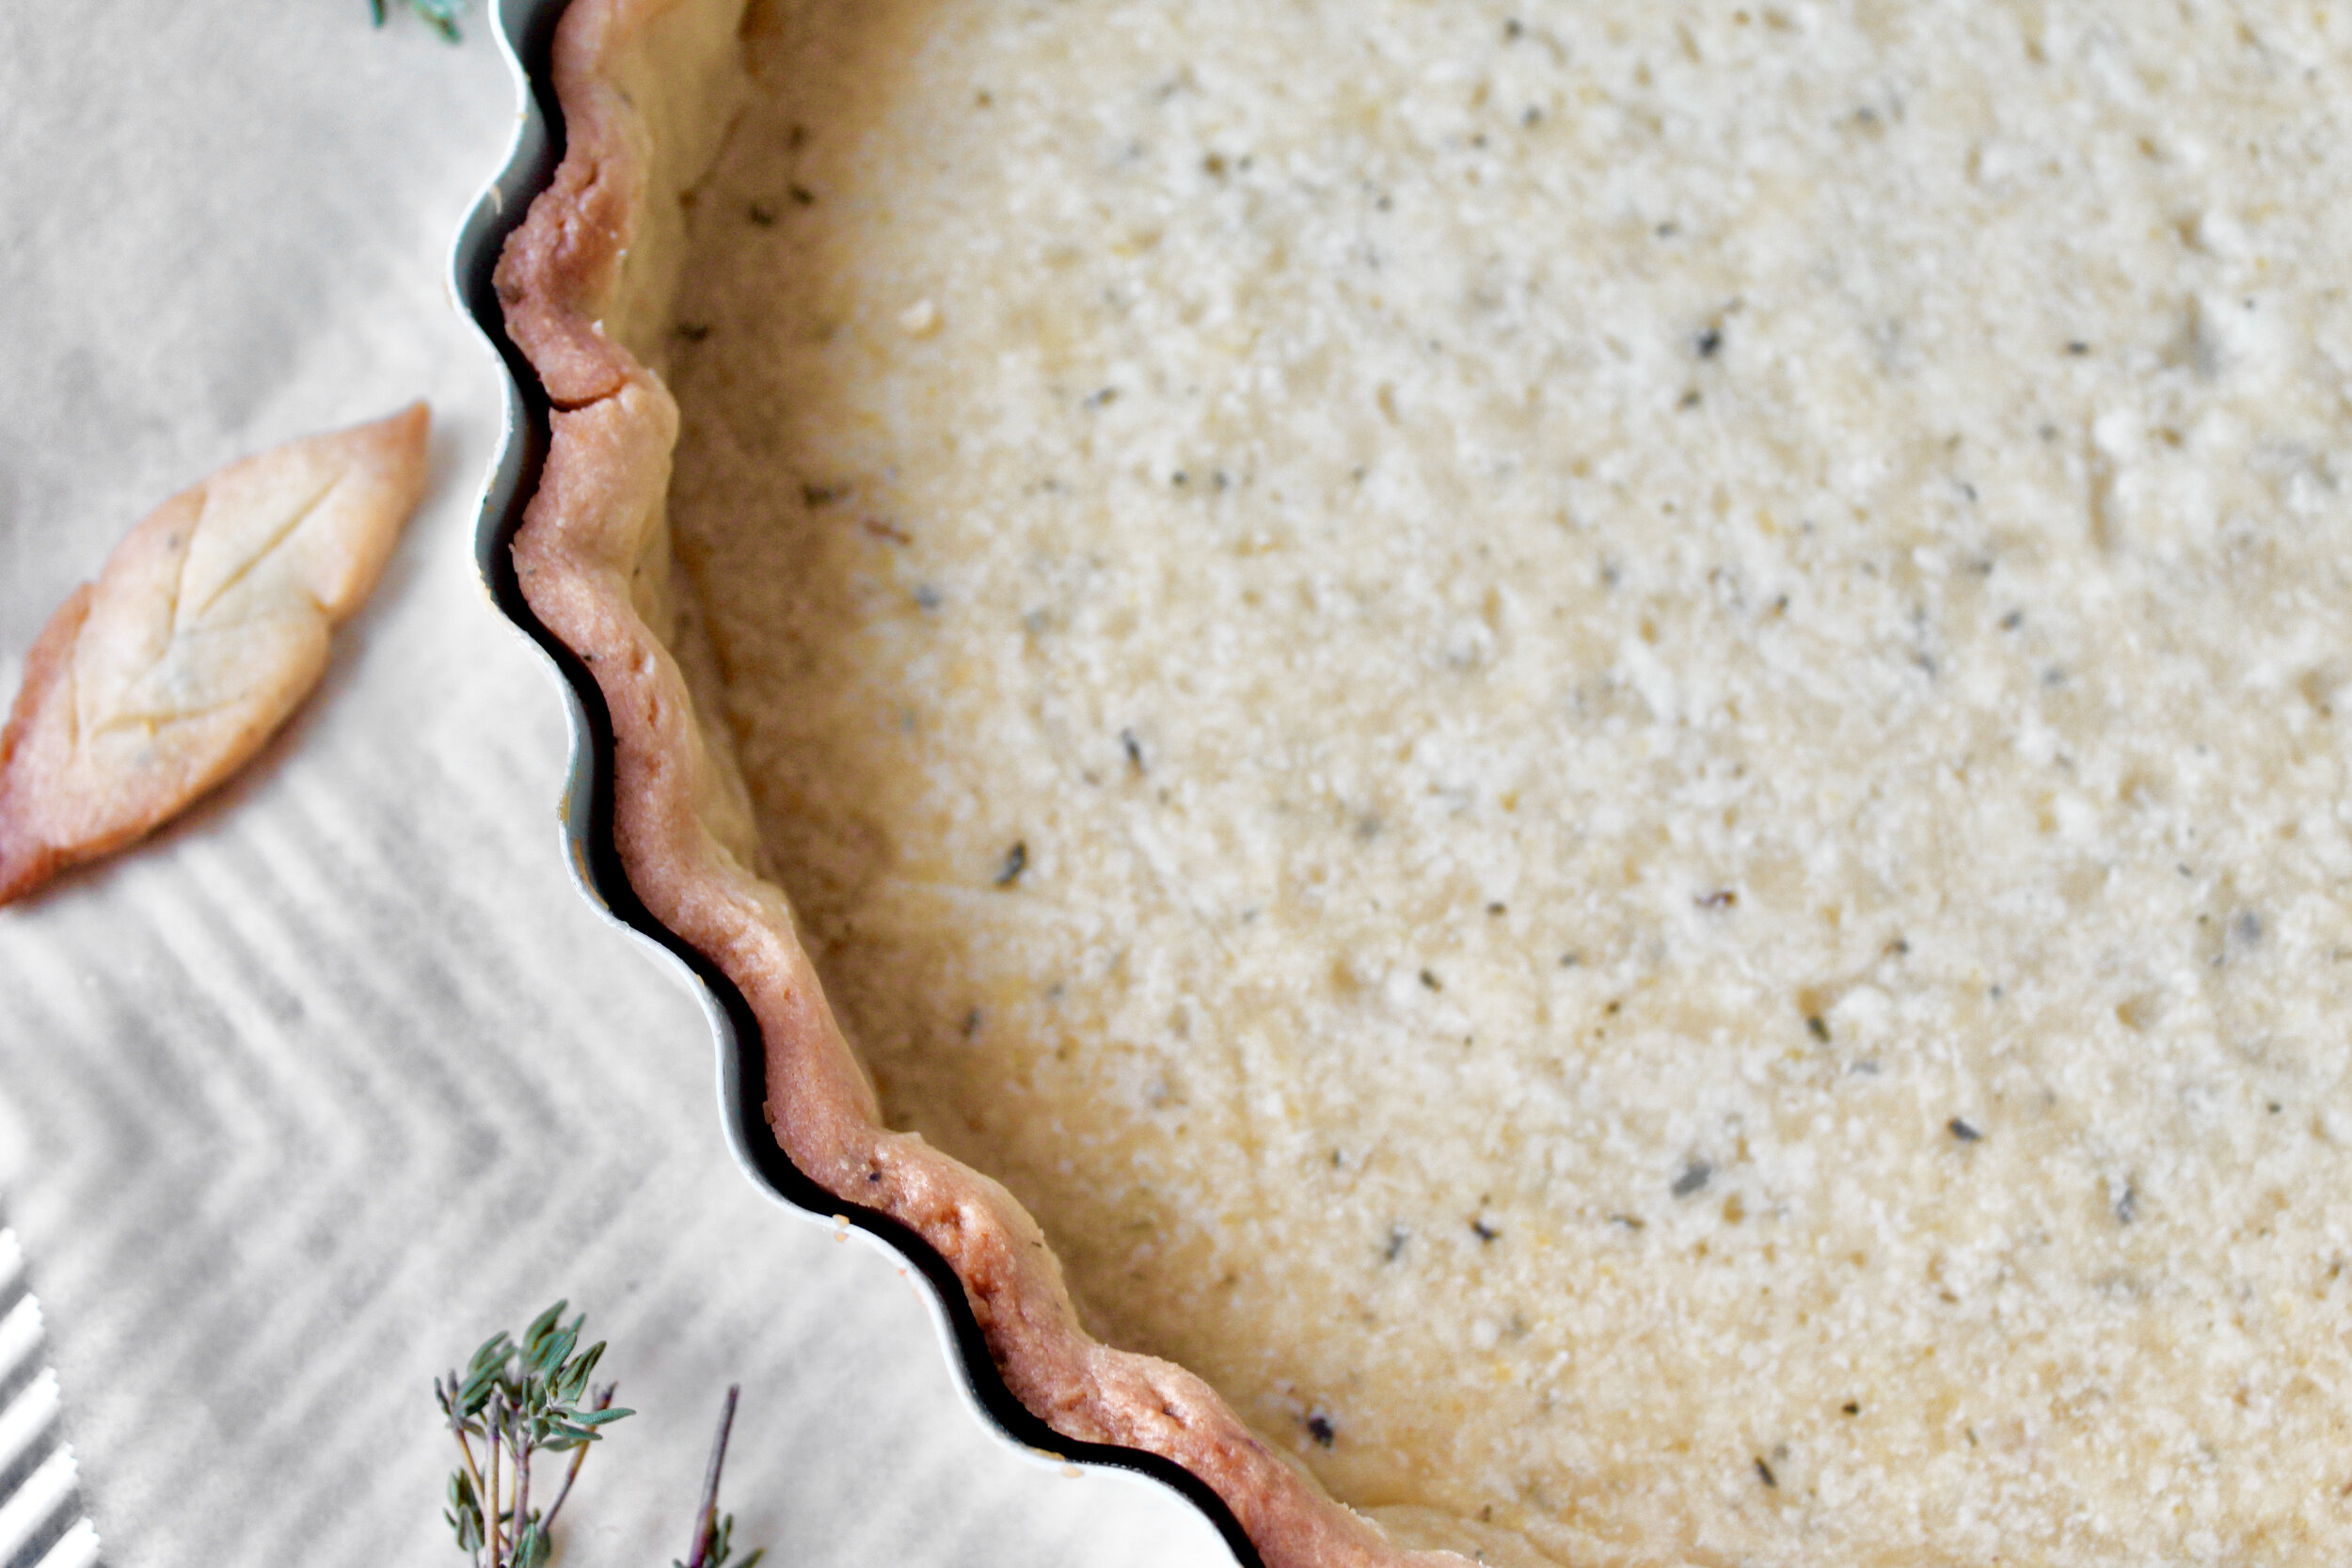
Otherwise, you can gently transfer it to your tart pan. Very gently lift the edges and press it into the corners of the pan, rotating as you go. You want to ease it into the pan. Be sure to press it into the scalloped edges as well, then fold the overhanging crust to a 90 degree angle over the edge.
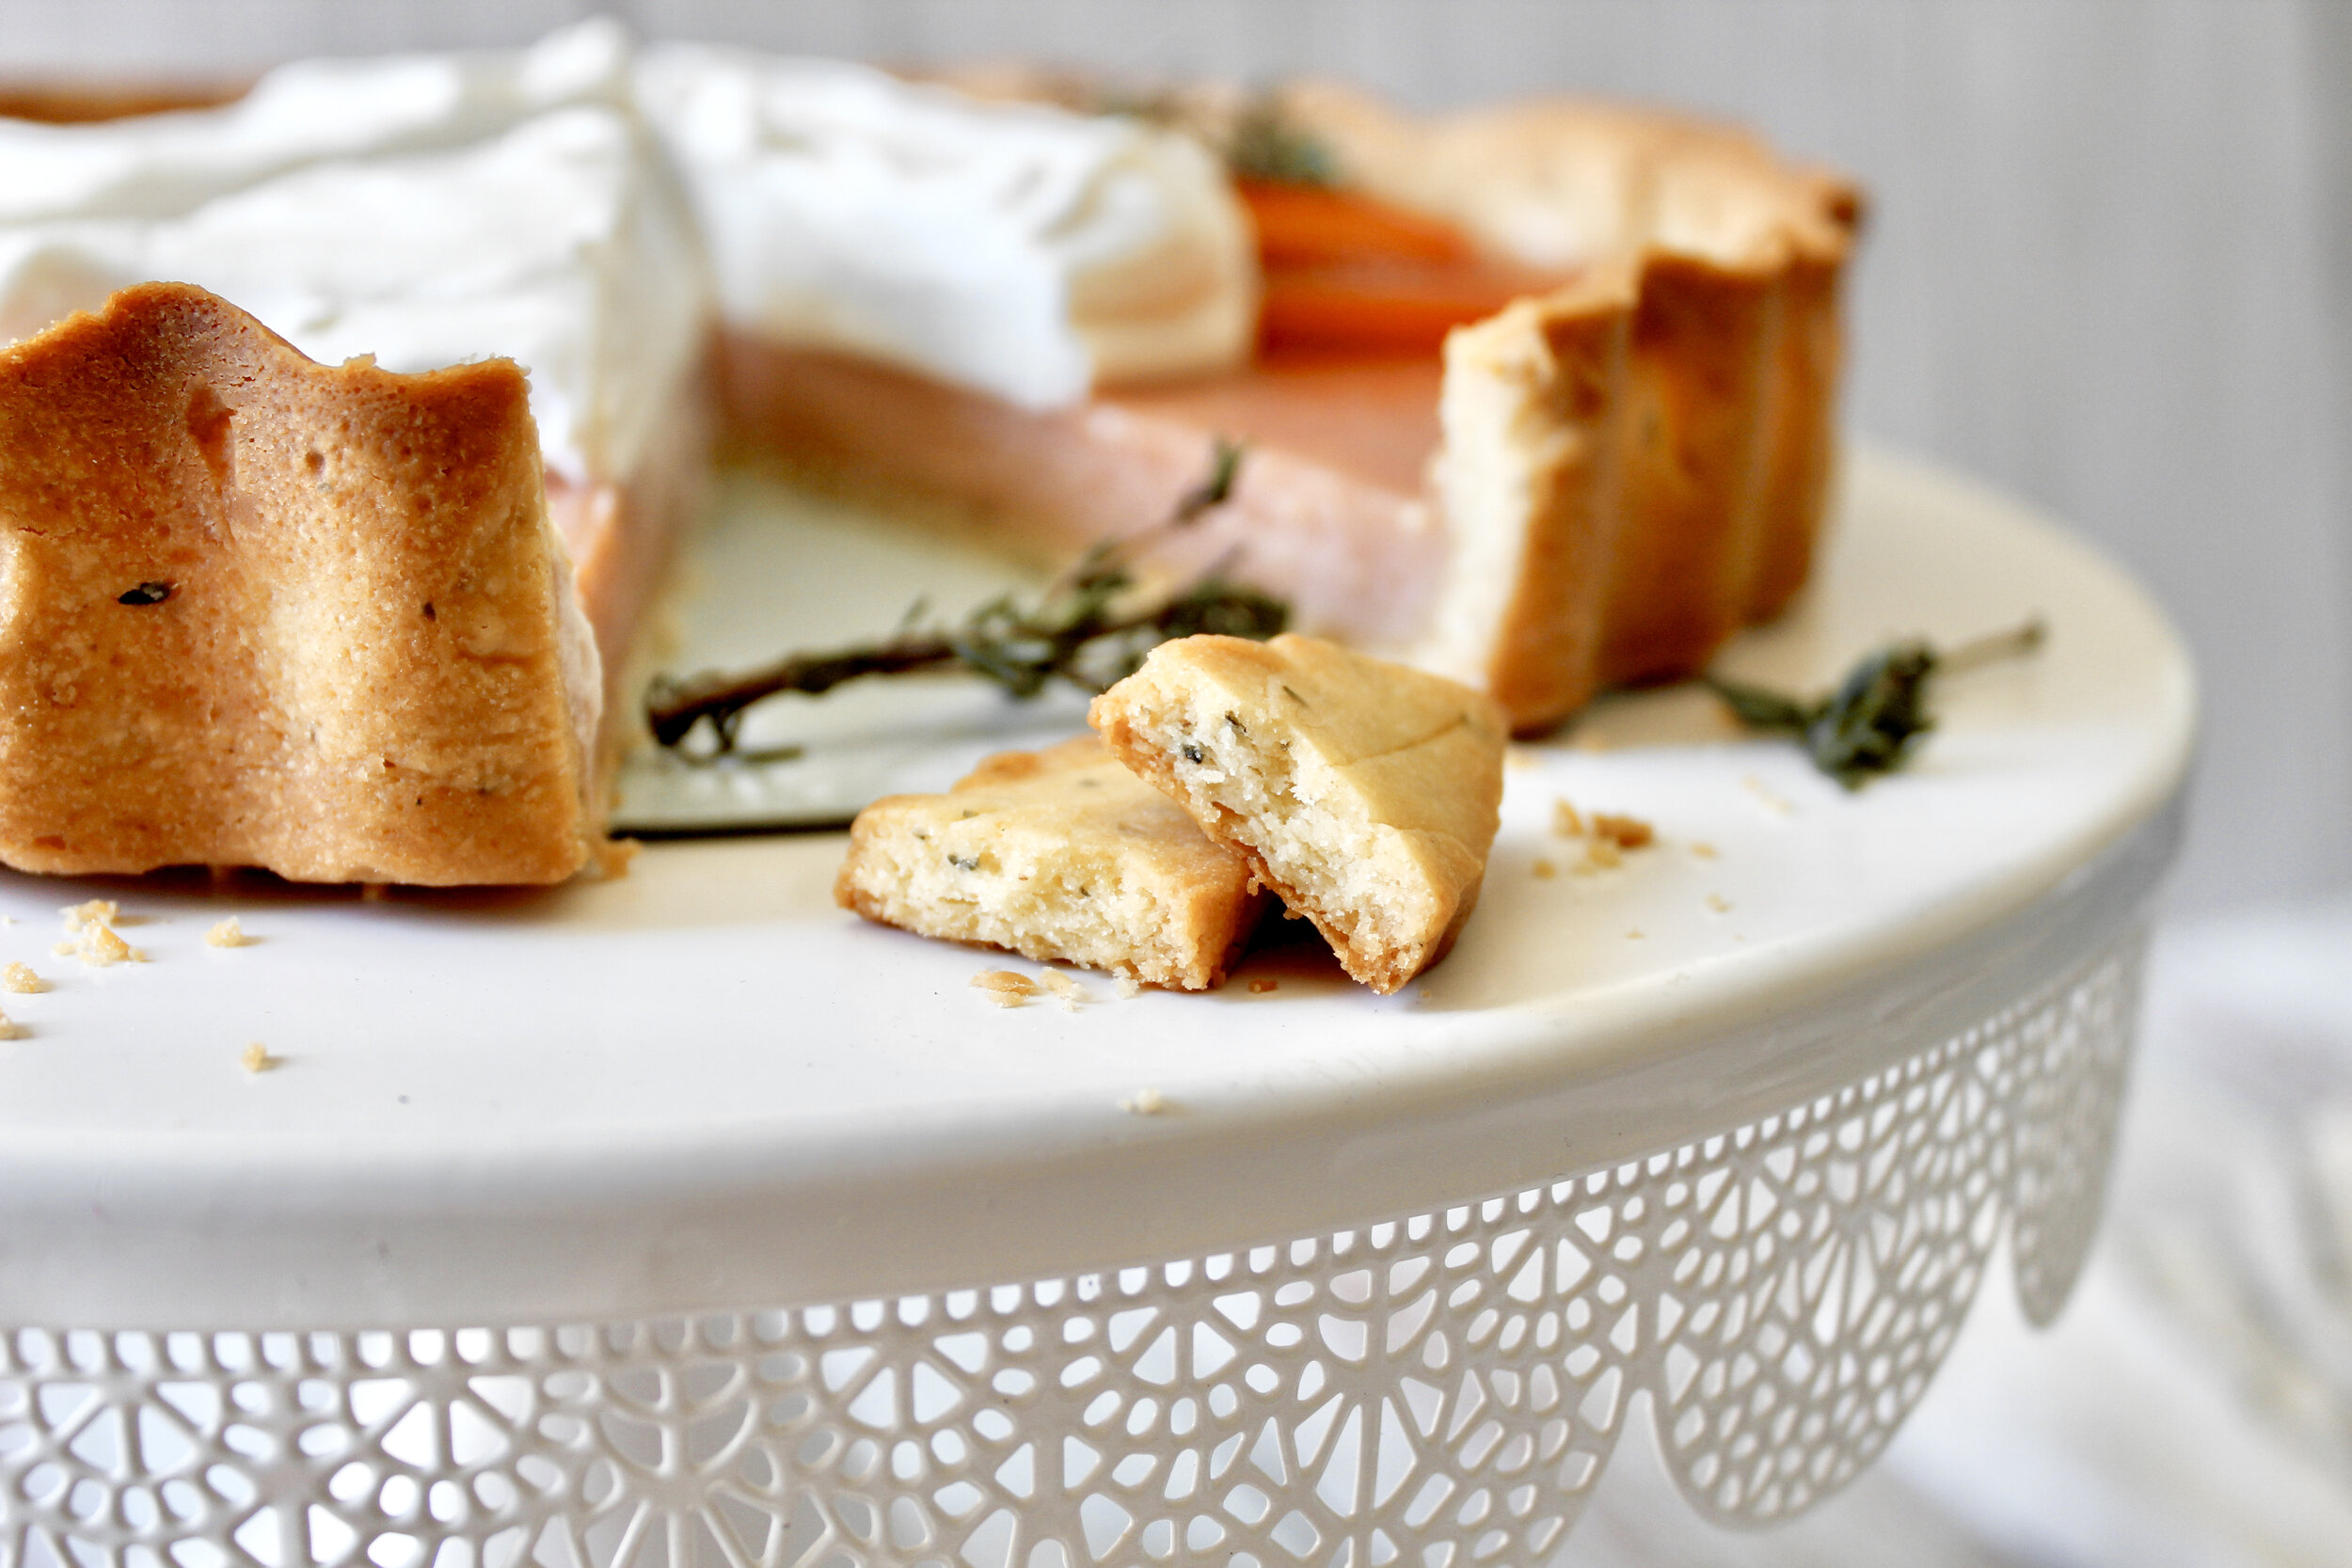
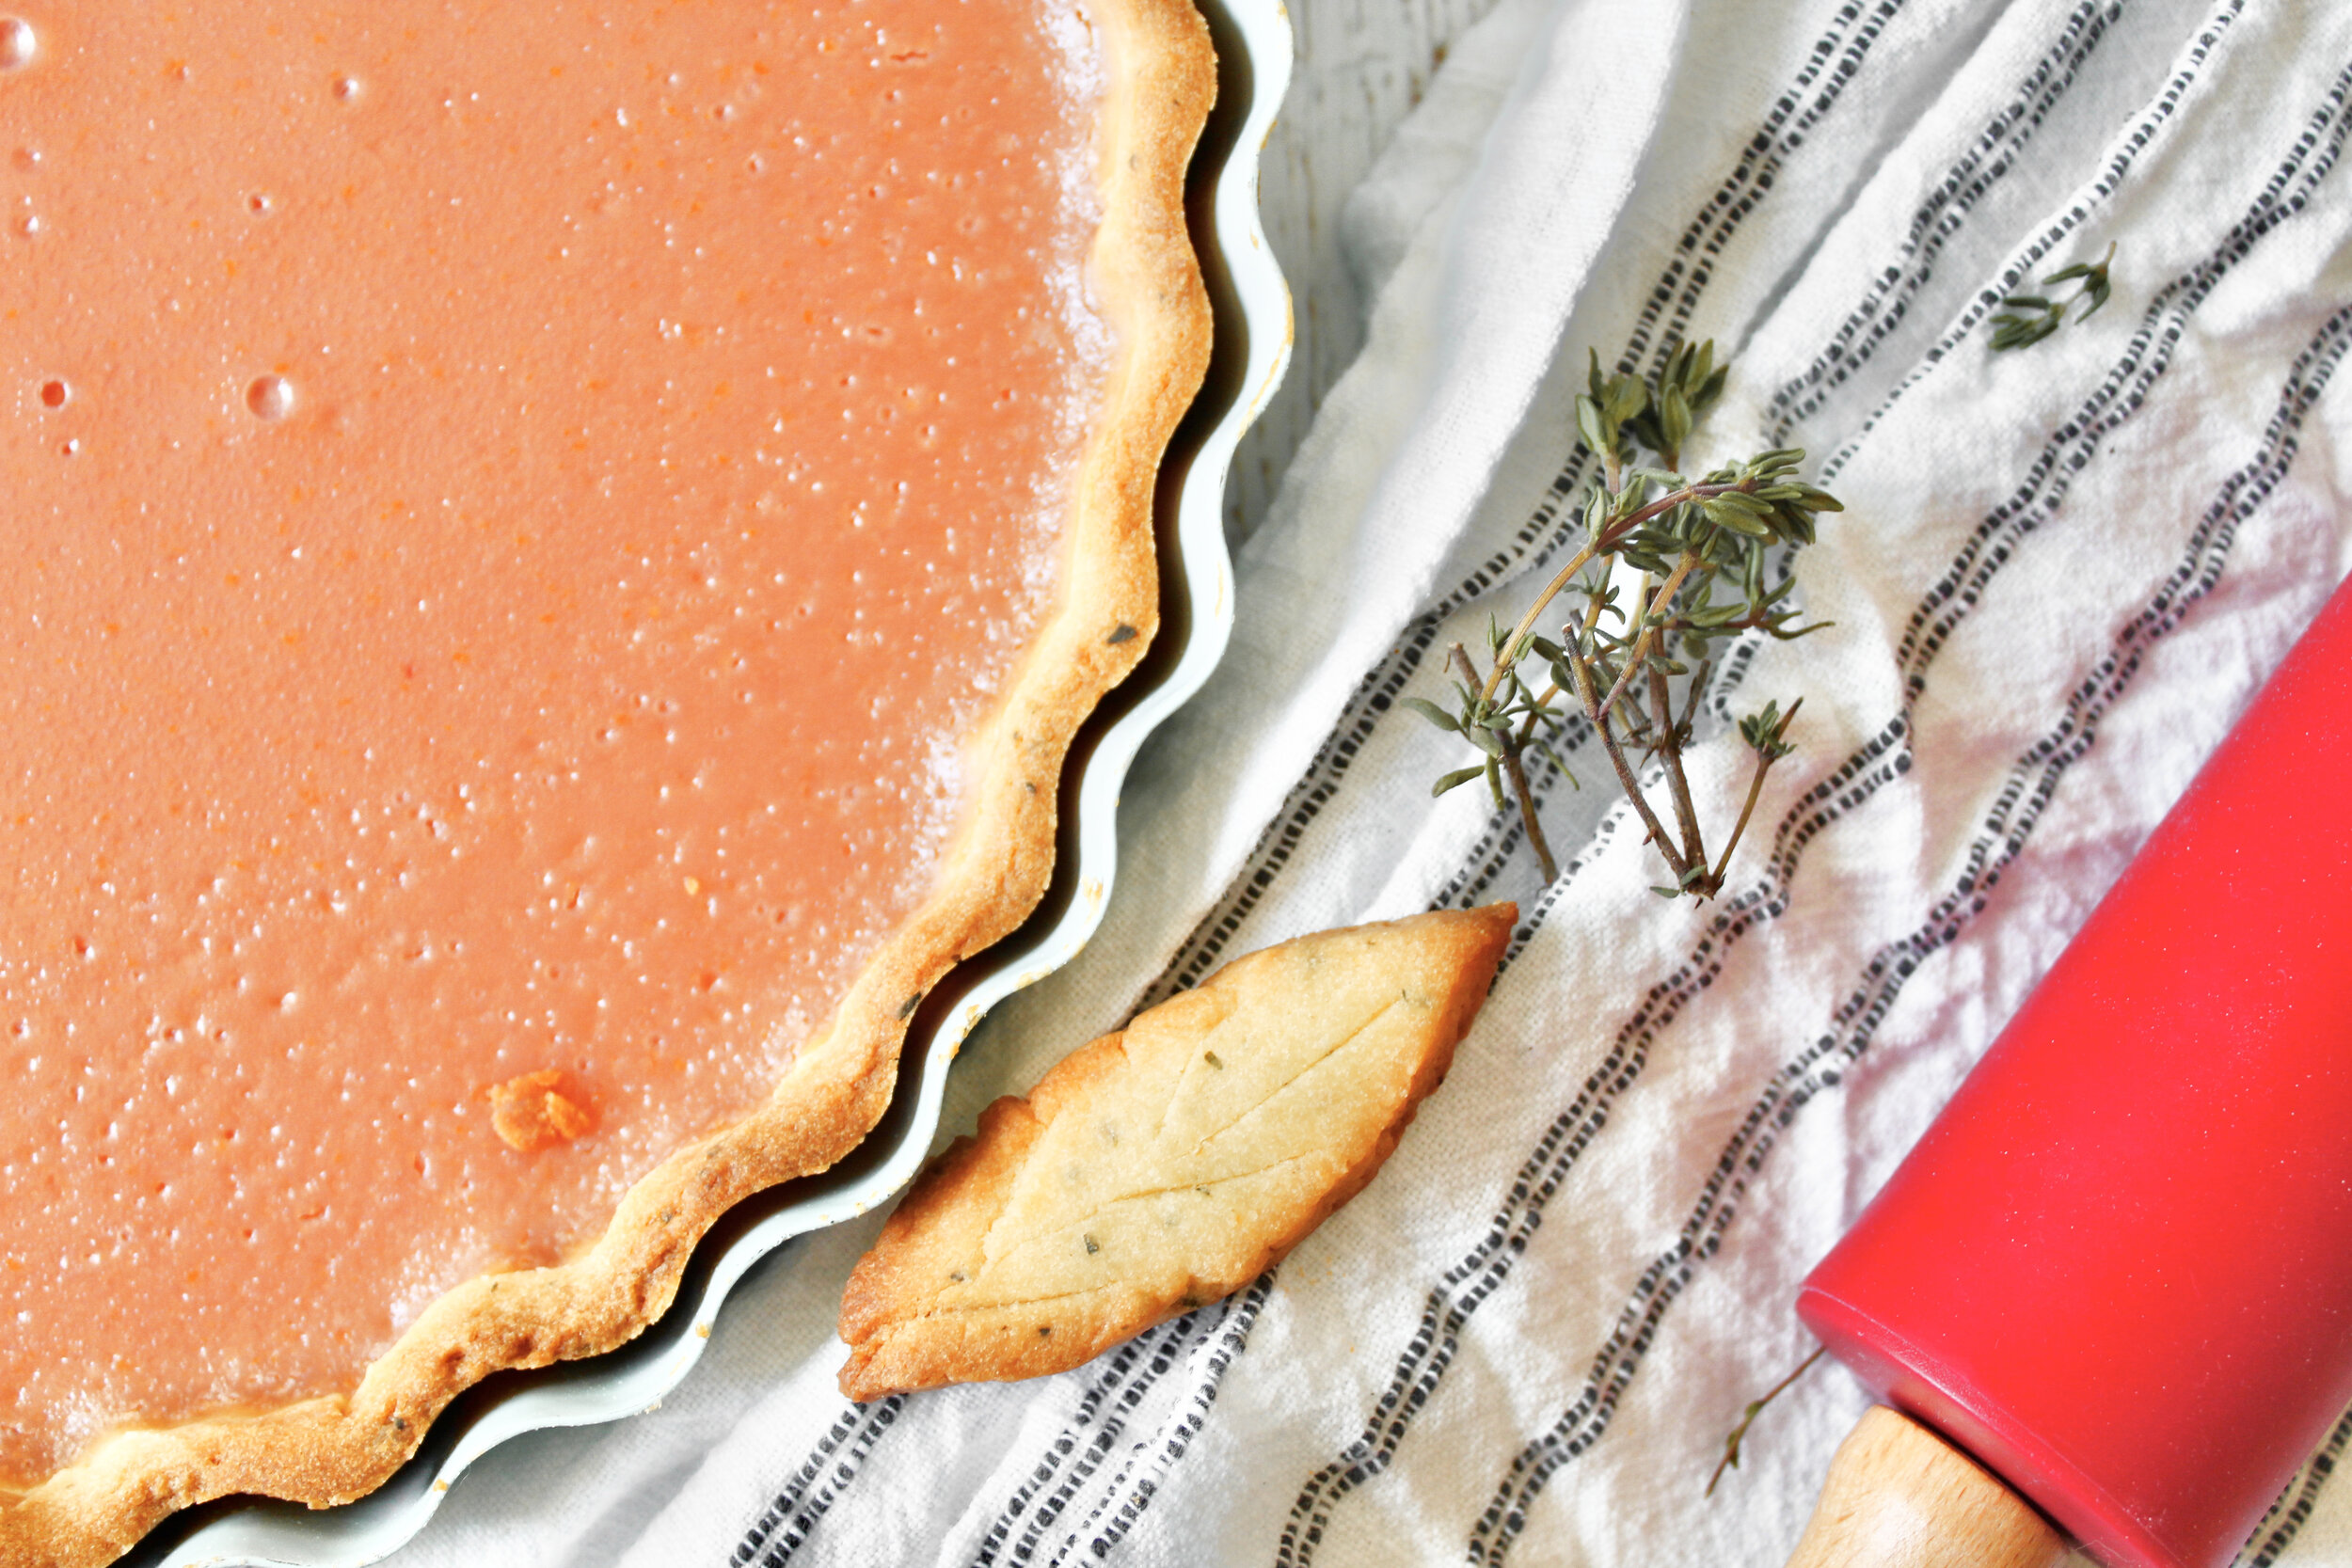
Using a rolling pin or sharp knife, cut off the overhanging edges of the dough. Freeze for 10 minutes to set the crust. Save the trimmings to bake as cookies while you bake the tart!
If pre-baking or par-baking the crust, line with a double layer of foil (criss cross each layer so there’s enough to cover all edges). Loosely fold it over the edge of the pan without sealing it in. Fill the pan with rice or beans or pie weights. Rice is my favorite.

Bake on a parchment lined cookie sheet for 30 minutes. If par-baking, you can fill it at this point then finish baking. If fully pre-baking, remove the rice and foil and bake another 10-15 minutes, until the bottom begins to look golden.
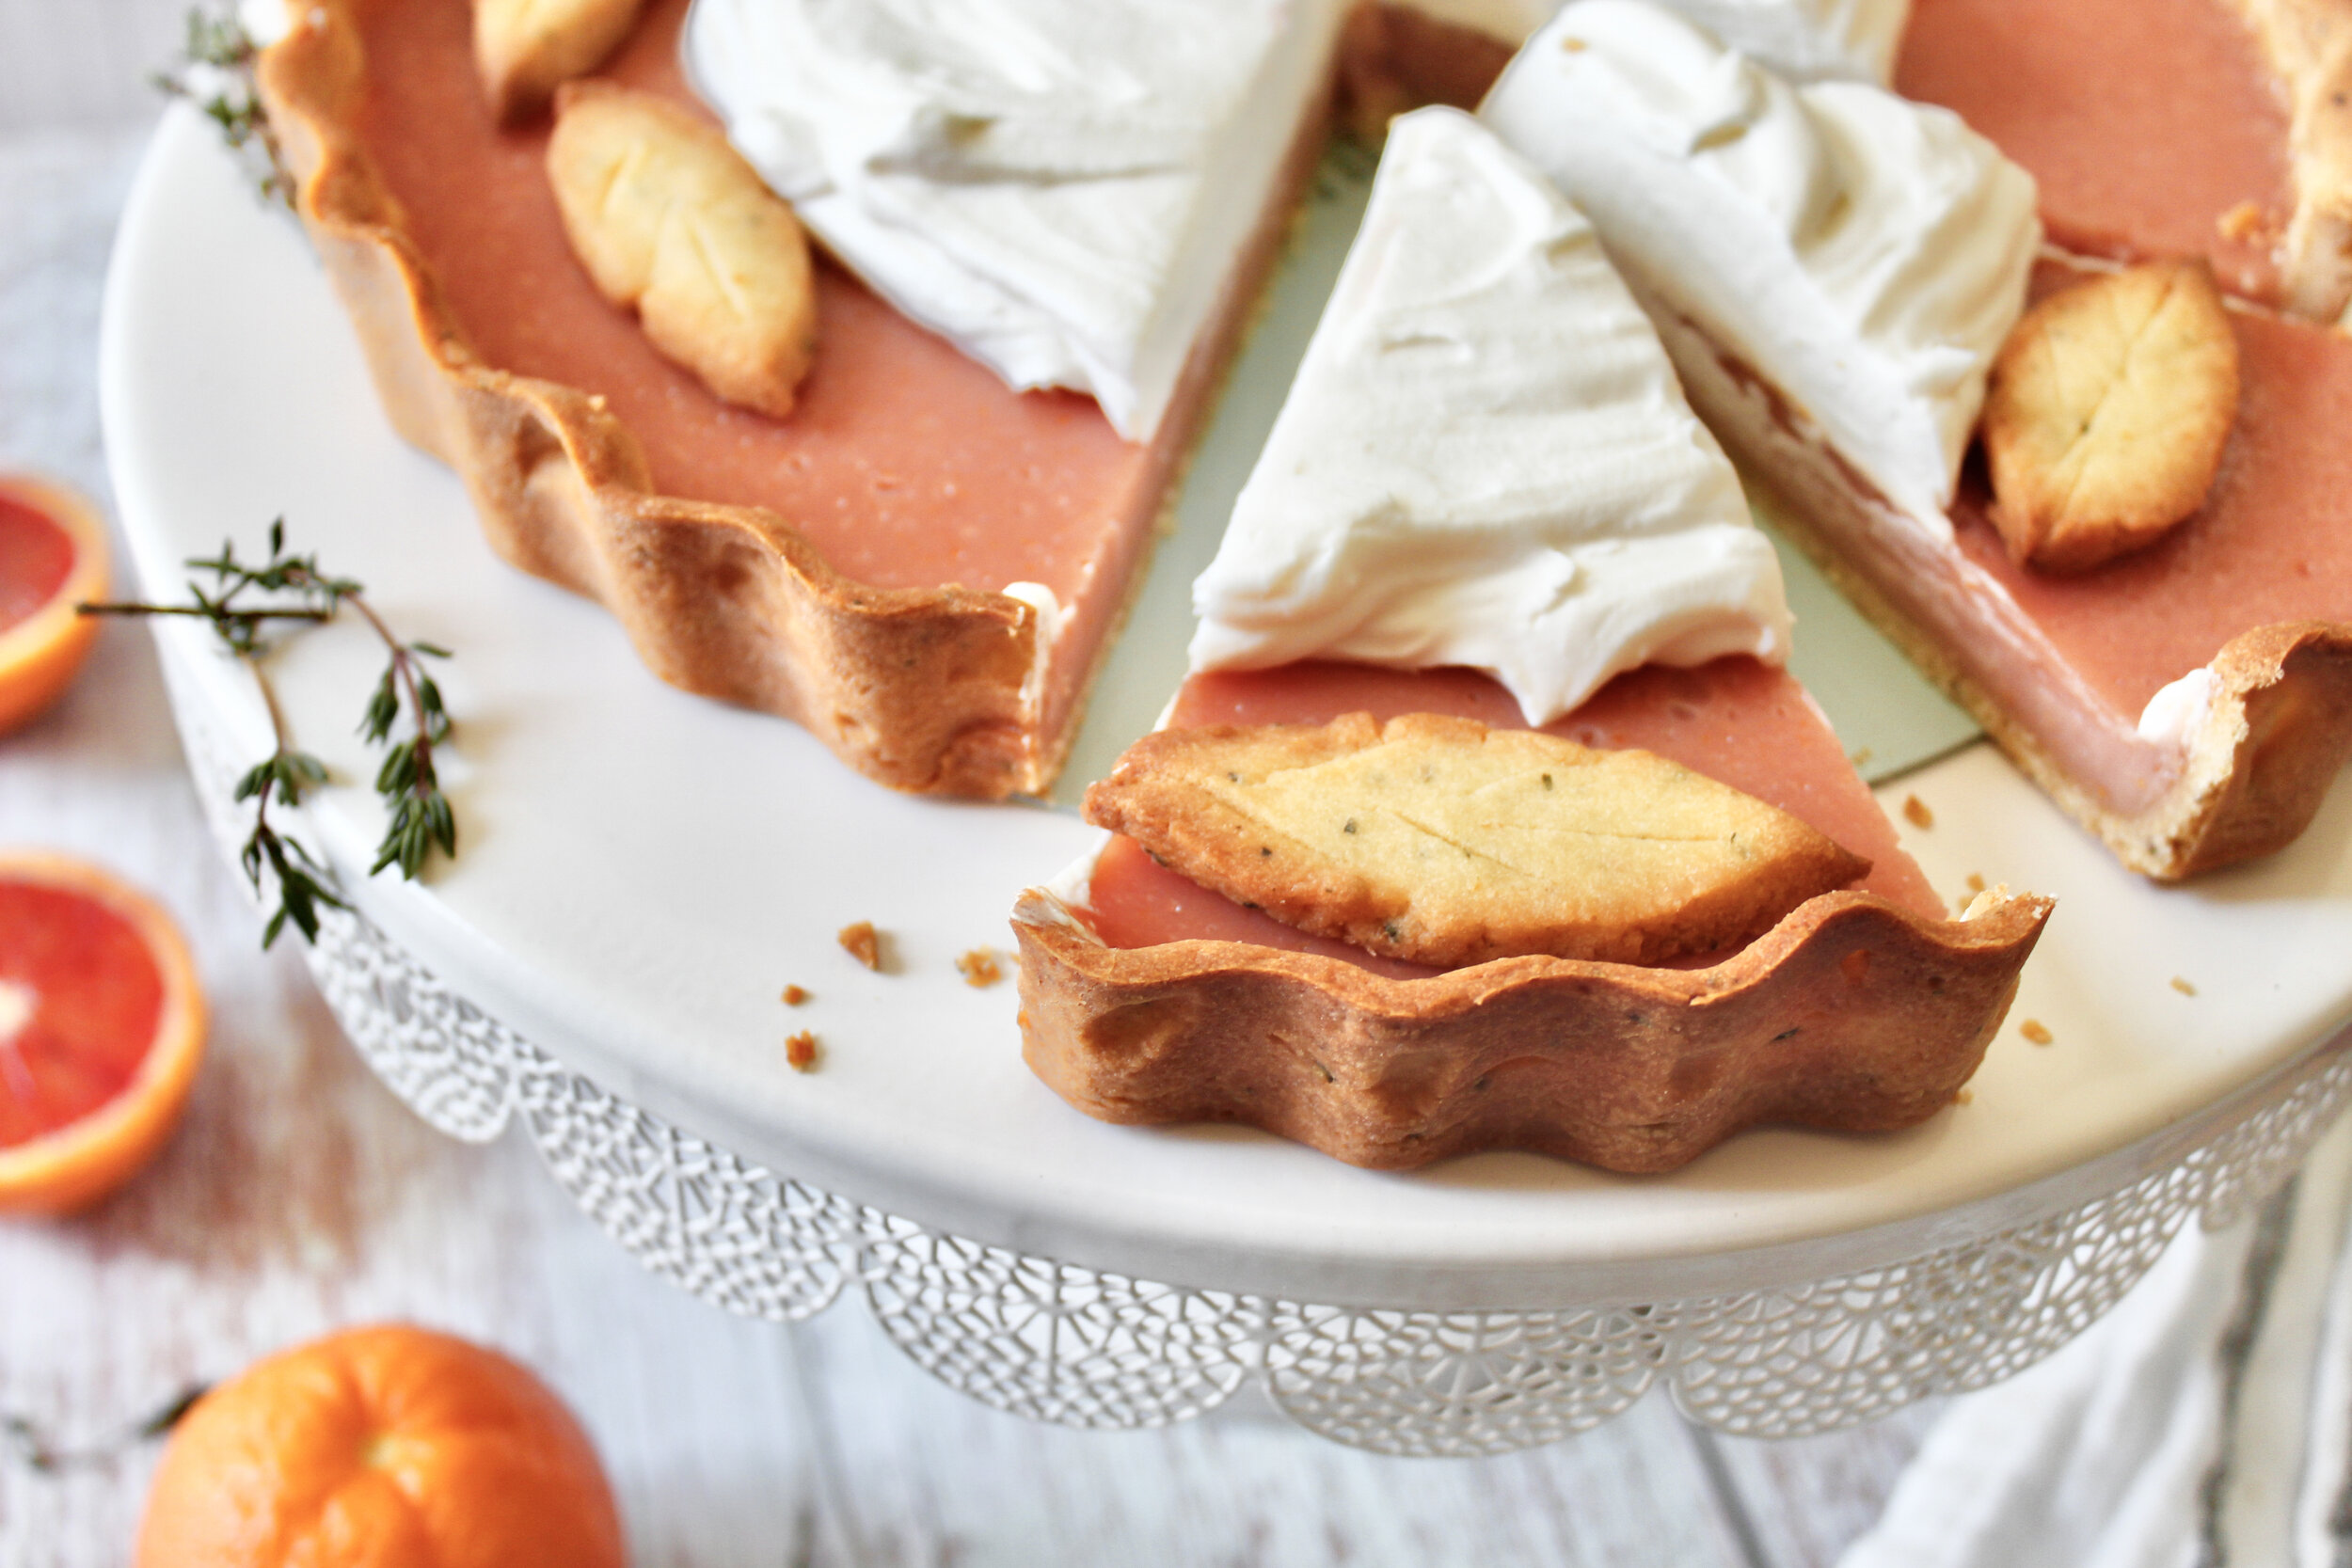
Pairs well with:
Try any of these fillings for this lovely tart crust!
Lemon Curd layered on top of Raspberry Jam Filling
Clementine Creme Patisserie layered with Blueberry Clementine Curd
Try this Key Lime Curd with some whipped cream on top!

Tips and notes for this recipe
Don’t over process the dough
I like that it’s easier to know when this dough is done. Just when the dough begins to come together is when it’s finished. But if you’re worried, you could dump the sandy flour-butter mixture into a bowl and stir the yolk and cream in to be safe. That’s what I typically do with pie dough—I trust my own hands more than a food processor.
Don’t roll or shape hard dough
After chilling, you actually want to let the disc return to pliability, which takes about 10 minutes on the counter. Mine had been on the top shelf of the fridge, where it’s coldest, and I had to warm up the disk a bit by placing my hands on the middle section for a few seconds. But don’t do this if you’re not super familiar with crust textures. Just know that if it’s hard and won’t roll out, wait. Same with placing it in the tart pan. If it’s too stiff, it will crack when you try to shape it to the edges and fluting. However, if it’s too warm, it will begin to melt and lose its shape as you press it into the pan. The rule of thumb is that you shouldn’t be fighting the dough, so use the fridge as well as warming up on the counter to your advantage.

Process the thyme and lemon zest well
No one wants a huge chunk of thyme or lemon zest. Don’t be afraid to pulse the lemon and thyme with the flour until you’re absolutely certain it’s been broken down. Once you begin adding the butter, you're limited on how much you can process the dough, so get those pieces down to beautiful flecks, not whole leaves or long strips of zest.

Use a pastry blender or your hands
If you don’t have a food processor, you can easily use a pastry blender or even your hands to get blend the butter into a sandy texture. However, you’ll first want to chop up the zest and thyme a bit. If using your hands, don’t let the butter get melty. If it does start to melt, chill for 10-20 minutes then continue. Then, once done, chill for 10-20 minutes before adding the egg/cream mixture. For either method, you’ll just stir the egg/cream in gently until it comes together.


Lemon Thyme Shortcrust (Pâté Sucrée)
- prep time: 20-25 minutes (includes rolling and resting)
- chill time: 70-80 minutes (in 2 to 3 parts)
- bake time: 30-40 minutes
- total time: 2 hours, 25 minutes
yields: one crust for a 9” to 10” tart
Ingredients:
- 1 ¼ cups (156g) flour (spooned then leveled)
- ½ cup (65g) powdered sugar
- ¼ teaspoon (3g) sea salt
- 1 tablespoon fresh lemon zest
- 1 tablespoon thyme leaves, woody parts removed
- 8 tablespoons (113g) cold, unsalted butter (diced)
- 1 egg yolk
- 1 ½ tablespoons (22g) heavy whipping cream
- ½ tablespoon vanilla extract
Instructions:
- First, you want to wash your lemon and thyme to remove any dirt. I like to scrub my lemons with vegetable wash. While the thyme dries (you can’t really pat it down easily), dice up your butter then put it in the fridge to keep it nice and chilled.
- Zest your lemon (as finely as possible) and remove as much of the brown woody part of the thyme as you can. A few green stems is fine. Process those with your flour, sugar, and salt.
- Add in the butter and pulse until a wet-sand texture, with some butter pieces a little smaller than peas and the rest is smaller and mixed in with the flour like wet sand.
- Whisk the egg yolk, cream, and vanilla together then add to the processor. Pulse a few times, until it begins to clump together and pull away from the edge. (If it’s easier, you can dump the flour into a bowl and gently stir the egg/cream in to avoid over mixing.)
- Dump out onto a piece of plastic wrap and pat into a 6” disc. If any flour was left in the corners of your food processor, sprinkle those over the dough before forming into a disc. Double wrap the disc and chill at least an hour, or up to 2 or 3 days. If you want to keep it longer, you need to freeze it then let it thaw in the fridge.
- When ready to use, let the dough sit on the counter for 10 minutes, until a little pliable. Lightly flour a clean work surface or rolling mat. Sprinkle a little more flour over the top. Begin rolling out the dough, rotating the rolling pin as you go. I like to imagine it’s a clock and I need to roll it over every hour—so top down is 12 and 6, left right is 3 and 9, etc. Roll it out to be 2-3 inches bigger in diameter than your tart pan (e.g. a little over 12” for a 10” pan).
- Be sure to flip and rotate the dough every so often, sprinkling a tiny bit more flour as needed to 1) keep it from sticking and 2) ensure you’re rolling evenly. I tend to roll the bottom left too thin and the top right too thick. Rotating balances this out.
- If any bits of the edge crack or break, gently press them back together with your hands. If the dough has become warm (room temperature), cover it with plastic wrap and refrigerate for 10-20 minutes (sliding it onto a cutting board or rimless cookie sheet helps). Otherwise, you can gently transfer it to your tart pan. Very gently lift the edges and press it into the corners of the pan, rotating as you go. You want to ease it into the pan. Be sure to press it into the scalloped edges as well, then fold the overhanging crust to a 90 degree angle over the edge.
- Using a rolling pin or sharp knife, cut off the overhanging edges of the dough. Freeze for 10 minutes to set the crust. Cut any trimmings into cookie-like shapes or leaves to use as decoration on your finished tart or simply to eat! You can bake them on the parchment lined cookie sheet next to the tart (see step 11), but you’ll need to remove them after they turn golden, around 10-12 minutes.
- If pre-baking or par-baking the crust, line with a double layer of foil (criss cross each layer so there’s enough to cover all edges). Loosely fold it over the edge of the pan without sealing it in. Fill the pan with rice or beans or pie weights. Rice is my favorite.
- Bake on a parchment lined cookie sheet for 30 minutes at 375 (or as directed by your recipe). If par-baking, you can fill it at this point then finish baking. If fully pre-baking (for a no-bake filling), remove the rice and foil and bake another 10-15 minutes, until the bottom begins to look golden.
Enjoy!