
All-Butter Pie Crust
This flaky, all-butter pie crust is the perfect base to complement any pie.
The story
Yep, I’m on a pie kick. It’s part of the baking goals I set for myself in 2020. Not a vision board and not a New Years resolution. The first is cheesy (get it, 2020 vision?) and the second is doomed to create self-doubt or even self-hatred. Most resolutions are based on what you’d like to change about yourself, somehow building in us the idea that we aren’t good enough and need to change and we must do it in a rigid timeframe based on the earth’s journey around the sun. How does that make any sense?

I’ve learned that if there’s a serious need for change in your life—physical health, mental health, relationships, spiritual, etc.—then make it now. Despite what we tell ourselves, January 1 doesn’t bring with it magic fairy dust that suddenly gives us the ability to change what we’ve always wanted to Or even what we truly need to.

Instead, I set some goals for myself on this blog. Technically 2020 goals, but we’ll see what happens. They’re just my current goals and I happened to make them during Christmas break, around New Years.
Plus, I’ve found I much prefer and better complete goals like watch all the James Bond movies in order (my husband’s 2018 goal) or learn to make macarons and become an expert at pies (instead of cringing for two hours until it’s over and I see what I get). These goals fill me with excitement, not self-criticism.

Anyway, enough with the proselytizing. On to pie. Cause, ya know, I called this site Poetry & Pies. I feel I ought to be at least decently skilled at making pies.
As I said recently, my favorite and most successful pie crust uses shortening. But I rarely use it anymore. I don’t feel good about using shortening. In anything but pie, it has a gritty, grainy, greasy taste.
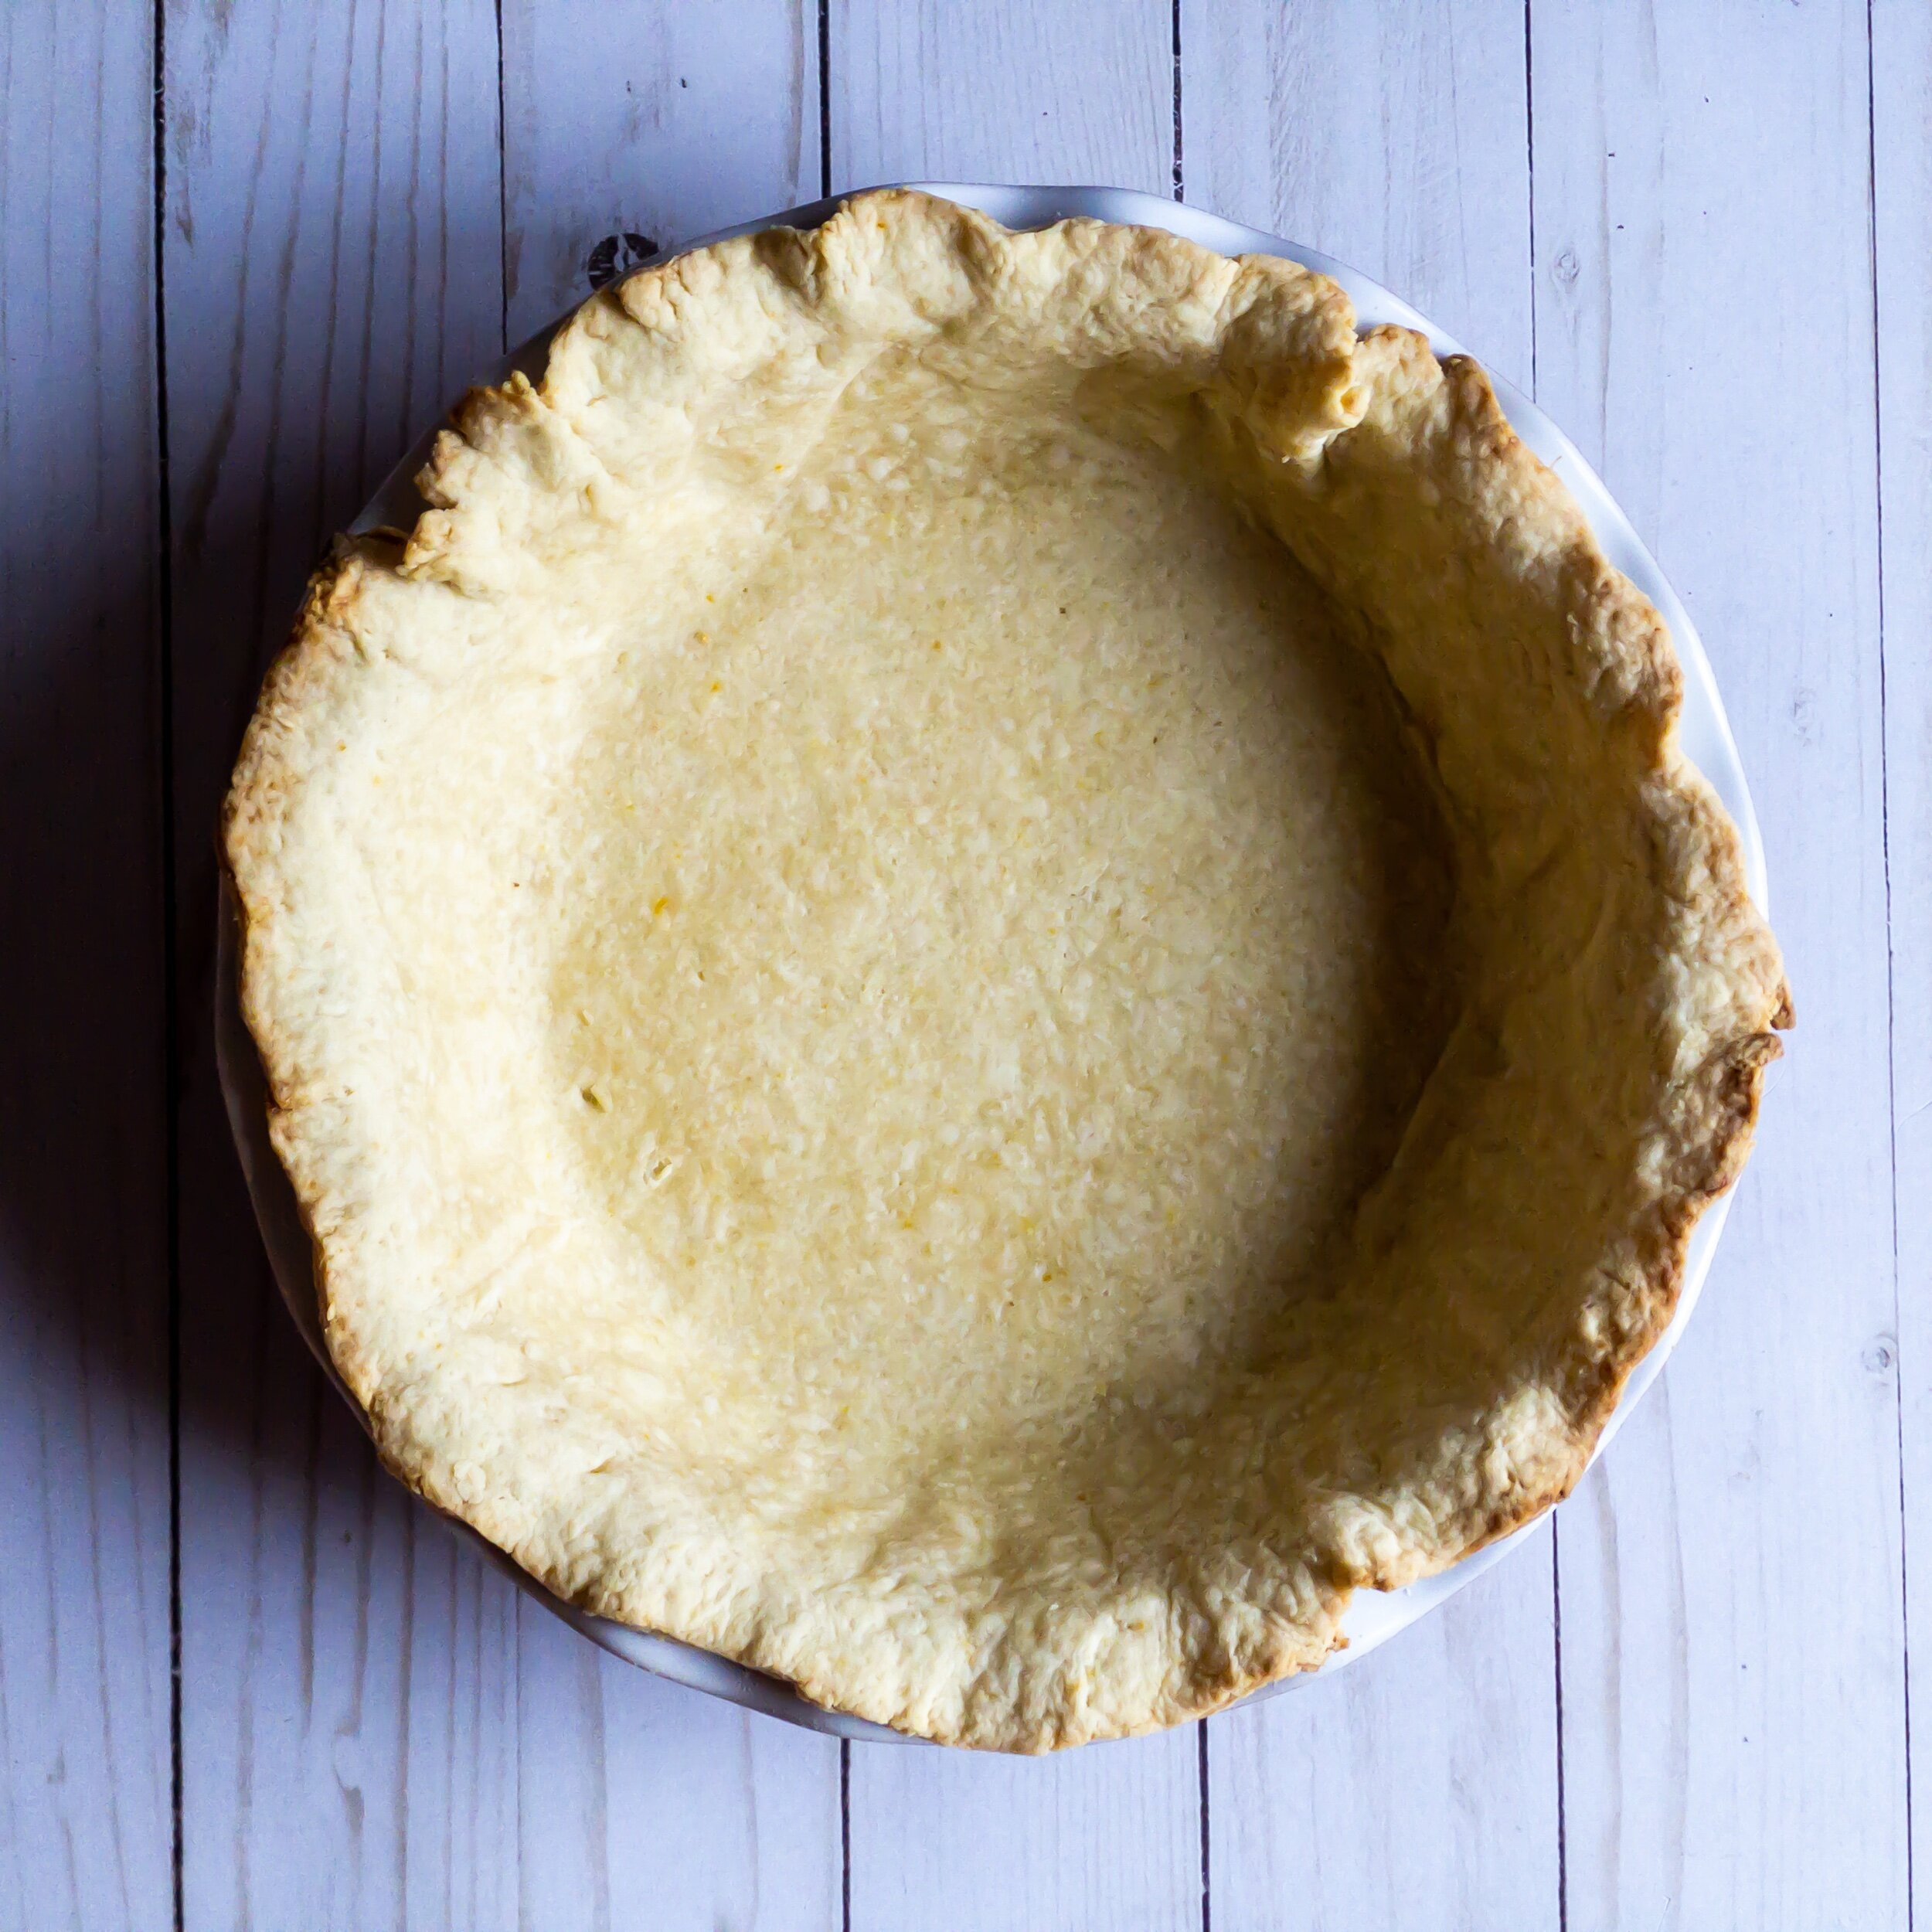
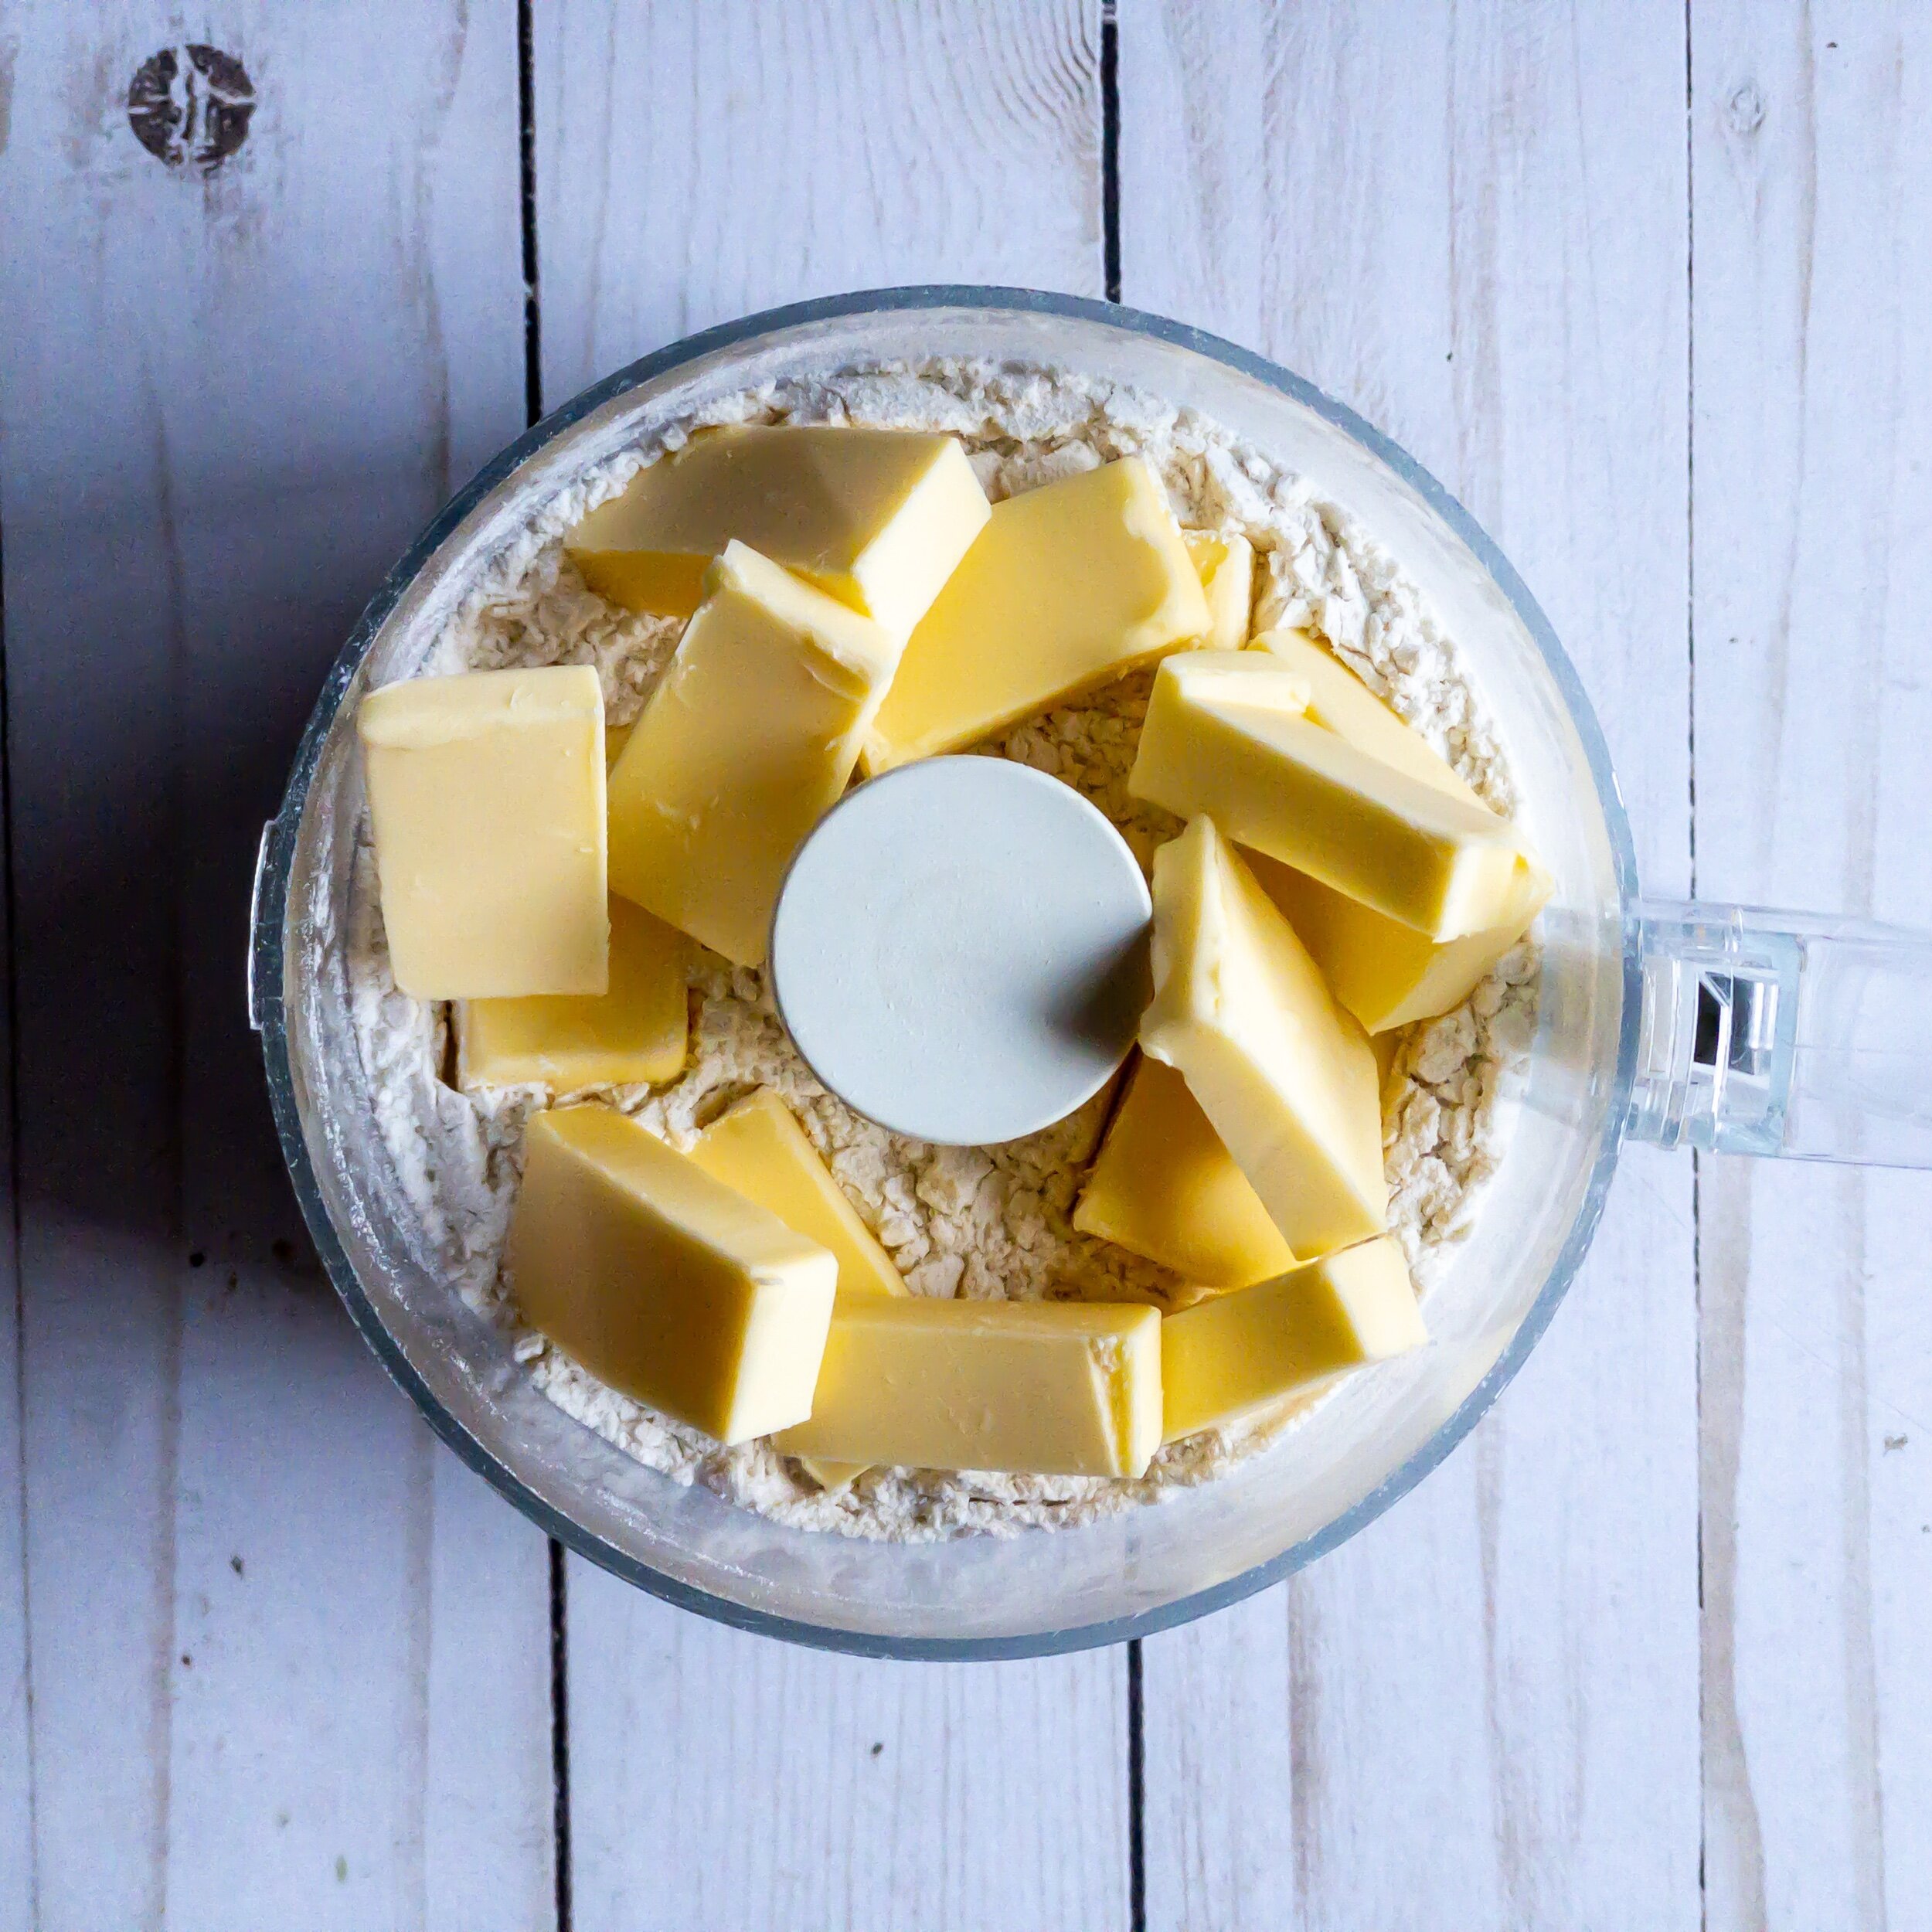
However, I’ve weirdly struggled with all-butter crusts. Having more than one type of fat (like butter and shortening) helps add flakiness. I also tend to over blend the butter, which turns it into more of a short crust (used for tarts). You want pea-ish sized pieces of butter before you add your water, but you also don’t want large clumps of flour that have no butter dispersed in them.
The solution? More butter.
Butter is often the answer, specifically using more of it. Most all-butter pie crust recipes call for similar amounts to what mine uses. It’s not exactly proprietary information that you need about half a cup of butter and a little over a cup of flour or so per crust. And one day I tried just a little more butter, and that solved the problem. My faithful friend to the rescue yet again. #imighthaveanaddiction

Tips for this recipe
Follow my pie crust basics
Most of what I can teach you about pie crusts is here.
Try a pastry blender if a processor isn’t yielding a perfect crust
Food processors save so much time and elbow grease with pie crusts. However, they add cleaning time (at least my behemoth does) and can lead to flour clumping in the corners and unevenly distributed butter. Pastry blenders let you have total control over your crust, including stopping to gently stir if flour is getting stuck in a corner, and I’ve found that they keep me from over blending the butter, partly because my arm is tired.

An almost-blended dough that’s about 1 tablespoon of super cold vodka away from pulling from the edges to tell me it’s done.
Vodka=flakier crust
I don’t even drink vodka. I just keep it around for pie crusts. It evaporated faster than water, leading to a flakier crust. If you use a high quality brand, you won’t taste it in the finished crust, plus all the alcohol cooks out during baking.
Flavor to your filling
I love adding a teaspoon or so if cinnamon to crusts for berry pies or some finely grated lemon zest for lemon merengue. The key is adding it with the flour so it evenly distributes.

Sugar should be fine
We use organic sugar, which comes in slightly larger crystals. One reason I like my food processor for crust is that it helps blend the sugar to smaller pieces. I’ve also used powdered sugar when using a pastry blender, but you need to reduce the amount by about half.

Smooth edges before refrigerating
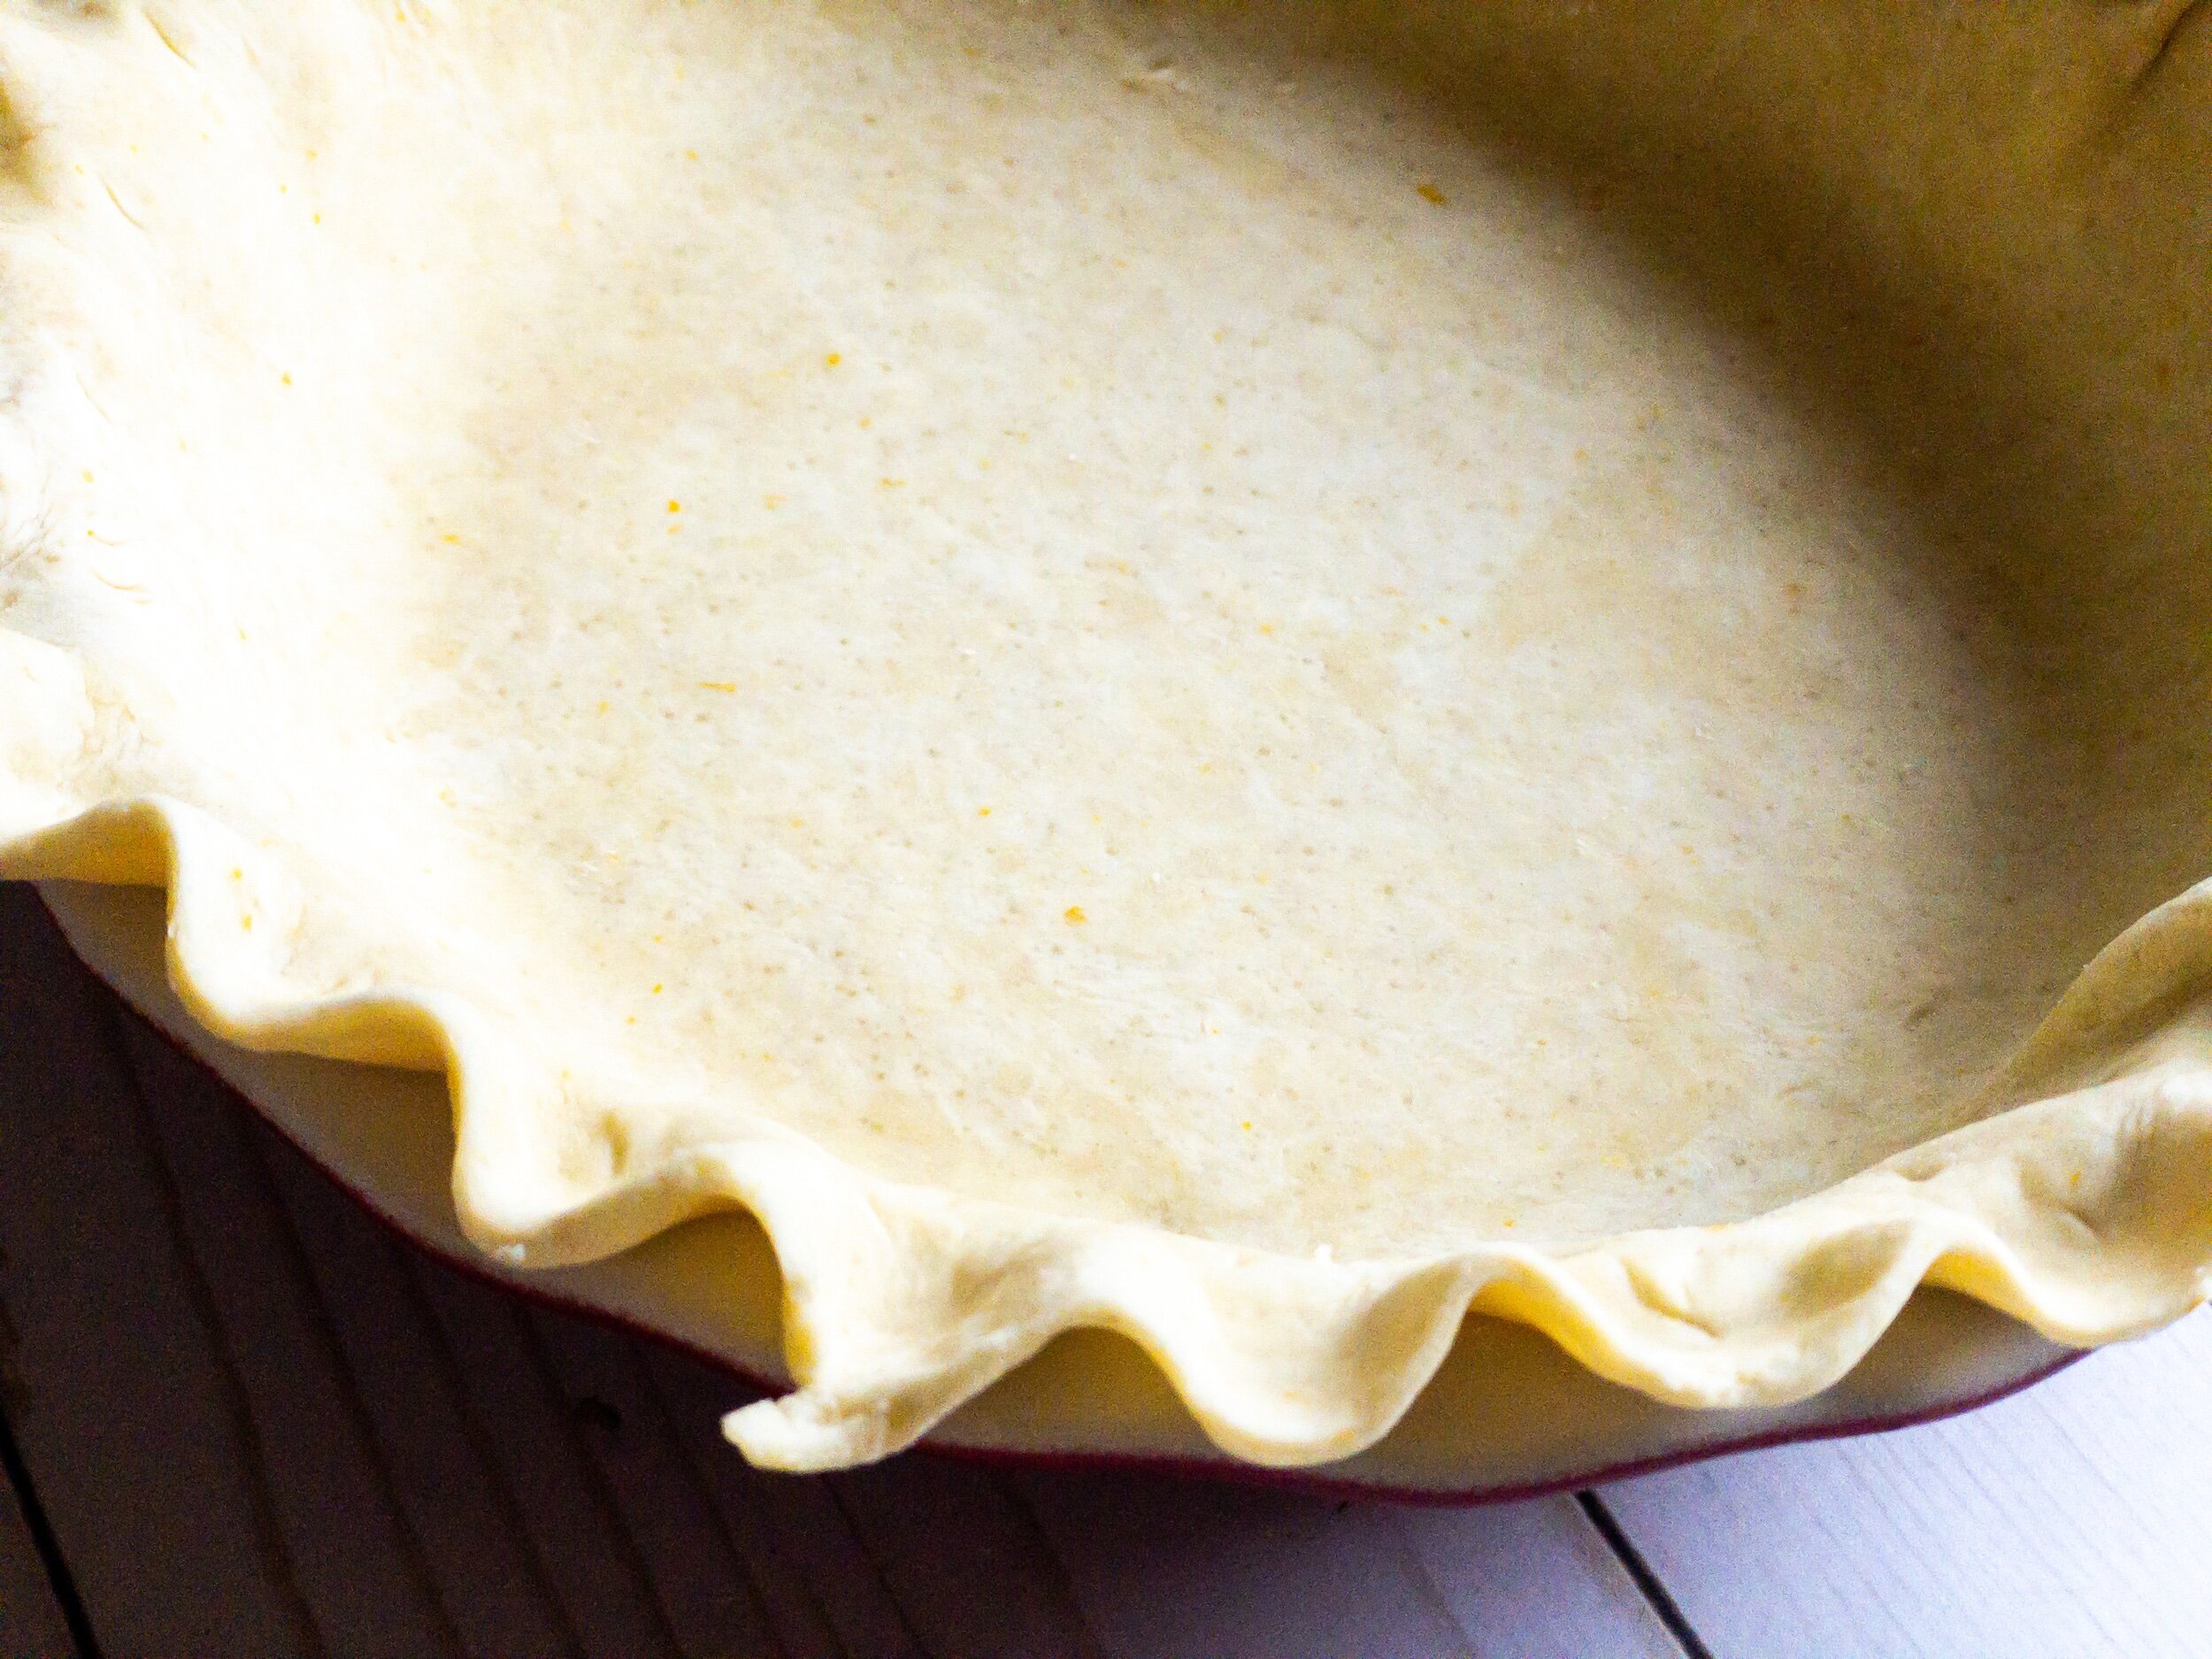
I learned the hard way over the years that if you have smooth edges on your disc before you roll out your crust, you’ll have a more circular had finished product with fewer tears. Just gently shmoosh the ball together then turn and shmoosh again, rotating it continuously until it’s roughly equal and smooth.

All-Butter Pie Crust
- prep time: 10-15 minutes
- chill time: 30 minutes
- total time: 40-45 minutes, plus bake time per recipe
Servings: 1-2 pie crusts
Single Crust:
- 1 ⅓ cups (181g) all purpose flour, sifted
- 1 tablespoon sugar, optional
- ¼ to ½ teaspoon fine ground sea salt (or to taste)
- 10 tablespoons unsalted European style butter, cubed and frozen for 5-10 minutes
- 2-4 tablespoons very cold water or flavorless vodka, or as needed
Lattice Crust:
- 2 cups (272g) all purpose flour, sifted
- 1 ½ tablespoons sugar, optional
- ¼ to ½ teaspoon fine ground sea salt (or to taste)
- 15 tablespoons unsalted European style butter, cubed and frozen for 5-10 minutes
- 3-6 tablespoons very cold water or flavorless vodka, or as needed
Double Crust:
- 2 ⅔ cups (362g) all purpose flour, sifted
- 2 tablespoons sugar, optional
- ½ to 1 teaspoon fine ground sea salt (or to taste)
- 20 tablespoons unsalted European style butter, cubed and frozen for 5-10 minutes
- 4-8 tablespoons very cold water or flavorless vodka, or as needed
Instructions:
- Combine flour, sugar, and salt in a mixing bowl or large food processor. Whisk or mix on low 15-20 seconds to combine.
- Add butter and cut into flour using a pastry blender or by pulsing 20-30 times, until butter is the size of small peas (or a little smaller, but not the texture of coarse sand—you want some butter pieces to create a flaky crust).
- With the mixer on low, slowly stream in water or vodka, 1 tablespoon at a time. (Or, add to bowl by streaming it in a circular motion so it doesn’t clump in one area, then blend slightly after each tablespoon.) Only add enough liquid to create a ball that pulls away from the sides of the bowl/mixer then stop mixing.
- Turn out onto a floured surface and form into a smooth disc with no cracks in the edges (using your hands to gently do this). For lattice crust, divide into two discs, one twice the size of the other. For a double crust, divide into two even discs (it’s okay if one is very slightly larger than the other). Wrap tightly in plastic wrap and refrigerate for 30 minutes. Do not freeze.
- Once chilled, unwrap and place one disc at a time on a floured surface. Lightly spread a small sprinkling of flour on the top as well. Roll each disc to about ⅛ inch thick (don’t let it be thinner), adding more flour as needed to keep the crust from sticking to the rolling pin. A little stickiness is okay, as long as it pulls away easily as you roll. Keep it evenly circular by rolling from the center outward and alternating directions.
Sprinkle a small bit of flour on bottom of pie pan. Transfer crust by wrapping it around the rolling pin until about half is wrapped up, then lift and set over the pie pan. Gently center and fit crust into pan by wiggling from the edge. Avoid pressing bottom too hard. Trim and shape edges as desired.
For lattice or double crust: I recommend an egg wash and sugar. Simply whisk 1 egg with 1 tablespoon milk. Brush over entire top crust or lattice. Sprinkle with a tablespoon of sugar mixed with a pinch of salt.
- For pre- and par-baked crusts: Chill dough in the pan for one hour. When ready to bake, preheat oven to 400 degrees. Optional: Brush edges with egg wash (one egg whisked with 1 tablespoon milk). Gently line crust with foil, loosely covering edges to prevent burning. Fill with pie weights or dry beans. Bake for 15-20 minutes, until foil pulls away from bottom easily. For a par-bakes crust, remove at this point if baking filling for a short amount of time (20-30 minutes max). For a fully pre-baked crust, continue baking another 5-10 minutes, until the edges are golden brown.
Enjoy!
