
Bourbon Pumpkin Pie
Silky, creamy pumpkin pie with the perfect balance of pumpkin flavor and spices. This simple pie is easy to make and reliably delicious!
This post may contain affiliate links from which, at no additional cost to you, I may earn a small commission to keep this site running. Only products I myself would or do use are recommended.

Okay, this pie. This stupid, delicious pie. It has given me issues for years now. The first time I made it, it was delicious and beautiful. Then I dropped it as it came out of the oven. Yep, I cried a little. It was still delicious, but I had to abandon the thought of sharing it on my blog that year.
The next year, I thought I’d try turning it into pumpkin pie bars for the blog, but I didn’t do the base correctly and the filling seeped underneath and was (delicious) but ugly. Ugh.
The next time I made it, I was converting the recipe, did my math wrong, and had WAY too much spice. Like, there is a limit and I found it. Gross.
So, this year, yet again, I tried making this pie. I was actually ready to give up. I was going to be resigned to not having a pumpkin pie on my blog, because I seem to be cursed whenever I try making one.
Which is sad, because I know I can make this pie well and I know it’s delicious!
So, a few weeks ago on a random afternoon, I thought I’d give it one more try.
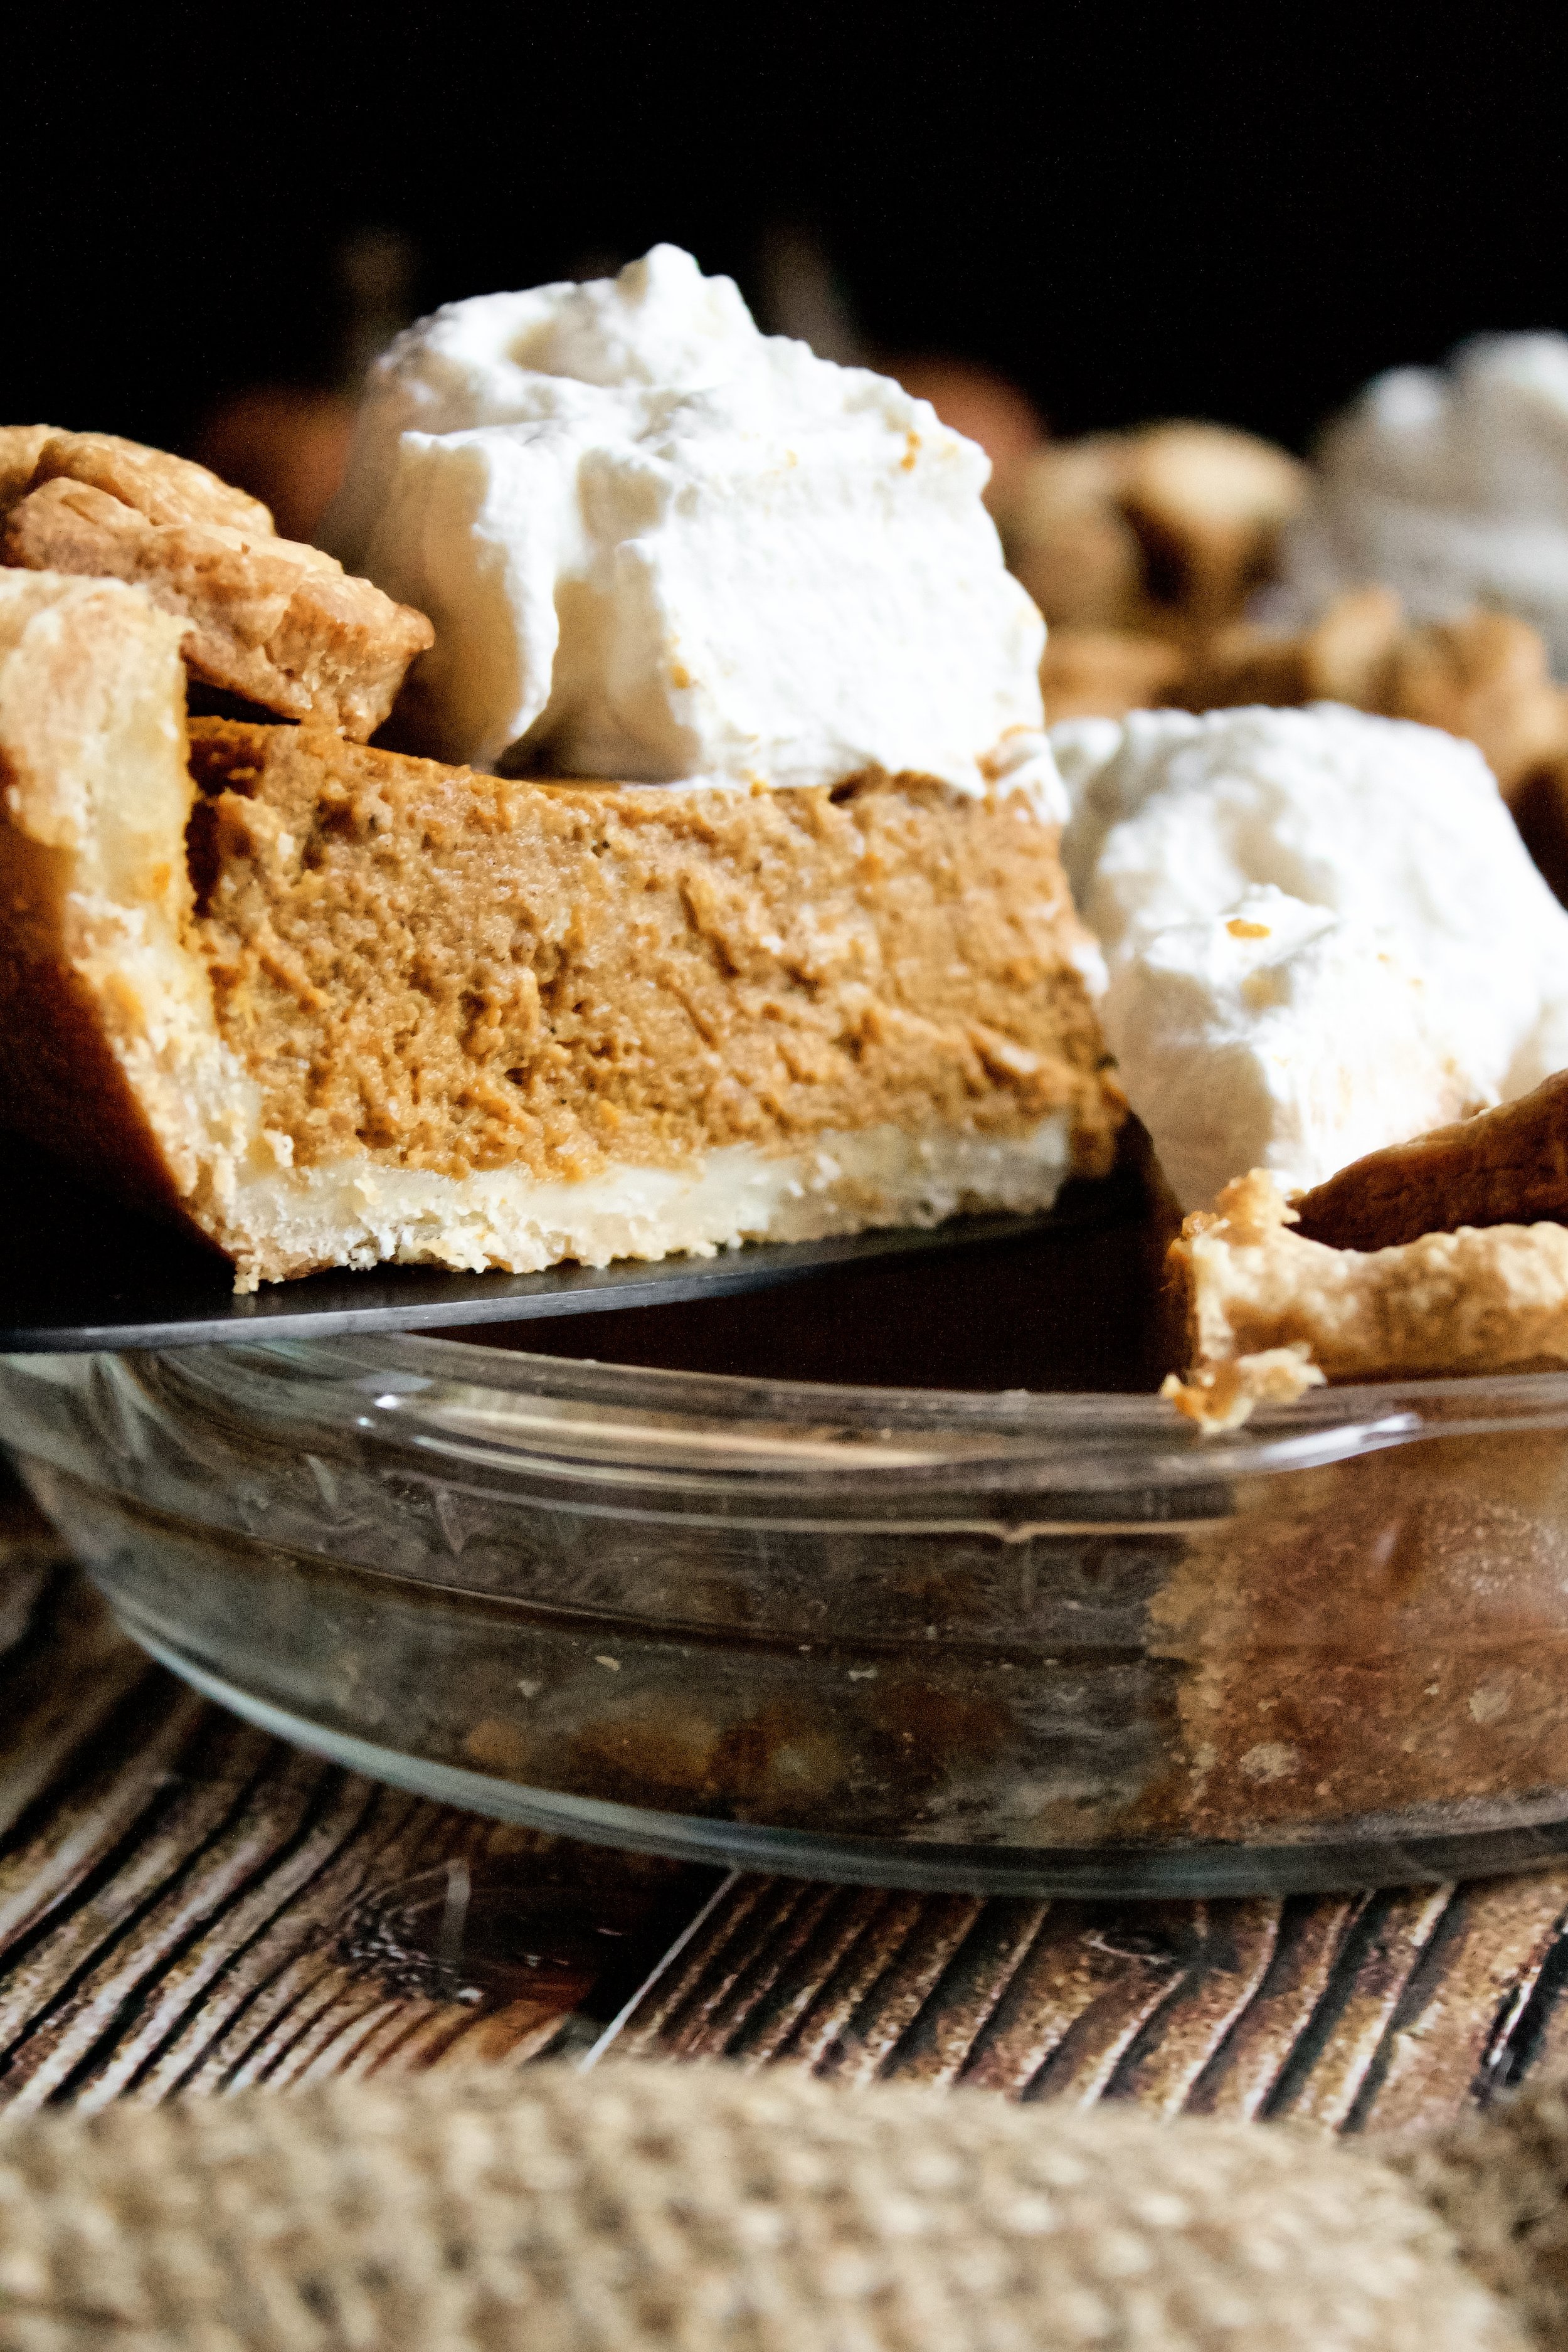
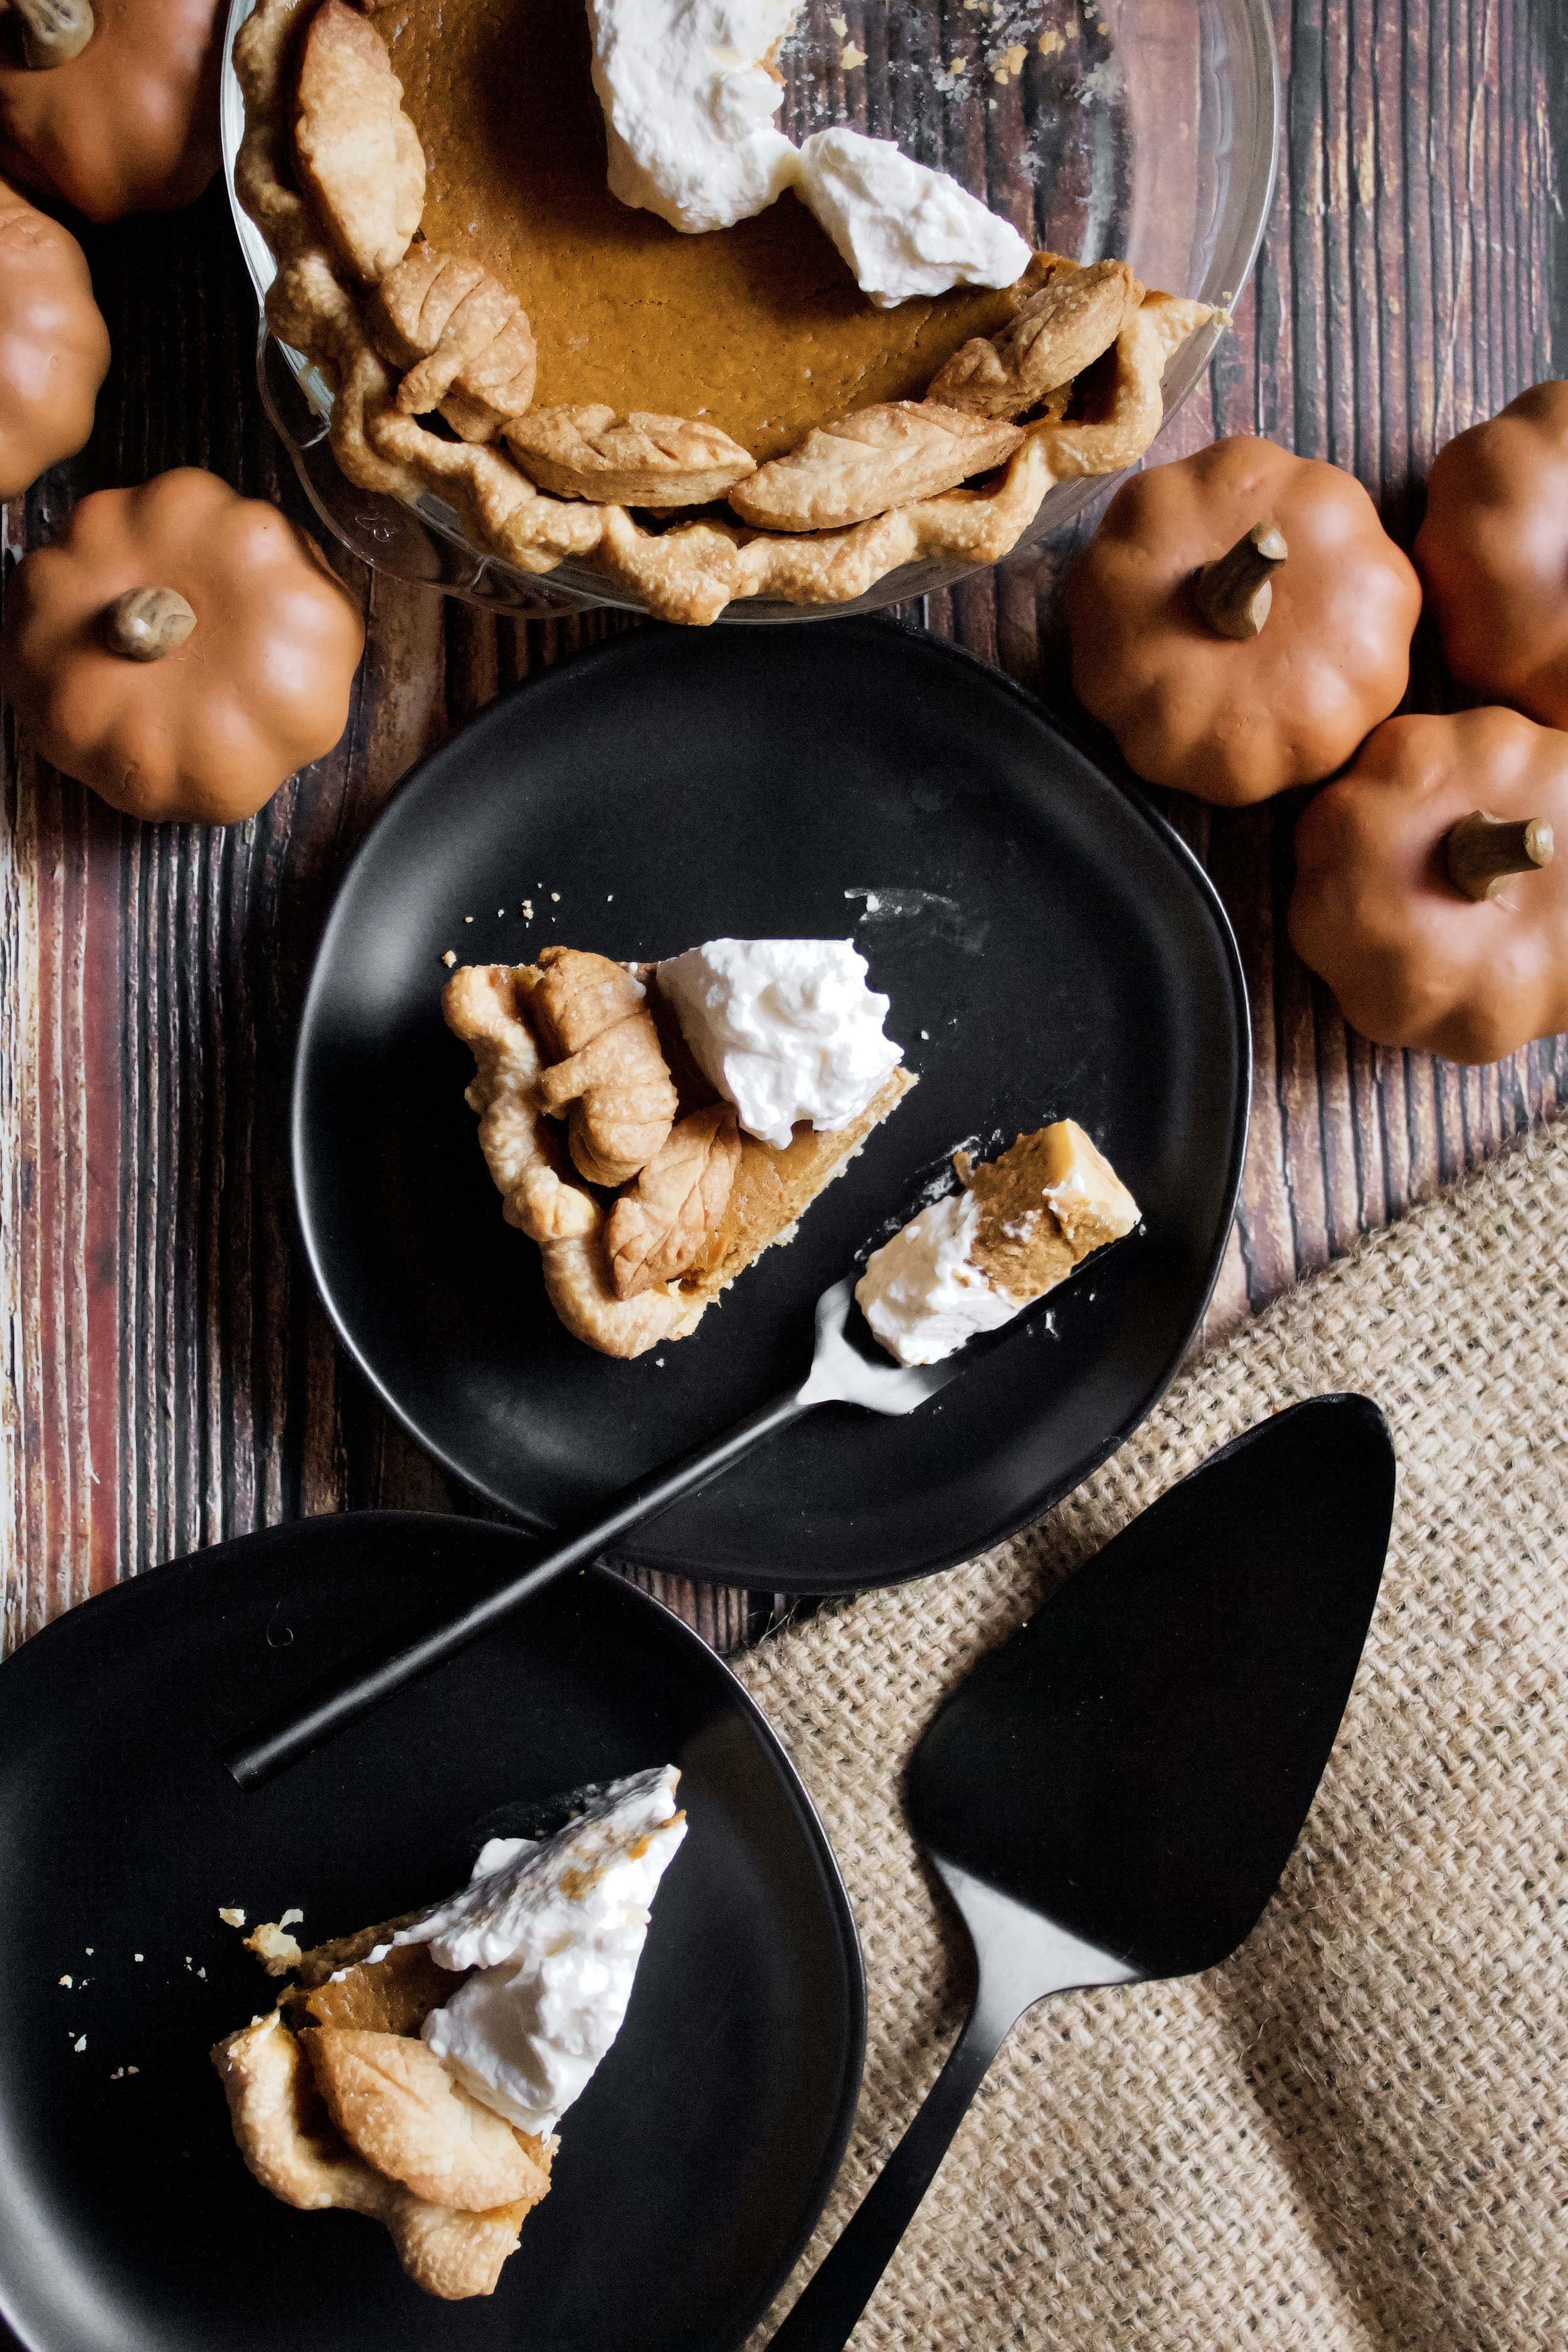
I’m so glad I did. It FINALLY turned out! Beautiful and delicious and everything I remember loving about it. I think my favorite part is the texture. This pie is creamy and smooth and not at all dense or dry or soupy. The key is to only bake it until it’s just barely set but still a little jiggly. Too long and it’ll pull away from the crust (which isn’t bad, just not pretty).
All in all, it really is one of my favorite pumpkin pies!

Why this recipe works
Using egg yolks and only one egg ensures a rich, silky filling rather than one that rises too much or gets too bubbly. Another way to make this creamy and rich is to use heavy whipping cream, to help create that perfect pumpkin custard texture. Also, you want to mix it all well, but not to the point that there are air bubbles. If those do show up, let it sit for a few minutes to release the air bubbles so it bakes up smooth on top.
As for flavor, obviously using pumpkin gives that pumpkin flavor. I added just enough bourbon to add a bit of flavor without altering the texture. And of course you need pumpkin pie spice! I’ve played with this recipe enough to know just how much pumpkin spice you can get away with before it’s overwhelming. The key is adding enough sugar so you have that sweet and spicy balance.

I also recommend a crust you love for this recipe, since there’s not a lot to the filling and you can spend some time on the crust. The sour cream pie crust is seriously my new favorite. Not only does the sour cream help prevent over kneading or a too-dry or too-wet crust (which is my problem at least half the time), but it adds a tartness that pie crusts need! My professional baker friend—the kind who actually went to pastry school—said you need something tart or acidic in a pie crust. I’m not sure if this is just for taste or actual science, but there is some sort of pie magic in this crust. The taste and flakiness are just beyond belief. Plus, it rolls out perfectly. It’s the easiest crust to work with!
Key ingredients
Pie crust. You can use any recipe (or store bought), but this one’s my favorite. It is such an easy crust that works SO well with any pie! You can use your favorite pie crust or even store bought. Just be sure you have a double batch.
Plain pumpkin. Use plain pumpkin puree, not pie filling. If it’s a little on the loose, applesauce-y side, see the note below about blotting it to dry it out before measuring it.
Heavy cream. This is what makes pumpkin pie good! No, it’s not a health food, but you also don’t eat that much and not very often—so treat yo’self!
Milk. We do use a little whole milk here, but not much, since I’ve replaced a bit with the bourbon.
Egg/egg yolks. Use fresh, room temperature eggs.
Brown sugar. Most recipes use sugar, but I like brown sugar for it’s caramelized flavor.
Bourbon. Just enough to taste it but not so much that this is a boozy pie (you have one shot in the whole pie, and some off that alcohol bakes out). You can replace this with an equal amount of milk.
Vanilla. Use pure vanilla extract (or vanilla bean paste).
Pumpkin pie spice. I use The Spice Lab’s Pumpkin Pie Spice, which my husband found at Costco (he is a Costco fiend and finds the best stuff there).
Ground cinnamon. I like a little extra cinnamon in my pumpkin desserts, so I add just an extra teaspoon.

How to make bourbon pumpkin pie
1. Make the pie crust ahead of time. I like making a few batches of pie crust in November and keeping them in my freezer until needed. They will last 2-3 months if well-covered.
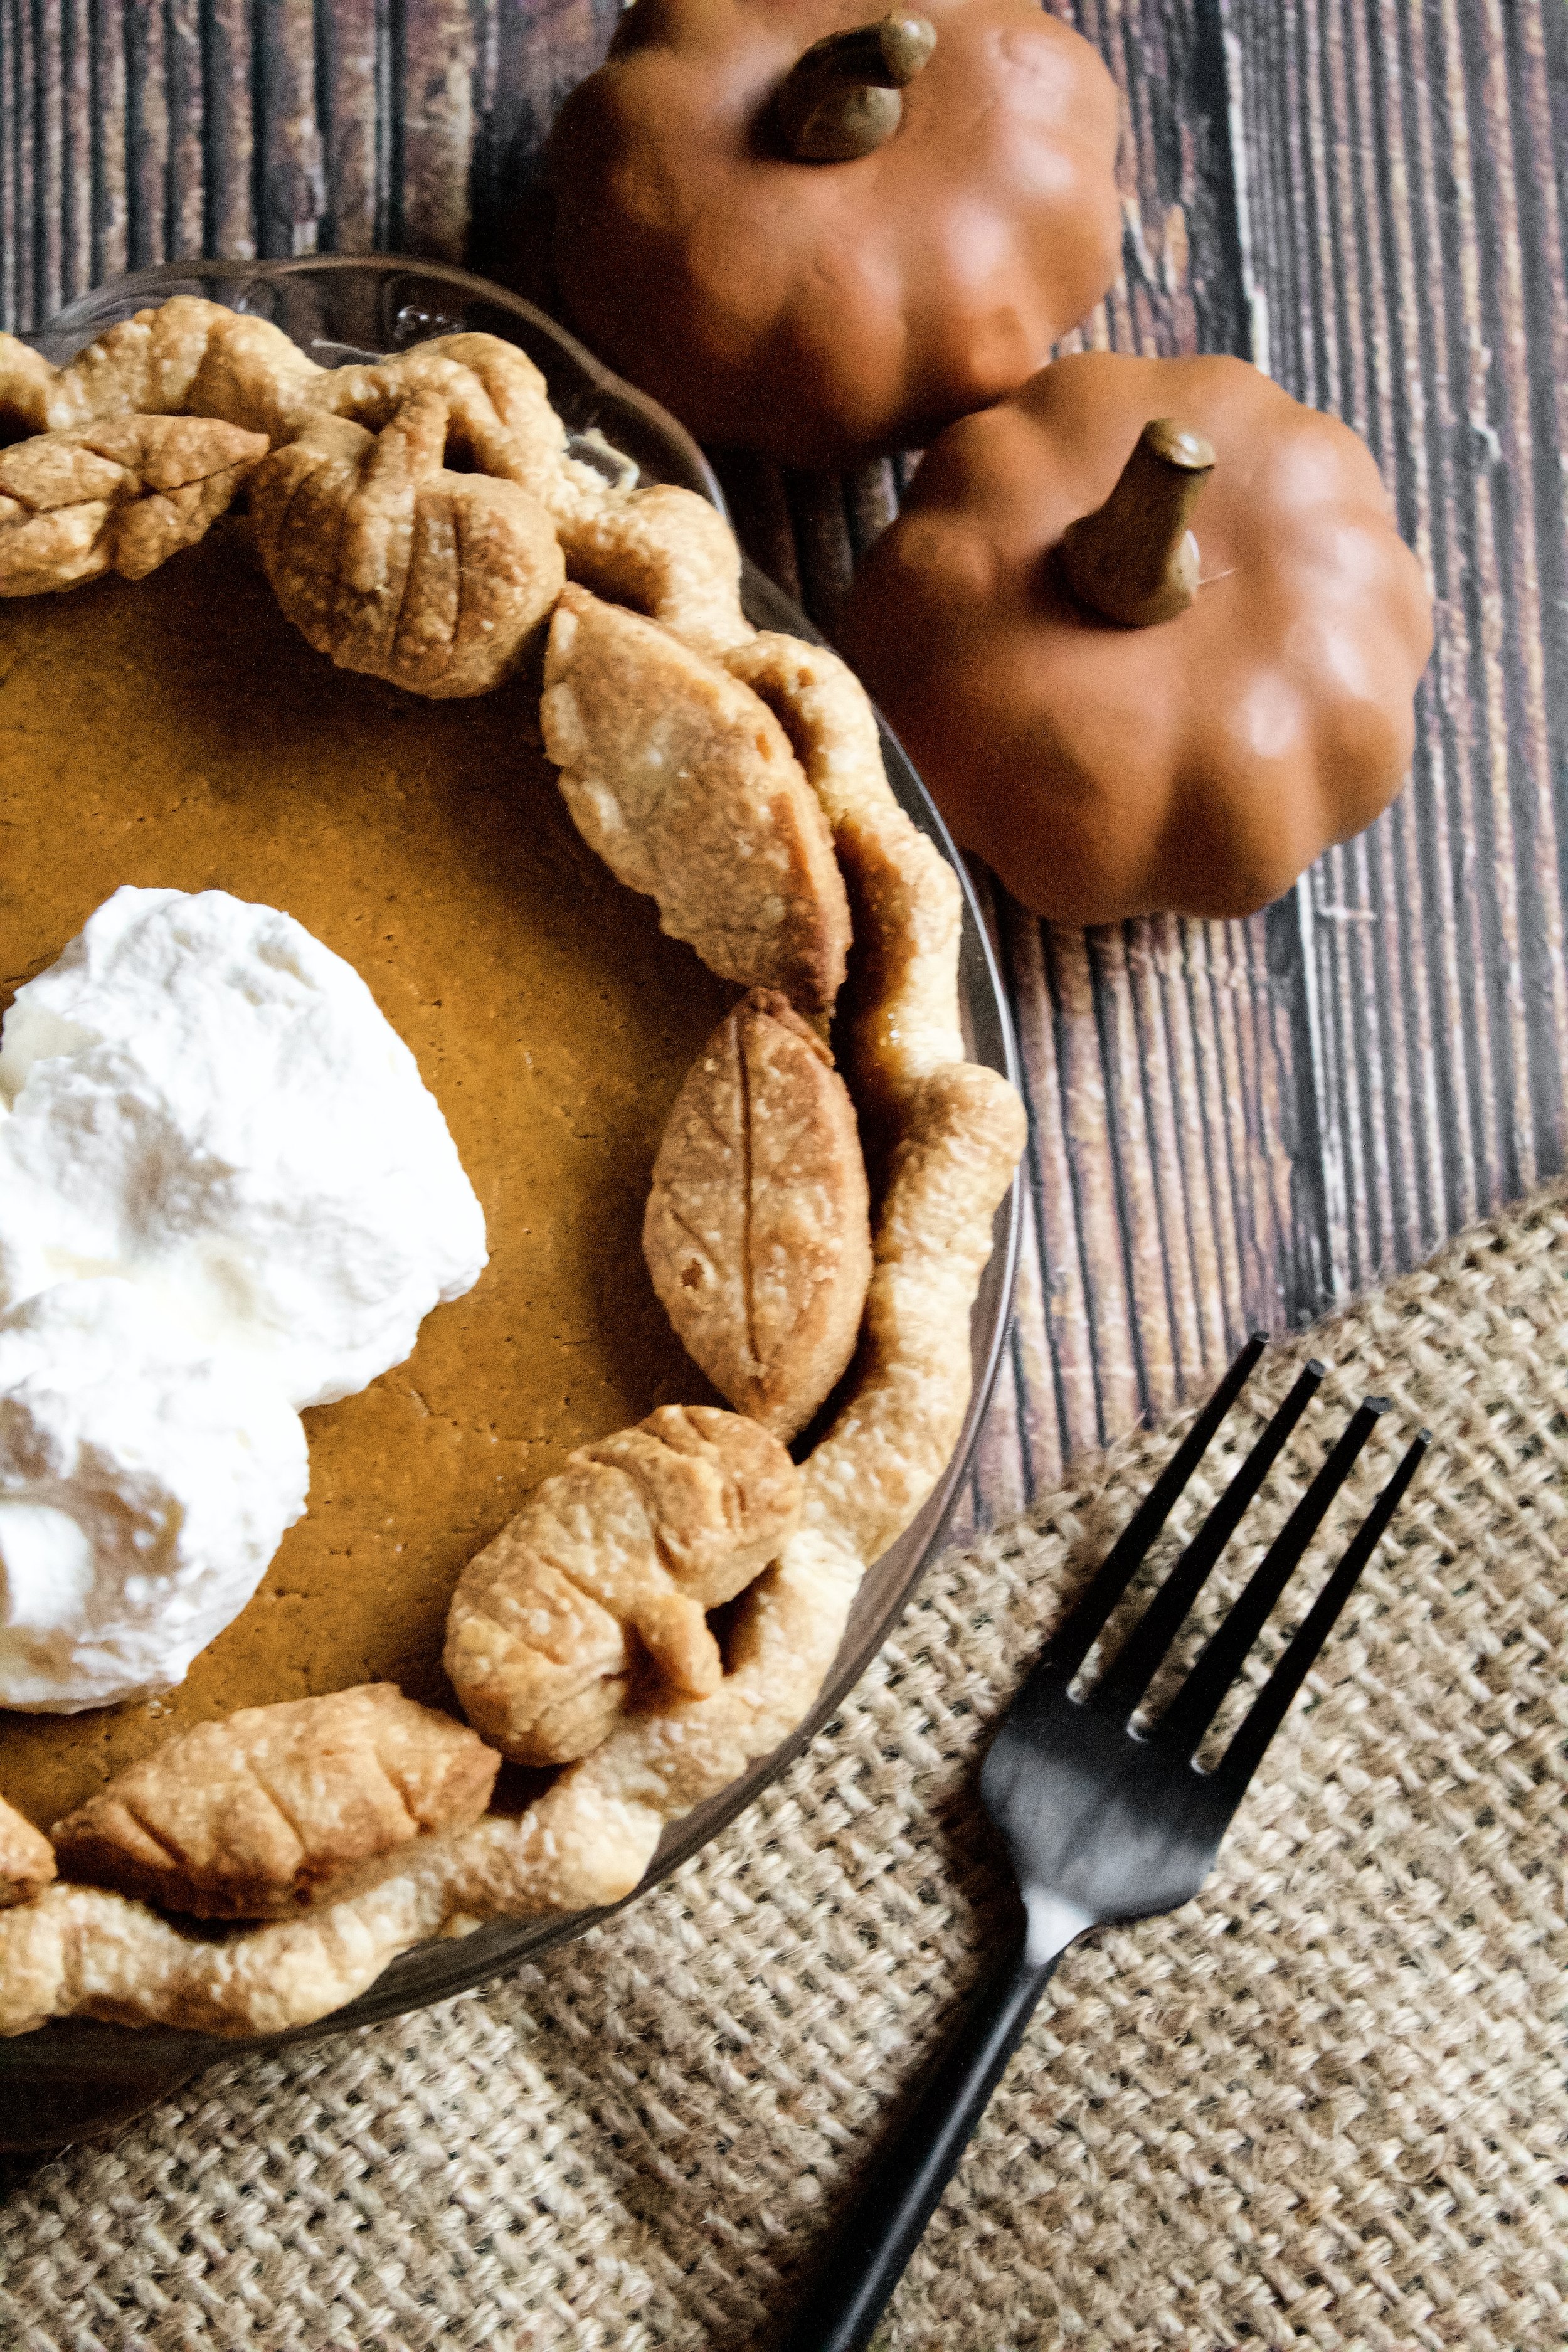
2. Roll out and shape pie crust. Be sure to tuck the crust under so the edges are double thick. I tend to go with a simple scalloped edge, but feel free to get fancy!
3. Line and blind bake crust. Line with foil that’s loosely tented over the edges (not touching them). I like to use rice to blind bake because it sits more evenly than weights and creates a flat bottom. You’ll remove the foil and let it bake a few minutes so the bottom gets cooked.
4. Mix all filling ingredients. Let the crust cool for a few minutes while you combine all of the filling ingredients. Don’t mix to the point that you have air bubbles.
5. Pour into blind-baked crust. Be careful not to splash or let it overflow—it can get under the crust and make a soggy bottom.
6. Bake until set but slightly jiggly. The edges might start to pull away from the crust, and this is another way to know it’s done.
7. Let cool completely. This is a key to pie baking—let it cool entirely before cutting.
Enjoy!


Tips and FAQ’s for this recipe
What if my pumpkin is thin?
I used Libby’s for this recipe (thank you, Costco, for the superfluous amount of pumpkin!), but I usually use Trader Joe’s pumpkin, which is on the watery side. Think of the difference between applesauce and mashed potatoes (the kind you can scoop that will somewhat hold their shape—not potato puree). If your pumpkin is more like applesauce, you’ll want to blot it with a paper towel to remove some of the moisture OR add two more tablespoons of flour to the recipe (3 if using the 9x5 recipe option). Otherwise, you may have a slightly denser cake that will take longer to bake.

What if my filling is bubbly?
If you whisked too vigorously (it happens to me all the time), you may end up with air bubbles in your filling. In that case, let it sit for a few minutes then stir gently with a spatula to help remove the bubbles. You don’t want any bubbles in the filling when it goes in the oven, or they’ll bake into little craters on the finished pie.

Why did my filling pull away from the crust?
This sometimes happens and I don’t always know why. One possibility is that you forgot to tent your pie halfway through baking. Another is that you over baked the pie. To avoid this, follow bake times and know that the center should still be jiggly or wobbly, like jello. So be sure to check your pie often to ensure it doesn’t over bake. If it pulls away more than your comfortable with, you can always try my hack: use leftover pie crust scraps to make decorative pieces (leaves, pumpkins, whatever) and lay those around the edge to cover any unsightly bits.

Why did the center crack?
This is another common issue with pumpkin pies. It could mean your oven is too hot or that you let it bake too long or that you didn’t tent it with foil. All of those expose the top to excess heat, causing it to crack before the center is cooked through. So be sure to set a timer for the halfway point and get that foil on. Also, be sure to check your pie early in case your oven runs hot or your climate/altitude is causing it to bake too quickly. If you try everything and still get a cracked center (it happens to the best of us), you can use whipped cream or decorative pie crust scraps to cover this up and no one will know.
What if my edges get too dark?
This is either due to insufficient tenting or an oven that runs too hot. For the blind bake, be sure the foil is pulled down over the edges (without touching them) so they are tented. At the halfway point, be sure to use a piece of foil large enough to drape gently over the sides when you tent it so the edges aren’t exposed to excess heat. And also be sure you check/know your oven. Some ovens just run hot and need to be turned down, but luckily this is usually a consistent thing (like an oven being 25 degrees too hot).

Is this suitable for children or pregnant women?
That depends on your comfort level, but I always say no. The entire pie has one shot (2 ounces) of bourbon. A bit of that will bake out in the oven, but it’s impossible to know exactly how much bakes out without testing each pie yourself. At most, you’d have 1/4 ounce in each serving, which is more than I’d want a child or pregnant woman having, so I always err on the side of caution and omit the bourbon or make a second, non-alcoholic dessert.

Do I have to freeze the crust?
One of my pro tips for pie crusts is to freeze them before blind baking (or a whole, filled pie before baking). This helps the edges to stay nice and clean. It also makes it MUCH easier to line an empty pie crust with foil. You don’t have to worry that you’ll squish your beautifully shaped edges. Just be sure the foil isn’t touching the edges or they’ll flatten in baking.

Can I use a different pie crust?
My favorite crust is my sour cream pie crust (super easy to make and use!). It comes out very flakey and has a great subtle tang that complements the pumpkin filling well. Other good options are my foolproof classic pie crust and my brown sugar all butter pie crust. I suggest making a double batch ahead of time and freeze one disc for a later pie. Whichever one you make, a homemade crust needs to chill in the fridge at least an hour before you roll it out.

My tools
Here are my must-have tools I use for making this pie. Affiliate links provided.
Vegetable peeler or cheese grater (optional, for the butter in the crust)
Pastry blender or food processor
Pie pan(Emile Henry has become my favorite!)

Bourbon Pumpkin Pie
- prep time: 20-25 minutes
- chill time: 1 hour (for the crust–can be done ahead)
- freeze time: 15 minutes (optional)
- bake time: 40-50 minutes
- prep time: 2 hours, 30 minutes
servings: 8-12
Ingredients:
- one sour cream pie crust (or your favorite pie crust)
- 1 can (15oz or 425g) plain pumpkin puree
- 1 cup (240g) heavy whipping cream
- ¼ cup (60g) whole milk
- ¼ cup (60g) bourbon*
- 1 large egg, room temperature
- 3 large egg yolks, room temperature
- ¾ cup (150g) brown sugar (use up to 1 cup if you like a sweeter pie)
- 1 tablespoon (13g) pure vanilla extract
- 1 tablespoon (8g) pumpkin pie spice
- 1 teaspoon (3g) ground cinnamon (optional–I like a little extra cinnamon)
Instructions:
- Make the pie crust ahead of time, at least one hour but ideally a day ahead.
- Once the pie crust is chilled (or you are ready to bake), preheat your oven to 400F/205C. Sprinkle a little flour in the bottom of your pie pan. Let the pie crust rest on the counter 5-10 minutes, until workable.
- Place the pie dough disc on a lightly floured surface, then sprinkle the top with a little more flour. Begin rolling out the dough, rotating the rolling pin as you go. Be sure to flip and rotate the dough every so often, sprinkling a tiny bit more flour as needed to 1) keep it from sticking and 2) ensure you’re rolling evenly. I tend to roll the bottom left too thin and the top right too thick. Rotating balances this out.
- Roll the dough out to ⅛” or ⅓ cm thick (or slightly thicker–this is the thinnest you’ll want to go), or about 12” or 30 cm in diameter for a deep 9” pie pan.
- Carefully place the crust over your pan. Gently lift the edges to help ease the crust into the pan, pressing gently to get it flush with the bottom and edges. You’re basically wiggling and gently pressing it into place. Trim all but ½” (or a little more than 1cm) of the excess dough. Fold overhanging dough underneath itself until flush with the edge of the pie pan. Shape as desired.
- Optionally, you can freeze the dough for 10-15 minutes at this point. It helps it bake evenly and also makes it much easier to line with foil.
- Gently line the crust with foil, pressing it against the middle of the crust but only having it hang loosely over the edges. You want them fully tented but not touching the foil. Pour pie weights or rice or dry beans in the middle, being sure they fill up the pie to keep the bottom in place.
- Bake for 15 minutes. Remove the foil/weights and bake 5 minutes more, just until the bottom starts to turn golden. If you notice it starting to bubble up, prick with a fork a few times. When the crust is done blind baking, turn the oven down to 325F/265C (350F/175C at high elevation).
- Feel free to roll the trimmings out and shape into leaves or pumpkins. Bake on a parchment lined pan for 10 minutes and use to decorate your pie!
- Let the crust cool slightly while you mix the filling. Combine all filling ingredients in a large mixing bowl. Whisk until fully combined, being careful not to create air bubbles. If any do appear, let it sit a few minutes then stir gently with a spatula to remove the bubbles.
- Pour filling into the warm crust. Bake for 40-50 minutes, until the filling is set but still jiggly (not sloshy). Halfway through baking (after about 25 minutes), tent the pie loosely with foil to prevent overbaking the crust or cracking the middle.
- Let pie cool completely (at minimum 2 hours) then refrigerate until ready to serve.
Enjoy!
*You can easily use milk instead of bourbon, for ½ cup total of whole milk.
