
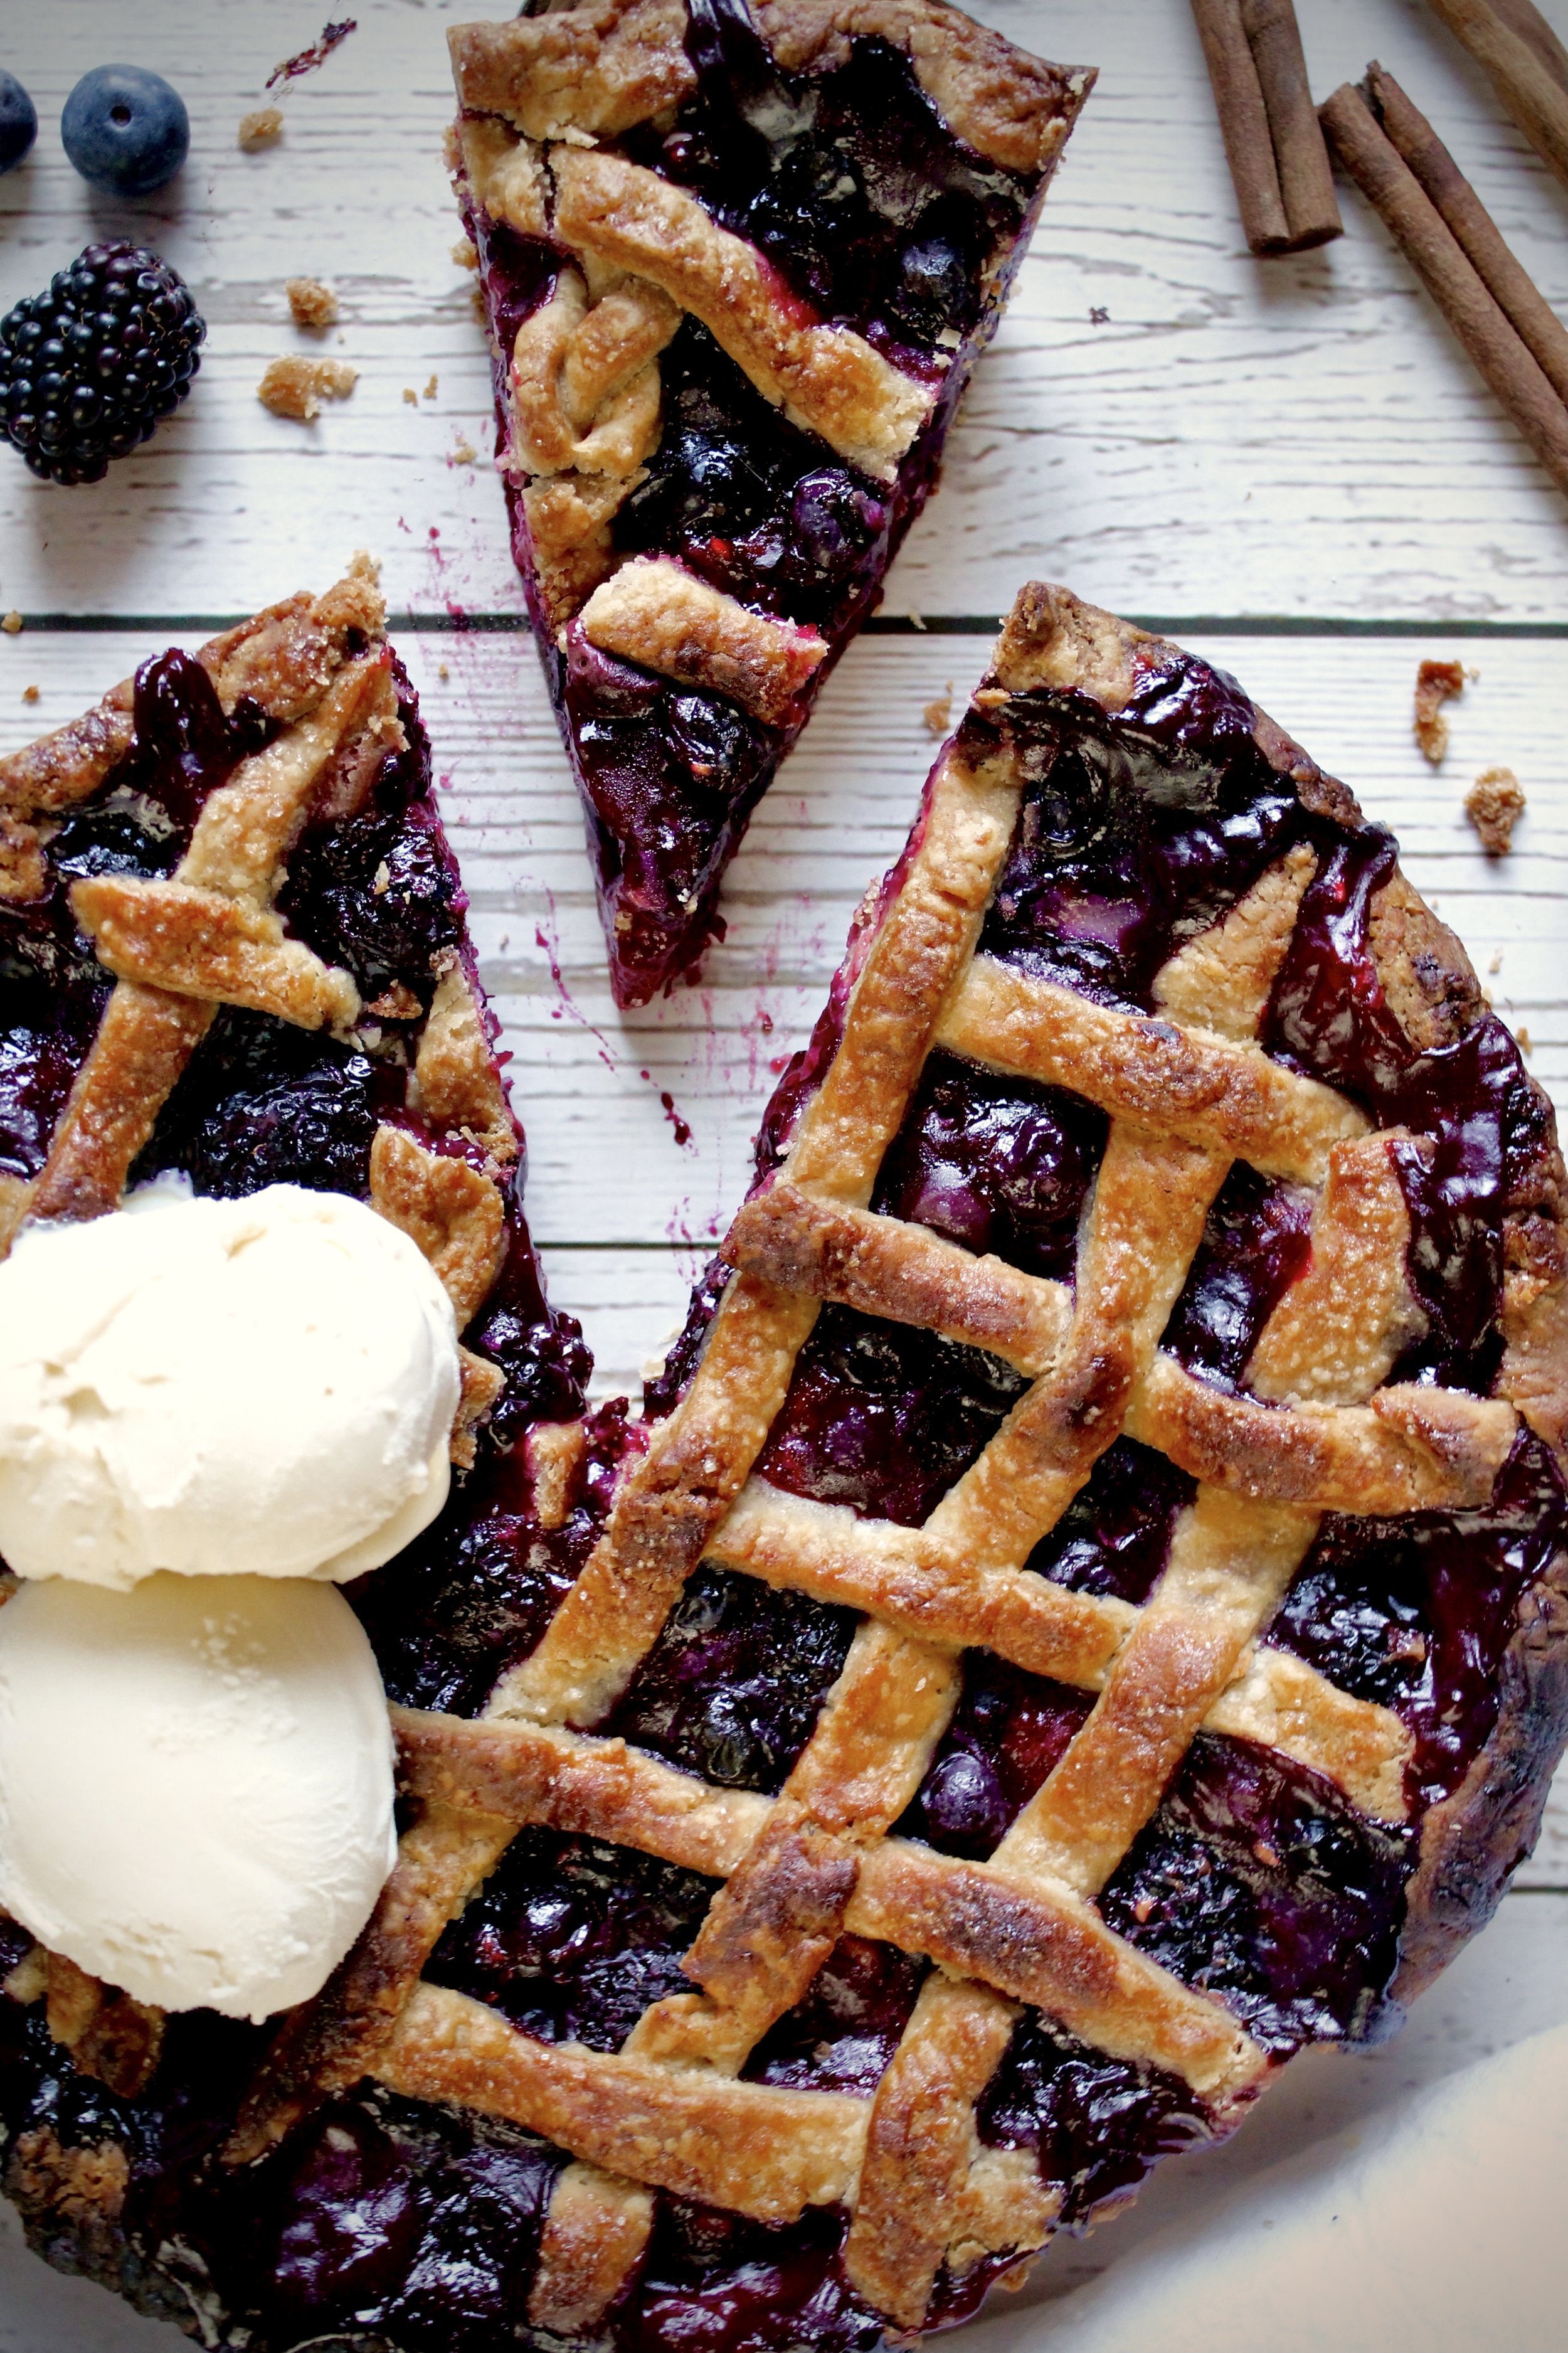
Ginger Berry Pie
Warm spices, juicy mixed berries, and the flakiest brown sugar crust make this ginger berry pie delicious yet light and refreshing. This pie is perfect for any celebration year round, but is particularly great as a fresh addition to the holiday pie rotation! Even non-dessert eaters rave over the flavors!
This post may contain affiliate links from which, at no additional cost to you, I may earn a small commission to keep this site running. Only products I myself would or do use are recommended.
This pie. Ugh. It’s my white whale (one of many, I suppose). The first time we made it, it was utter, utter perfection. Then, as my husband went to take it out of the oven, the pan caught on the rack and the pie spilled ALL OVER MY NEW OVEN. Literally. We had to take the door apart to get pie filling out from between the glass layers. That led to denting the door then the broiler drawer. It was a whole thing.
We ended up eating the pie with forks and it was still just unbelievable how good it was, big fat mess and all.

So I made it a few months later and it was just as good. Only I didn’t have time to take any photos. Then, disaster ensued. I kept having issues with it the next three times I made it, because I hadn’t written down what I’d changed from the original to make it perfection. One pie accidentally had too much flour and was a weirdly pale color. One didn’t set because I’d crowded the oven. One got burnt (because #toddlermomlife).
It quite literally took me over two years to finally make a decent looking version of this pie that I could take photos of.
But it was worth the effort to bring you one of my favorite pies! This pie works year round but is particularly fitting for the holidays. :)
Why this recipe works
This pie is enveloped in my perfectly flakey, all-butter crust. It’s foolproof because it uses both cold and frozen butter to ensure the perfect sizes spread throughout. Plus, cinnamon and brown sugar in a pie crust are always a good idea.
The filling is such a great combination of ginger, cinnamon, and lemon joined with bursting berries. It’s bright and fresh yet warm and spicy. And the combination of flour and cornstarch mixes with the natural pectin in the berries to create the perfectly sturdy pie.

Finally, freezing the pie before baking activates some kind of science magic that has never failed me with pie. That, plus letting the pie cool completely, helps give you a flakey crust that isn’t soggy on the bottom plus that ever-elusive sturdy filling.
Key ingredients
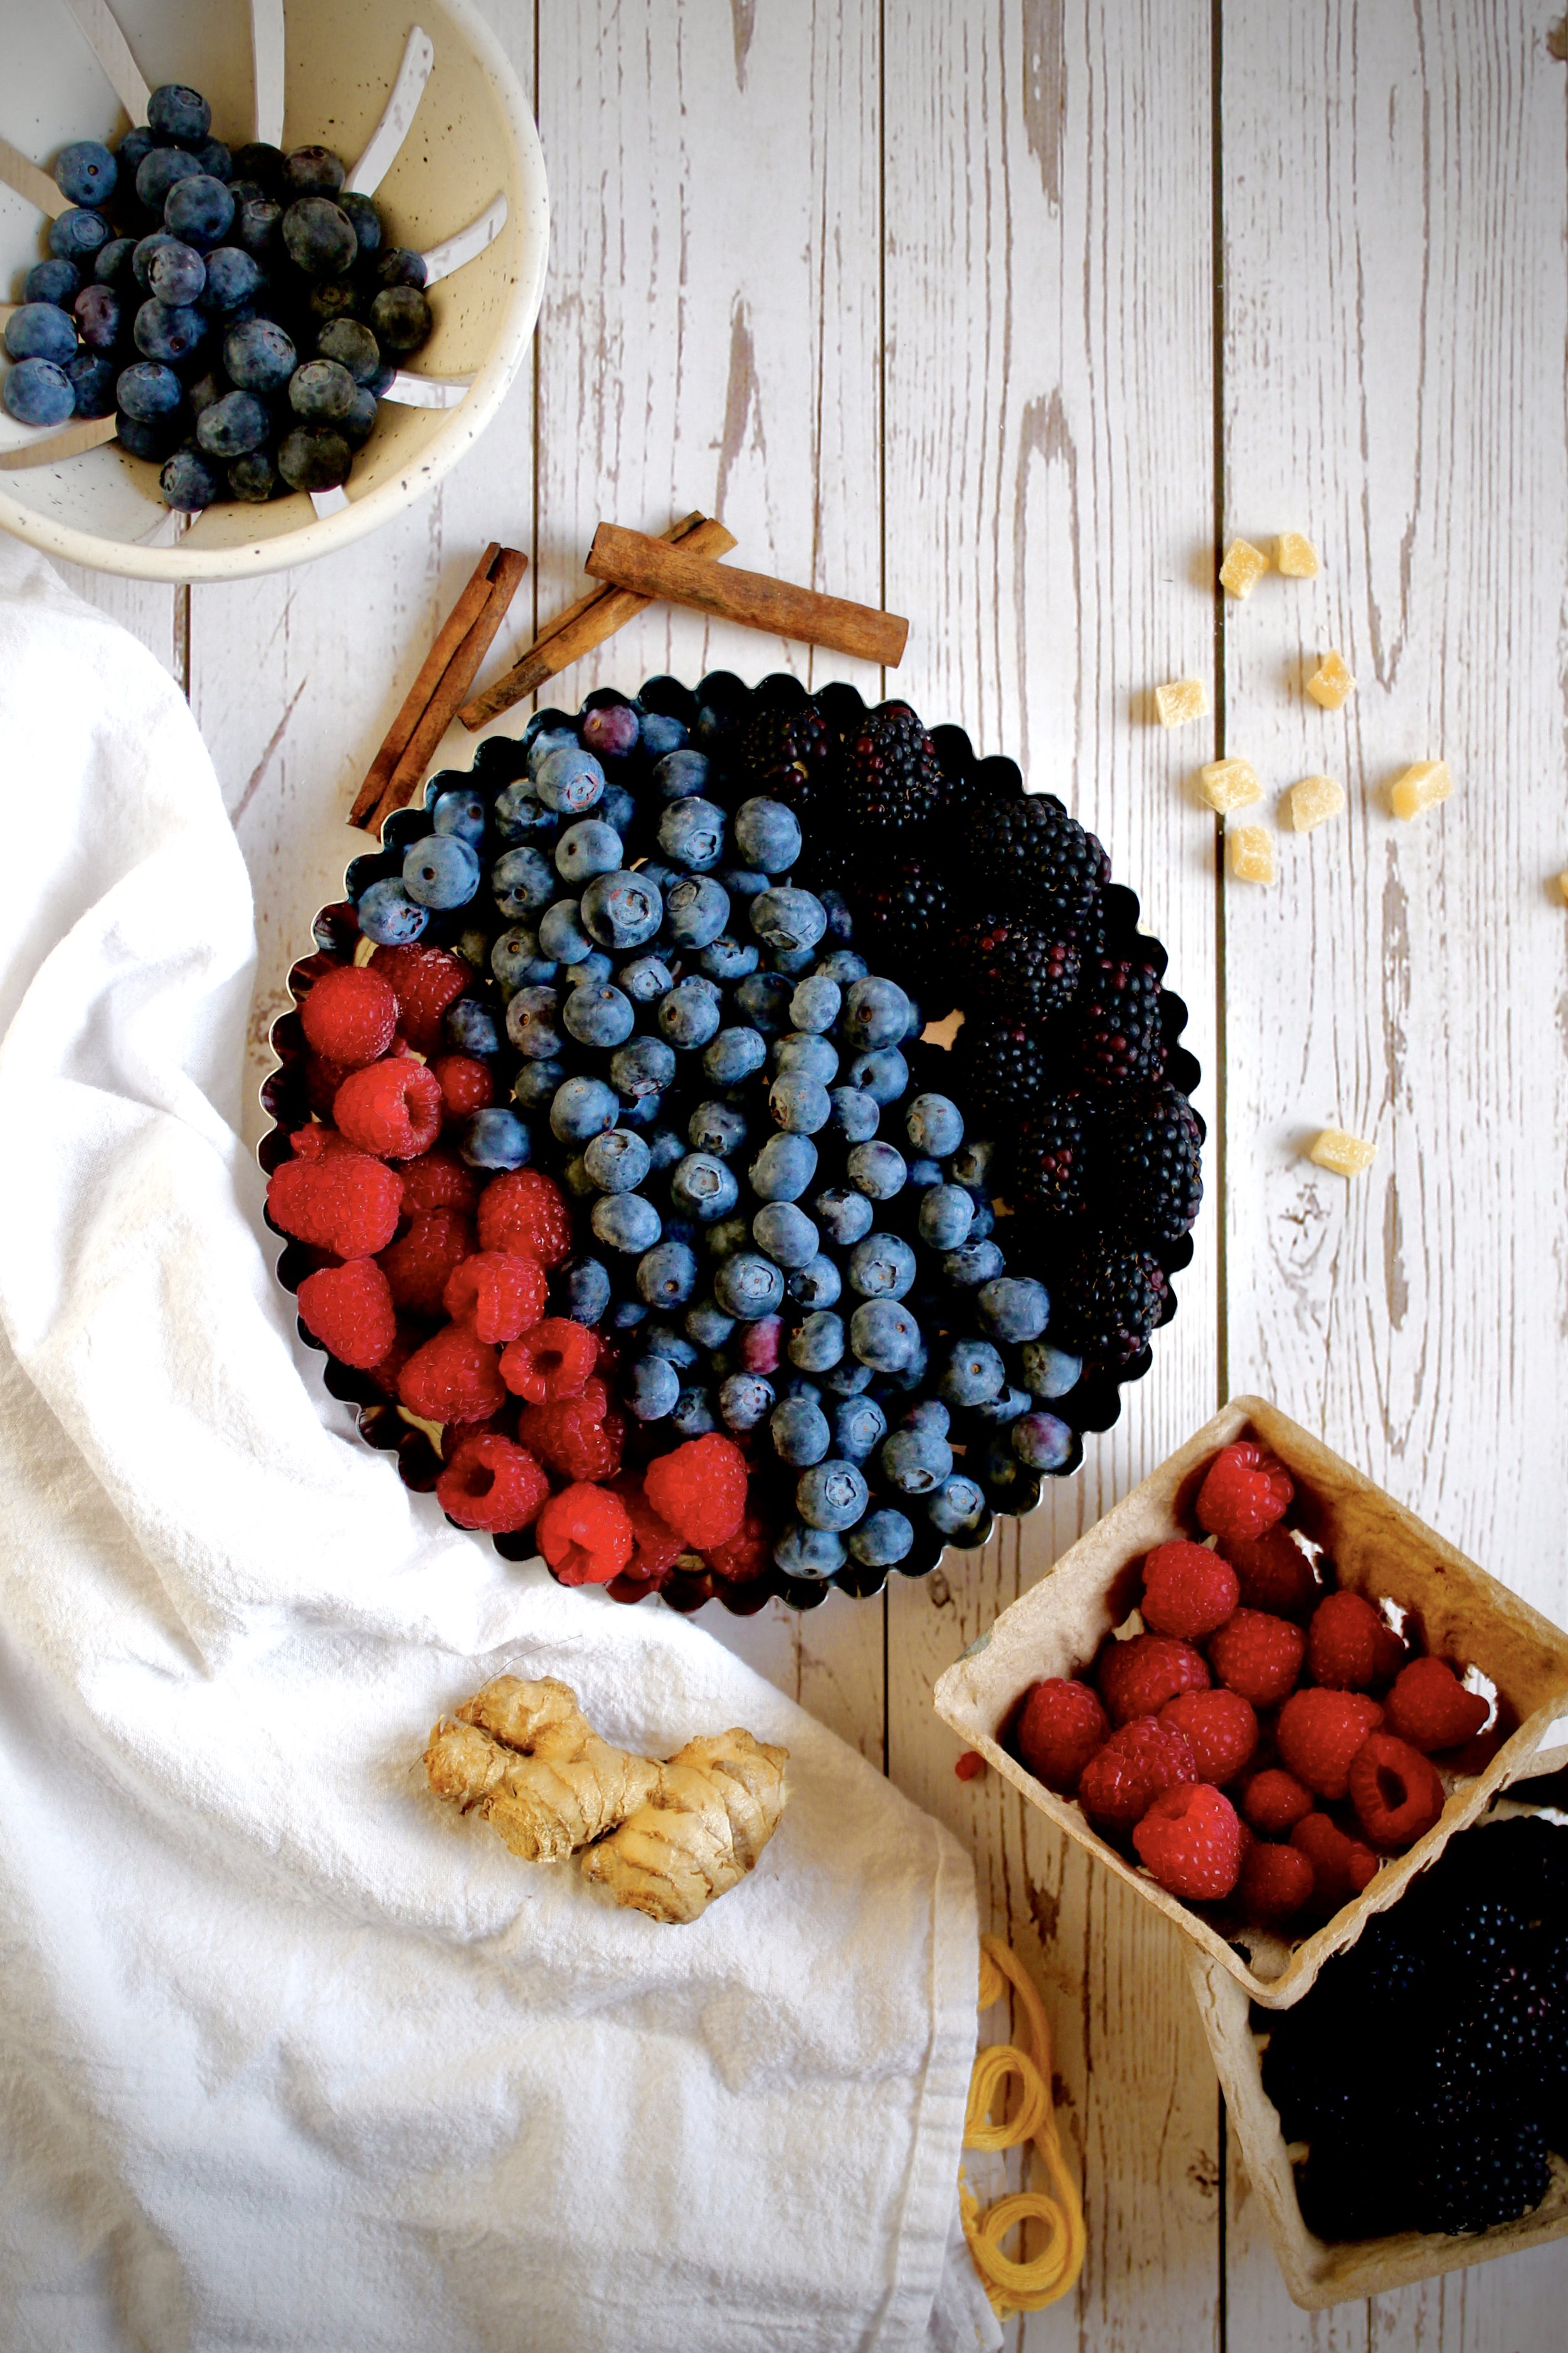
Berries. Technically, this is a razzleberry pie because it uses blueberries, raspberries, and blackberries. Try to use organic so you don’t need to wash them. Otherwise, wash, rinse, and completely dry your berries at least a few hours ahead so there’s no added liquid.
Fresh and candied ginger. Don’t use any extra or it’ll taste like soap.
Sugar. You don’t need much to get a great flavor, plus this helps keep the filling sturdy.
Lemon. Zest blends perfectly with the ginger and the juice keeps the berries bright.

Flour and cornstarch. The combination is perfect for a sturdy filling that isn’t gelatinous or gooey.
Cinnamon. Optional, but adds so much warmth.
All-butter pie crust. You’ll need a double crust for the lattice. You can use any crust you like, but I love an all-butter crust, and this one uses brown sugar to create a warm, caramelized flavor.
How to make ginger berry pie
1. Make the crust ahead of time. I usually make a double or triple batch of crust and freeze 1-2 of the discs for later. Then, you can defrost it in the fridge.
2. Prep the ingredients. Zest and juice the lemon. Peel and grate (or finely chop) the ginger. Finely chop the candied ginger.
3. Mix the filling. Add the lemon juice last, so the dry ingredients mix well. Take your pie dough out at this time, too.
4. Roll out the bottom crust. Follow my directions so it’s even and doesn’t stick to the mat. Chill it after you line the pie pan and while you roll the lattice.
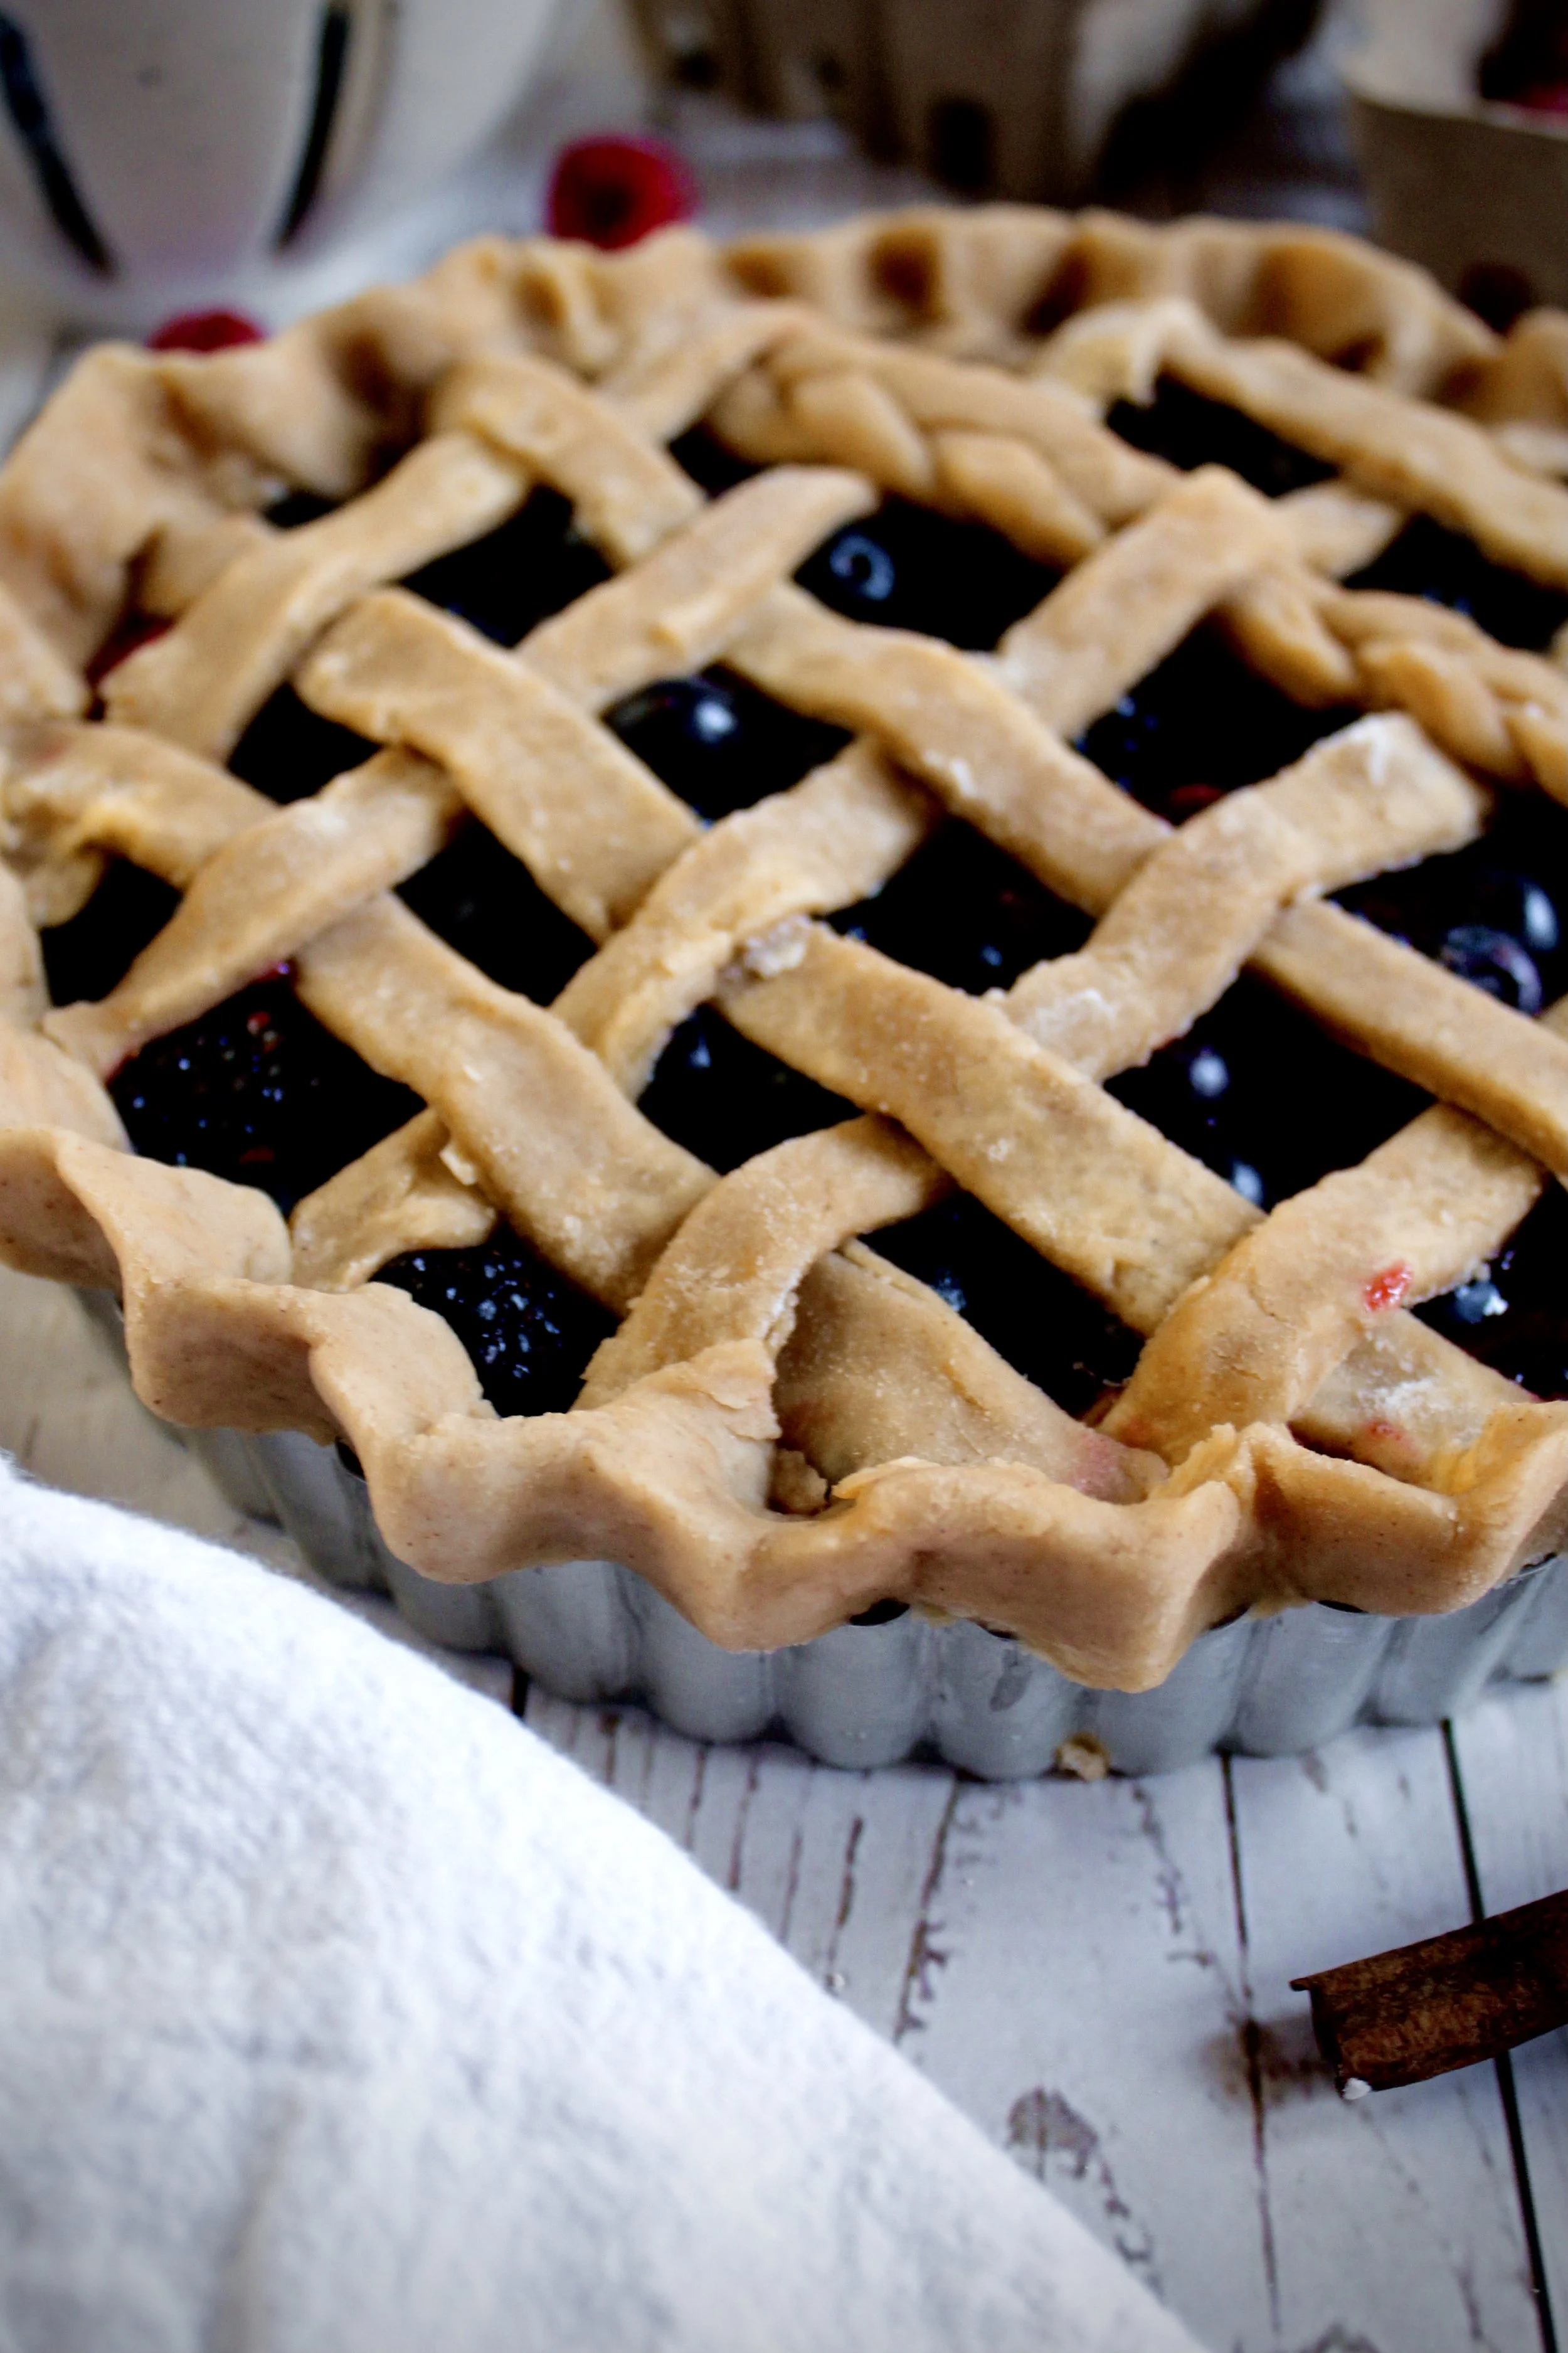
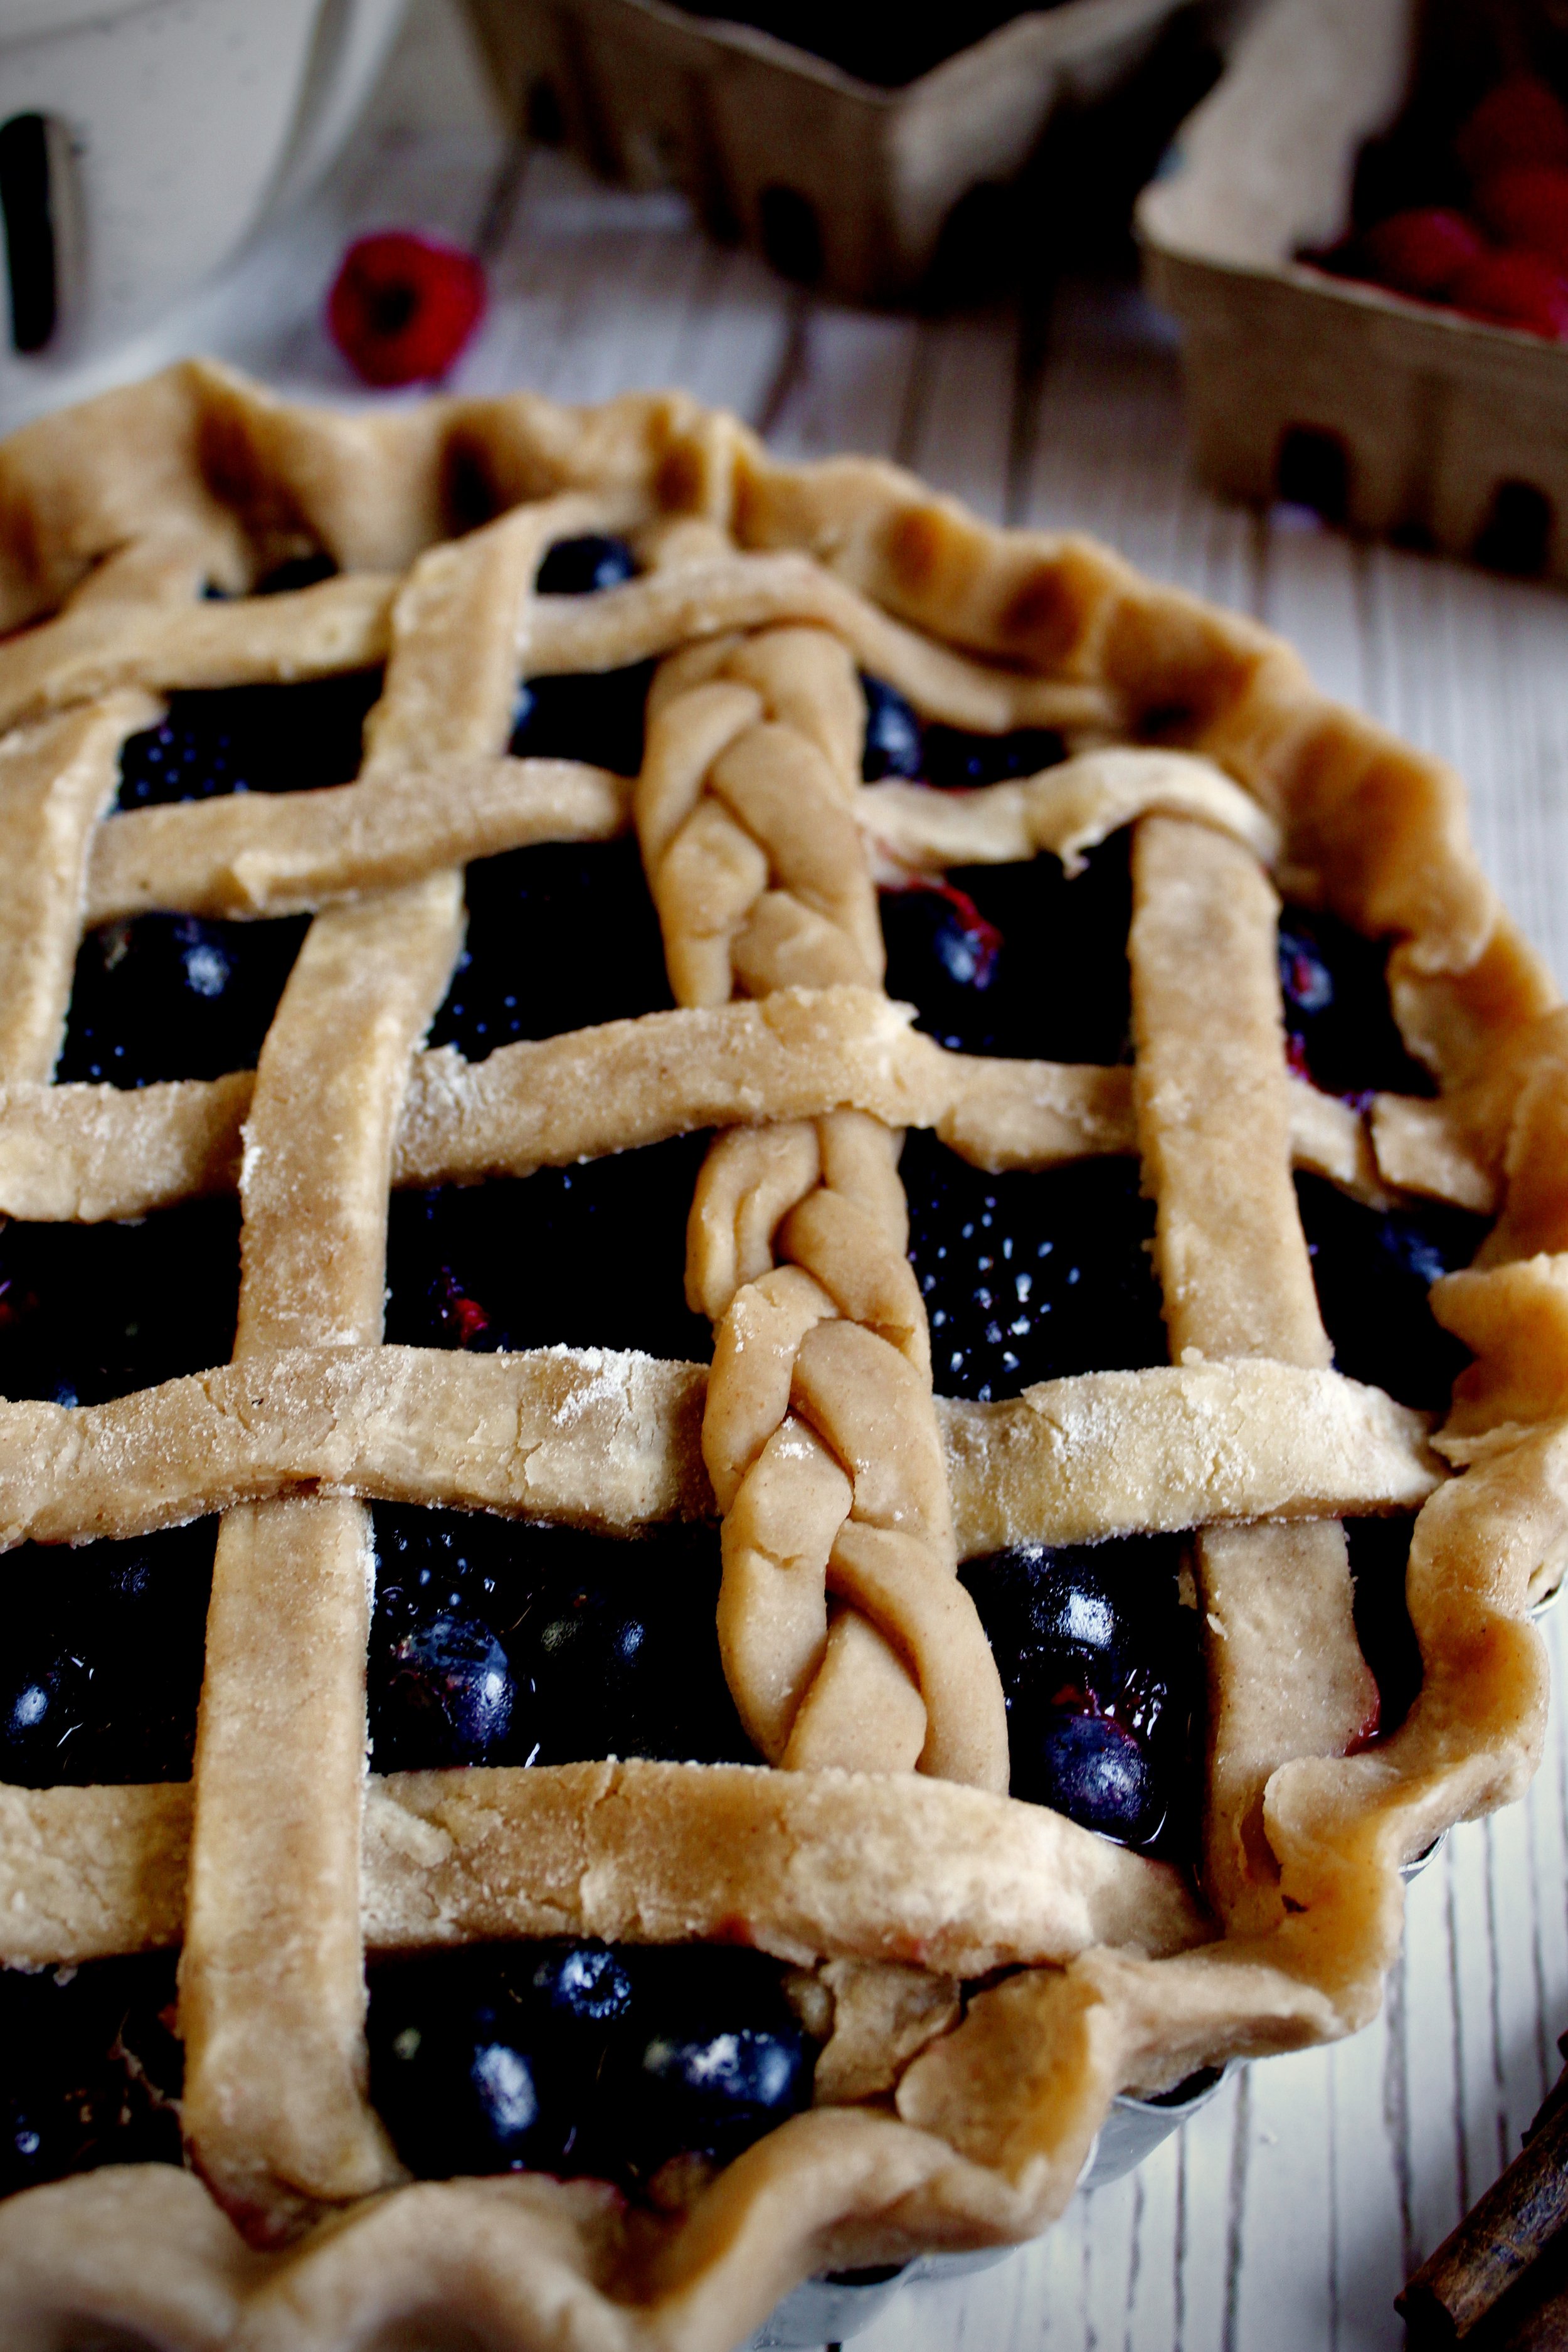
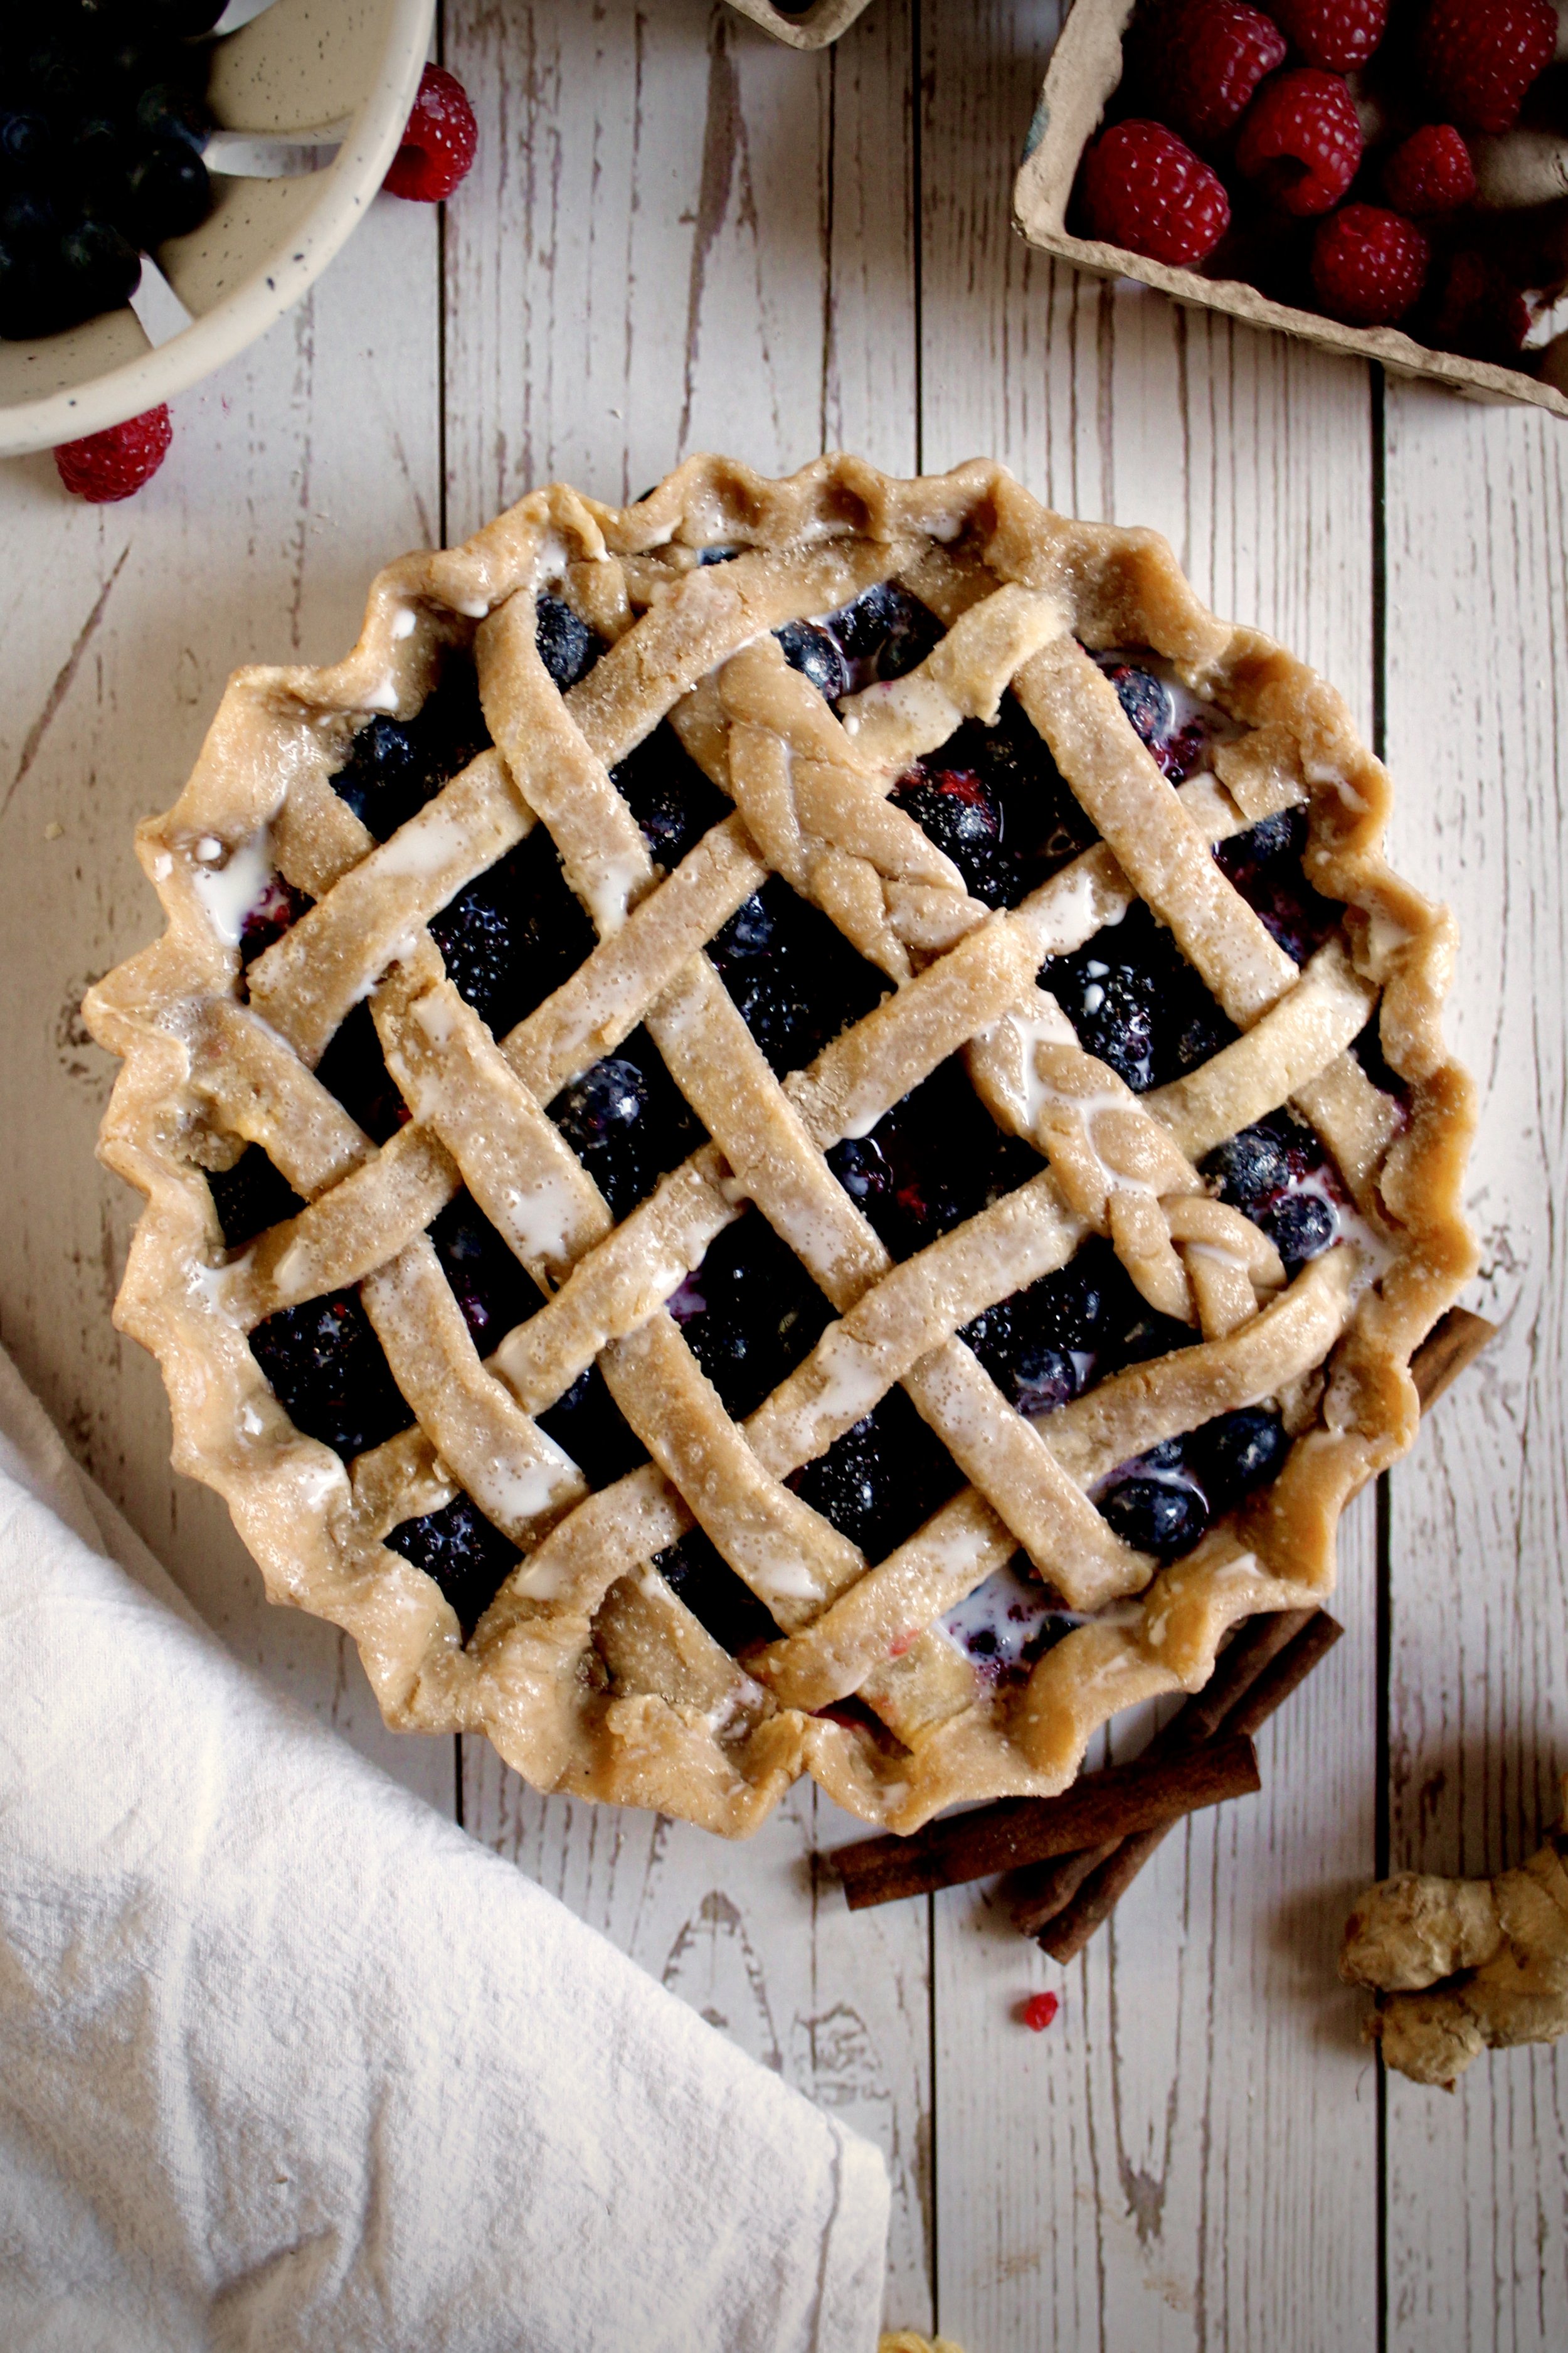
5. Roll out the lattice. You can cut it to any width you’d like, just be sure it’s at least 1/2 inch wide and that the strips are even (unless you want to braid it or do an asymmetrical lattice).


6. Fill the pie and weave the lattice. I braided one strip by taking three full-width pieces, cutting each into three pieces, then gently braiding that. Once done, gently line the three braids up, sync up the weaves, then gently press them together so they’re one long piece.
7. Freeze for 30 minutes. You can do longer, but it will affect the bake time. Freezing is key to keeping the crust from drooping and the filling from burning.
8. Bake until bubbling. Tent it with foil when you turn down the oven. Be sure it’s bubbling in the middle when you remove it from the oven—this means it’s fully cooked.
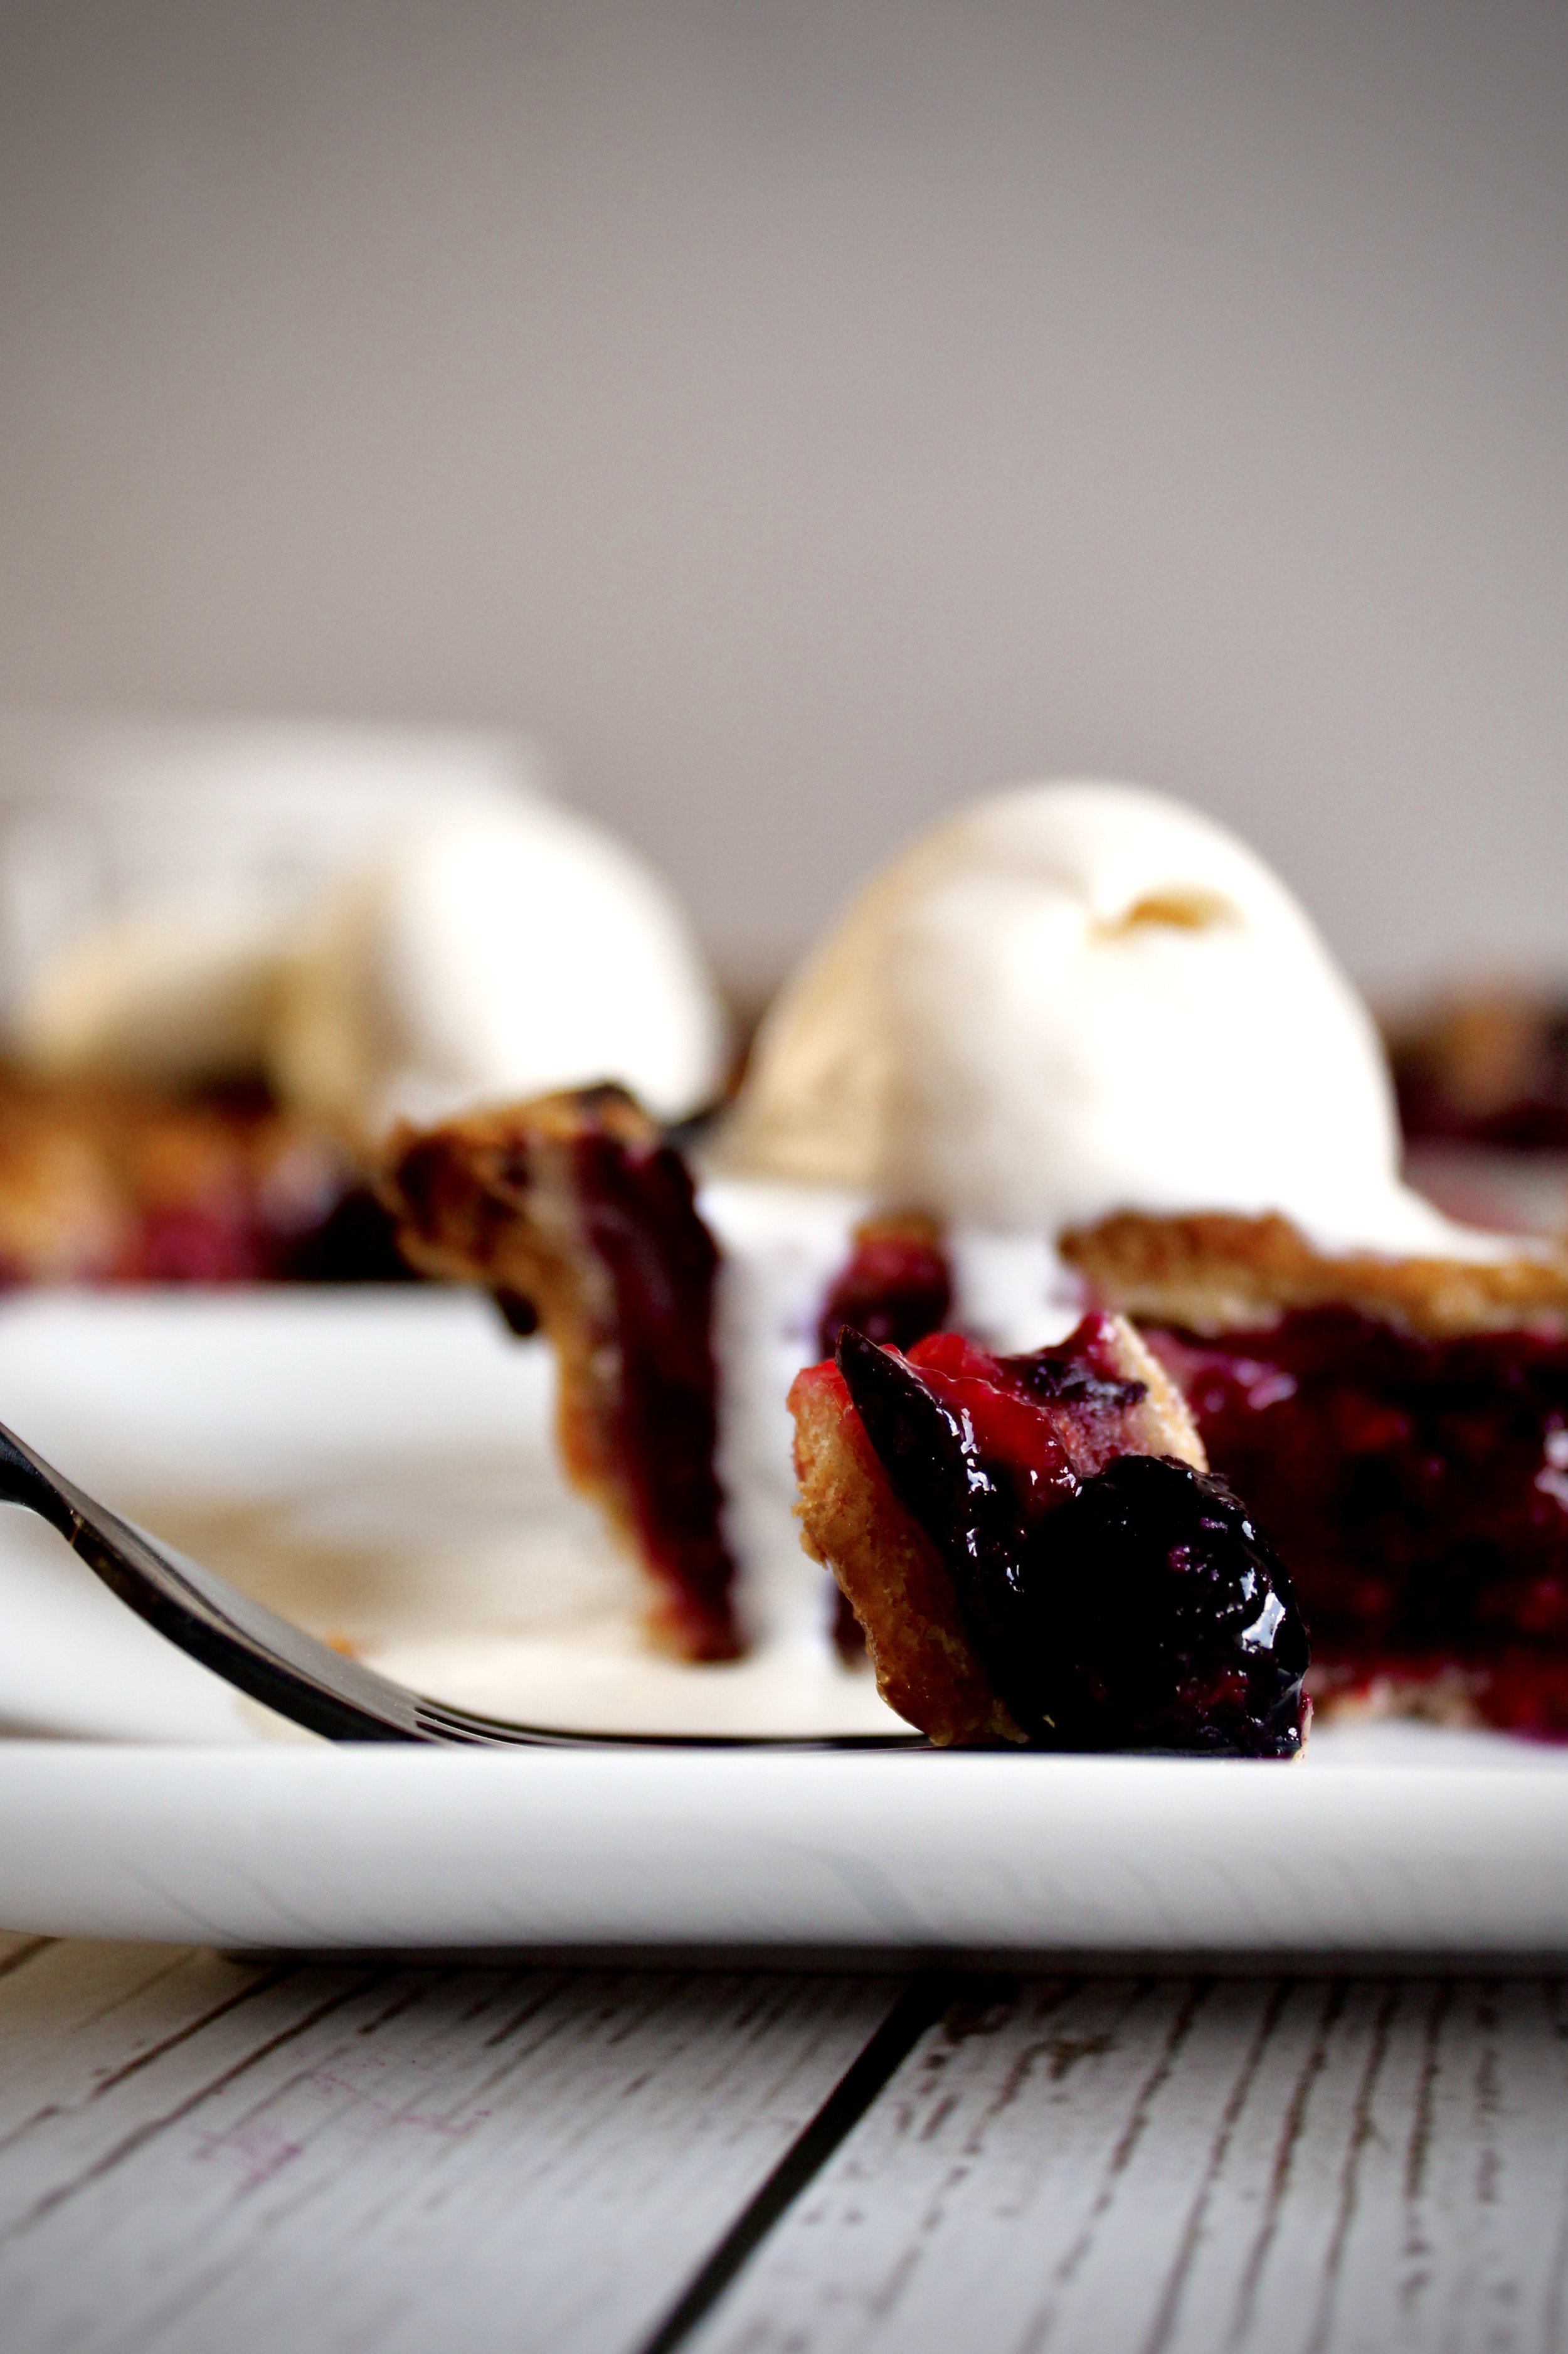
9. Cool completely. Don’t cut while warm or you’ll get a soupy filling and tough crust.


Enjoy!
Tips and FAQ’s for this recipe
Do I have to wash my berries?
Not really. I always spring for organic so I don’t have to worry about pesticides. I also always get an organic brand I can trust to be clean, not covered in dirt. If you do need to wash your berries, do this well in advance or even the day before so they can dry completely. You don’t want any extra liquid in this pie.

How do I grate ginger?
You can use a microplane grater, the small side of a cheese grater, or just chop it really well. To peel it, I usually just use a paring knife to scrape off the outer skin. It comes off fairly easily, but you may need to rinse the ginger afterward since this is usually messy.

Help! My pie crust cracked!
That’s okay! You can use your fingers to gently press it back together. If it’s a big tear, wait until you trim the edges then use a trimming to patch the hole. As long as it’s sealed when you fill the pie, you’ll be fine. :)

How do I weave lattice?
Honestly, I wish I were better at this. It’s always a messy ordeal. You can actually weave it in a variety of patterns, but the basic premise is always the same: line up strips in one parallel direction (use the shorter strips along the edge and the longer strips across the middle), fold back every other strip to about the middle of the pie, lay a piece perpendicularly across this, then fold back the strips you folded back. Next, fold back the other strips you left straight and repeat this process, filling in one side of the pie then the other.

My pie making tools
Here are my must-have tools I use for making this pie. Affiliate links provided.
Vegetable peeler or cheese grater
Pastry blender or food processor
Pie pan (Emile Henry has become my favorite!)
Microplane zester for the lemon


Ginger Berry Pie
- prep time: 20-25 minutes
- freeze time: 30 minutes
- bake time: 40-50 minutes
- total time: 1 hour, 45 minutes
servings: 8-12
Ingredients:
- two brown sugar all-butter pie crusts (or a double batch/two of your favorite pie crusts)
- ¾ cup (150g) granulated sugar
- zest and juice from one large lemon (or two small lemons)
- 1 tablespoon (8g) ground cinnamon
- 4 tablespoons (37g) cornstarch
- 2 tablespoons (17g) flour
- 1 tablespoon (5g) grated fresh ginger
- 1 ½ tablespoons (16g) finely chopped candied ginger
- 3 cups (444g) fresh blueberries (organic, if possible)
- 3 cups (369g) fresh raspberries (organic, if possible)
- 3 cups (432g) fresh blackberries (organic, if possible)
- optional: egg wash of 1 egg and 1 tablespoon (13g) whole milk
- optional: 1 tablespoon of sugar for finishing the crust
Instructions:
- First, make the double pie crust and form it into two discs. You can double the recipe and still follow all of the same steps, only forming it into two discs instead of one at that step. I highly encourage using cinnamon in the crust, as it complements the cinnamon and ginger in the filling. Make this ahead of time. You can refrigerate it for a few days or freeze it for a few weeks. If you freeze it, thaw it in the fridge overnight.
- When you are ready to make your pie, set the crust discs out on the counter for about 10 minutes while you prep the filling. If you end up taking longer than 10 minutes, put the crust back into the fridge for a few minutes--you want it pliable but not soft.
- Prep the filling. If your berries are not organic or need a wash, be sure to gently rinse them then let them dry COMPLETELY. You don’t want any extra liquid in this filling or it will turn soupy. Zest then juice your lemon. Peel the ginger and grate it or finely chop it. Finely chop the candied ginger.
- Make the filling. Stir the lemon zest and sugar together until fragrant. If you don’t have a microplane zester, you can blend the sugar and zest in a food processor or blender until fragrant. Whisk in the cinnamon, cornstarch, flour, fresh ginger and candied ginger. Gently stir in the (dry) berries. Add the lemon juice and gently stir until combined. Set aside while you roll out your pie crust.
- Place one of the pie dough discs on a lightly floured, clean work surface or rolling mat. Sprinkle a little more flour over the top. Begin rolling out the dough, rotating the rolling pin as you go. I like to imagine it’s a clock and I need to roll it over every hour—so top down is 12 and 6, left right is 3 and 9, etc. Roll it out to be about ⅛ inch thick and about 3 inches bigger in diameter than your pie pan (e.g. 12” for a 9” pan). Be sure to flip and rotate the dough every so often, sprinkling a tiny bit more flour as needed to 1) keep it from sticking and 2) ensure you’re rolling evenly. I tend to roll the bottom left too thin and the top right too thick. Rotating balances this out. If any bits of the edge crack or break, gently press them back together with your hands.
- Lightly sprinkle your pie pan with flour. Roll about half of the crust onto the rolling pin then gently slide it over the pie pan until centered. Gently lift the edges of the crust and press it into the pan. You want about ½ inch of overhang, so trim anything beyond that. Place the crust in the fridge while you roll out the lattice top.
- Roll out the lattice top to a little larger than your pie pan (about 10” for a 9” pan). Cut it into strips anywhere from ½ to 1 inch wide. It’s entirely up to your preference how thick you cut each strip.
- Gently pour the filling into the chilled bottom crust, scooping all of the juices into there as well. Weave the lattice strips over the top. You can weave it in a variety of patterns, so don’t worry too much about getting it perfect. This video is also helpful with classic lattice weaving.
- Trim any excess lattice to be flush with the bottom crust’s overhang. Fold the overhanging crust over itself and press gently to seal it. Shape it as desired.
- If desired, brush with an egg wash (one egg whisked well with a tablespoon of whole milk or cream). Sprinkle with some sugar.
- Place the pie in the freezer for 30 minutes while your oven preheats to 400F/205C. Line a baking sheet with foil. After 30 minutes in the freezer, bake the pie for 20 minutes at 400F/205C then turn down the oven to 375F/190C. Tent the pie with foil and let bake 30-40 minutes longer, until the crust is golden and the filling bubbles and looks thickened. Be sure it’s bubbling throughout before you remove it from the oven, to ensure a sturdy pie.
- Let the pie cool completely at room temperature. Once the bottom of the pan is cooled, it’s safe to slice, but don’t cut it sooner or you’ll get a soupy filling and chewy crust.
Enjoy!
Leftovers will last 1-2 days on the counter (covered) or 5-7 days in the fridge (covered).
