Sourdough Cinnamon Rolls
Fluffy cinnamon rolls filled with the perfect combo of sourdough flavor and spicy sweetness, topped with a sweet and tangy cream cheese frosting. These overnight rolls are easy to prep the day before and bake fresh in the morning—perfect for a lazy weekend or even a holiday gathering.
This post may contain affiliate links from which, at no additional cost to you, I may earn a small commission to keep this site running. Only products I myself would or do use are recommended.

FYI, If you’re new to the world of sourdough, check out this post about creating a starter and this post about maintaining a starter. And before baking your first loaf, you may want to check out this post all about levains. And, if need be, check out this post about troubleshooting a sourdough starter. And most importantly, try out my simple, easiest sourdough recipe here!

Okay, full disclosure: I don’t make cinnamon rolls that often. I made them a few times like 15 years ago, and it was okay, and then not again until recently.
Recently, I decided I wanted to try something besides bread with my sourdough. And since I’ve been baking something each week that is the same size as my baby (or uses ingredients that are her size, like a peach or a mini M&M), this was the perfect chance to bake up a whole tray of cinnamon rolls, since baby girl is now the size of a whole cake pan (or as long as a 9x13 pan from head to toe!).
So, experimenting I went.
We were all pleasantly surprised by how delicious these were. A hint of sourness from the sourdough. A lot of cinnamon and brown sugar filling. A balanced frosting using cream cheese to bring out the tang of the sourdough.
And the fluff! I was very concerned that these wouldn’t turn out, but they did! Fluffy and chewy in a good way, these were so, so good even a few days later.

Why this recipe works
The sourdough starter, when used fresh, helps create the ideal rise. It’s fluffy yet still has that classic cinnamon roll chew. The rise time will vary by season and how warm/cold your kitchen is, but using the oven light method is fairly reliable in timing. Plus, sourdough starter has gut-healthy bacteria, so yay!
I also like to use brown sugar in my filling for a deeper flavor. And I tend to use a little more sugar and cinnamon than the average recipe calls for, which both adds flavor and creates a bit of a sticky cinnamon-y sauce at the bottom of the pan—no dry cinnamon rolls in this house!
Finally, while you can use any glaze or frosting you like, using a cream cheese frosting is ideal for these because it brings out the tanginess of the sourdough. If you want this to be more subtle, feel free to substitute butter for the cream cheese or just use a simple milk and powdered sugar glaze instead.

Key ingredients
Active sourdough starter. This needs to be “peak” active starter, so be sure to feed it no more than 12 hours before you begin (it’s best to know your starter and kitchen to know when it should be fed). Also be sure you will have enough for this recipe—if desired, you can scoop some starter out and create a levain separate from your main starter. This is helpful if you keep your starter in the fridge, keep a small starter, feed it at a high ratio, or don’t want the hassle of feeding the retained portion of starter again while simultaneously trying to start the cinnamon roll dough.
Milk. I suggest whole milk, but as far as I understand, any type of milk will technically work in case you need it dairy free.
Butter. Use unsalted, so you can control the amount of salt in this recipe. You’ll need softened butter for the filling.
Egg. One large, room temperature egg is needed.
Flour. I prefer all-purpose, as it’s fluffier and softer. But you can sub a small portion of the flour for bread flour, to create a more bread-y texture.
Sugar. Just a bit of granulated sugar is used in the dough.
Salt. Sea salt is best.
Brown sugar. You can use regular sugar for the filling, but I prefer the deeper flavor of brown.
Cinnamon. I use a bit more than the average recipe, because I love cinnamon.
Cream cheese. This is optional for the frosting, but I think it adds a lovely tang and keeps the rolls from being overly sweet.
Powdered sugar. For the frosting as well.
Heavy whipping cream. You could use milk instead, but I think heavy cream is better for the frosting.

How to make sourdough cinnamon rolls
1. Feed your sourdough starter. Do this 4-12 hours before you plan to begin the rolls. I fed mine in the morning and put it in the (turned off) oven with the light on, so it was ready to use around lunch time. Another option is to feed it the night before and leave it on the counter. Be sure you will have at least 250g for the cinnamon rolls.
2. Heat the butter and add milk. As soon as the butter is melted, remove the pan from heat and add the milk. This will be enough to warm the milk.
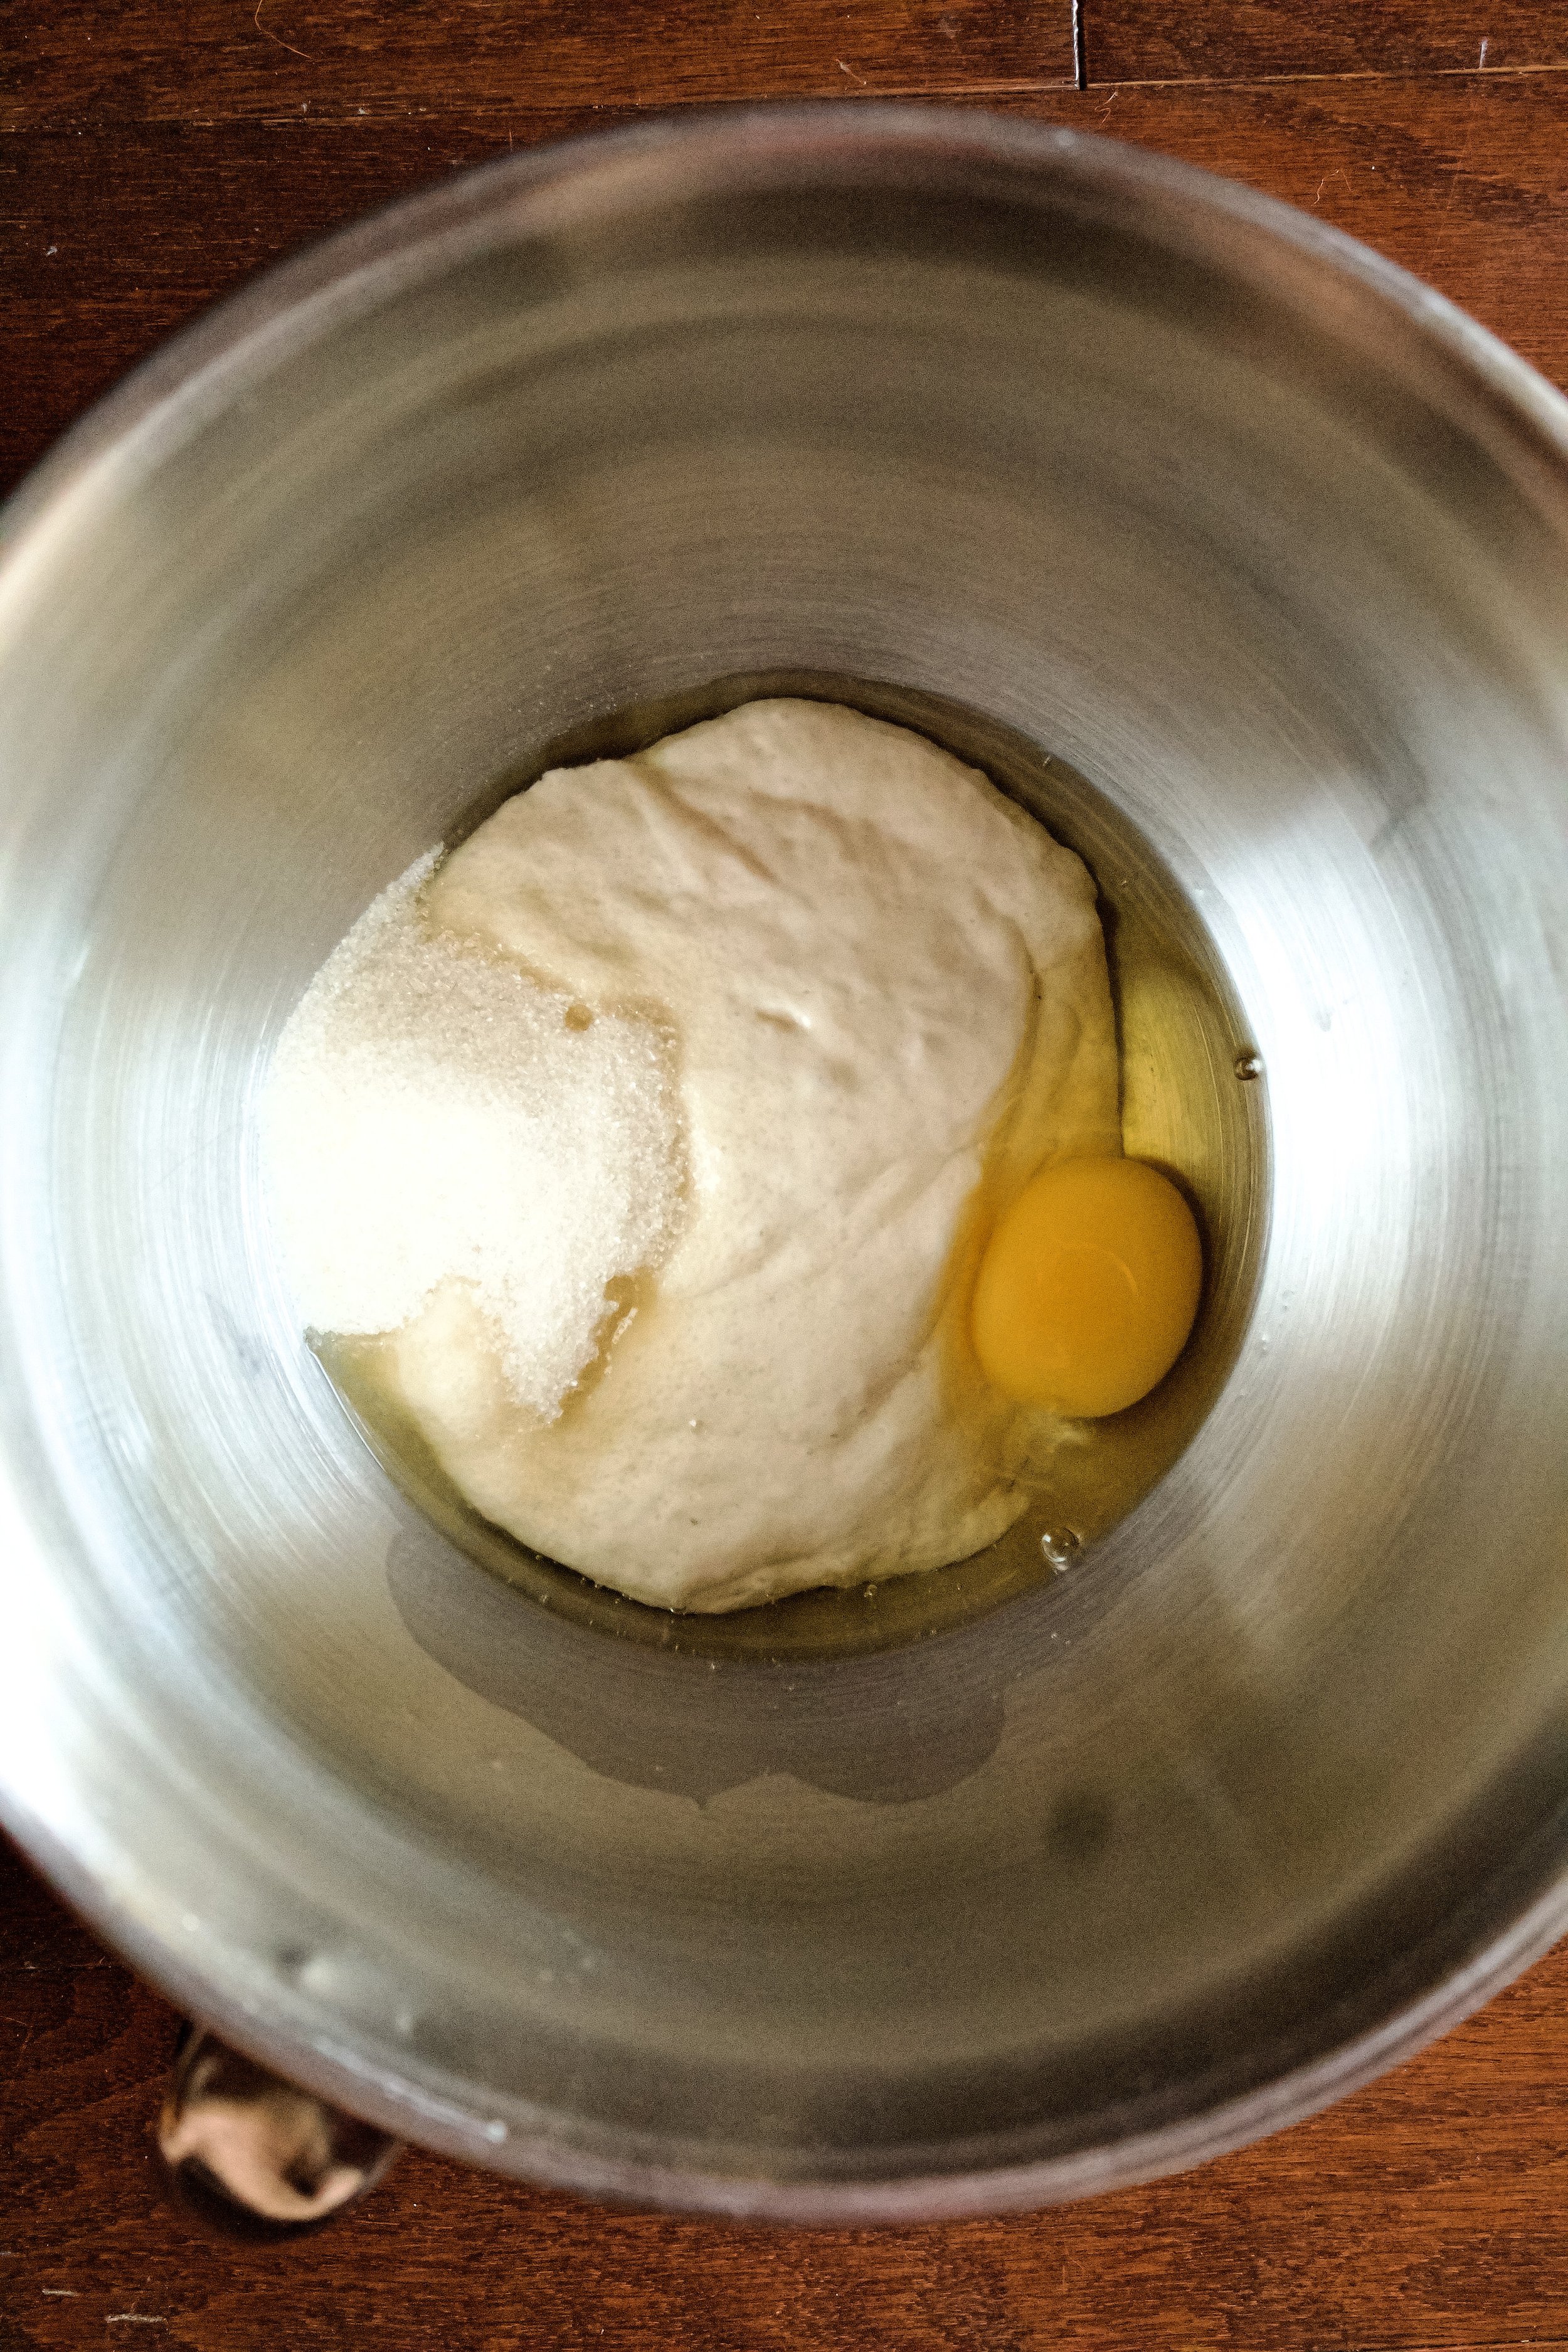
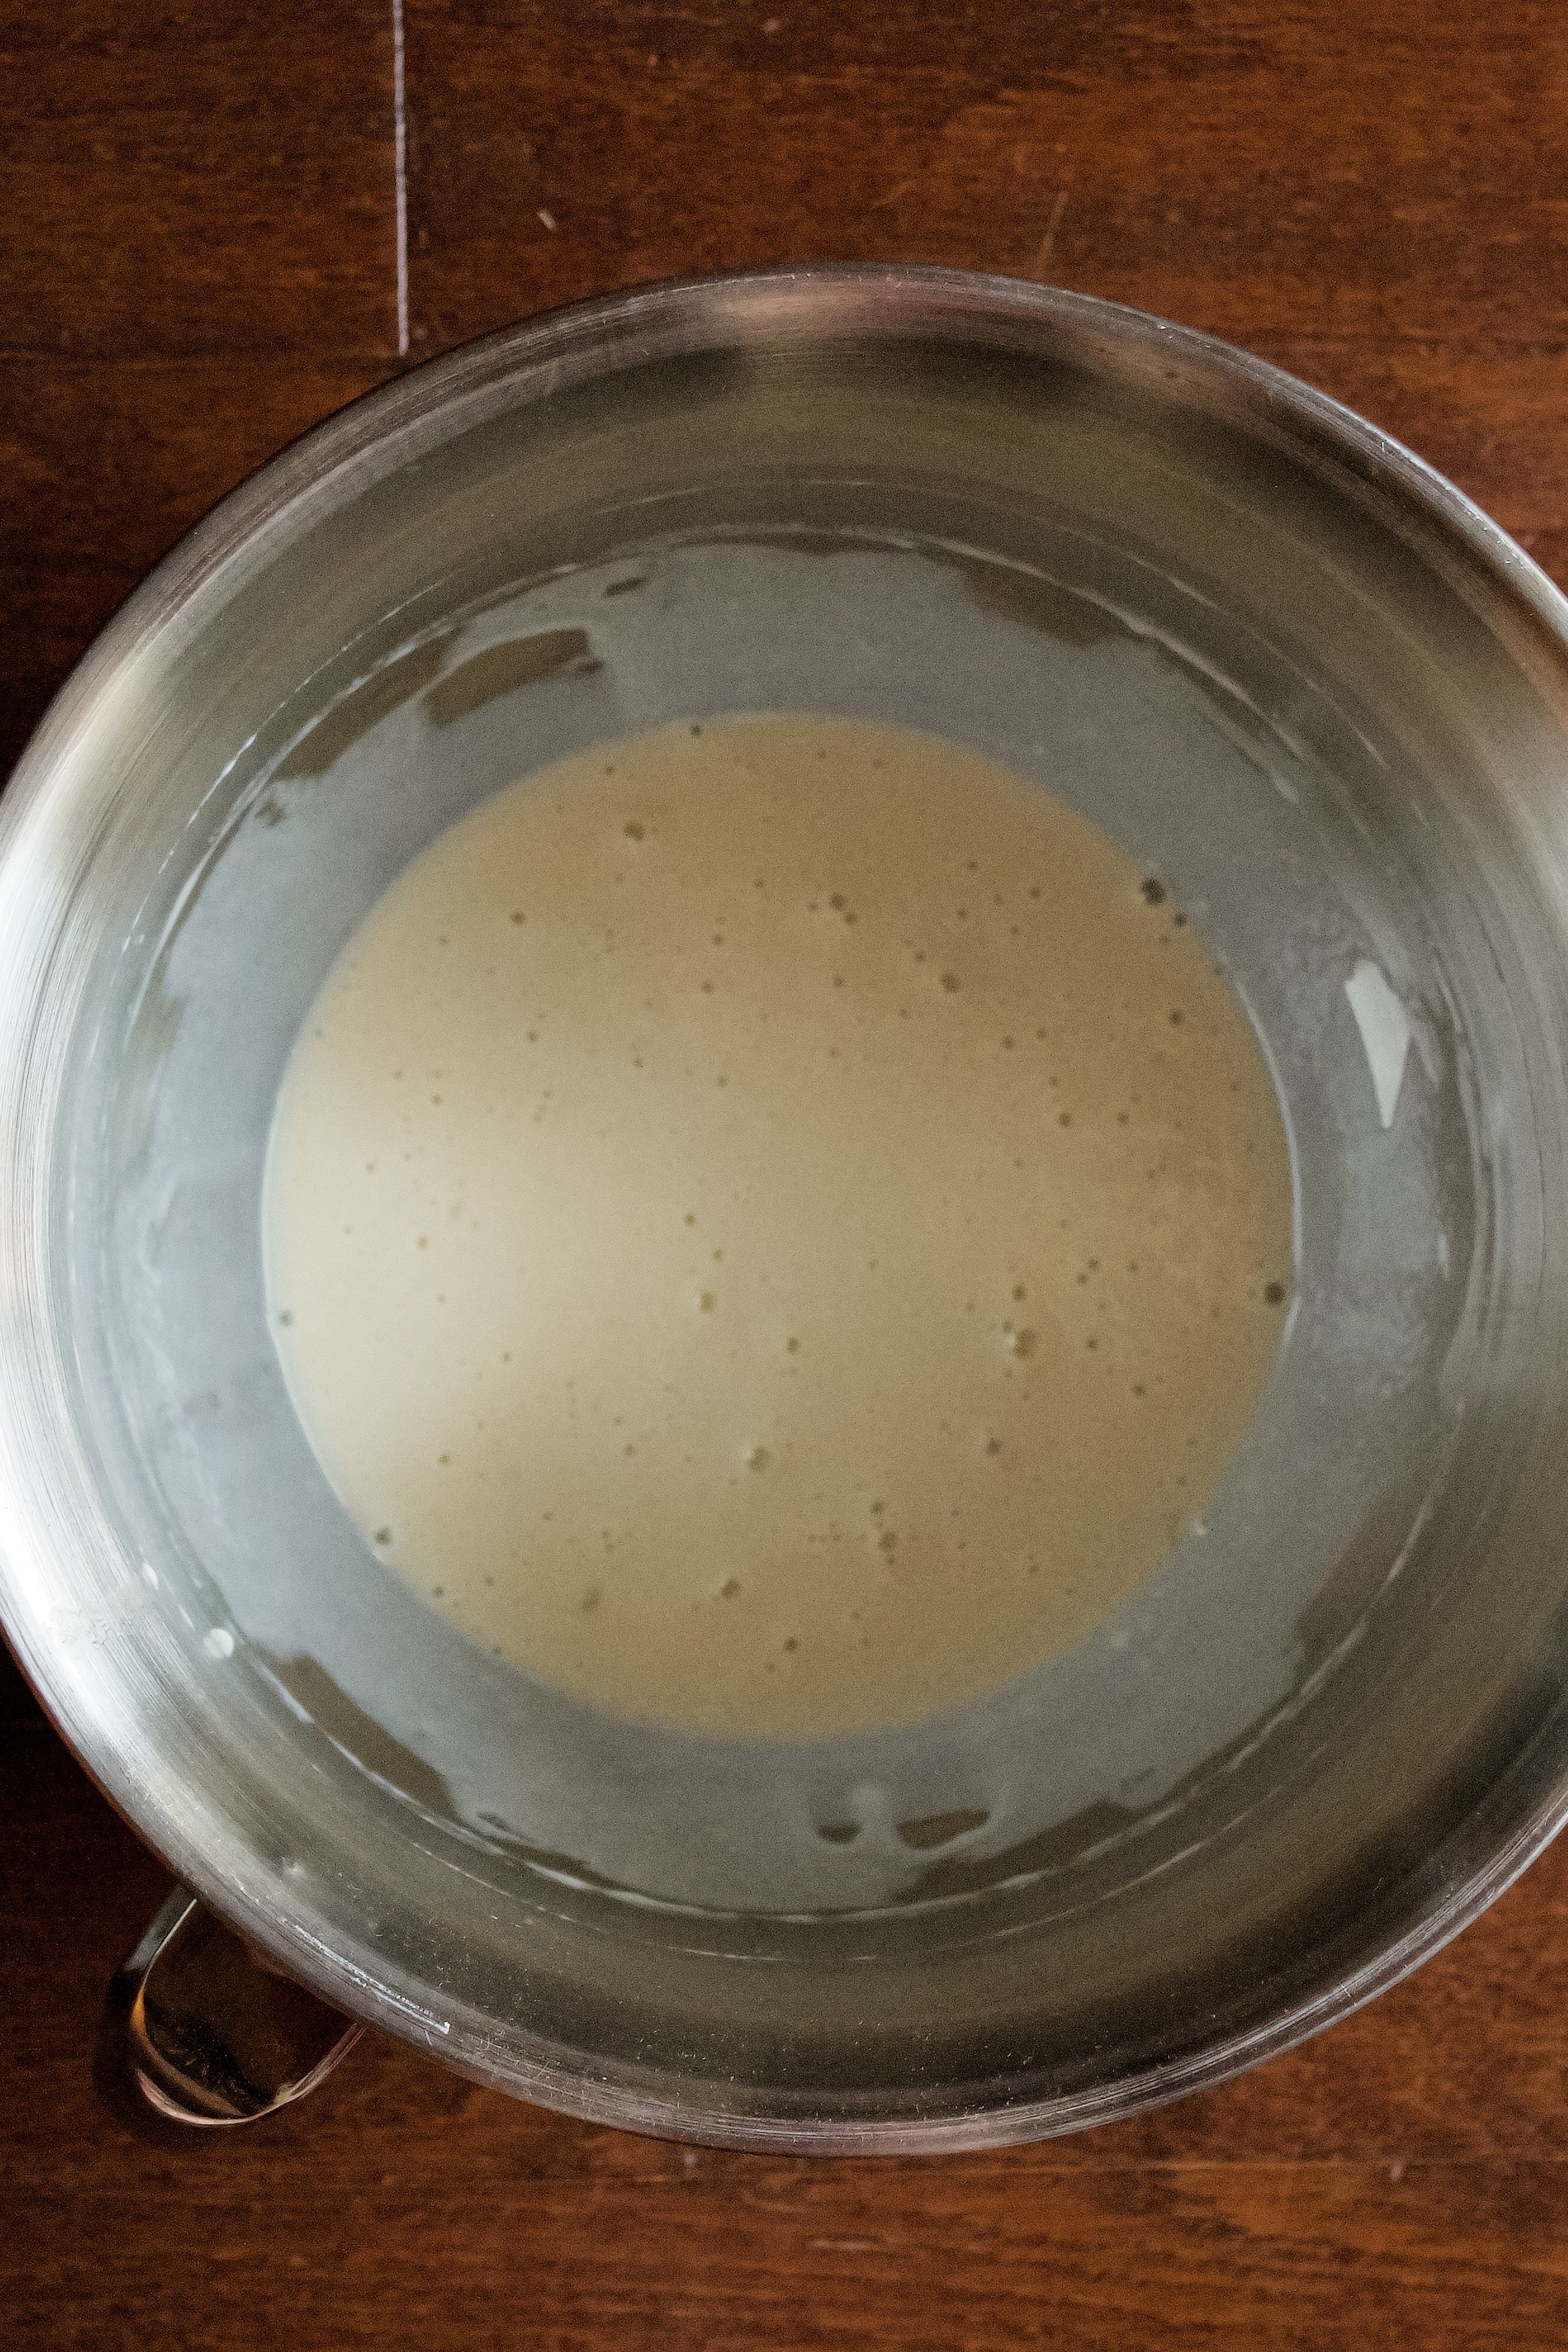
3. Combine wet ingredients. Mix the starter, egg, and sugar well. Slowly mix in the milk. If using a stand mixer, use the paddle attachment (or a hand whisk).
4. Add flour and salt then let rest. Mix until just combined—it will be a shaggy ball at this point. If the paddle attachment isn’t mixing it enough, you can use a spatula or wooden spoon.


5. Mix with dough hook. You’re really just looking for it to slightly begin to pull away from the sides of the bowl, so don’t worry about it being smooth and shiny or forming into a ball—the next step will take care of that.
6. Stretch and fold. Every 15-20 minutes for an hour (so 3-4 sets), you will perform stretch and folds. This simply means to gently lift up one side and fold it over the middle, repeating this until all 4 “sides” have been stretched and folded.
7. Bulk ferment (first rise). Place in a lightly buttered bowl or straight-edged vessel and let rise. Only let it rise by 50%—not double. I chose to do this in my oven with the light on, so it only took a few hours. You could leave it on the counter, which would take 4-6 hours in a warm kitchen and 12-18 hours in a cold kitchen.


8. Pre-shape. Once it has increased in volume by 50%, spread it onto a floured surface and pat into a rectangle. Let rest 5-10 minutes.
9. Make the filling. While the rectangle rests, mix the cinnamon and brown sugar in a bowl. Make sure your butter is softened.
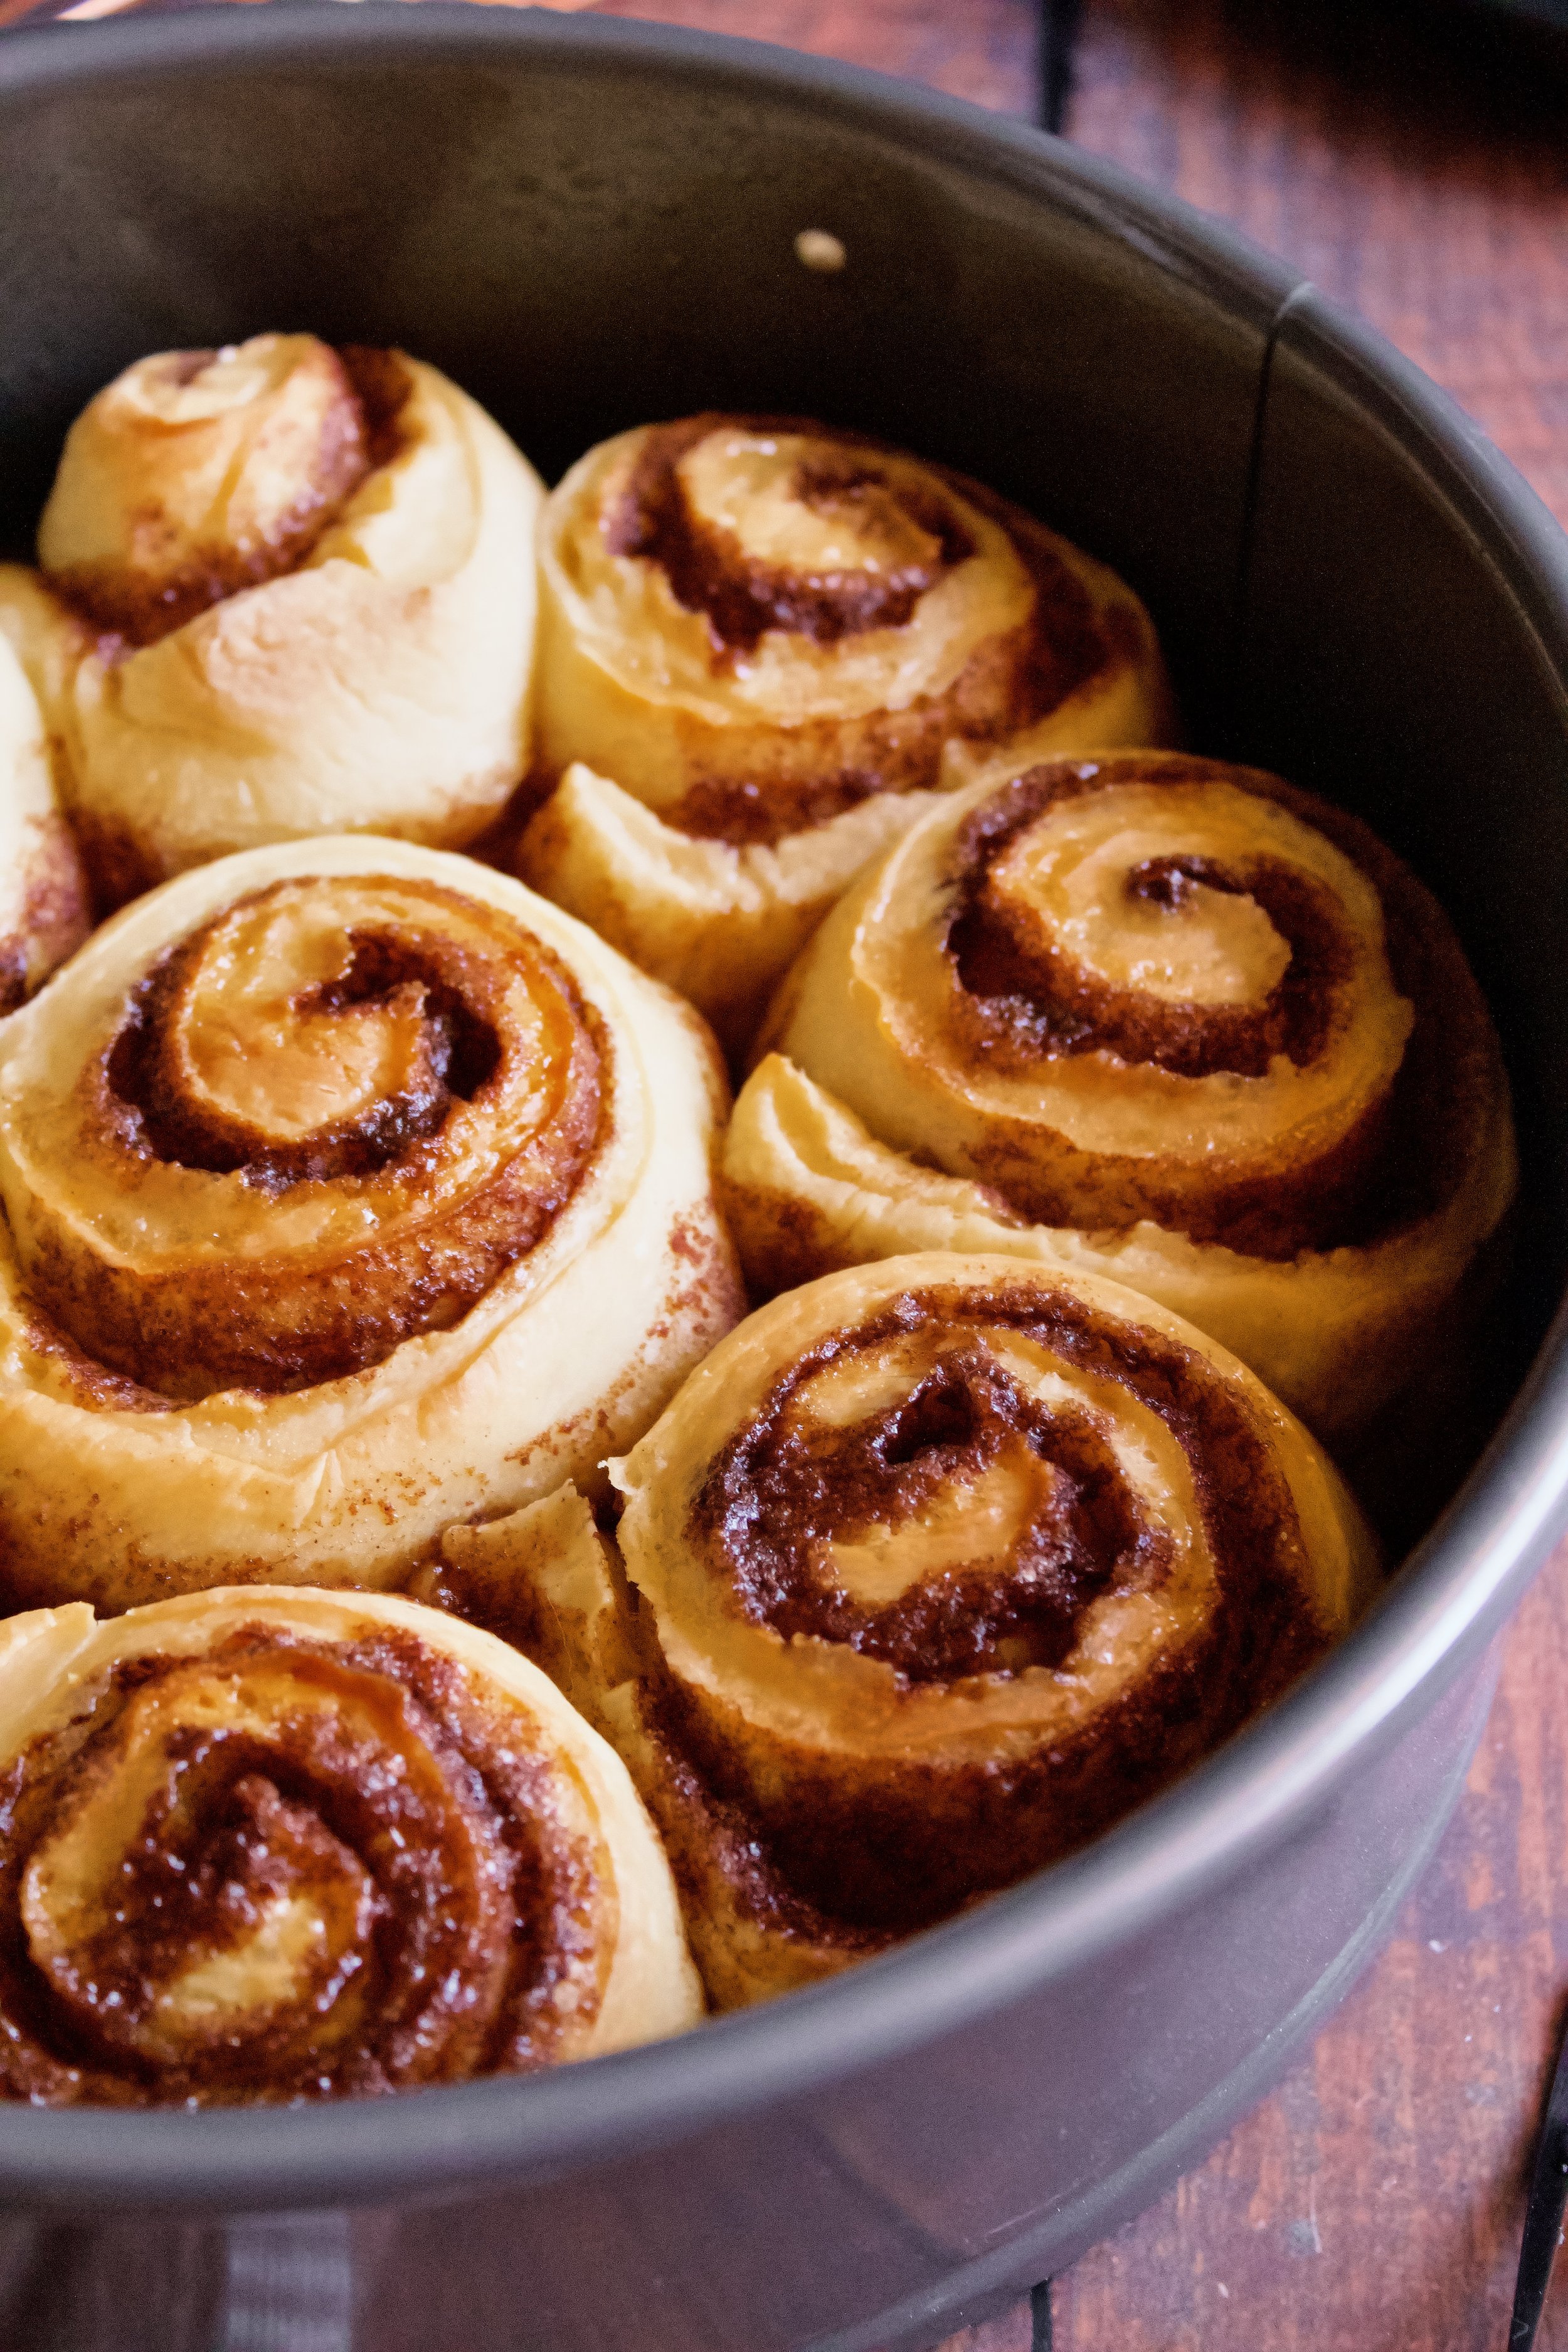
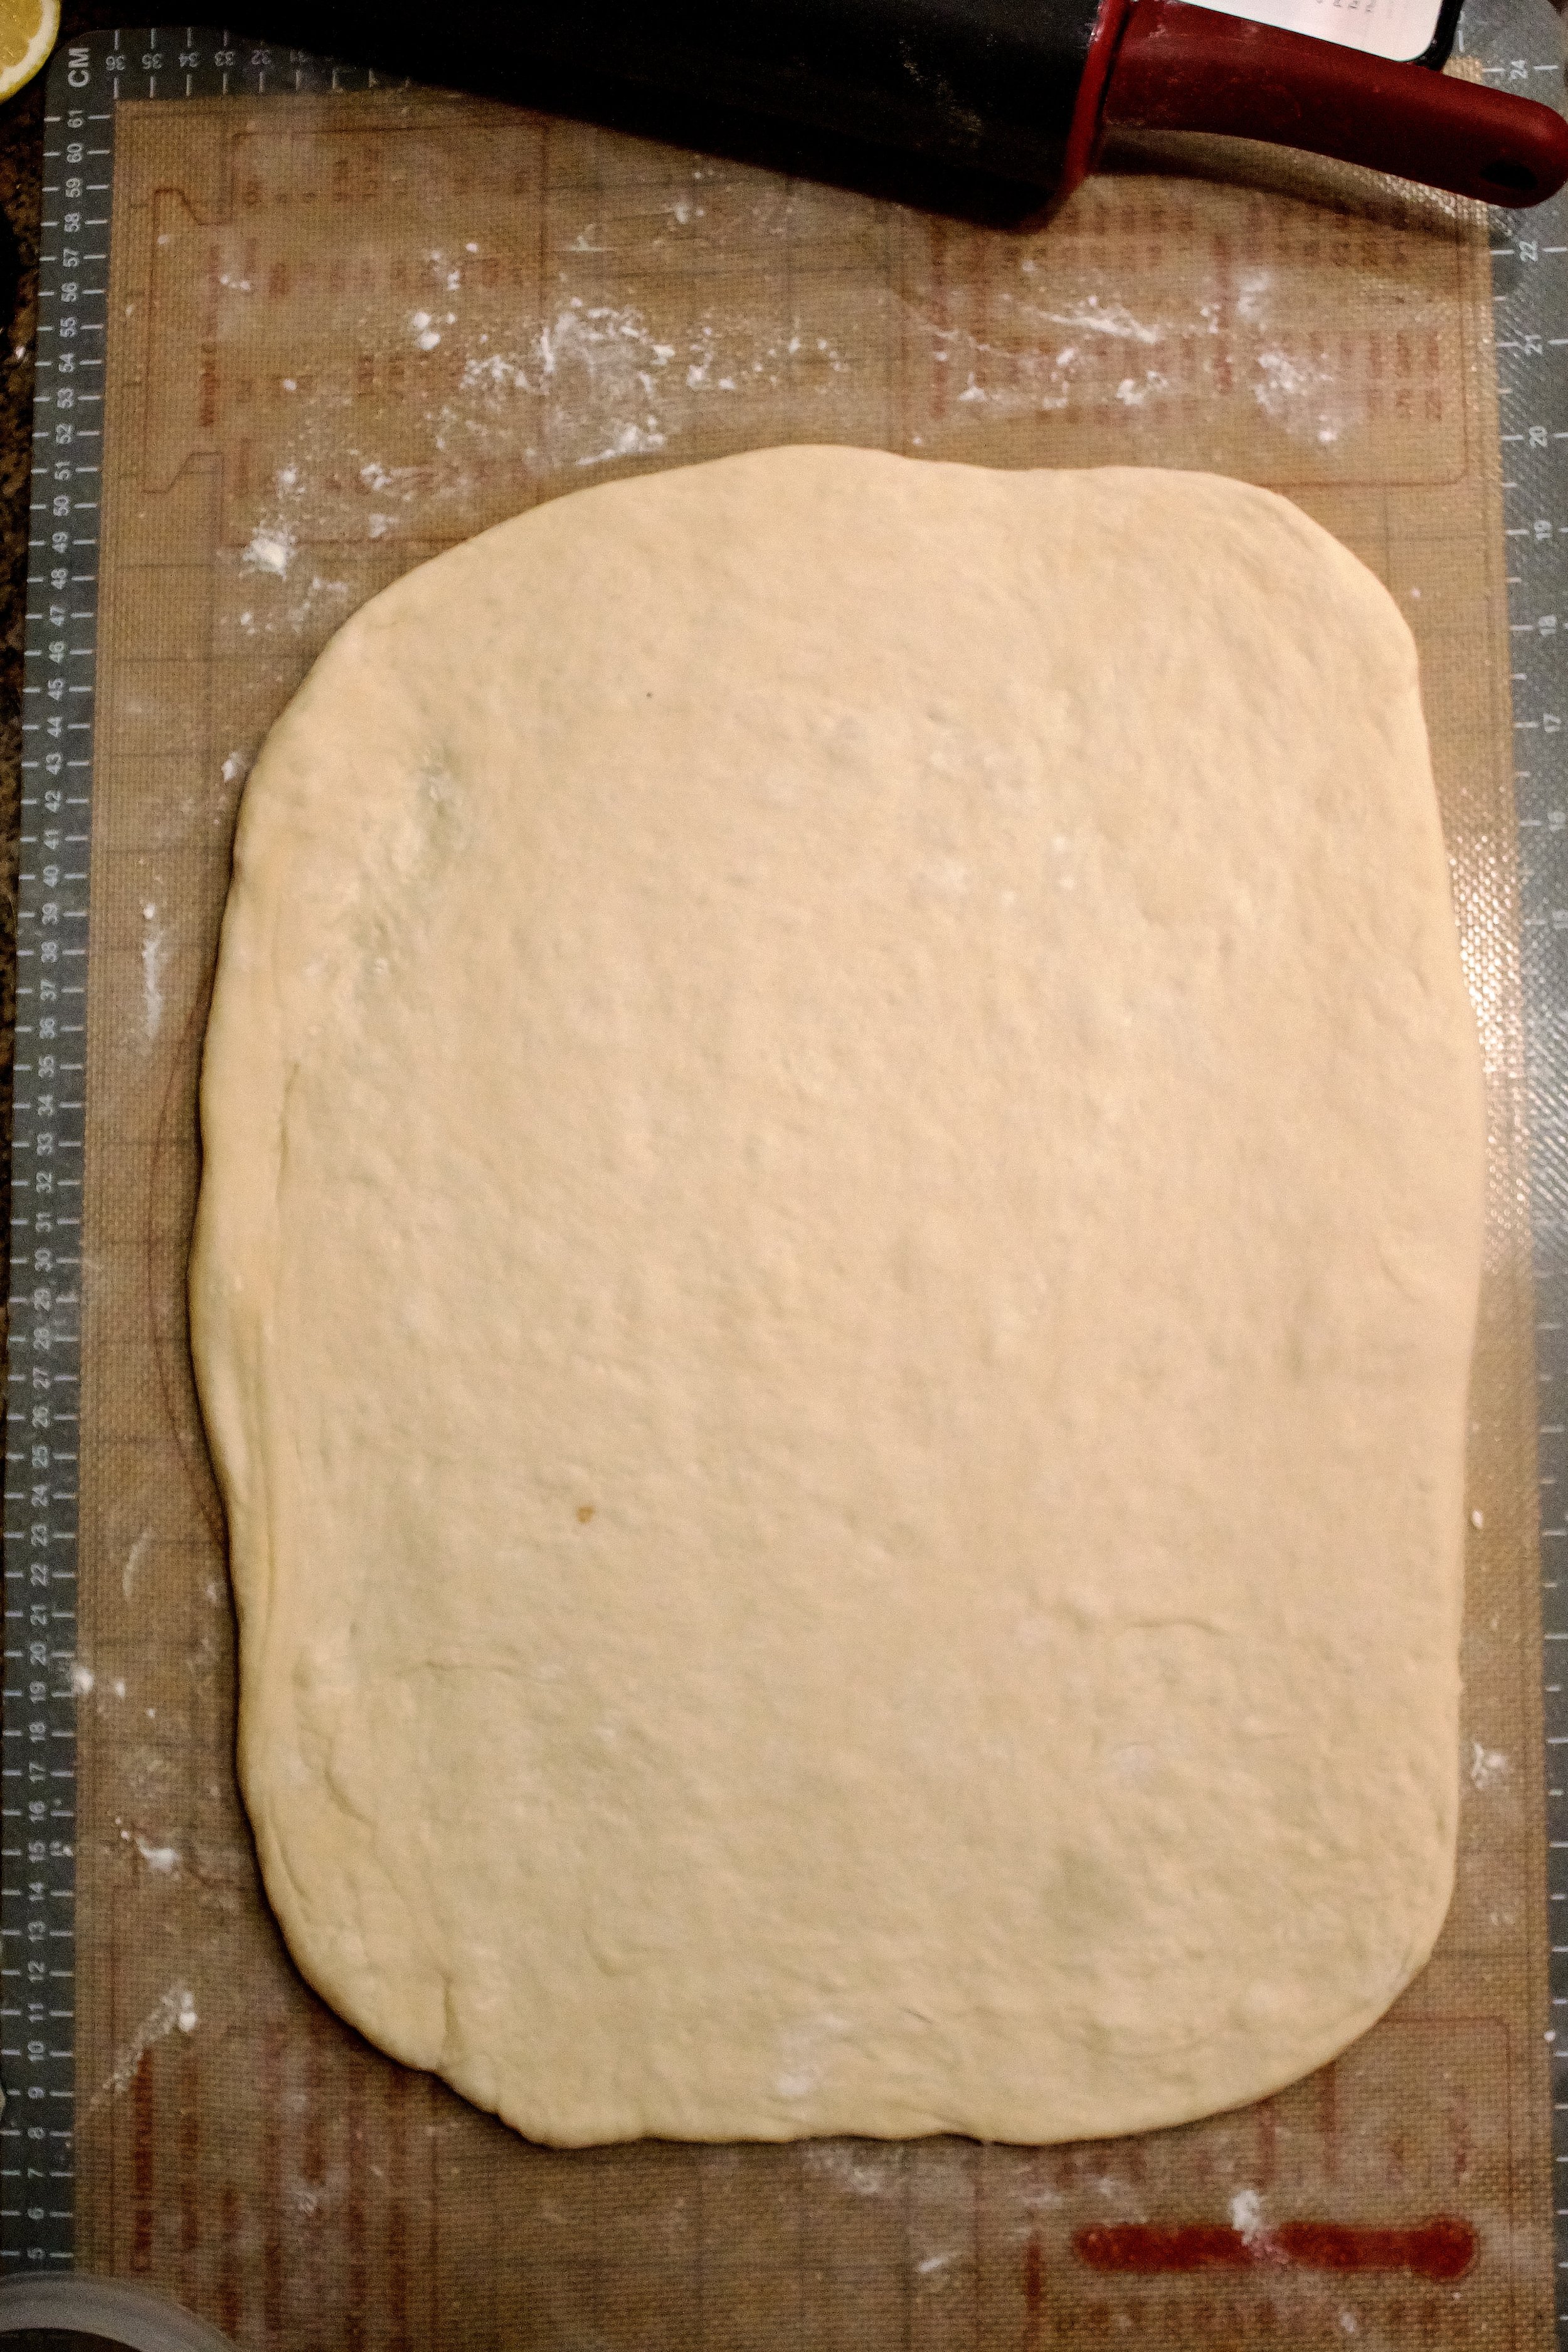
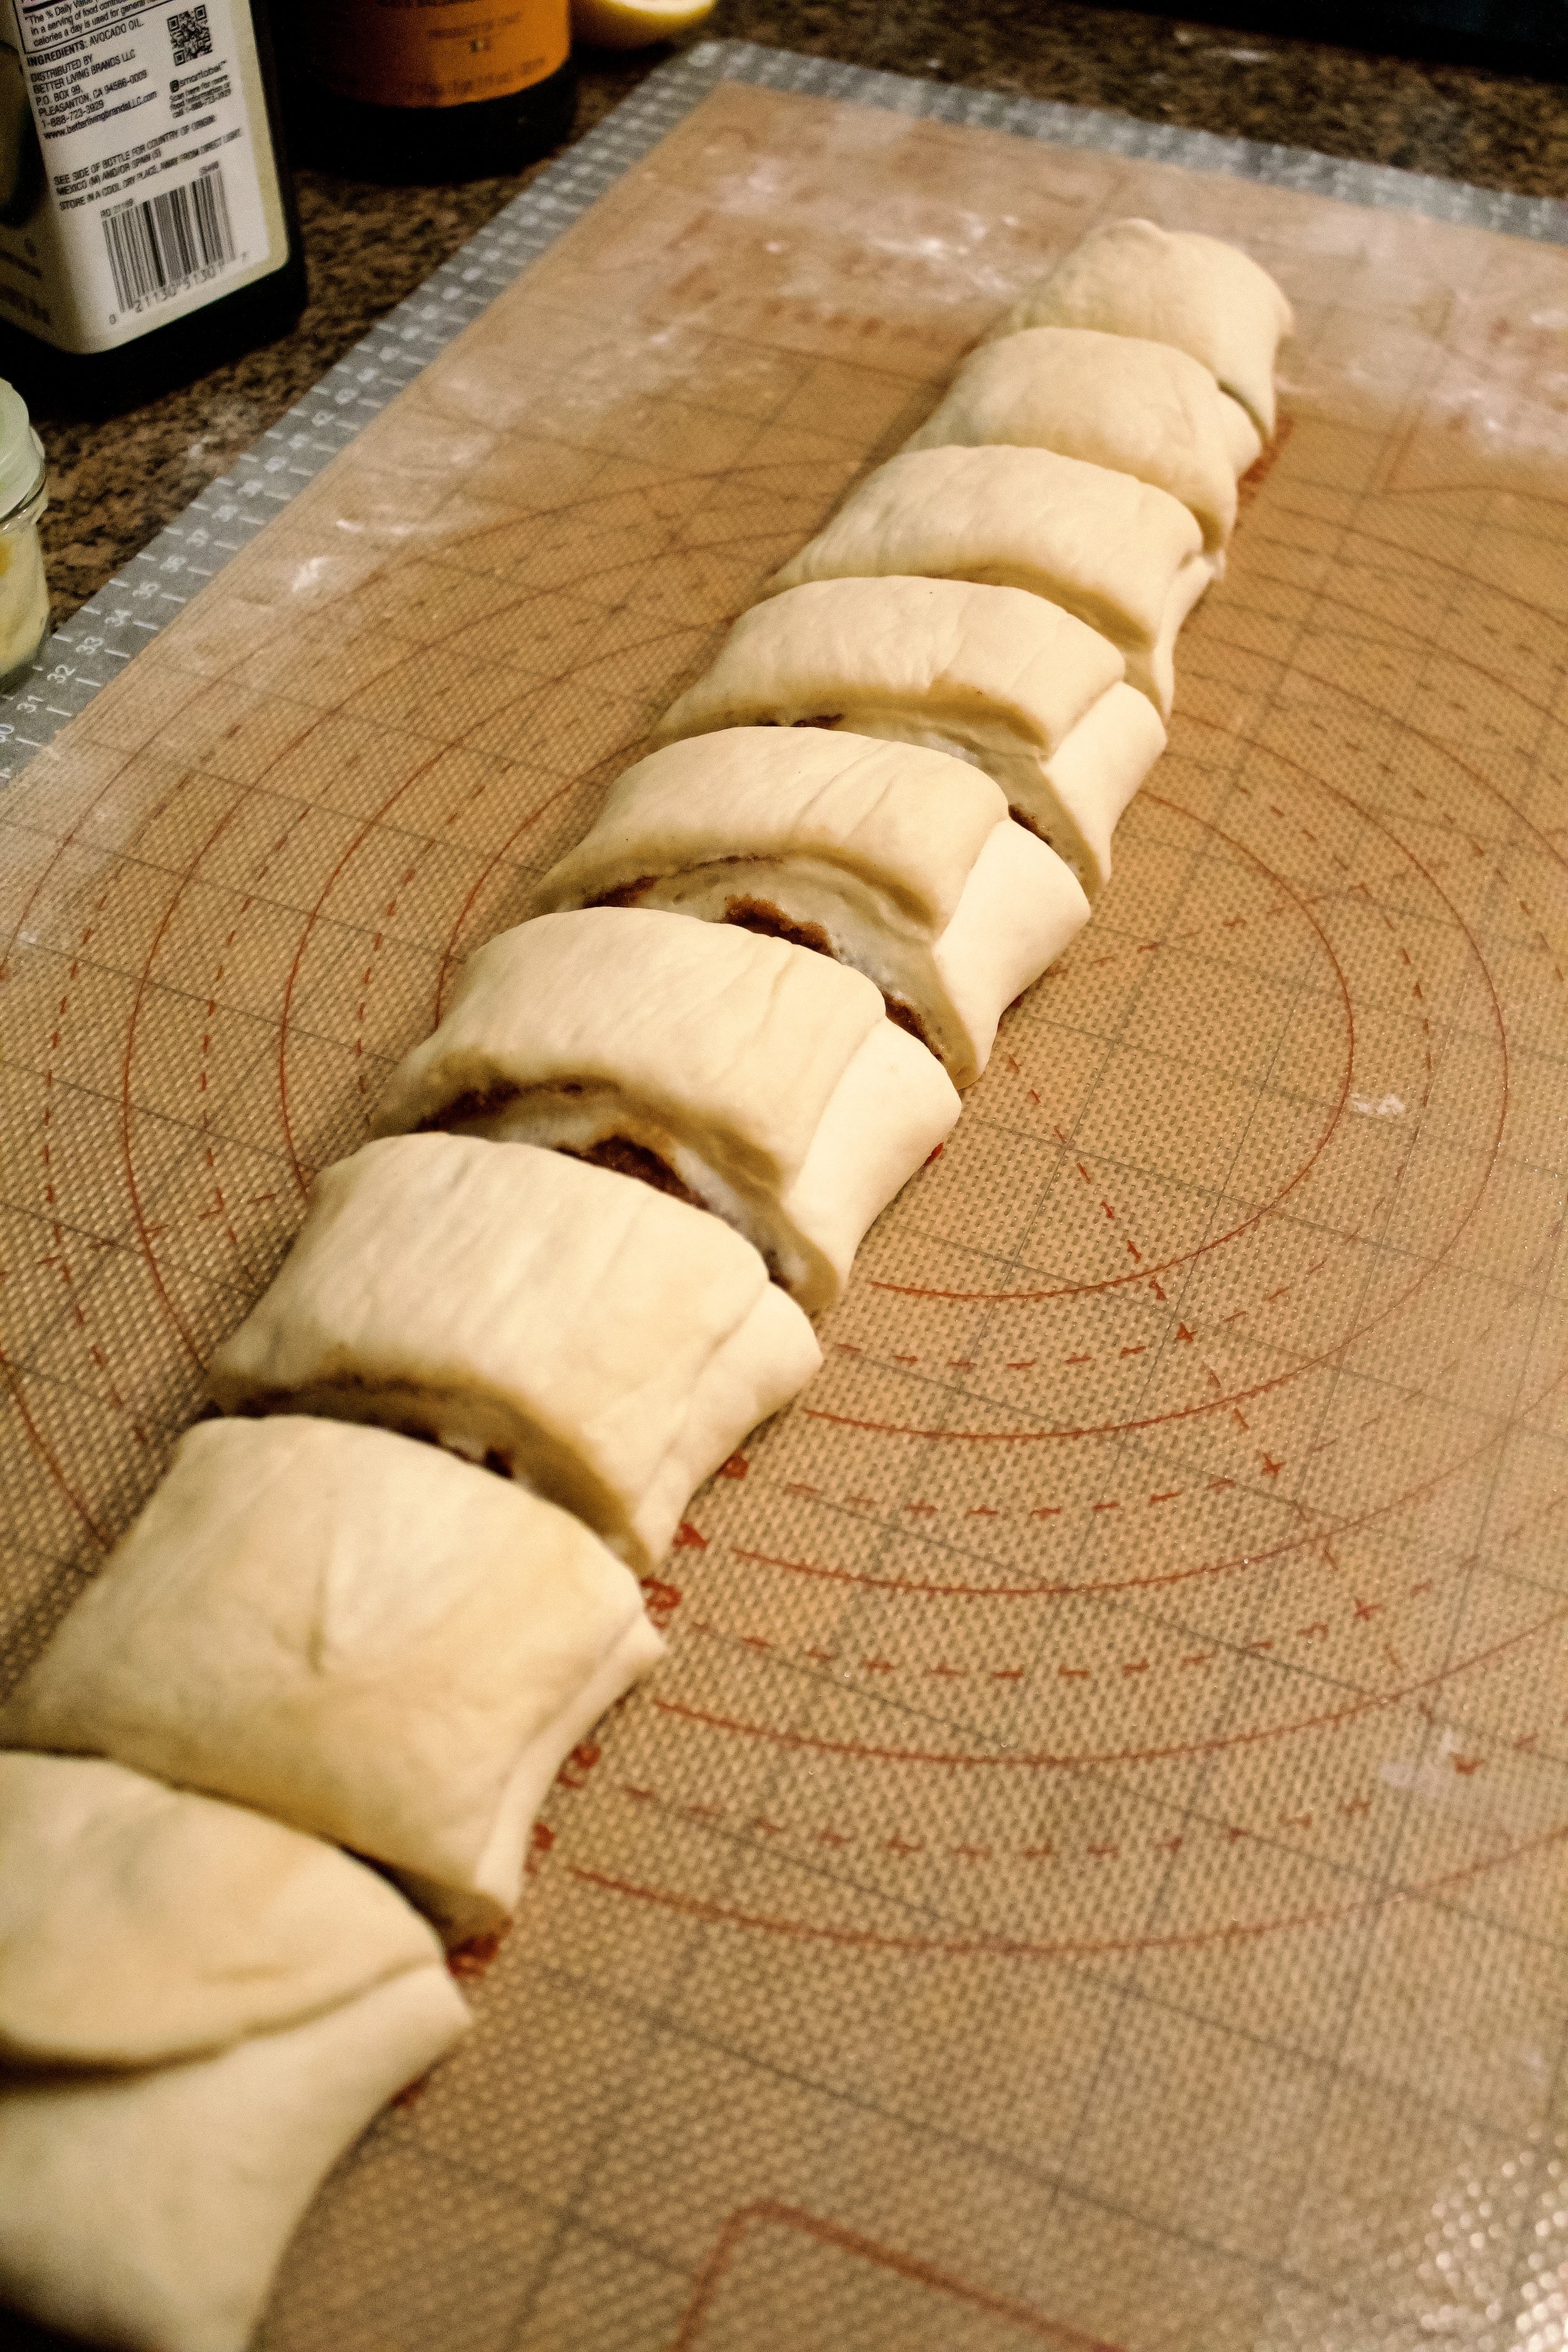
10. Shape into rolls. Use floured hands or a rolling pin to stretch it into a rectangle that is about 12 inches by 18ish inches. With the long edge facing you, use a butter knife or offset spatula to spread the butter onto the dough, leaving a 1/2 inch border on the far side (the long edge that is furthest from you). Sprinkle the cinnamon sugar mixture evenly over the butter. Gently begin to roll it away from you into a tight log, using your palms to gently roll it evenly. Once you reach the far end, press gently to use the un-filled edge to seal the log. The log should now be 18inches long. Slice into 2 inch pieces.


11. Proof (second rise). Place in a greased (or parchment lined) 9inch springform pan. Cover with plastic wrap and either let sit about an hour until puffed up slightly or refrigerate up to 24 hours, until ready to bake.
12. Bake. Bake until puffed up and the tops begin to turn golden. Let cool about 10 minutes.
13. Frost/glaze. While the rolls cool slightly, make the frosting (or make it while they bake). Spread on still-warm rolls. I like to double the frosting and reserve half for dipping when I eat.
Enjoy!


Tips and FAQ’s for this recipe
How do I time this?
This depends on your day, when you want to serve the rolls, and if you want them freshly baked. I started this on a Saturday to have freshly baked cinnamon rolls Sunday morning. I created a levain Saturday morning and let it rise with the oven light, mixed the dough around lunchtime, let it rise in the oven during the afternoon, then refrigerated my shaped rolls overnight, baking them Sunday morning. If you’re going to be out and about, it could be easiest to build your levain Friday night and leave it on the counter to rise, mix the dough Saturday morning then let that rise on the counter during the day, then shape your rolls in the afternoon or evening. Both methods allow you the freedom to bake in the evening or the morning.

How do I build up my starter (create a levain)?
I keep a small starter that’s roughly 90g total. I suggest creating a levain, which is just a sectioned off bit of starter (usually what I’d normally discard or a portion of it) that’s fed at a 1:2:2 ratio (starter:flour:water). The idea is that you’ll have just slightly more than you need for the recipe. Some people keep a larger starter, so if you normally have 250g or more of discard, you can just feed your starter 4-12 hours before starting the dough and scoop out 250g when it is at its peak (doubled in volume and the bubbles are breaking the surface). If you’re new to sourdough starter, I suggest creating a levain that you let rise in the oven (turned off, light on) so it rises at a reliable pace and is separate from your main starter and you don’t have to worry about what to do with the remainder (I’ve known people who’ve used it all in a recipe and thus have NO starter left to keep).

Can I use a different frosting or a glaze?
Yes! I chose cream cheese because it’s classic, brings out the tang of the sourdough, and I had some leftover that we needed to use soon. You could sub butter for the cream cheese in my recipe, or use a simple icing of heavy cream, powdered sugar, and vanilla.

Can I use a square pan?
Yes! I just chose a round pan because 1) the rolls are round and I like keeping them that way and 2) the springform edge makes it easier to take them out of the pan and take photos. But you can use an 8x8 or 9x9 square pan, just be sure to grease it well.

Can I double the recipe?
Yes! If you double the recipe, you’ll either use two 9inch springform pans or use a 9x13 pan. You’ll also need to create two “logs” so that each roll is still the right size. If using a 9x13 pan, bake at 325F/165C for 45-50 minutes.


Sourdough Cinnamon Rolls
- prep time: about 30-40 minutes, spread out
- rise/resting times: 6-16 hours (depending on where it rises)
- baking time: 25-30 minutes
- total time: 7-17 hours (adjustable to your schedule)
servings: 9-10
Ingredients:
for the dough
- ¼ cup (57g) unsalted butter
- ⅔ cup (160g) whole milk
- 250g active, bubbly sourdough starter (not discard)
- 1 large egg, room temperature
- ¼ cup (50g) granulated sugar
- 3 cups (408g) all-purpose flour
- 1 teaspoon (6g) sea salt
for the filling
- ⅔ cup (133g) brown sugar
- 4 teaspoons (10g) ground cinnamon
- ¼ cup (57g) unsalted butter, room temperature
for the cream cheese frosting
- 4 ounces (113g) cream cheese, room temperature (can sub butter)
- 1-2 cups (130-260g) powdered sugar (to taste)
- ¼-½ cup (60-120g) heavy whipping cream
- pinch sea salt
- 1 tablespoon (13g) pure vanilla extract
Instructions:
prep the starter
- Either feed your main starter enough to have 250g that you can scoop out and use OR build a separate levain by taking 50g starter and feeding it with 100g 80F/27C filtered water and 100g flour. Leave on the counter 8-12 hours (or place in a turned-off oven with the light on for 4-6 hours), until it has doubled in volume and become bubbly throughout, with bubbles breaking the surface. This means it is ready to use. There is a 1-2 hour window of use, starting when just a few bubbles break the surface and ending when it starts to sag and begins to sink back down.
make the dough
- Once the starter is bubbly and active and passes the float test (see this post for the float test), you can begin mixing the dough.
- In a small saucepan, heat the butter until melted. Remove from heat and add the milk. Set aside while you mix the wet ingredients.
- In the bowl of your stand mixer fitted with the paddle attachment (or in a large mixing bowl with a whisk), mix the active starter, egg, and sugar on medium-low until well-blended. Slowly stream in the milk and butter while mixing.
- Add the flour and salt and mix until just combined. (If not using a stand mixer, use a spatula, wooden spoon, or your hands to mix the flour in). Cover with plastic or a damp towel and let sit for 15-20 minutes.
- Switch to a dough hook and mix on medium-low until it it begins to pull away from the edge of the bowl (once you stop mixing, it will slacken and stick to the edges again). If after 3-4 minutes it’s just not pulling away at all, at one tablespoon of flour at a time until it begins to pull away from the edge (still slackening when the mixer stops).
- Transfer the dough to a buttered bowl or straight-edged vessel (so you can gauge how much it rises). Cover and let sit 15-20 minutes.
- After 15-20 minutes, perform your first set of stretch and folds. Take clean, damp hands and lift one side of the dough, pulling it up and over the middle to the opposite side. Rotate 90 degrees and repeat. Continue until you have done 4-5 stretch and folds around the whole bowl.
- Repeat this process every 15-20 minutes for an hour, performing 3-4 sets total. The dough should be smooth and shiny and much stronger than when you started.
- Let the dough rise (bulk fermentation) on the counter for 8-12 hours (or in your turned-off oven with the light on for 4-6 hours), until it has increased in volume by about 50%. If it is rising too fast for your schedule, you can place it in the fridge to slow the rise.
shape the rolls
- Turn dough out onto a floured surface or pie mat. Use floured hands to gently pat it into a rectangle. Cover with plastic wrap and let rest for about 10-15 minutes.
- While it rests, mix the brown sugar and cinnamon for the filling.
- Use a rolling pin or floured hands to shape the dough into a rectangle that is about 12” by about 18”. Have the long edge facing you (so parallel to the counter’s edge).
- Use an offset spatula or smooth butter knife to gently spread the softened butter all around the dough, leaving a ½” border on the long edge furthest from you. Sprinkle the cinnamon sugar evenly over the butter.
- Gently roll the dough away from you, tucking it tightly along the seam closest to you then gently (but still tightly) rolling it evenly into a log. Using your palms once it gets going is easiest to keep it tight without being too rough.
- Once the log reaches the far edge, gently press the un-buttered end to “seal” the log.
- Using a very sharp knife, cut into 9-10 roughly 2” pieces. Arrange these evenly spaced in a lightly buttered (or parchment lined) 9” springform pan or 8” to 9” square pan. If using springform, wrap foil around the bottom to catch any drips.
proof the rolls
- Let the rolls sit on the counter for about 30 minutes. At this point, you can continue to let it proof until puffy and increased in volume between 20-50%, anywhere from 30-90 more, or cover and refrigerate for up to 24 hours, until ready to bake.
bake and frost
- When ready to bake, preheat oven to 350F/175C. Bake for 25-30 minutes, or until the tops begin to turn golden.
- While the rolls bake, make the frosting. Beat the cream cheese with a stand mixer or hand mixer on high until smooth. Add 1 cup of the powdered sugar and mix until smooth. Taste, adding more sugar to taste. Once the taste is to your liking, add the vanilla and ¼ cup heavy cream. Mix until smooth. Add more heavy cream as needed, to achieve a very soft consistency (not as thick as cake frosting).
- When the rolls are done baking, let cool 5-10 minutes (or slightly longer–they should be warmish when you frost them). Frost in the pan, letting the frosting melt around the rolls. (Tip: double the frosting to have some for dipping!)
Enjoy!
Leftovers should be covered well and refrigerated. Reheat in the microwave or a warm oven.