
Creating a Sourdough Starter
Everything you need to know about creating a thriving sourdough starter—from scratch! This is my simple, minimal-waste method that works for my busy schedule (and lazy self). While this takes a little more time and patience, there is something so rewarding about baking a perfect loaf using a starter made entirely by you!
This post may contain affiliate links from which, at no additional cost to you, I may earn a small commission to keep this site running. Only products I myself would or do use are recommended.
Bear with me as I venture down a new type of recipe: sourdough. I’ll try my best to keep things organized, clear, and concise!
My sourdough starter story
I’ll admit: I’m a pandemic sourdough bandwagoner. I actually named my starter Tina, short for “Quarantina.”
To be completely honest, I had terrible luck with my early starters. Yes, plural. The first one just wasn’t doing a thing for nearly two weeks, so I gave up. The next was better and actually had some bubbles after several days. Then I forgot I was keeping it in the oven (it was cold in our house) and preheated it with my beautiful starter inside. Oops.
Finally, my third attempt at a starter worked. I didn’t forget to feed it. I didn’t bake it on accident. And I was patient with it. And that is the key.
The key to a successful sourdough starter made from scratch is patience.
I’d also say the key is the right flours. My original starter was just all-purpose flour, and it took 2-3 weeks for it to even begin to be usable. My first several loaves were flat and dense. Partly due to inexperience but mostly due to a weak starter. When I recently made a new little starter specifically for this post, I used part rye flour and it was active within 3 days.
Major difference.
Note: What I’m sharing with you today is my preferred method for creating a starter that has minimal waste, minimal effort, and minimal stress. There are so many ways to do this, because sourdough starter is versatile and can be tailored to what works for you.
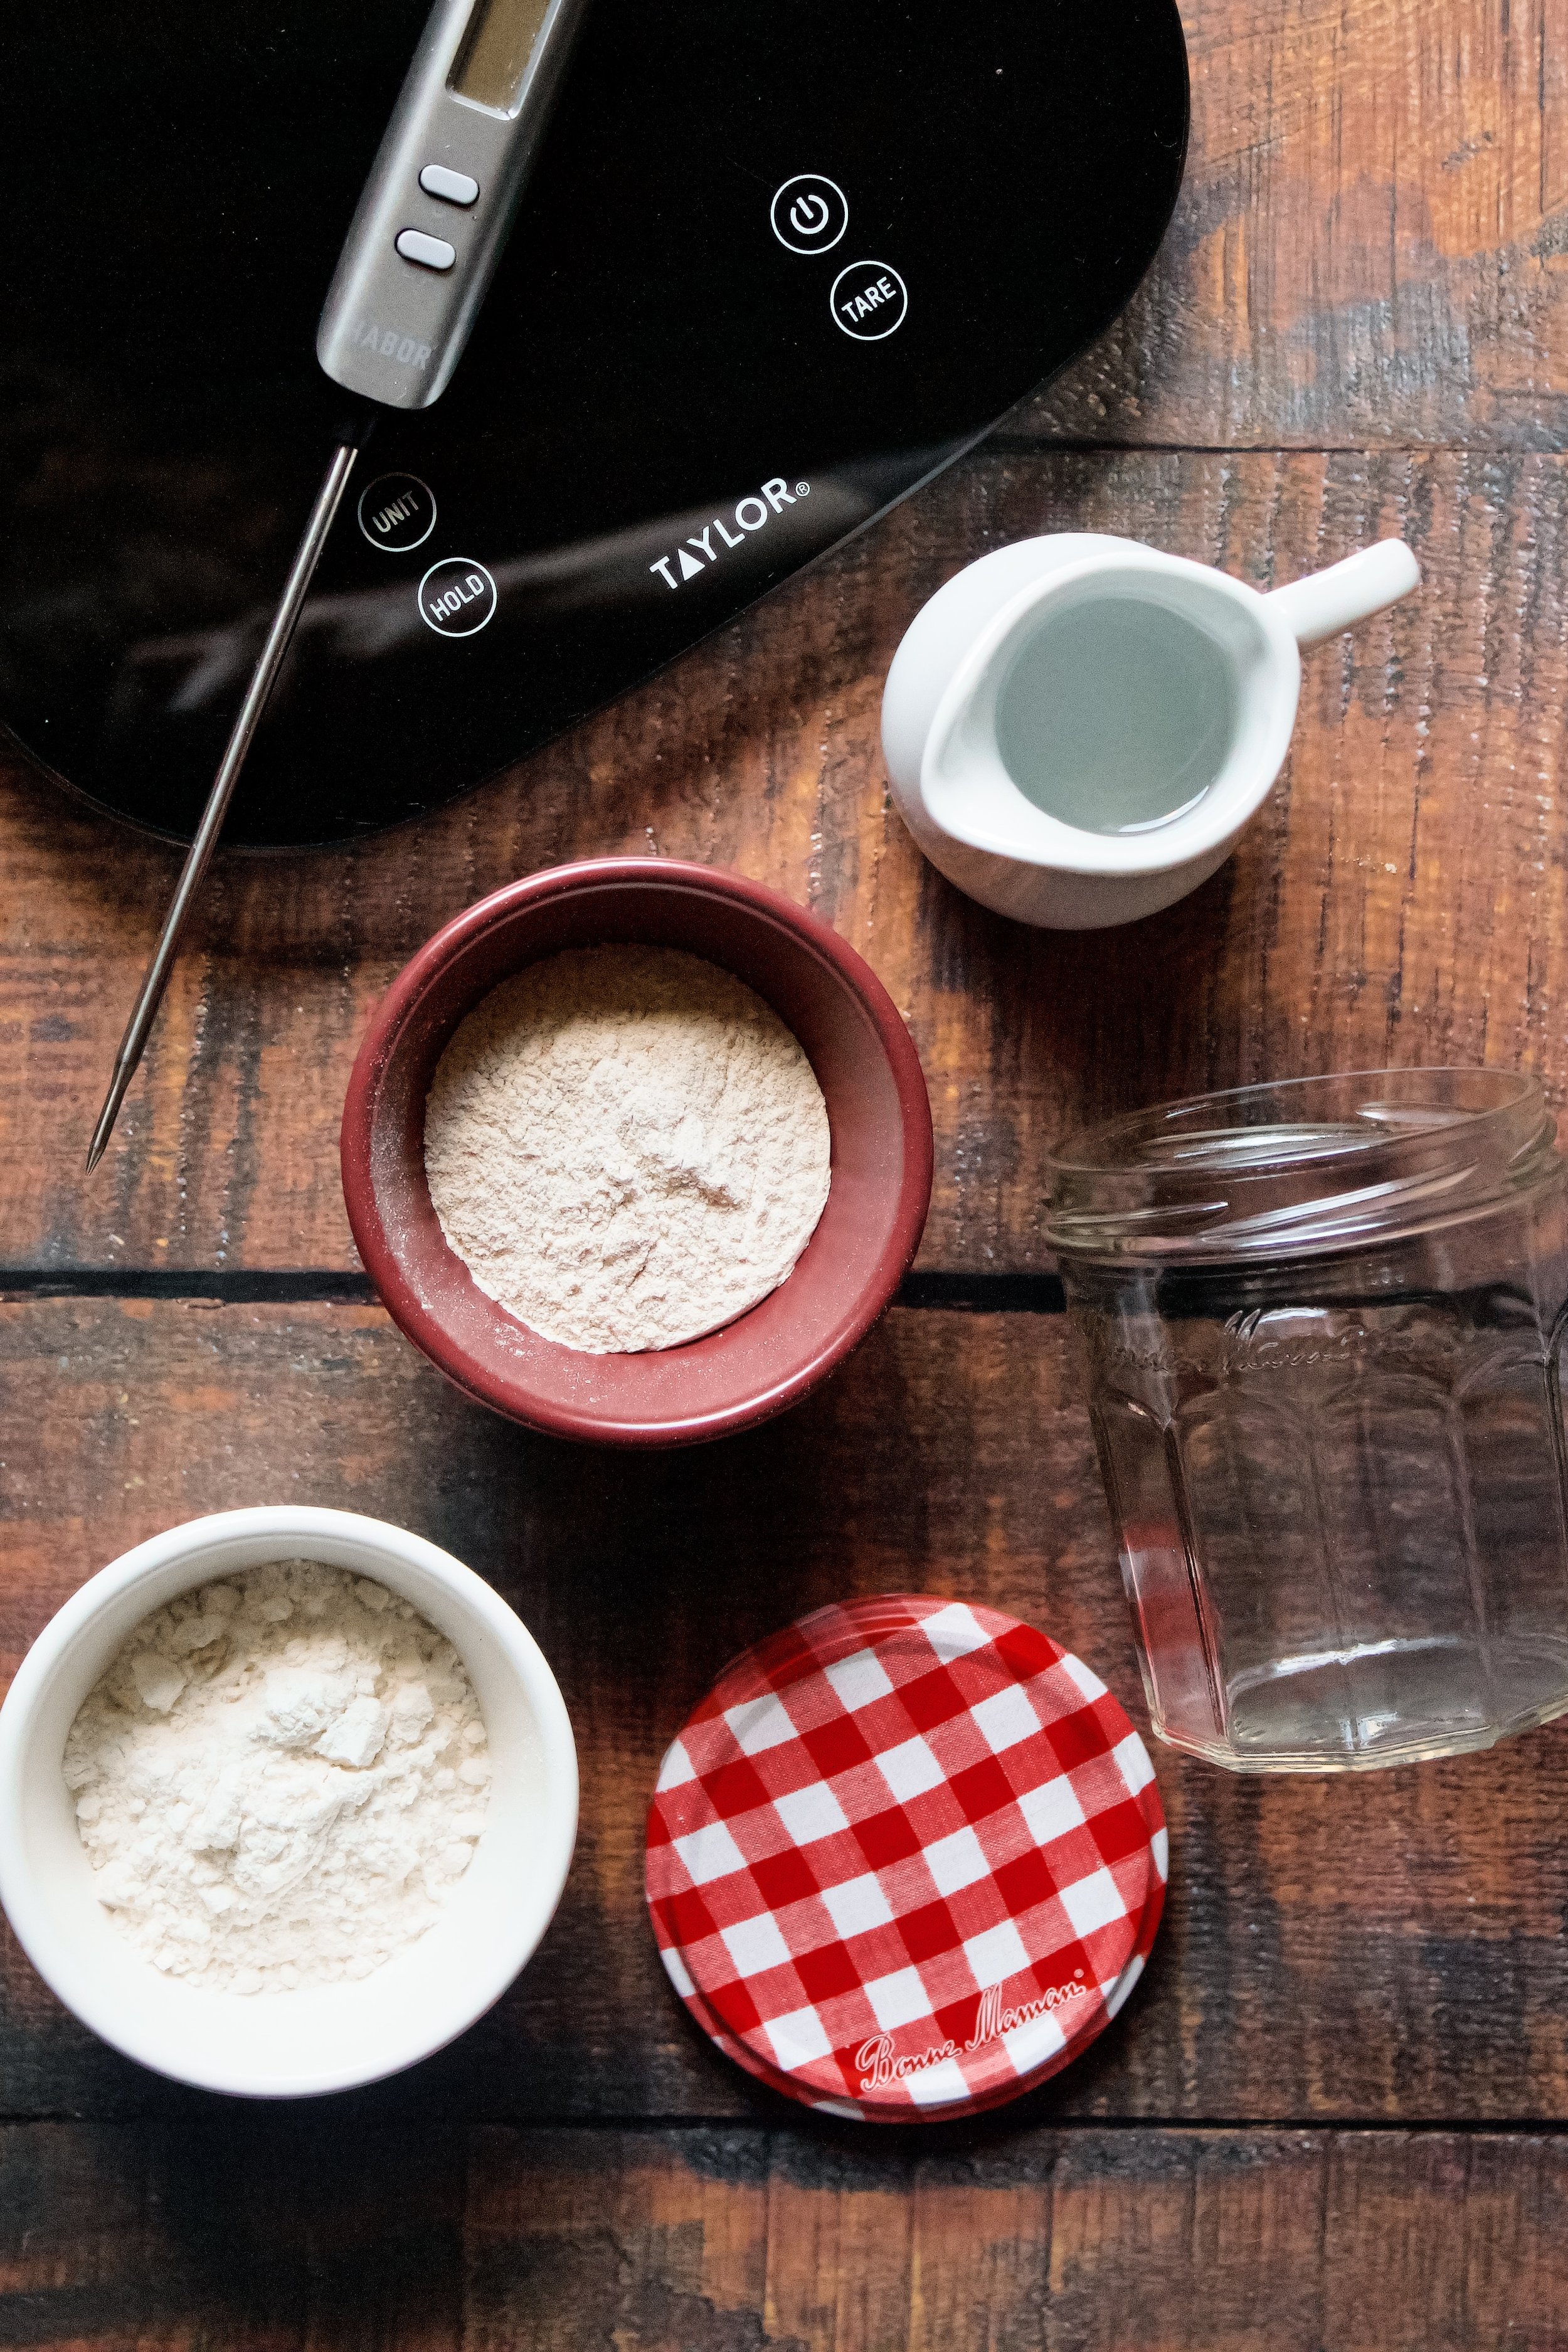
Ingredients and equipment
Flour. For a brand new starter, I suggest half all-purpose flour and half rye flour (dark or light). This will help it become active (meaning usable) much faster. You could also sub spelt or whole wheat for the rye (or one you’ve had recommended to you, but i can only vouch for these three). Later on, feel free to experiment with types and amounts of flours. I typically do about 85% all-purpose and 15% rye or whole wheat because it works but is still cost-effective.
Water. I suggest filtered water, but tap will work if it’s really clean. It must be warm—about 80F/27C. Never use higher than 90F/32C.
Kitchen scale. Be sure it’s reliable. I highly suggest weighing everything for sourdough, as measuring cups can pack in the flour and cause your ratios to be wildly off. Until you’re experienced, it’s best to carefully weigh ingredients.
Thermometer. Again, be sure it’s reliable. If you don’t have one or it breaks, you can use the boiled water method: bring 1/3 cup water to a boil and add it to 2/3 cup cold water. You won’t actually need this much, but it’s easier to boil 1/3 cup water than 1/3 of the 40g we need.
Jar with lid. You’ll need a clear, straight-ish jar with a wide opening so you can stir easily. I suggest one with a lid that you can just loosely set on top. Another option is a cup with a towel set on top (you can keep it on with a rubber band), but this can be prone to drying out and will take much longer to become active. I had the best luck with a lid set on top (but not screwed on). Now that my starter is mature, I actually screw the lid on—but it’s a weak lid that doesn’t create a super tight seal anymore.
Mini spatula. This is entirely optional, but I exclusively use mini Christmas spatulas because 1) Christmas is the best and 2) they’re the easiest to mix well with and to scrape down the jar to avoid a lot of dried starter making things yucky.

How to create a sourdough starter
Starter really is just flour and water that you keep feeding with more flour and water.
Day 1: Mix 40g flour and 40g warm water.
I suggest your flour be half all-purpose and half rye. Spelt or whole wheat would work instead of rye, but I’ve had the best luck with rye in my starter. The exact percentage that is rye isn’t too important; since it’s more expensive, you can use just 5-10g rye if you want—just be sure you have 40g total flour.
Be sure the water is about 80F/27C. If you don’t have a thermometer, see the note above for how to create it using boiling water.
Place this in a clear jar with a lid set on top (not screwed on).
Place somewhere that’s roughly 70F/21C.
Current weight: 80g (this is approximate, as some weight likely was lost to the edge of the jar or the spoon/spatula you mixed with, but that’s okay).


Day 2: Remove 40g from the jar then add 40g flour and 40g water.
The same as day 1, use warm water and part rye flour, part all-purpose.
Try to feed it at roughly the same time each day.
I suggest mixing the water with the non-discarded starter then adding in the flour. It’s easier to mix this way, in my opinion.
After day 1, the key is to have a 1:1:1 ratio (starter:flour:water). So we have to discard some (just 40g today). Otherwise, you’d just keep adding and adding and eventually have a monstrous starter that belongs in an episode of The Twilight Zone.
At this point, just toss the 40g. It may feel like a waste, but it’s so little. Plus, it’s not active enough to use in a discard recipe. The point of a discard recipe is adding some of that good sourdough bacteria, which we don’t have yet, to another recipe.
Current weight: 120g (again, this is approximate, but that’s okay).


Days 3-5 (or so): Remove 80g from the jar then add 40g flour and 40g water.
Again, use warm water and half all-purpose, half rye flour.
Try to feed it at roughly the same time each day.
You may see some bubbles on day 3, but if not, be patient. It could take a few more days. Each day, you should see more and more bubbles.
From here on out, we’ll remove 80g each day so we have a remainder of 40g. That 40g will get combined with 40g flour and 40g water, to maintain our 1:1:1 ratio.
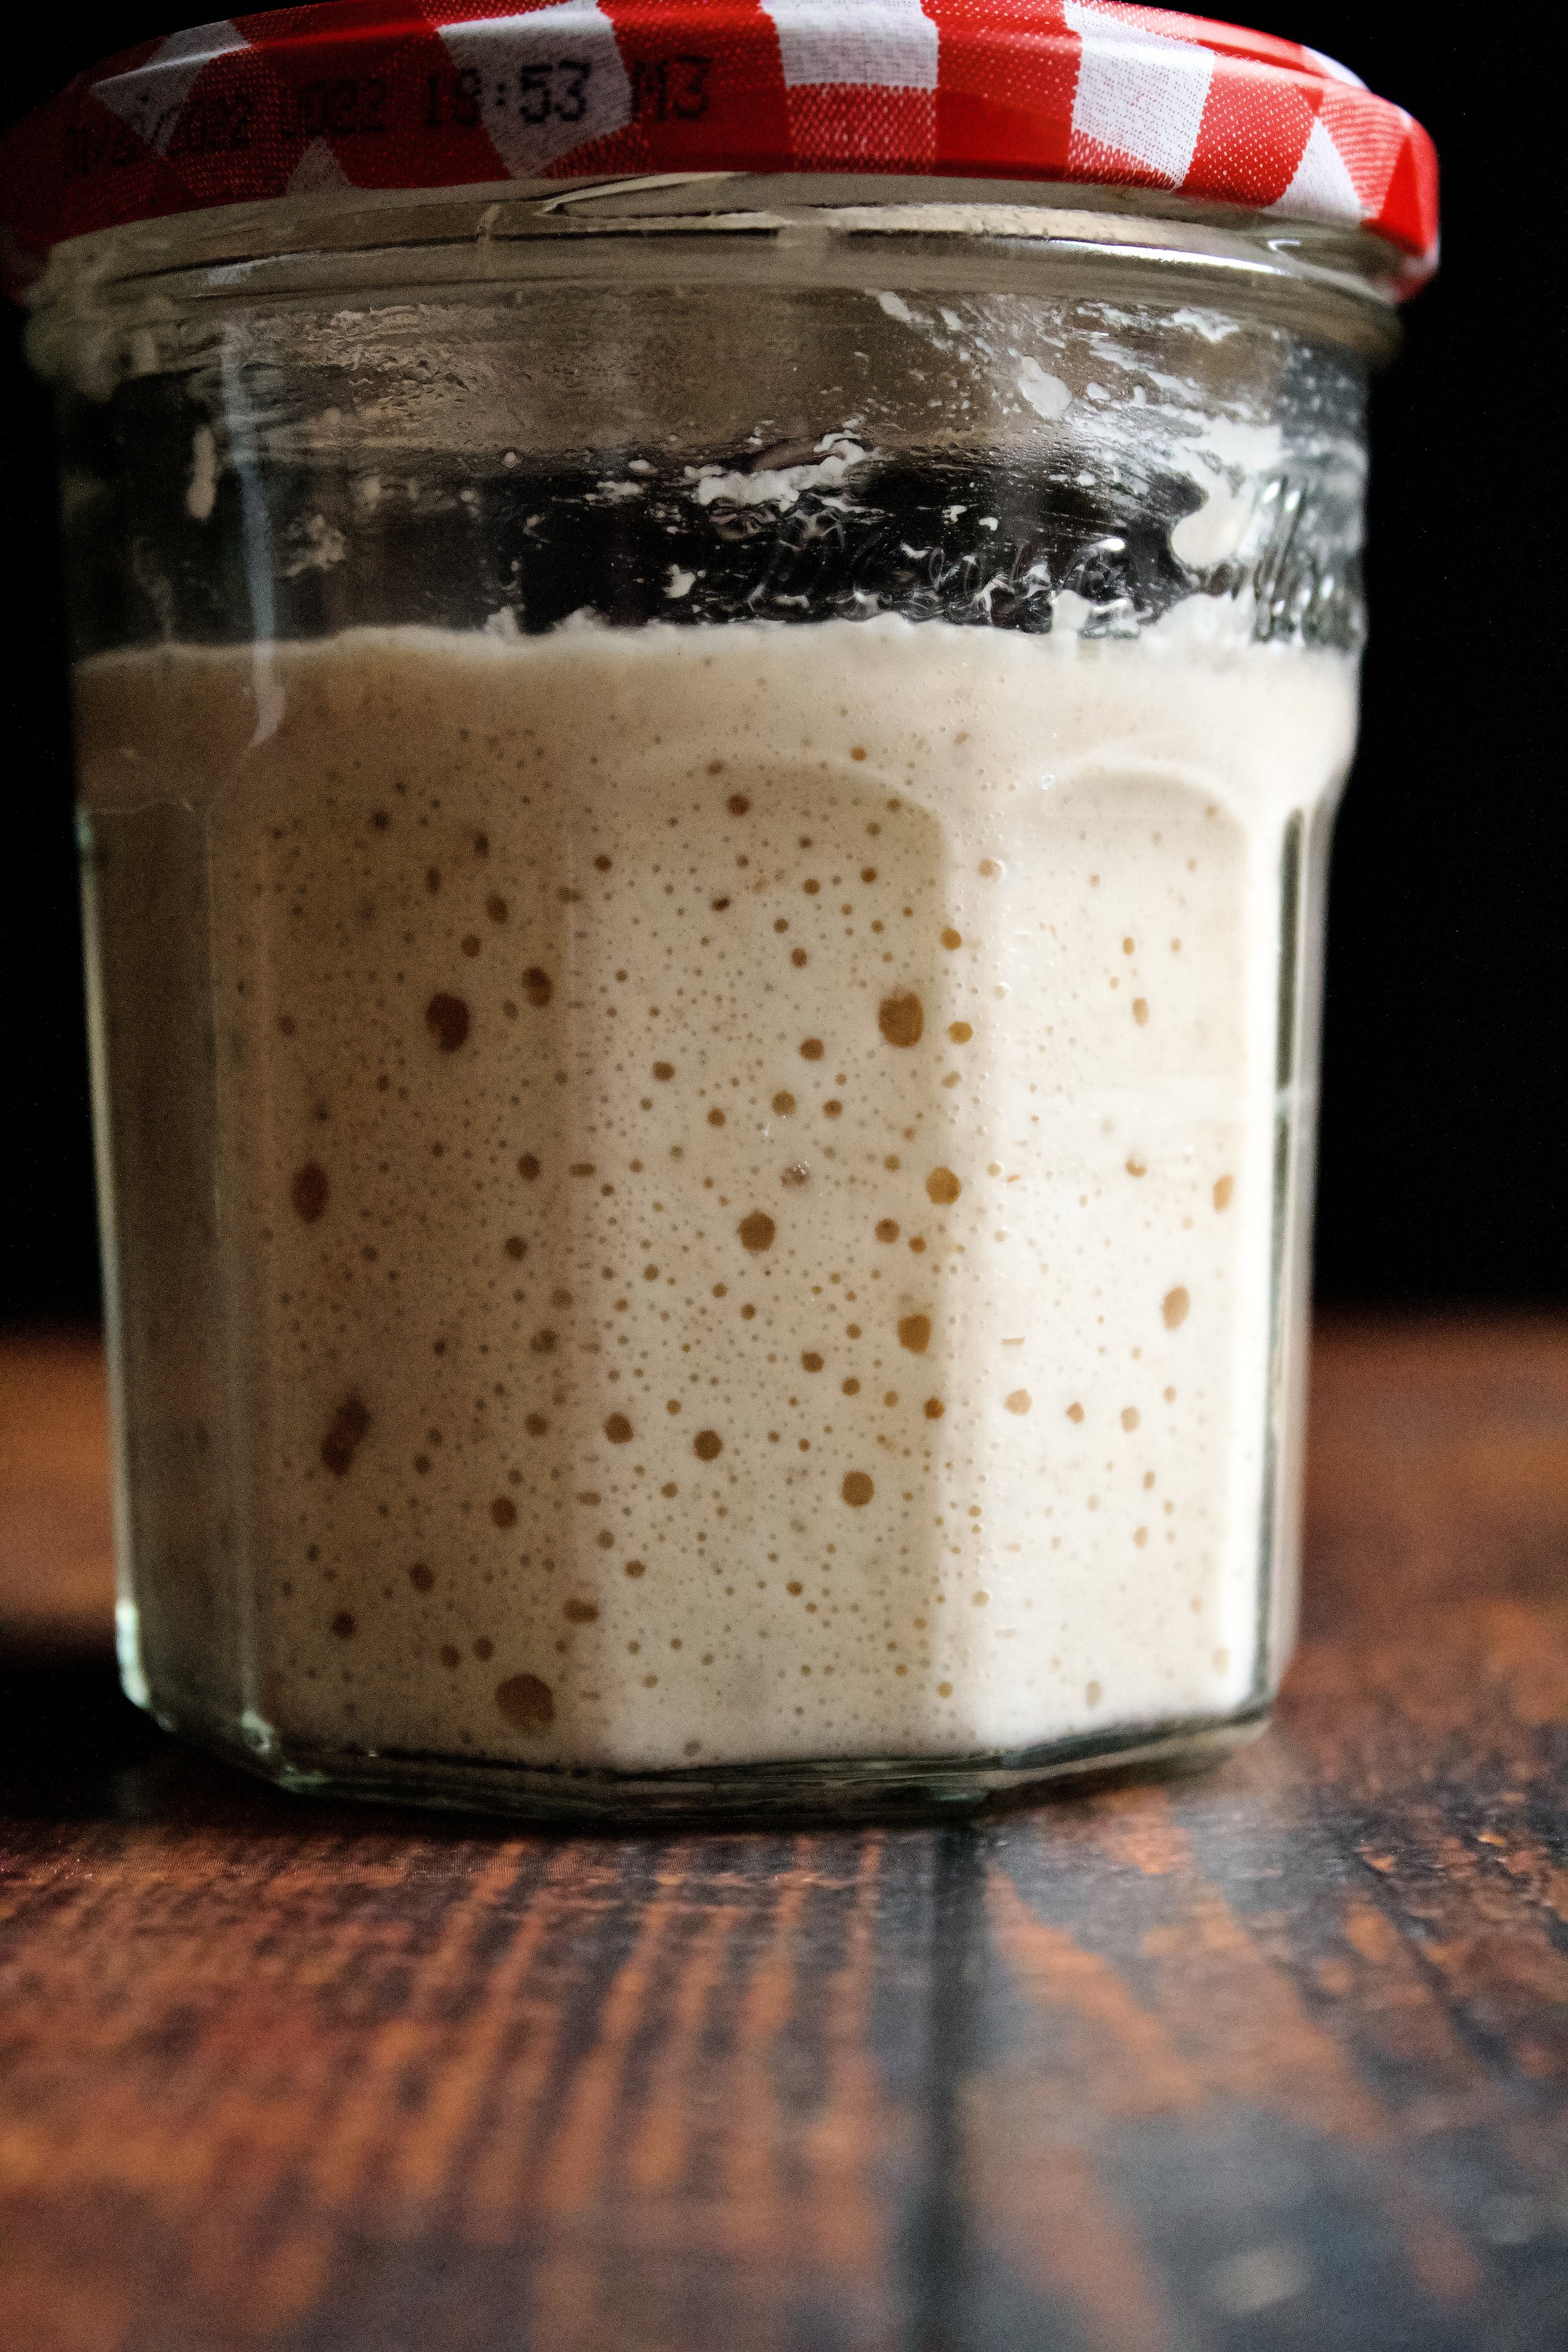
Continue this step each day until it bubbles throughout, doubles in volume, and passes the float test (see below).
Current weight: 120g (again, this is approximate, but that’s okay).


Above you can see my older starter next to Day 5 of the the brand new starter for comparison on their rise.
Maintenance: Once it passes the float test, you’ll enter maintenance mode, which is basically the steps from day 3-5. However, soon you’ll notice it’s sunk back down quite a bit and lost most of its bubbles come feeding time. This means you either need to feed it twice a day or double the amount. Many bakers prefer the once a day method with extra food. To save on flour, you can begin to reserve 20g starter and feed it 40g flour and 40g water, for a ratio of 1:2:2.
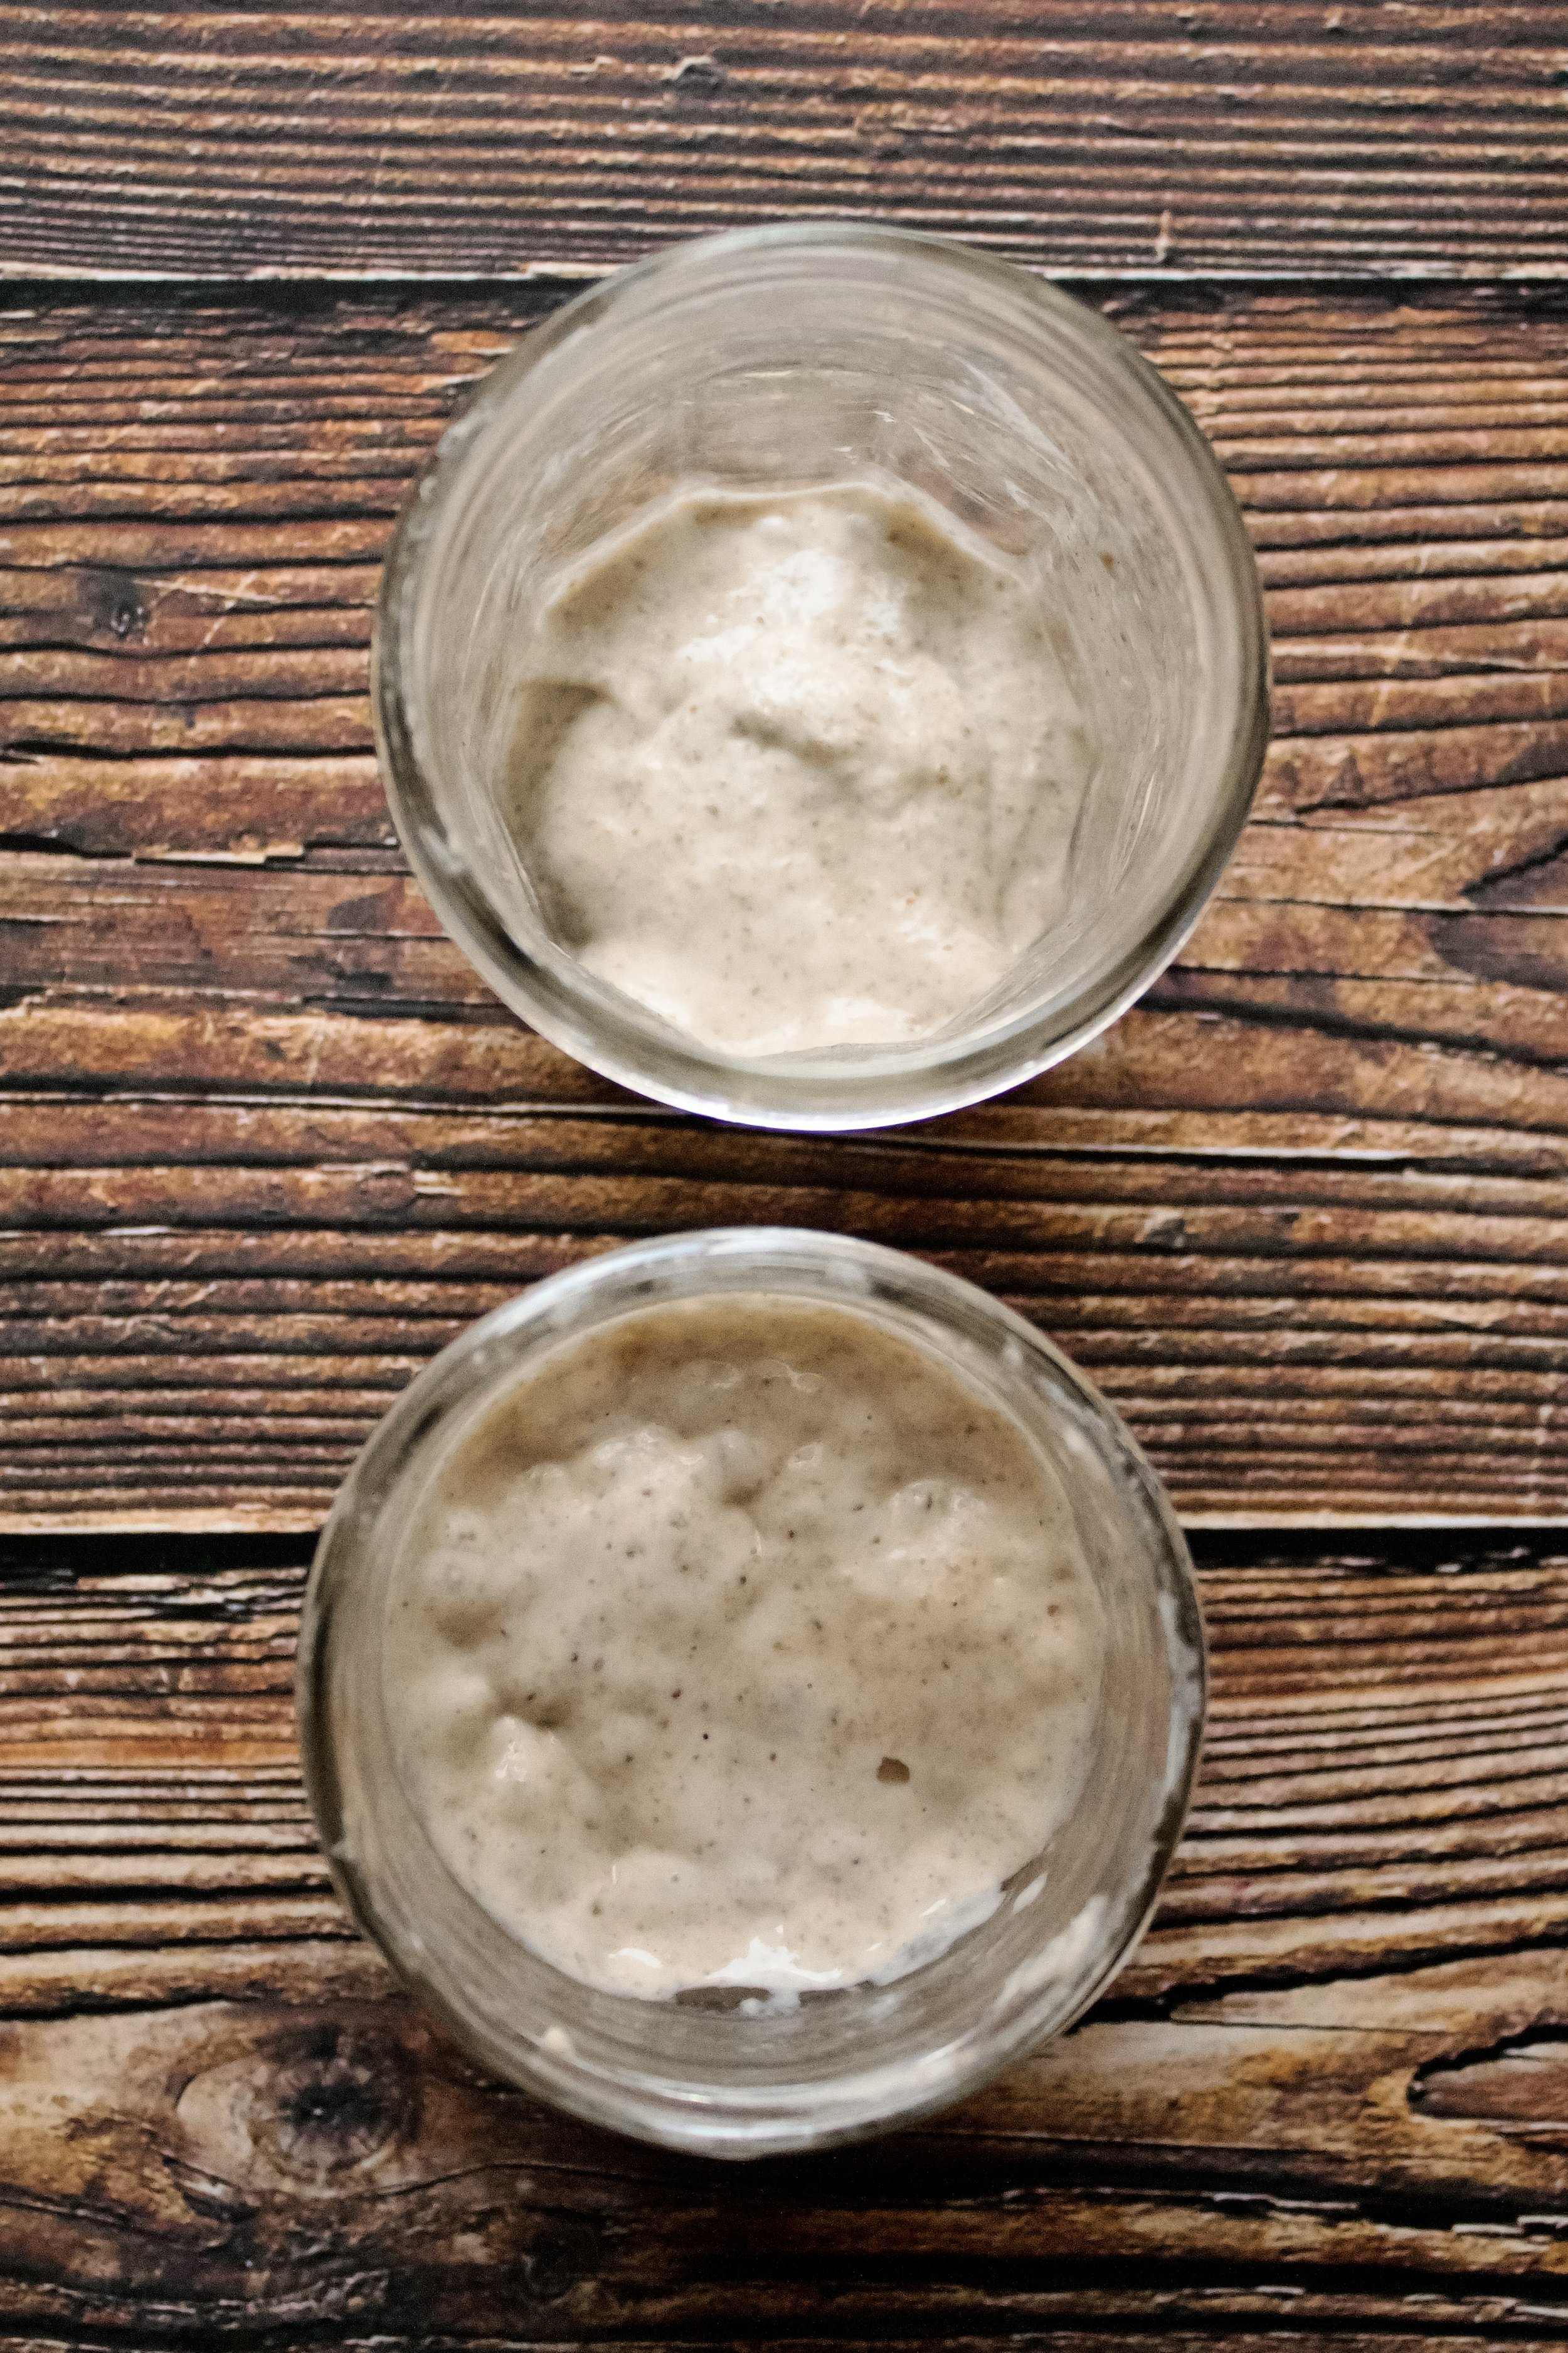
Top is the brand new starter on day 2 compared to my older starter less than 24 hours after feeding (pictured on the bottom).
How to know if it’s finally active/usable
A truly active, healthy starter will do all of the following after about 6-12 hours, depending on the season. My starter takes about 12 hours to be active in the winter and about 6 in the summer. Early on, you should see the following things within 12 hours of feeding:
Bubbly throughout
Doubling in volume
Passing the float test (see below)
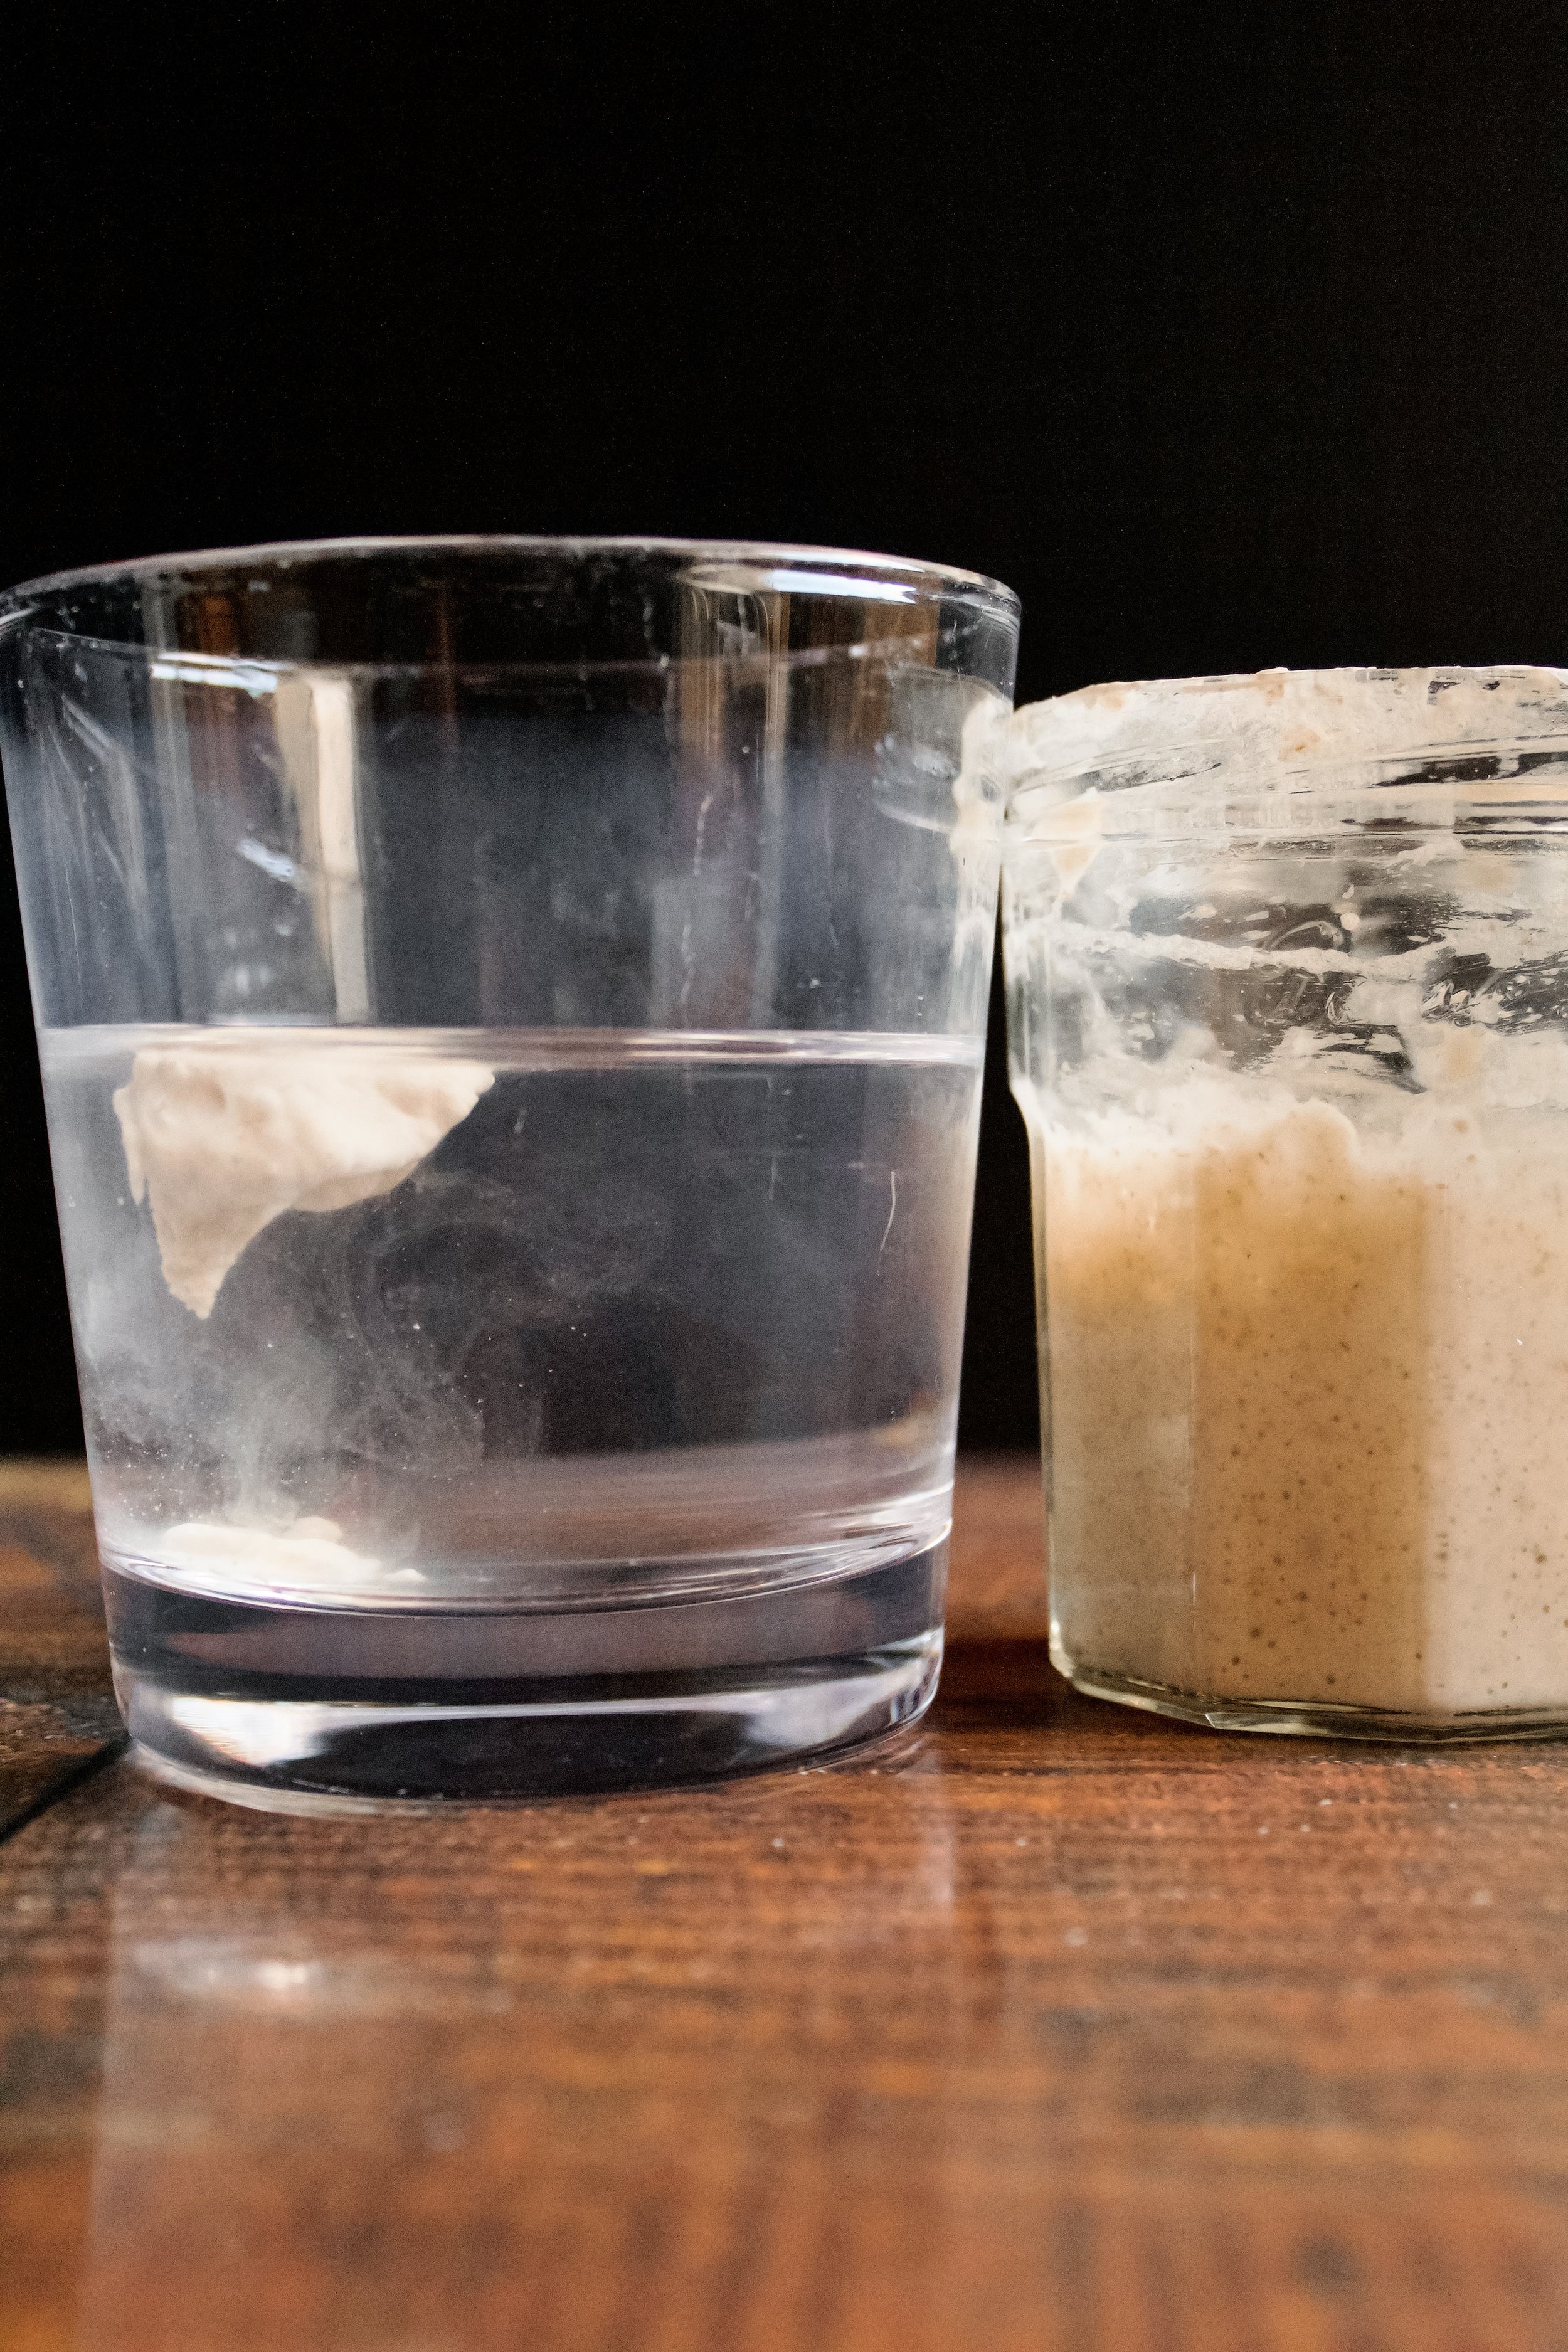
The float test
The float test is usually seen as the right of passage for a starter to be “ready.” Once it’s filled with bubbles that break the surface and is doubling within about 12 hours, take a small spoonful of starter and place it in a glass of room temperature water. If it floats, it’s ready. If not, it needs more time. Keep checking it every day.
Be sure to weigh how much you removed for the float test. Otherwise, you won’t know how much is left in the jar and how much more to remove to be left with your 40g starter come feeding time.
Note: you’ll want to check it about 12 hours after feeding, as starters typically rise, hit a “peak” (which is when they’re best for creating a bread dough), then sink back down. If you wait until 24 hours later, your starter may actually be ready but you’ve missed its “peak” time and it no longer floats.
Tips and FAQ’s
When can I start using my sourdough starter?
As the section above notes, once it’s passing the float test (which is usually when it’s doubling in 12 hours and the bubbles break the surface), you can start using it. Most recipes call for you to use “active” starter, meaning it’s currently passing the float test, around this 12 hour mark or a little before. There’s wiggle room, and you can use it when you just start to see one or two bubbles on the surface or when the surface is full of bubbles and it’s just starting to sink back down. So there’s really a window of when it’s “active” or at its “peak.” However, each of these bookends of your peak window may yield different results. Usually, if you use it at the early side, it rises faster, rising slower if you used your starter at the tail end of the peak window.
Why is my starter not active yet?
The most likely culprit is time. Sometimes, it just takes a long time for the starter to be strong. Some things you can do to troubleshoot include:
Feed at a lower hydration for a few weeks. Try feeding it 35g water and 40g flour. Only do this until you start to have proper doubling and bubbling within 12 hours (and it passes the float test). Then work your way back to 100% hydration (so equal amounts of water and flour).
Check your flour. If you started with only all-purpose, it will take longer for the starter to be active. Try using at least 5g of rye flour for a while (you can also try whole wheat or spelt, but rye is the most effective). Remember that your total weight of flour should still be 40g, but part of it will come from rye. If you’ve been using rye the whole time, be sure your flour is not old. This could be the culprit.
Temperature of the water. If your water is too warm or too cold, it could affect the quality of your starter. Too warm of water can kill the good bacteria/yeast that we’re trying to grow. Too cold of water can slow your starter down, similar to being kept in too cold an area. If you’re unsure if your thermometer is working, try the boiled water method: bring 1/3 cup water to a boil and add it to 2/3 cup cold water. You won’t actually need this much, but it’s easier to boil 1/3 cup water than 1/3 of the 40g we need.
Quality of the water. If your water has a lot of chemicals in it, it could be impacting your starter. Be sure to use clean water. For me, this means using filtered water. For some people, tap is just fine. If you’ve been using tap and having trouble, try filtered or bottled for a while.
Ambient temperature. If your starter is kept too cold, it will take longer to be active, no matter how old or young it is. If it’s too warm (over 90F/32C), it could kill off the good bacteria/yeast. I keep my starter on my counter, but you may need to find a new spot if it seems cold where your starter is. 70F/27C is the ideal temperature.

Understanding ratios: feeding vs. hydration
There are two main ratios to understand with sourdough. First is the feeding. Young starters use a 1:1:1 ratio. Anytime you see this, it means starter:flour:water. The exact weights aren’t that important, just the ratios. I found 40g of each was easy to work with but not so much that the discard felt like a huge waste. As starters mature, they need more food, so you’ll graduate to 1:2:2 soon after your starter is usable, then one day to 1:3:3 and beyond. My starter is 3 years old this month and I just graduated it to a 1:4:4 ratio. However, I still feed it the same amount, simply reserving less. So my 1:4:4 ratio translated to grams is 10:40:40.
The other ratio you’ll see quite often is the hydration, usually indicated in percentages. This has to do with both starter and bread dough itself. It simply means the ratio of water to flour. It’s usually calculated by dividing the weight of water by the weight of flour. Starters are almost always fed at 100% hydration. Meaning you feed it the same weight of water as flour. The exception is troubleshooting a young starter and doing about 85% hydration for a few weeks to help it along.
Do I have to throw so much away?
No! There are tons of discard recipes online. I have several that I plan to share in the coming months, so check back soon! You can also store the discard in a jar in your fridge, as long as you use it within 1-2 weeks (this varies by fridge and starter—if it still smells like starter, it’s safe to use). However, don’t feel obligated to make discard recipes all the time. I found I was just making things so the discard wasn’t wasted, but it was extra calories (and ingredients) all so I didn’t feel wasteful.

My older starter (left) next to a brand new starter (right), right after feeding.
How do I know if I removed the right amount?
Here’s what I do: set my starter on the scale, zero it out (hitting “tare”) then scoop out 80g. You’ll actually be left with a little less than 40g, because some weight is lost to evaporation, stuck to the sides of the jar, or got stuck to the spoon/spatula during the last feeding or even this current feeding. However, I’ve found it’s a negligible amount. You could instead have two jars that you rotate between, always adding exactly 40g starter before feeding (which should always be done in exact measurements).
Note: I’m only okay with this method because I switch to a clean jar about once a week, ensuring I start the week with my exact ratios (which is currently 10g starter, 40g flour, 40g water).
Does the type of flour really matter?
Sort of. To get a starter going, using part rye is surprisingly helpful in speeding up the process as well as giving a more sour taste. I created a brand new starter specifically for this post, and as you can see it became bubbly and active within three days and passed the float test on day 5. I used about 80% all-purpose flour and 20% dark rye. This is drastically different than my first attempt, when I used only all-purpose flour. It took 2-3 weeks for it to pass the float test and several more weeks before it was truly reliable and had a truly sour taste.
I suggest half rye in my recipe simply because that’s easier, but you can use less. I did a little over 30g all-purpose then added rye until I hit 40g total flour.

Here you can see my three-year-old starter (left) next to my brand new starter (on day2).
When to feed
When you feed it is entirely up to you. Just be sure to feed it at roughly the same time each day. Once it’s doing well, it will survive if you forget a feeding (but may need to be fed every 12 hours to perk it back up). However, that’s all part of maintenance, and right now we’re focusing on getting it started.
Later on, you’ll notice there’s a difference between the ideal time to use it (when it’s doubled and the bubbles break the surface) versus the ideal time to feed it (at least once a day). You’ll also find, later on, that you may need to feed it twice a day in the day or two before you make a loaf of bread, to get it super active. Think of it like carbo-loading your starter so it has the energy to make your dough rise.
Give it a name and set feeding time
I highly suggest naming your starter and having a set routine for feeding it. Many sourdough bakers jokingly call their starter an extra child, because it has its own personality and needs. And it’s true. My starter is infinitely better now than when I first made it, because I found a routine that worked and helped me take better care of it. I stopped forgetting to feed it, and even started trying out different flours to see what it liked best. While I did name it, I don’t actually call it Tina. I just started caring for it better and it responded well.

Creating a Sourdough Starter
- total time: 5 minutes, once a day
Ingredients & Equipment:
- 40g flour (can use half all-purpose, half rye or whole wheat)
- 40g water, filtered and roughly 80F/27C
- 40g leftover starter (excludes day 1)
- kitchen scale
- food thermometer
- clean jar
Instructions:
Day 1: In your jar, combine 40g flour with 40g warm water. Set lid loosely on top and store in an area roughly 70F/21C.
- I suggest up to half your flour be rye, whole wheat, or spelt. Rye will make a starter usable fastest.
Current weight: 80g*
Day 2: Remove 40g starter. Stir in 40g warm water then 40g flour**. Set lid loosely on top and store in an area roughly 70F/21C.
- Again, up to half the flour can be rye, etc.
- Try to feed at roughly the same time each day.
Current weight: 120g*
Days 3-5 (or so): Remove 80g starter. Stir in 40g warm water then 40g flour**. Set lid loosely on top and store in an area roughly 70F/21C.
- You may see some bubbles on day 3, but if not, be patient. It could take a few more days. Each day, you should see more and more bubbles.
- From here on out, we’ll remove 80g each day so we have a remainder of 40g. That 40g will get combined with 40g flour and 40g water, to maintain our 1:1:1 ratio.
- Continue this step each day until it bubbles throughout, doubles in volume, and passes the float test (see below).
- Try to feed at roughly the same time each day.
Current weight: 120g*
Maintenance: Once it passes the float test, you’ll enter maintenance mode, which is basically the steps from day 3-5. However, soon you’ll notice it’s sunk back down quite a bit and lost most of its bubbles come feeding time. This means you either need to feed it twice a day or double the amount. Many bakers prefer the once a day method with extra food. To save on flour, you can begin to reserve 20g starter and feed it 40g flour and 40g water, for a ratio of 1:2:2.
The Float Test
Once it’s filled with bubbles that break the surface and is doubling within about 12 hours, take a small spoonful of starter and place it in a glass of room temperature water. If it floats, it’s ready. If not, it needs more time. Keep checking it every day.
Be sure to weigh how much you removed for the float test. Otherwise, you won’t know how much is left in the jar and how much more to remove to be left with your 40g starter come feeding time.
Note: you’ll want to check it about 12 hours after feeding, as starters typically rise, hit a “peak” (which is when they’re best for creating a bread dough), then sink back down. If you wait until 24 hours later, your starter may actually be ready but you’ve missed its “peak” time and it no longer floats.
Notes
- *Removing 40g starter on day one and 80g each day after may leave you with slightly less than 40g (due to evaporation, some drying to the sides of the jar, or getting stuck to the spoon/spatula when mixing). This will not hurt your starter at all. To keep exact measurements, you can pour 40g starter into a second jar, but this is not necessary to do this daily. Instead, I prefer to pour the exact amounts into a clean jar every 1-2 weeks when I make a loaf of bread. This ensures that I don’t one day end up with next to no starter left in my jar.
- **I prefer to mix the starter and water before adding flour. You are welcome to add and mix in any order you prefer, as long as it’s mixed thoroughly.