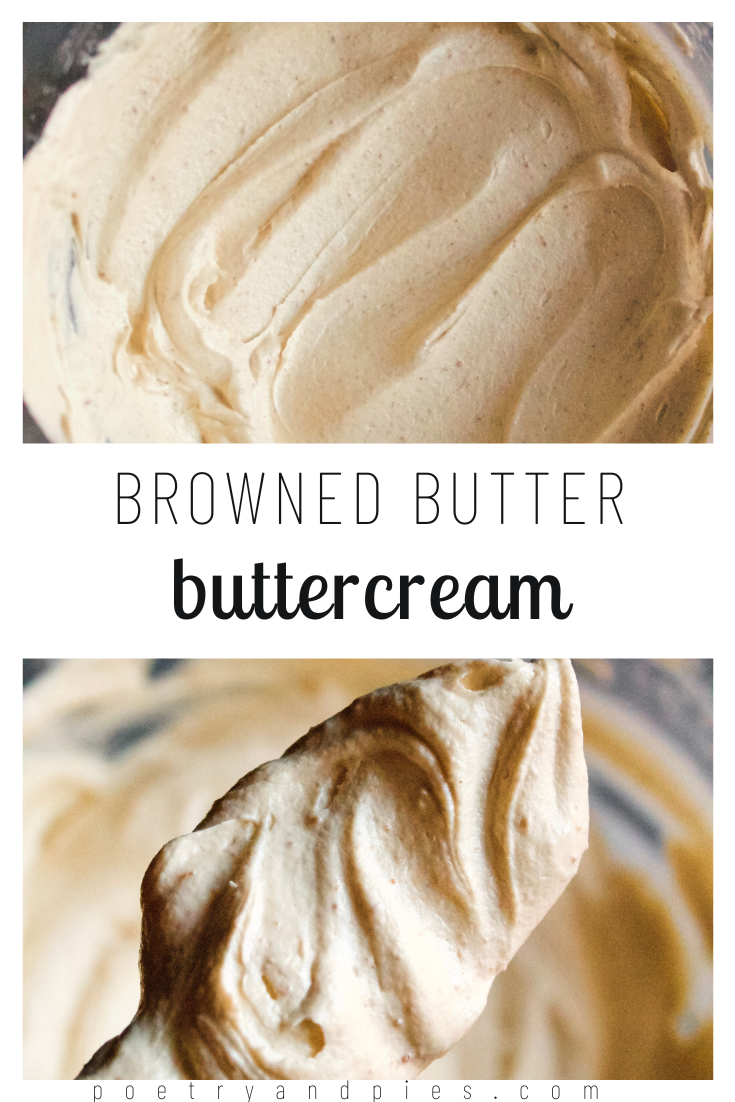
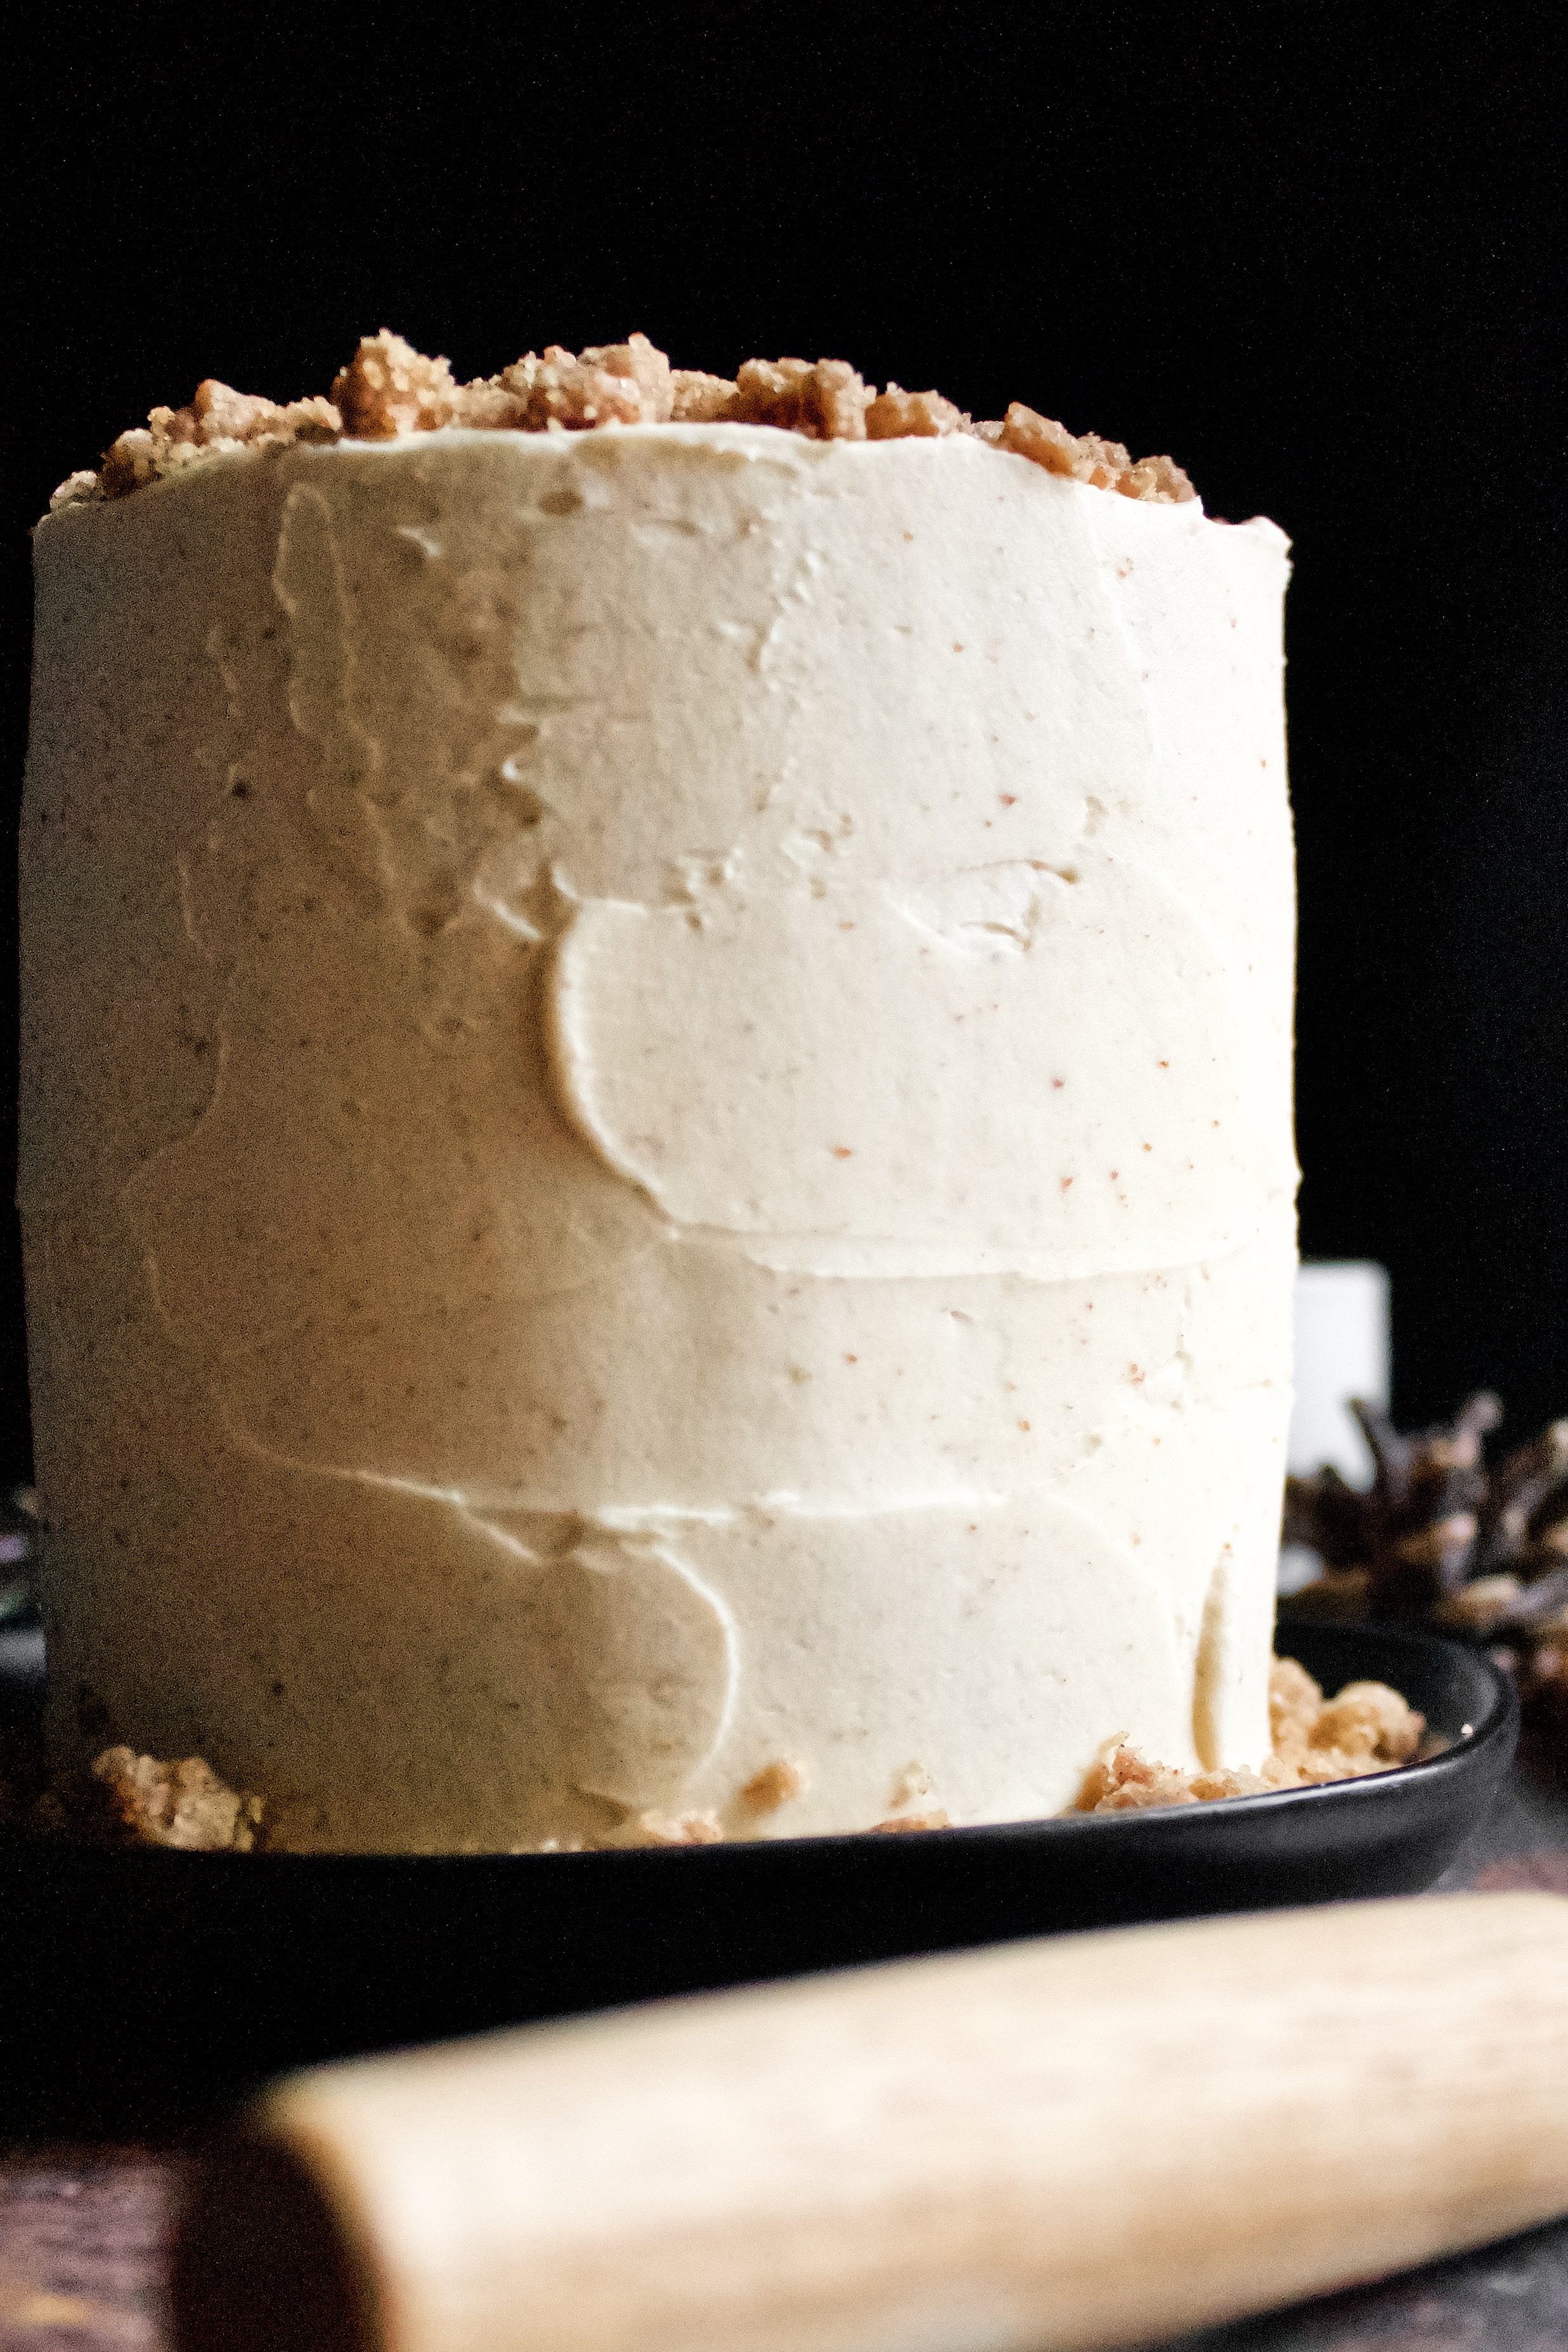
Browned Butter Buttercream
Delicious buttercream with the deep, caramelized flavor of browned butter. This buttercream pairs well with just about any cake, but especially with earthy, fall flavored cakes like apple, pumpkin, or spice cake.
This post may contain affiliate links from which, at no additional cost to you, I may earn a small commission to keep this site running. Only products I myself would or do use are recommended.

I might lose some readers with this statement, but I feel it needs to be said: we need to slow climate change NOW. I’m kind of getting tired of living through record breaking highs every single year. I’m also tired of those record breaking highs happening when pumpkin spice lattes are in full swing.
My Starbucks runs out of that stuff, guys. I have a limited amount of time to enjoy it. But it’s hard to enjoy a PSL when you’re sweating while inside your own house with the a/c on.
So, I’d like to think we can all agree that these record highs are at least partly our doing and perhaps we could undo some of that damage.
Because I’ve got pumpkin spice lattes to drink here.

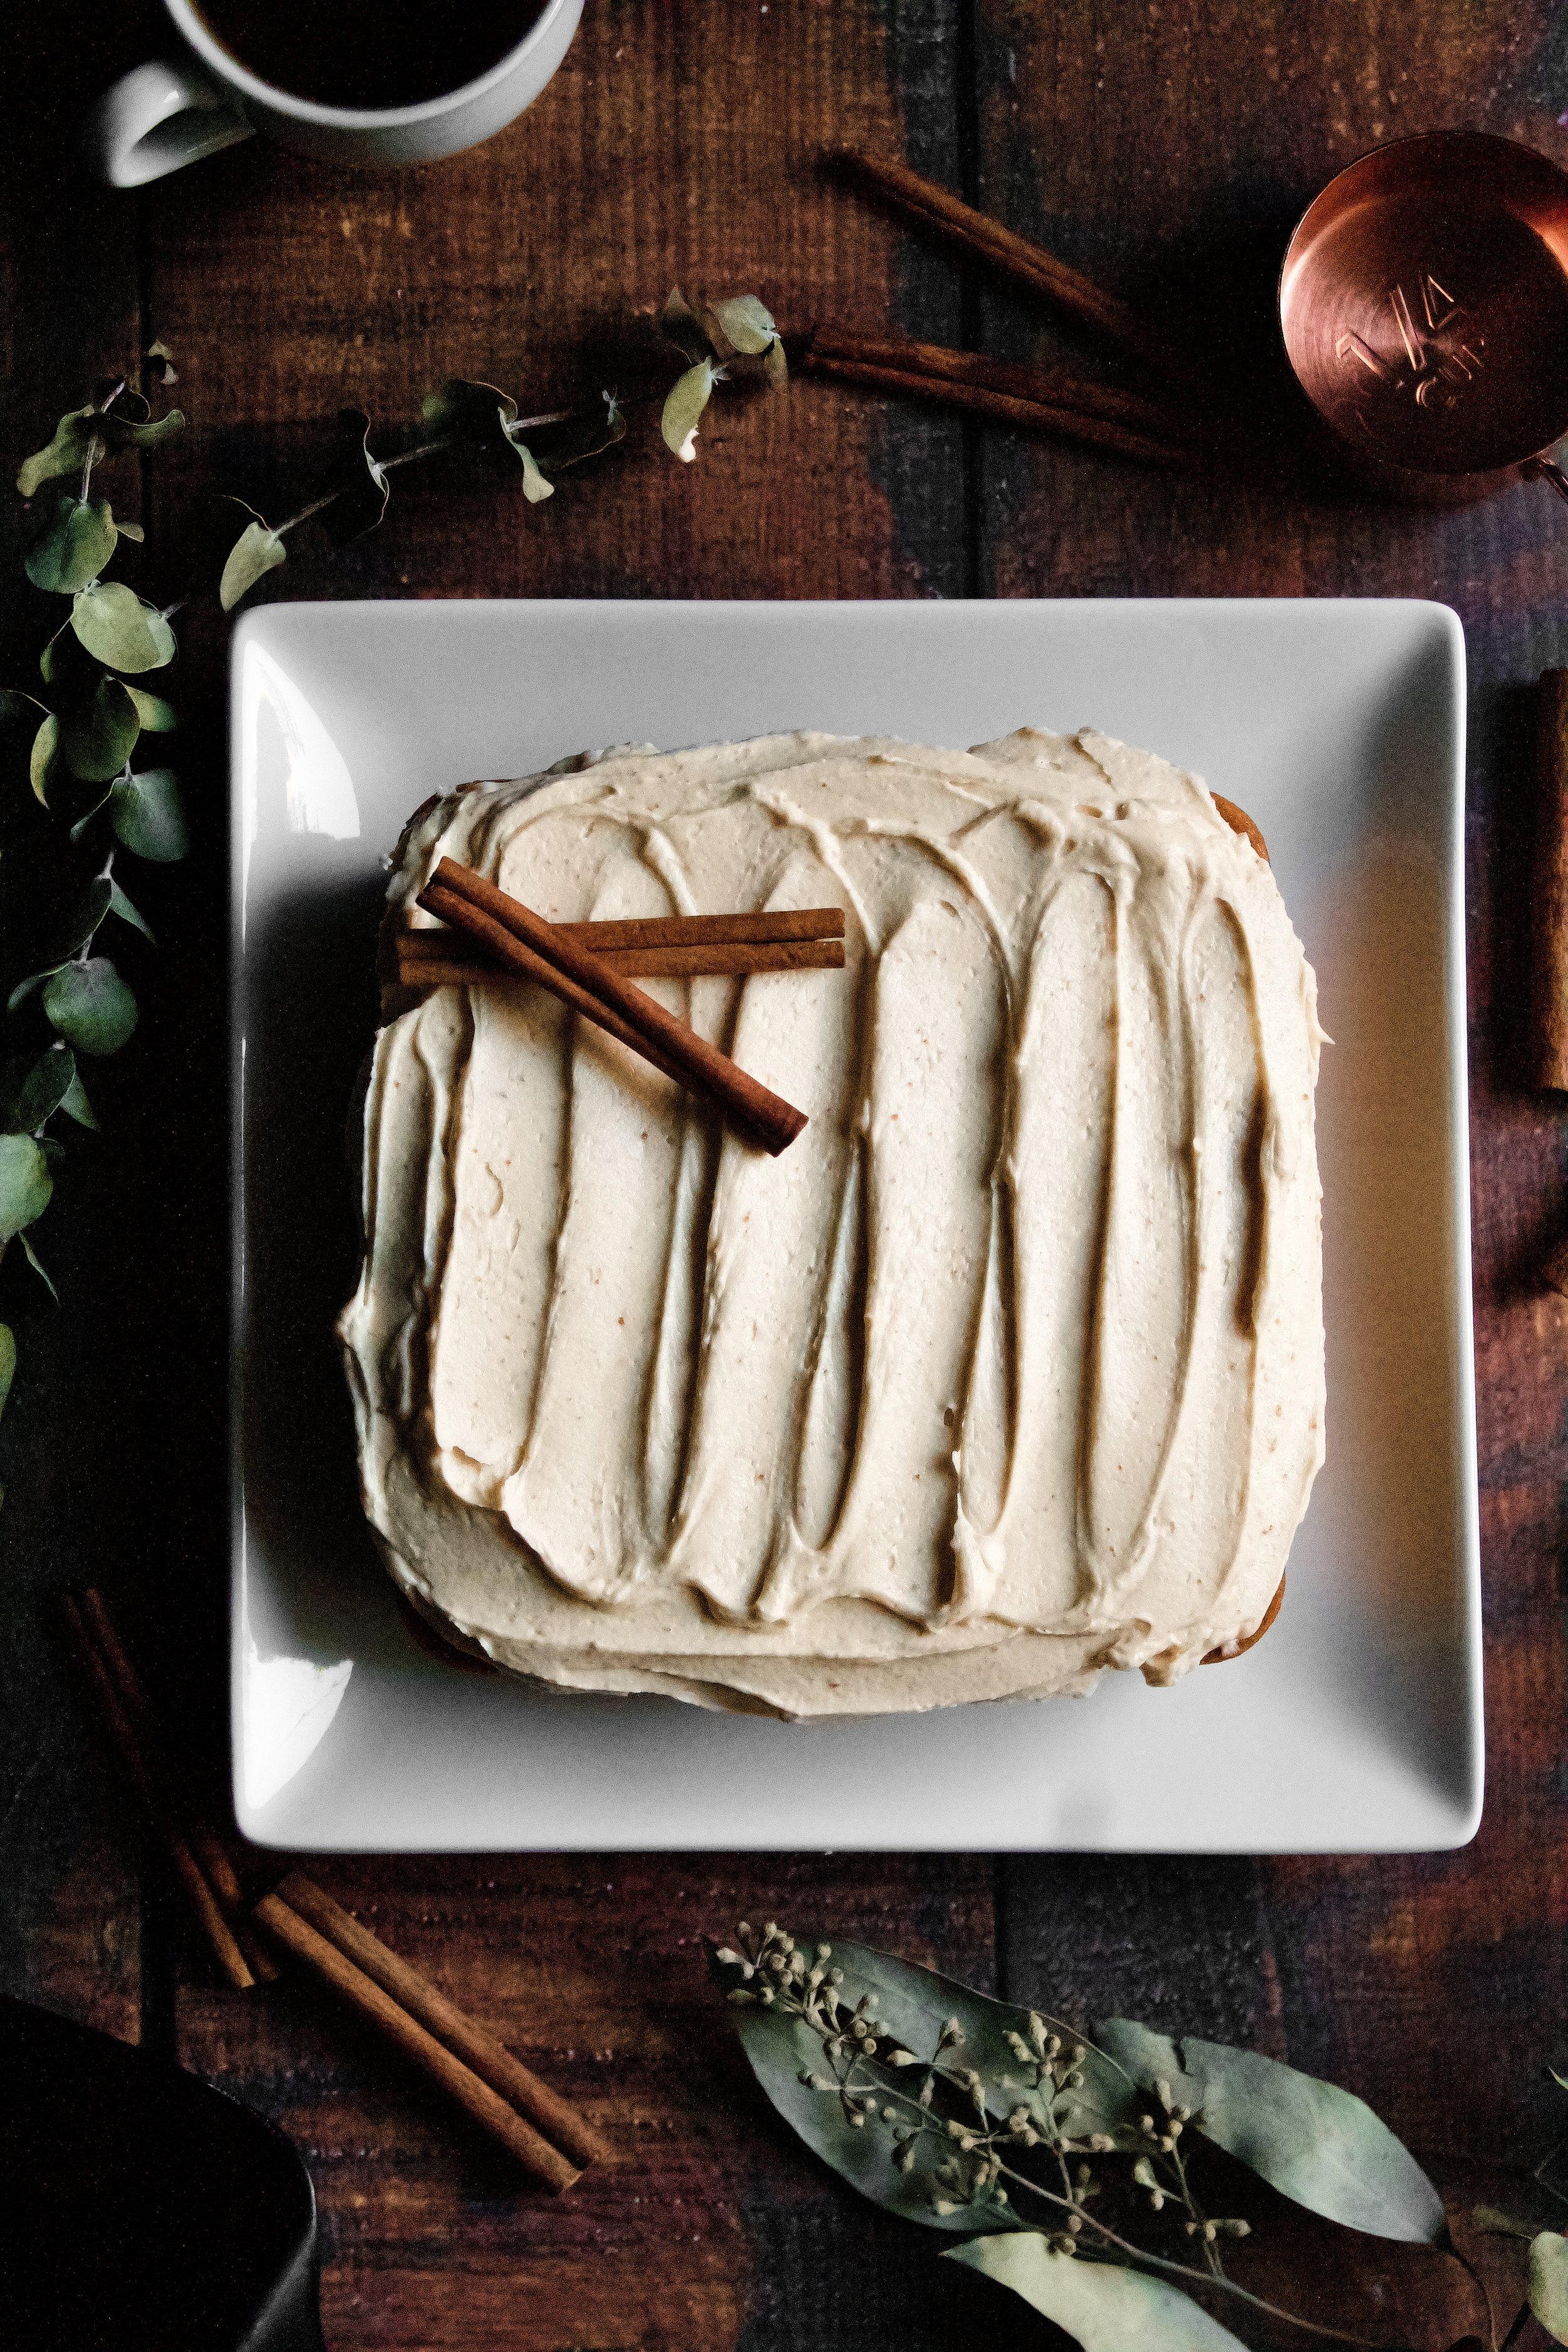
Speaking of pumpkin, this buttercream is not pumpkin. However, I made it to pair with two pumpkin cakes because it just goes so well with all the fall flavors. While I can (and do) use this year round, I tend to pair it with something cinnamon at the least, and pumpkin or apple if possible.
Something about that slightly nutty, slightly caramelized flavor and those cute little brown flecks just screams fall.
Why this recipe works
If you’ve never browned butter, you should. Not only is it a fun process, but it has this unparalleled flavor. A little nutty, a little caramel-y, it’s a far richer flavor than butter on its own. Usually, it’s a savory dish, but using it in a buttercream adds in a depth of flavor you never knew you were missing.
Browning part of the butter—but not all of it—ensures you get that nutty, caramelized flavor without it being overwhelming. It also cooks off quite a bit of the water in the butter, meaning an even creamier frosting! Yay! You also end up with little brown flecks, which are the milk solids from the butter that have browned. And as Ann Burrell says, brown food tastes good!
I like to use extra vanilla in my buttercreams—double the average recipe out there. It brings a deeper flavor that pairs so well with the browned butter. And I also add in just enough powdered sugar to make that classically sweet taste without drowning out the browned butter. Instead, the two complement each other perfectly.
Key ingredients
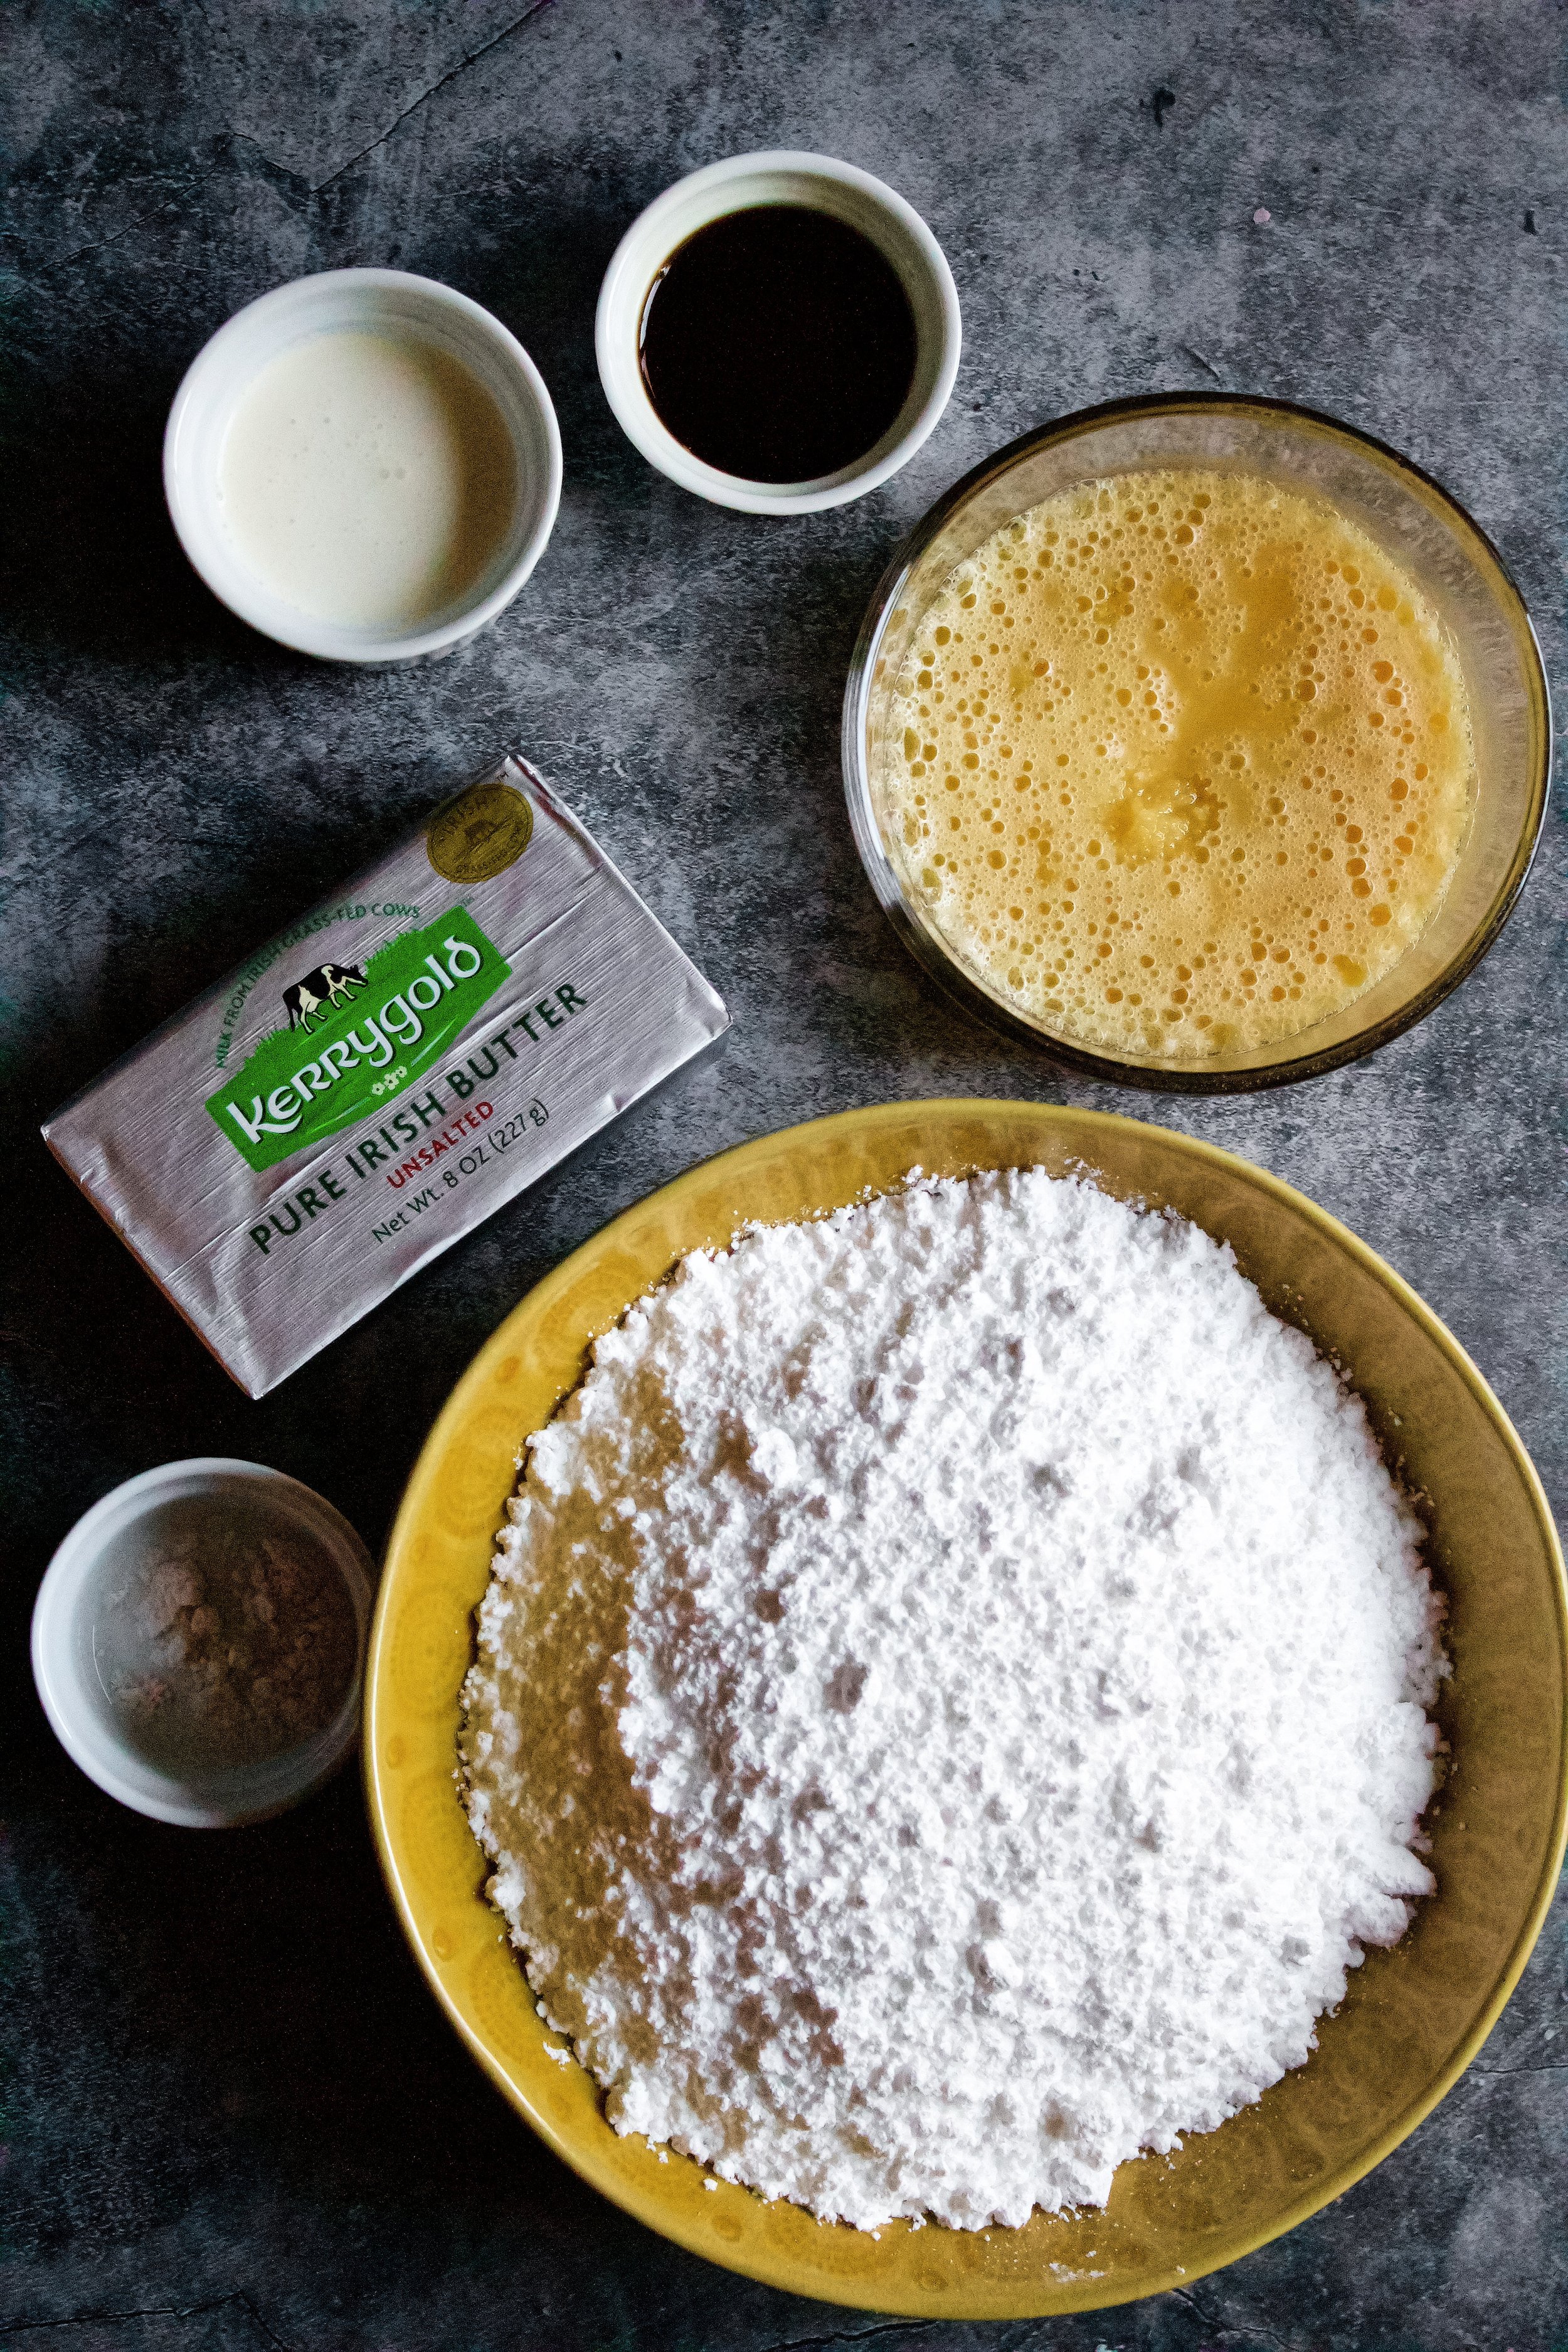
Butter. I always use European style butter in my frostings, but it’s especially helpful in this recipe, as you don’t want to lose too much volume in the browning process (to water evaporation). Unsalted butter is ideal, as salted butter can sometimes create a metallic taste when browned.
Powdered sugar. Also known as icing or confectioner’s sugar. This is added to taste, as browned butter can turn out a little differently each time, which will affect how much sugar you really need.
Vanilla extract. Use pure extract, not imitation.
Salt. Omit if using salted butter.
Heavy whipping cream. This is to smooth out the frosting, which is especially needed in this recipe due to the browned milk solids and altered overall texture of browned butter.
How to make browned butter buttercream
1. Brown 2/3 of your butter. This will take about 10 minutes over medium heat. Be sure to use a medium to large pan, because the butter will bubble up to about 10x its original volume. Learn from my greasy, buttery messes and use a larger pan than you think you’ll need! Once the bubbling starts to calm down and you see brown streaks as you stir and smell a nutty aroma, it should be cooked.
2. Beat cooled browned butter and regular butter. Cool the browned butter until solid. This takes at least an hour on the counter or about half an hour in the fridge, stirring frequently to keep it well mixed. You want it to be solid but not hard.
3. Slowly beat in powdered sugar. Do this about a cup at a time, scraping the bowl as needed.
4. Add vanilla, salt, and heavy cream. Heavy cream is usually optional in a buttercream, but not so much in this one. You need at least a splash to smooth this out, since the browned butter has a less-smooth texture.
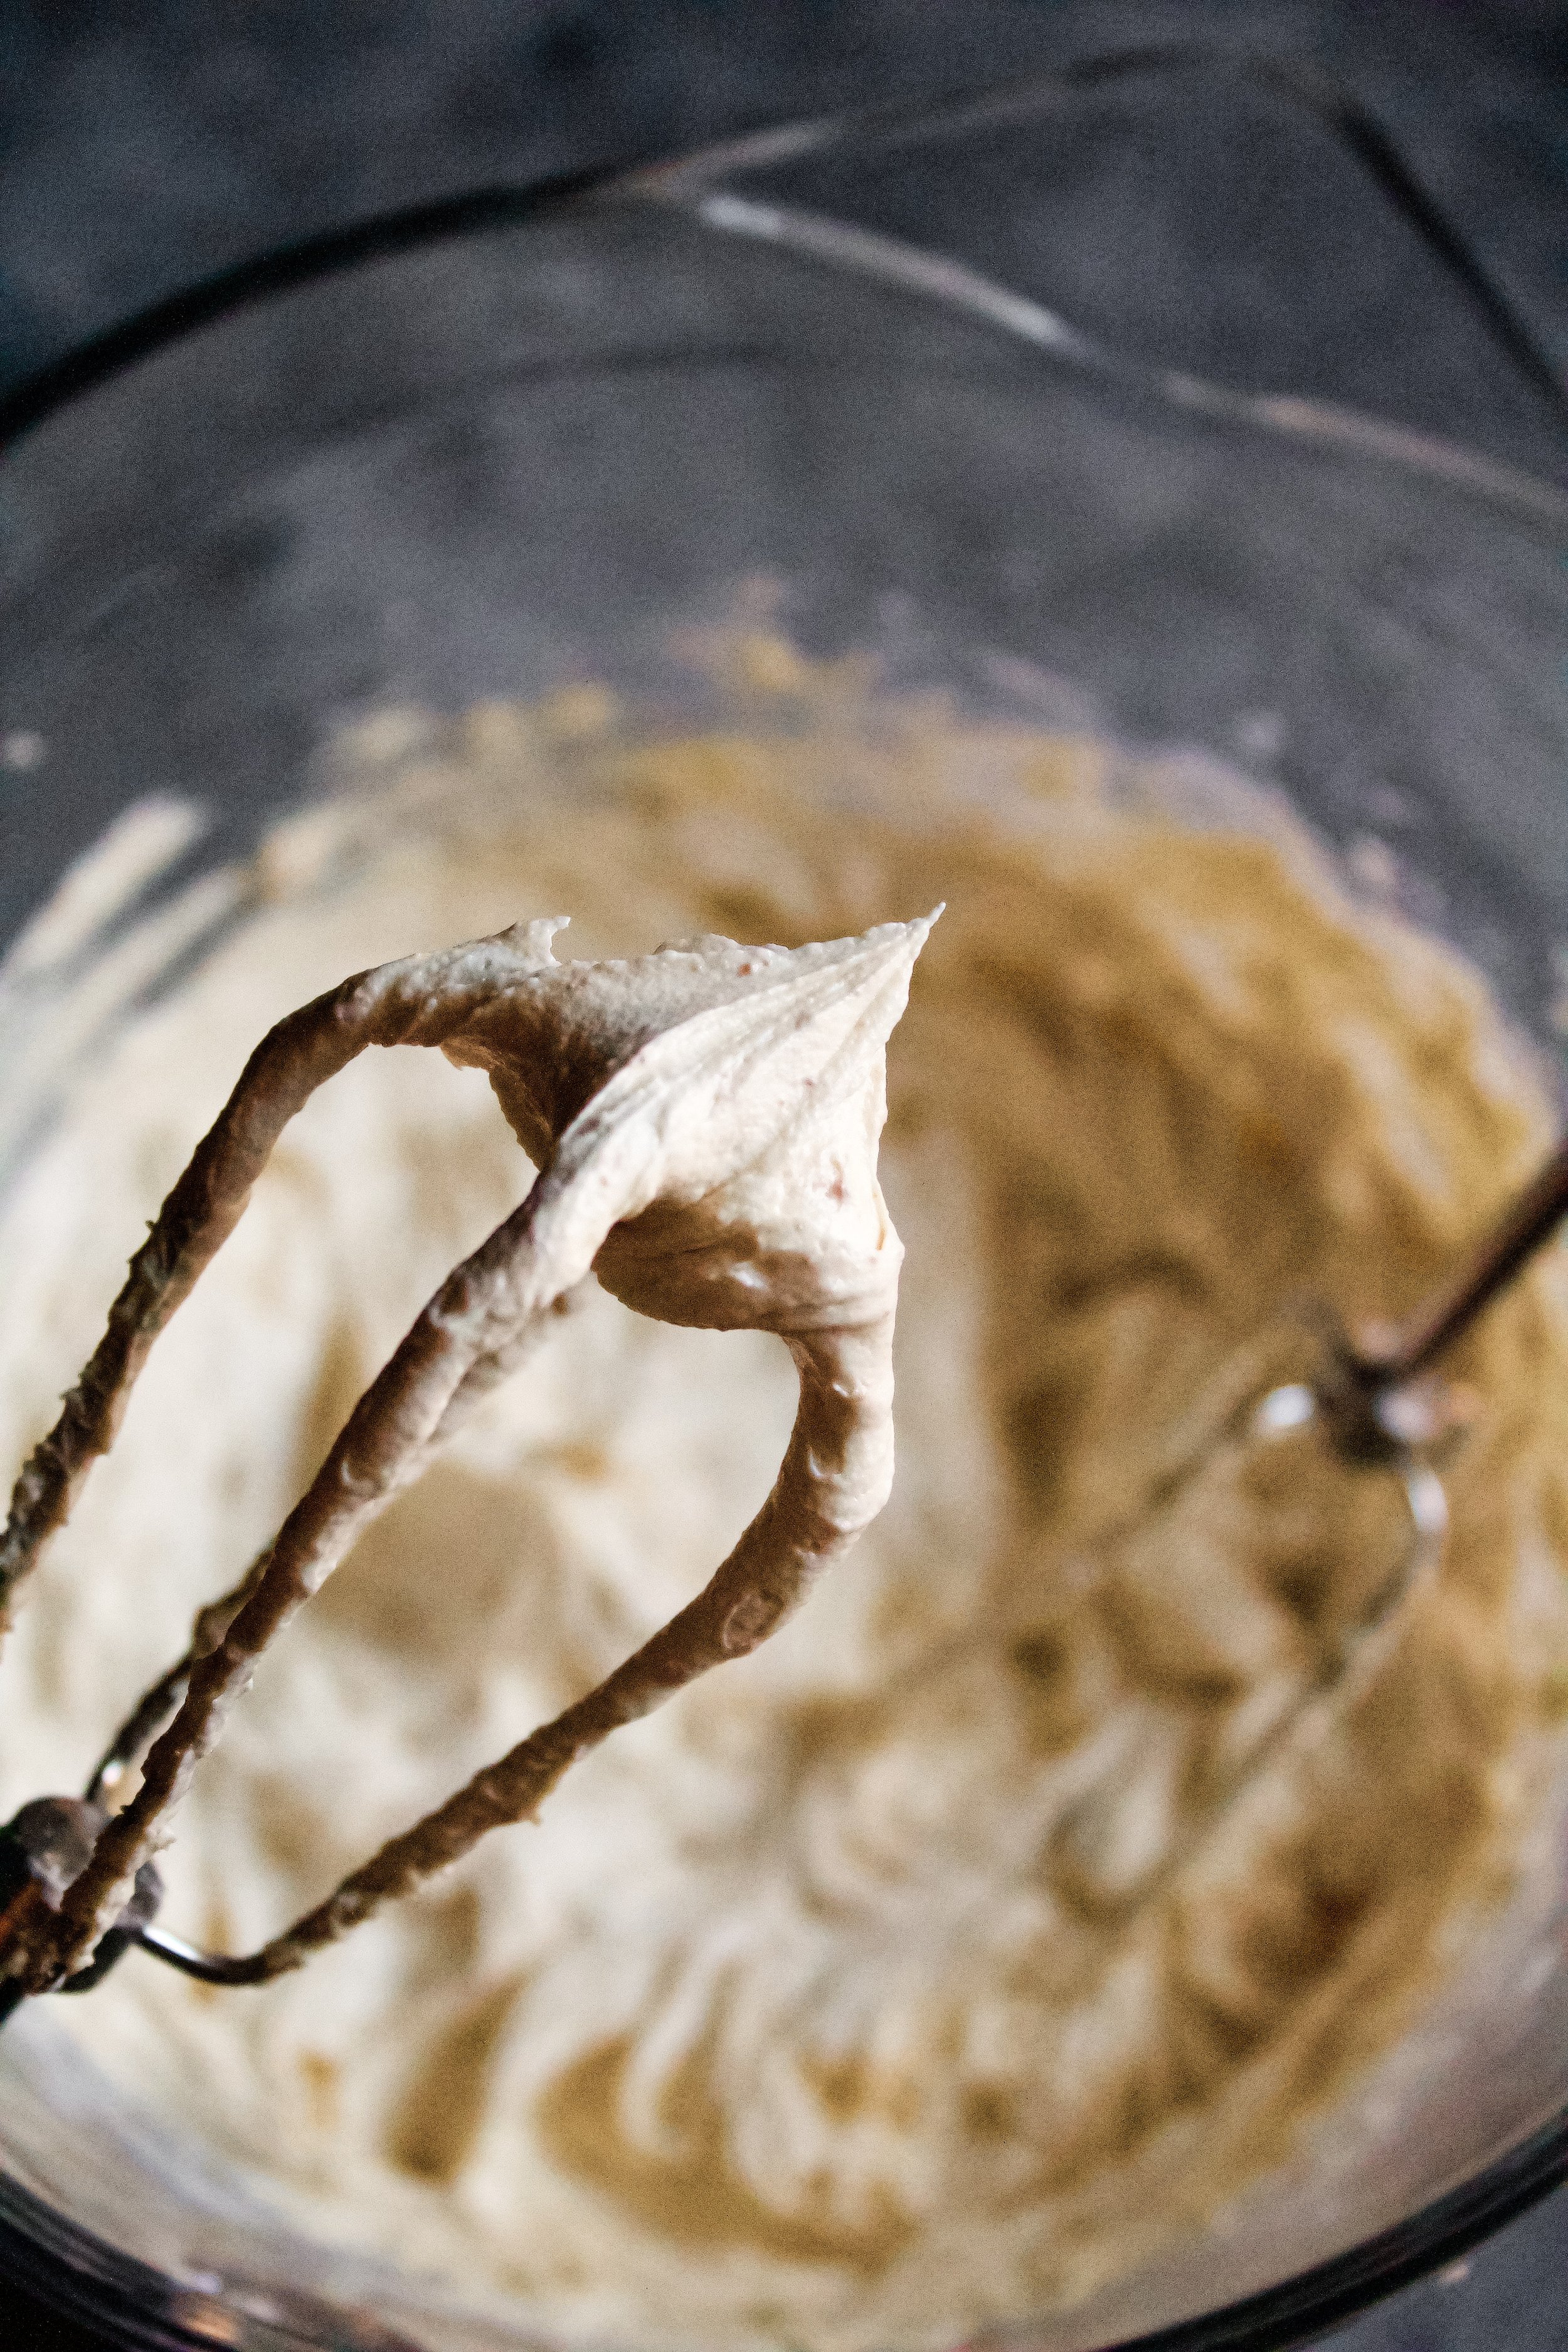
5. Adjust flavors then beat until smooth. You can add more powdered sugar, if needed. Do this in small increments so you don’t overpower the browned butter. Then beat on medium-high for a few minutes until very light and fluffy.
6. Stir to remove air bubbles. You can use your mixer on lowest setting for a few minutes or stir vigorously by hand for a minute or two. Just be sure those air bubbles are gone!
Enjoy!


Tips and FAQ’s for this recipe
How do I brown butter?
This is actually pretty simple! You’ll just cook it over medium heat in a medium/large saucepan, stirring constantly with a rubber spatula (be sure to get the bottom and sides). It’ll start to bubble then foam. Once this starts to calm down a bit, you’ll start to smell a nutty aroma and notice some golden streaks coming through as you stir (you may not be able to see the bottom). This means you’re almost done—keep stirring until the entire thing starts to take on a golden color, but watch carefully and stir constantly, as the bottom is always darker than what you see on top.

What if my butter burned?
Sadly, you’ll have to start over if it’s gotten dark brown or black. You could always save it for another recipe, but I don’t know of any that are forgiving about browned butter. It’s best to pull it off the stove early then keep cooking if you realize it didn’t brown enough (see below).

What if my butter didn’t brown?
You just didn’t let it cook long enough! Before you pour this into a bowl to cool, check that the color is golden throughout by stirring for a minute off the stove. If you realize that it’s only lightly golden, it will need another minute or so on the stove. The foaming can make it hard to see the bottom, so constant stirring is you friend here.

Can I use salted butter?
Yes, but be very, very careful not to over brown your butter. I’ve used salted butter plenty of times with great results, but it’s more prone to a weird taste if I brown it a little more than I meant to. If you’re careful with the stirring, you should be fine, just be sure to omit the salt in the recipe.

Help! I can’t see the bottom of my butter as it’s cooking
Welcome to the wonderfully stressful world of browning butter. The foaming and bubbling process makes it difficult to see the bottom, but as long as you’re stirring constantly and cooking over medium heat, you’ll be fine. Once the butter on the bottom (especially the milk solids) begins to brown, you’ll know because streaks of golden butter will come through as you stir. Keep cooking and stirring for another minute or so, the ensure all of the butter is evenly browned.

My tools
Here are my must-have tools I use for making this buttercream. Affiliate links provided.
Heavy medium pot (for browning the butter)
1M piping tips (for piping rosettes)
Offset spatula (if frosting a cake)


Browned Butter Buttercream
- cook time: 8-10 minutes
- prep time: 5-10 minutes
- total time: 20 minutes (plus 1 hour cooling time)
yields: about 3 cups (enough for 24 cupcakes or a two layer cake–double if making a tall cake or tall piping)
Ingredients:
- 1 ½ cups (340g) European style butter, room temperature
- 4-5 cups (520-650g) powdered sugar
- 1 tablespoon (13g) vanilla extract
- ¼ teaspoon (2g) sea salt
- 2-4 tablespoons (30-60g) heavy whipping cream
Instructions:
brown the butter
- First, brown the butter. Place 1 cup of the butter in a medium to large heavy bottomed saucepan. Cook over medium heat, stirring frequently with a rubber spatula. After a minute it will start to bubble and foam. At this point, stir constantly, getting the bottom and sides to prevent burning.
- Keep stirring and cooking until the bubbles turn to foam then start to subside. Around the time that the foaming finally starts to calm down, you’ll notice golden streaks of butter coming through as you stir. Keep cooking another minute or two as you stir constantly, until all of the butter reaches a deeper golden color (think caramel colored, but not too dark brown) and you smell a nutty aroma. This should take about 8-10 minutes total (from the time you started cooking it).
- Pour the browned butter–including the browned milk solids at the bottom–into the bowl of your stand mixer to cool completely. It should be the consistency of softened butter and become opaque again. This takes about an hour on the counter (longer in higher heat) or about 30 minutes in the fridge.
- At this time you can set the remaining ½ cup butter on the counter to soften.
make the buttercream
- Once the browned butter is completely cooled and the regular butter is soft (but not shiny), combine both butters in the bowl of your stand mixer fitted with the paddle attachment (or a large mixing bowl, using a hand mixer). Beat the butters on high until smooth, about 30 seconds.
- Add 1 cup of the powdered sugar and beat on low then slowly increase to high (to avoid a sugar cloud). Beat on high for about 30 seconds, until completely smooth. Continue this process until you’ve added 4 cups powdered sugar.
- Scrape down the bowl then add the vanilla and salt and beat again until smooth. Taste the buttercream, adding another cup or two of powdered sugar, as needed.
- Once the taste is to your liking, add a tablespoon of heavy cream and beat until smooth. Add up to 4 total tablespoons cream, just enough to make the frosting smooth and workable but not loose. Use only 1-2 tablespoons in warm weather or if the cake will be outside.
- Scrape down the bowl then beat on high for 1-2 minutes, just to fluff up the frosting. This is optional but creates a great texture. Stir on lowest setting (or by hand) for a minute or two to release the larger air bubbles.
Enjoy!
Frosting can be made ahead and stored in an airtight container on the counter overnight, in the fridge for 2-3 weeks, or the freezer for 1-2 months. If chilled, defrost on the counter for a few hours then beat again on high until smooth.