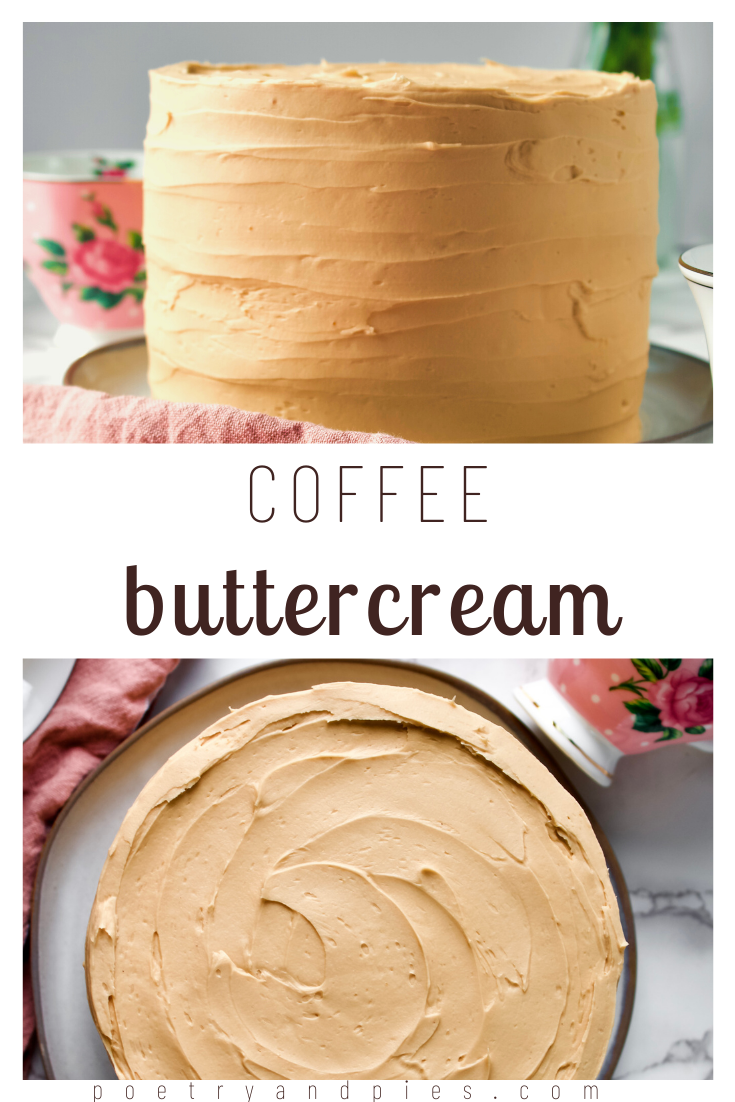
Coffee Buttercream
Smooth, perfectly creamy buttercream with a sweetness balanced by the bold flavor of coffee. This recipe is easily customizable—light coffee flavor or strong hints of espresso, decaf or fully loaded! It pairs wonderfully with a variety of cakes and is perfect for all coffee lovers!
This post may contain affiliate links from which, at no additional cost to you, I may earn a small commission to keep this site running. Only products I myself would or do use are recommended.

Where are my coffee lovers at?!?!?! This recipe is for you (as are the excessive punctuation marks, because only coffee can engender such energetic excitement).
Awhile back, I wanted to make a latte cake, but I wasn’t sure how to proceed with the buttercream. Do I just add chilled, super strong coffee or espresso? Perhaps, and I’m sure some people do that. But brewed coffee can turn bitter quite easily. Cold brew is another viable route, but that would take several hours to prepare, and you’d need just the right ratio—too strong of coffee and it’s overwhelming, too weak and you end up adding too much and watering down your buttercream until it’s soup.

Luckily, one of my favorite baking hacks makes this buttercream perfection: high quality instant coffee.
No, not Folger’s. Put that stuff back on the shelf where it belongs. I’m talking about quality instant coffee that you reserve for baking. It may seem expensive at first, but when you realize how far a small package or jar will go and how long it lasts, you’ll be glad you invested.
I usually have decaf, blonde, and maybe a stronger roast on hand at any given time. I probably stock up once a year, maybe less, but I’m also baking constantly. So I say go for it. Get that fancy instant coffee and make that cake you’ve always wanted to.

Why this recipe works
The use of instant coffee dissolved in hot water (or cream) means you have better control over the flavor and texture of this buttercream. If you want a strong coffee flavor, you don’t have to pour in huge amounts of strong, chilled coffee (that may taste bitter after cooling—all my hot coffee lovers can probably relate!). Even using cold brew won’t add enough flavor without adding far too much liquid for the buttercream to stay creamy. Instead, you can simply dissolve as much or as little high quality instant coffee or espresso into a tiny amount of hot water, and that’s enough. It ends up being just slightly more liquid than adding vanilla.

Key ingredients
Butter. Obviously! Use unsalted, European style butter for the best possible buttercream. European butter is creamier and has less water, meaning it will make the smoothest possible frosting you’ve ever made.
Powdered sugar. Again, one of our main ingredients! I never sift mine, because I’m in dry climate and have a container to keep open bags from absorbing moisture. If you see any clumps at all (usually from being left open or in humid climates), be sure to sift as you add it to the butter.
Vanilla extract. Try to use a pure extract, as imitation has a different flavor.
Instant coffee or espresso. I can’t stress enough using a good instant coffee! This flavor shines in the buttercream, so make it a good one. The best one I’ve found from Amazon is Starbucks Via, and I like Pike Place or Veranda, but any bean you prefer is fine. I’ve also found some really great local instant coffees at specialty stores and coffee shops, so keep your eye out when you’re out and about!
Salt. Just a bit, to help bring out the sweetness.
Hot water. Make sure it’s boiling-hot, to dissolve the coffee. You only need a little bit, too!
Heavy whipping cream. This is optional. You may not need it after you add the dissolved coffee, as that may be enough to smooth out the frosting. Otherwise, add this in small splashes (no more than 1 tablespoon at a time).

How to make coffee buttercream
1. Dissolve instant coffee in boiling water. Stir until fully dissolved then set aside to cool.
2. Cream butter and sugar. Add the powdered sugar slowly, and beat until fully smooth before adding more.
3. Add coffee, vanilla, and salt. Be sure to beat until very well blended before tasting it.
4. Adjust to taste. You can add more sugar or coffee, as needed. You can also add in some splashes of heavy cream, to smooth it out and make it easily spreadable.
5. Beat on high. This is technically optional, but it helps smooth out the buttercream, makes it nice and fluffy, and makes it easier to work with.
6. Stir by hand. When you beat the buttercream on high, it will get air bubbles, which make frosting it difficult. Do NOT skip the step of stirring by hand! Alternately, you could mix it on low for 30 seconds, scrape the bowl and stir it a bit, then mix it on low again, repeating until there are no visible bubbles left.
Enjoy!


Pairs well with:
This buttercream goes will with just about any cake! However, here are a few of my favorite combinations!
Chocolate Cupcakes or Chocolate Cake (just replace the chocolate buttercream with coffee buttercream!)
Eggnog Latte Cake (if you LOVE coffee, you can amp up the flavor by switching out the buttercream here)
Brown Sugar Spice Cake (for a great spiced coffee flavor!)
Dark Chocolate Mocha Cupcakes (or cake)
Chocolate Raspberry Cupcakes (for a raspberry mocha flavor!)

Tips and FAQ’s for this recipe
Do I have to stir it at the end?
Yes! It’s best practice to beat your buttercream on high or medium hight for at least a minute after everything is to your liking. It really does create a creamier frosting. However, it also creates bubbles (womp womp). So you need to stir those bubbles out, and doing this by hand is the best method I’ve seen so far.
What kind of coffee works best?
Honestly, any kind you like. The grocery store that is literally a 5 minute walk from my kitchen reliably carries Starbucks Via in a variety of roasts, so that’s what I use. However, I wouldn’t get anything less fancy than that. I always have Veranda (a blonde roast) and decaf on hand, though sometimes I get French or Italian if I want a strong coffee flavor. Decaf may seem pointless, but I bake for others quite a bit, and there’s usually children or expecting mothers enjoying my desserts, and I want to be mindful of their dietary preferences, too.

What if I want a lighter coffee flavor?
Use a blonde roast and use less of it. Start with just a teaspoon of coffee dissolved in a little less than a tablespoon of boiling water. Mix well, taste, and adjust until you’re happy with the flavor. If you plan to make this ahead of time or refrigerate it, be aware that the coffee flavor may intensify slightly in the fridge.
What if I want a stronger coffee flavor?
Honey, you are my people. I’ve used up to 1 tablespoon instant coffee, but that was just for me and other coffee lovers. If you’re using this to frost a non-coffee flavored cake, you want to leave room for other flavors to shine through, so it could be worth it to do a taste-test with a scrap of cake (such as cutting off the domed top) before going wild with that coffee. But in the end, it’s what you like that matters. :)

Take your time adjusting the flavors
If you dump in a ton of extra coffee or powdered sugar, you could end up with a too-strong flavor or something that’s sickly-sweet. Or, the absolute worst, is adding too much heavy cream. You can easily turn American buttercream (which is what this is) to soup or cause it to break (i.e. separate) by adding too much liquid, such as heavy cream or coffee. So, use a light hand and have the patience to take an extra 5 minutes adjusting the flavors. In the end, you’ll love the result and get to taste test more frosting.
My buttercream tools
Here are my must-have tools I use for making this buttercream. Affiliate links provided.
1M piping tips (if doing decorative piping)


Coffee Buttercream
- total time: 5-10 minutes
servings: about 3 cups, enough to fill and frost a two or three layer cake
Ingredients:
- 1 ½ cups (340g) unsalted butter*, softened
- 4-5 cups (520-650g) powdered sugar
- ¼ teaspoon (2g) finely ground sea salt (or to taste)
- 1 tablespoon (13g) pure vanilla extract
- ½ tablespoon (3g) instant coffee or espresso (or to taste)
- 2 tablespoons (28g) boiling water
- up to 4 tablespoons (56g) heavy whipping cream, optional (use only as needed)
Instructions:
- In a small bowl, combine instant coffee or espresso with the boiling water. Stir until dissolved and smooth. Set aside to cool.
- Either in the bowl of your stand mixer, fitted with a paddle attachment, or in a large mixing bowl and using a hand mixer, beat butter on high until very smooth, about 30 seconds. Be sure the butter is soft but still matte looking. If it’s shiny, it’s over-softened and needs to go back in the fridge for a few minutes.
- Add powdered sugar, one cup at a time, beating on low then increasing to high until smooth, about 1 minute. Stop after you’ve added 4 cups. You can add more at the end, if needed. Scrape the bowl.
- Add the vanilla, salt, and half of the cooled coffee. Beat on low until somewhat combined then on high until smooth and fully combined.
- Taste buttercream. If you’d like a stronger coffee taste, stir a little more of the coffee, until you’re happy with the taste. At the sametime, add up to 1 more cup of powdered sugar if it needs more sweetness. If you don’t want any more of a coffee taste but need to smooth out the frosting, you can add some heavy whipping cream, one tablespoon at a time, until smooth and nicely spreadable.
- Once the flavor and texture are to our liking, beat on high for about a minute, to fluff up the frosting. Then stir vigorously with a wooden spoon or rubber spatula for another minute to release the air bubbles.
Enjoy!
If not using right away, cover tightly and store in the fridge. To bring out a stronger coffee and whiskey flavor, refrigerate for up to a week then let come to room temperature for a couple hours before using. Frosting can be stored in an airtight container in the fridge up to 2 weeks or the freezer for 1-2 months.
*Note: I highly recommend European style butter because it has less water and is creamier.