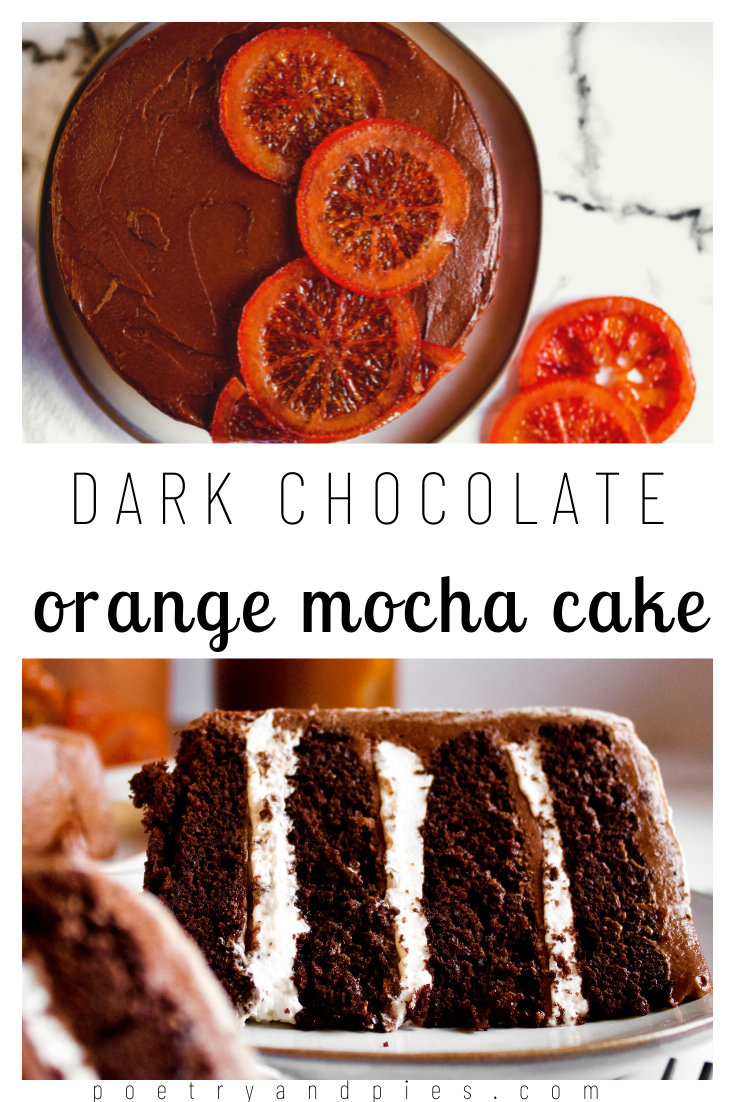
Dark Chocolate Orange Mocha Cake
Rich, fluffy chocolate espresso cake filled with fresh whipped cream, frosted with silky, creamy orange chocolate ganache buttercream, and topped with candied oranges. This cake tastes just like a dark chocolate orange mocha. This cake is perfect year round: chocolate and orange are quintessentially Christmas/winter flavors, yet the result is something you can enjoy even on the hottest summer day.
This post may contain affiliate links from which, at no additional cost to you, I may earn a small commission to keep this site running. Only products I myself would or do use are recommended.

Anyone had Peet’s Dark Chocolate Orange Mocha? If not, stop what you’re doing and go find one. Or, try one the next time you’re there. It is one of my favorite drinks that they make. It’s rich and chocolatey yet also light and refreshing. The chocolate and orange are quintessentially Christmas/winter flavors, yet the result is something you can enjoy even on the hottest summer day.
Which is why I made this cake last June. (Yup, #teacherlife leaves me little choice in that.) It was delicious and refreshing. Yet I would so eat this in the dead of winter, when oranges are all fresh and ripe and at their sweetest.

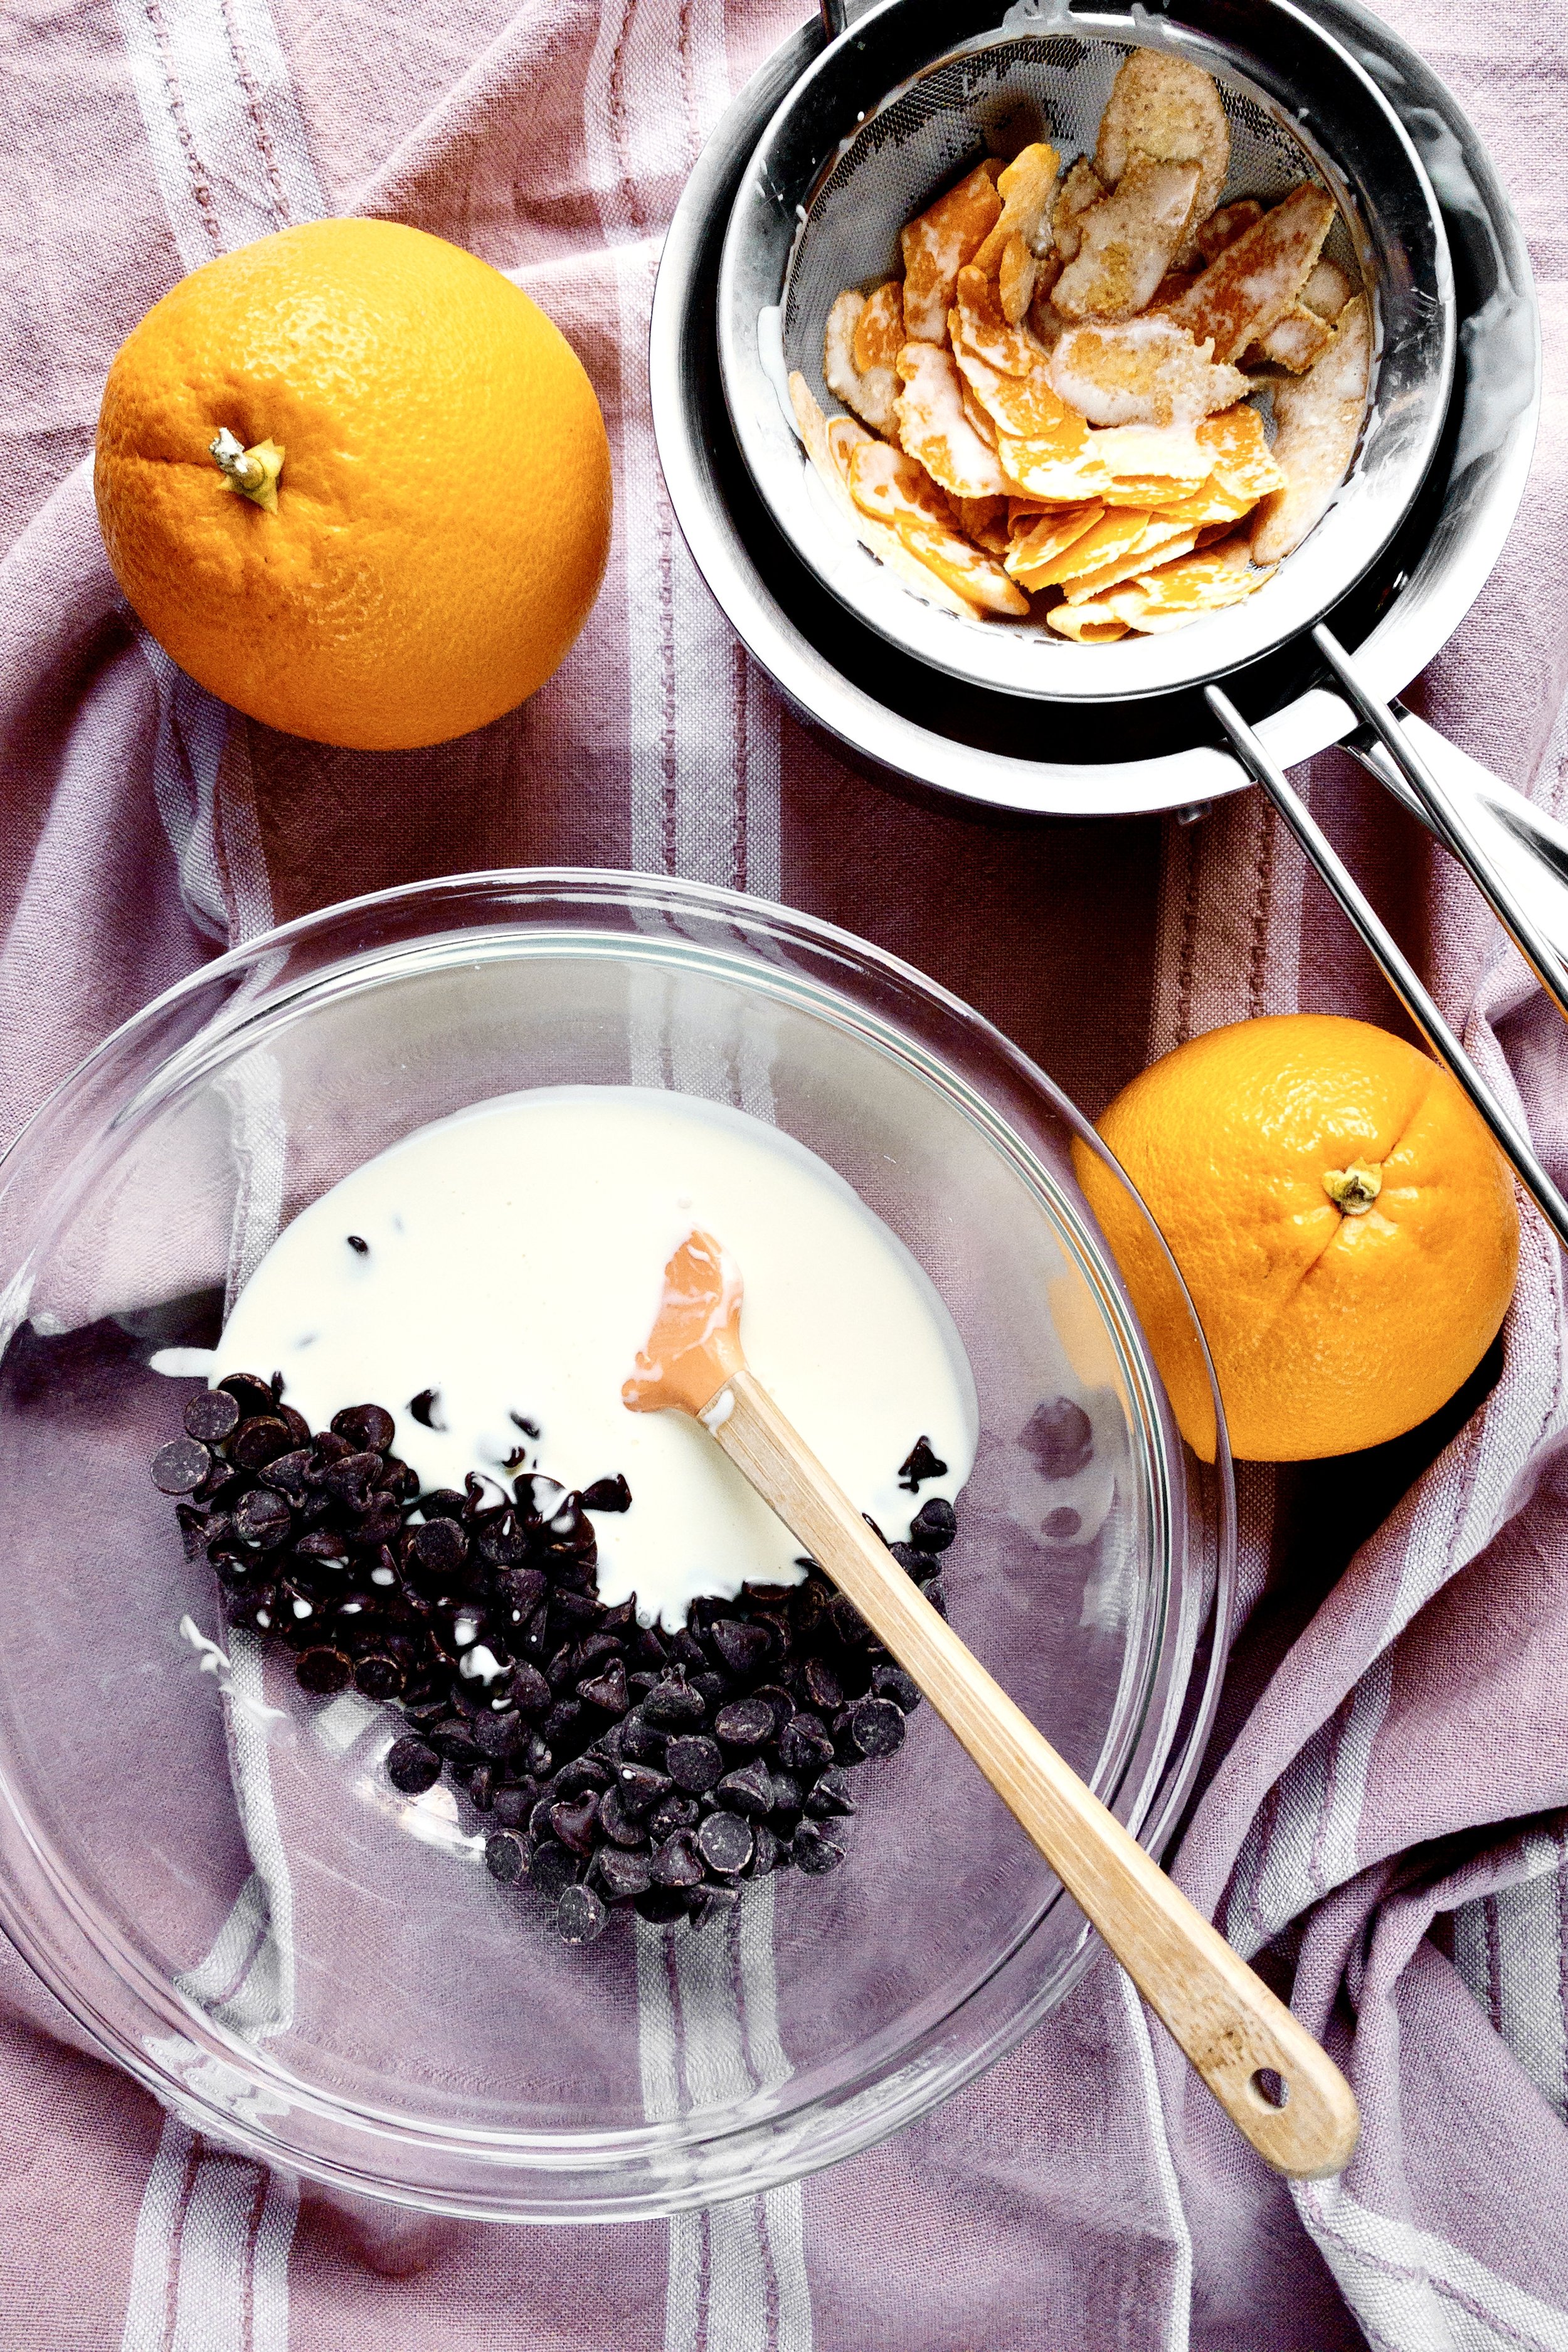
I think what makes this cake so great is the steeping of orange zest in all elements of the cake. The milk in the cake and the heavy cream in the buttercream both get heated with peeled orange zest (not whole peel—no white pith in here) then left to steep for an hour. You can also steep the heavy cream for the whipped cream in zest, but it’s actually best to do this overnight in the fridge, as heating heavy cream can sometimes cause it to not turn into whipped cream as well.
Why this recipe works
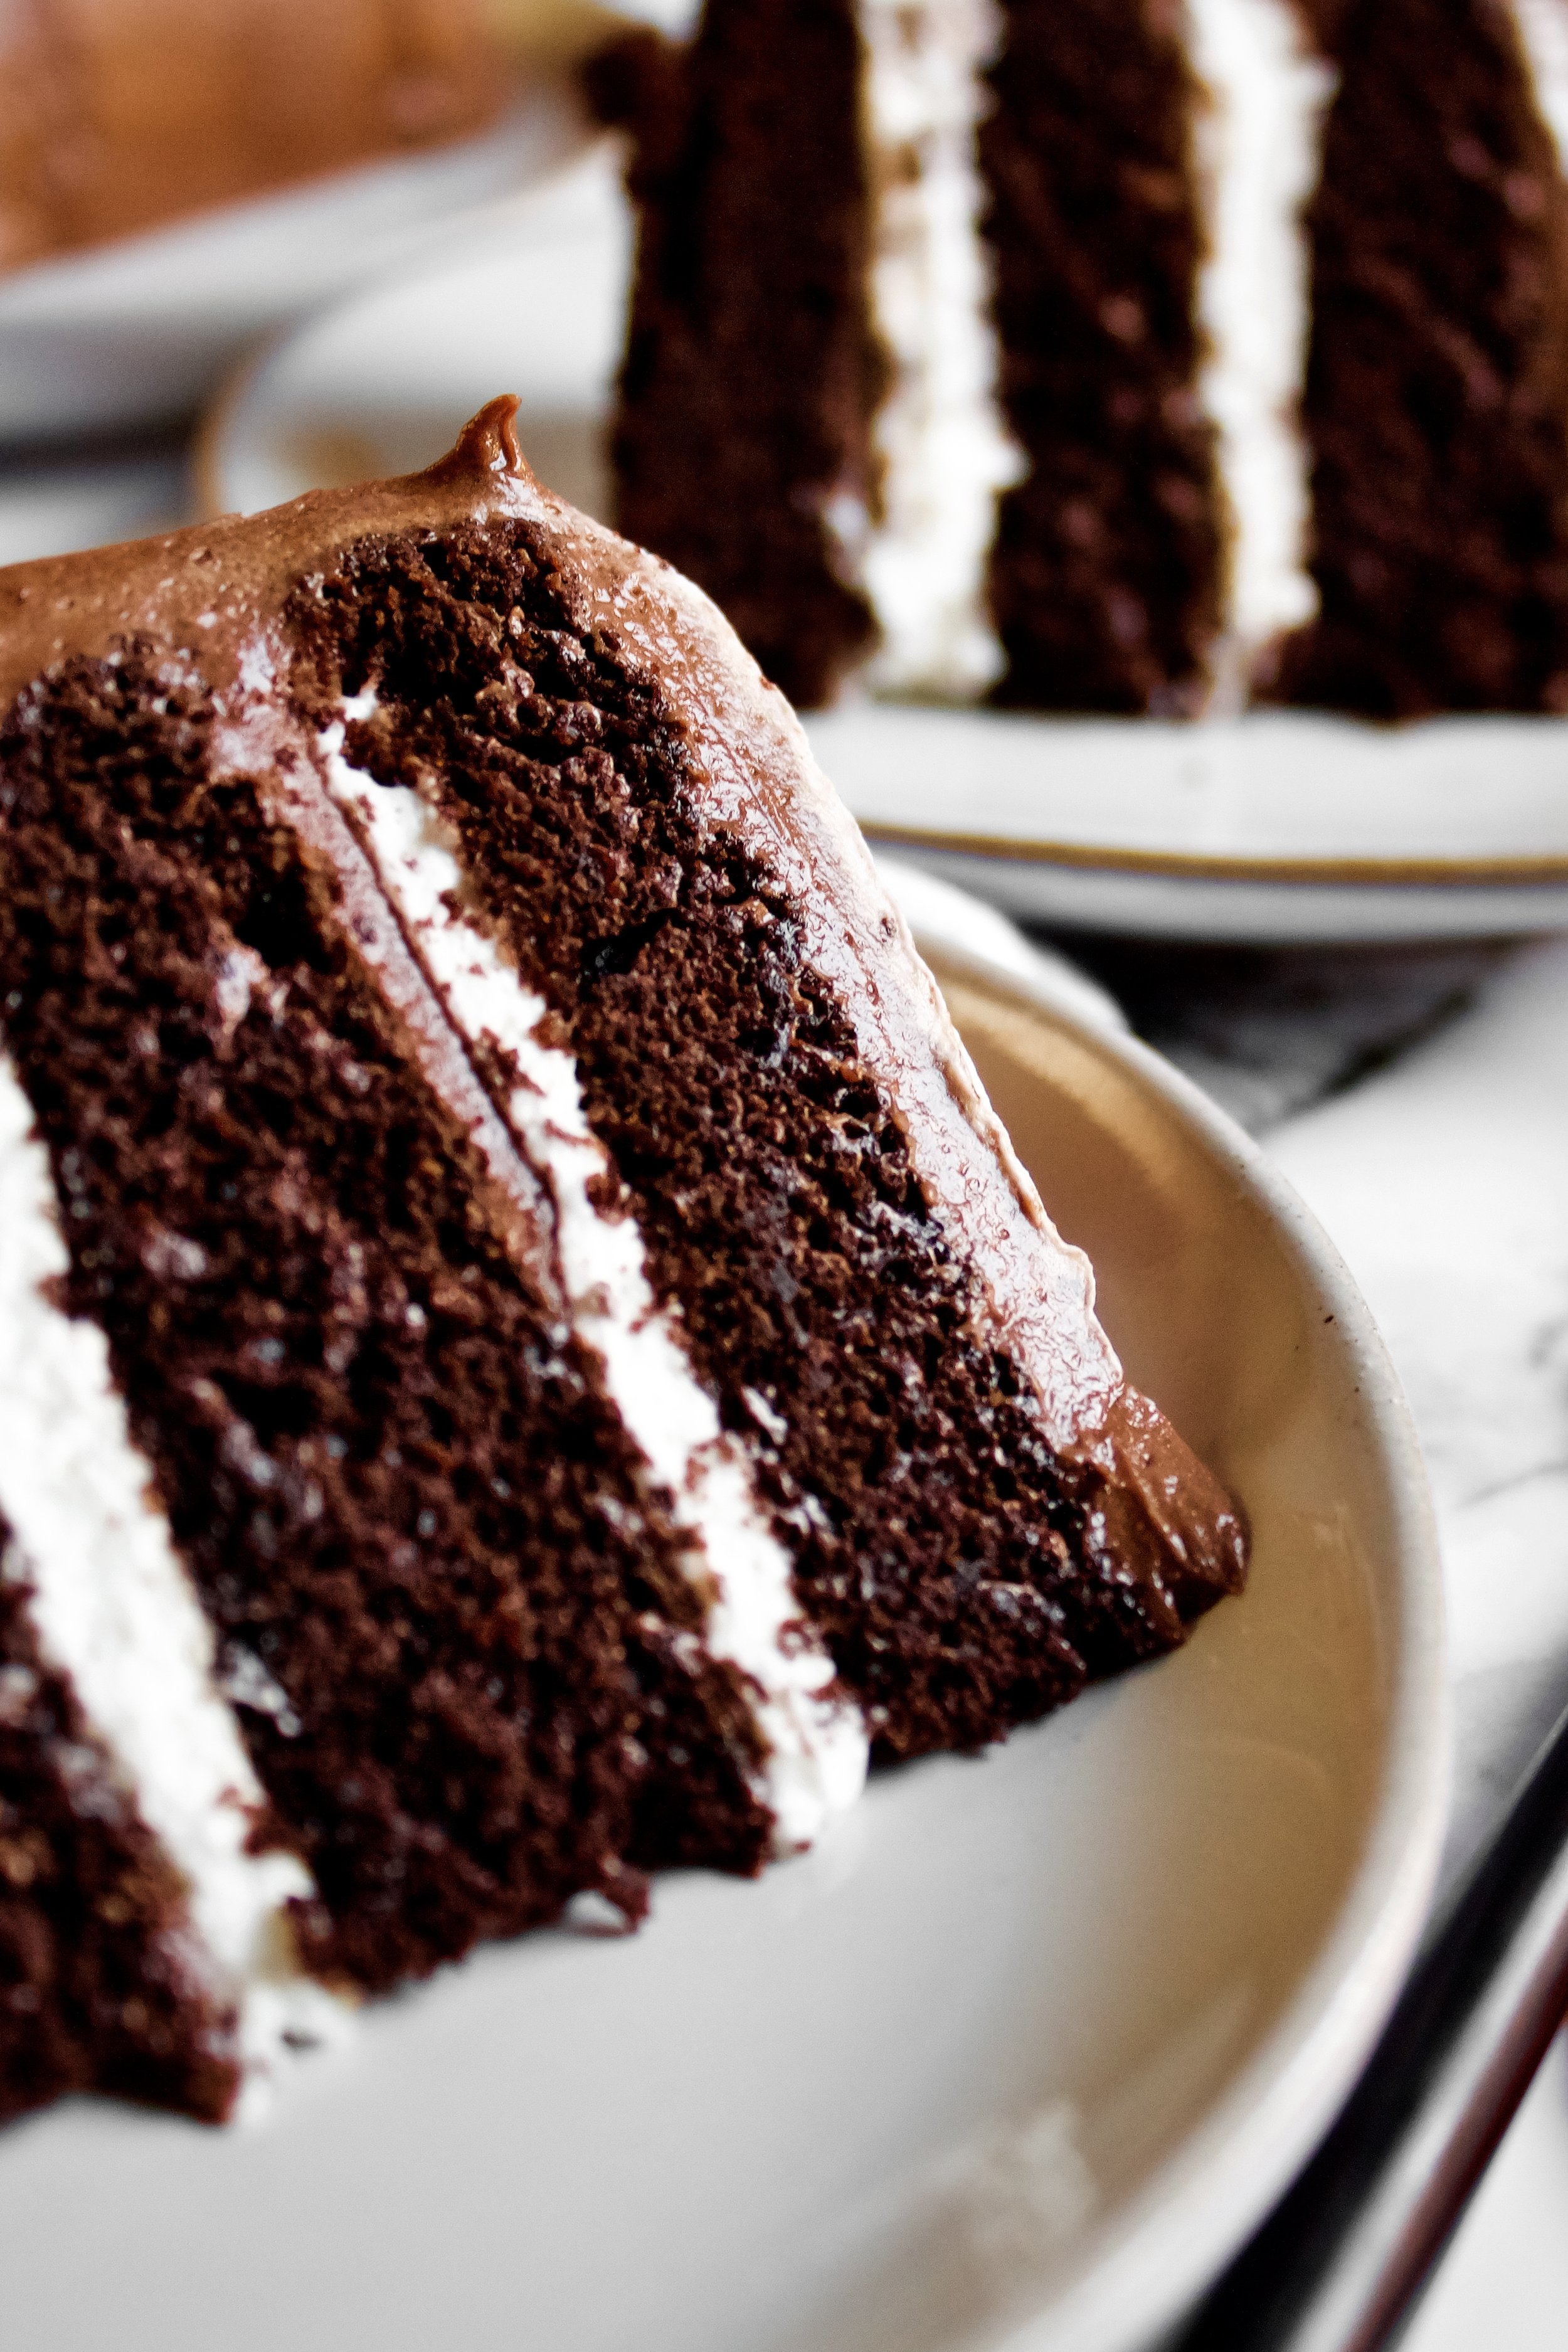
This cake really is a beautiful combination of flavors and textures. The cake is light and fluffy yet stays moist for days. I looooovvveee this cake with whipped cream filling, as the textures play off of each other so well. And that buttercream is silky and creamy. Plus, the flavors. The cake layers pack in all of the flavors of dark chocolate, espresso, and orange. Then the whipped cream filling helps balance that out with lightly sweet and creamy flavors, just like whipped cream on top of a real mocha. Finally, that frosting. It is one of my absolute favorites, with chocolate orange ganache all whipped up before you add in butter and powdered sugar. It adds a rich, slightly sweet, citrusy taste to bring everything together.
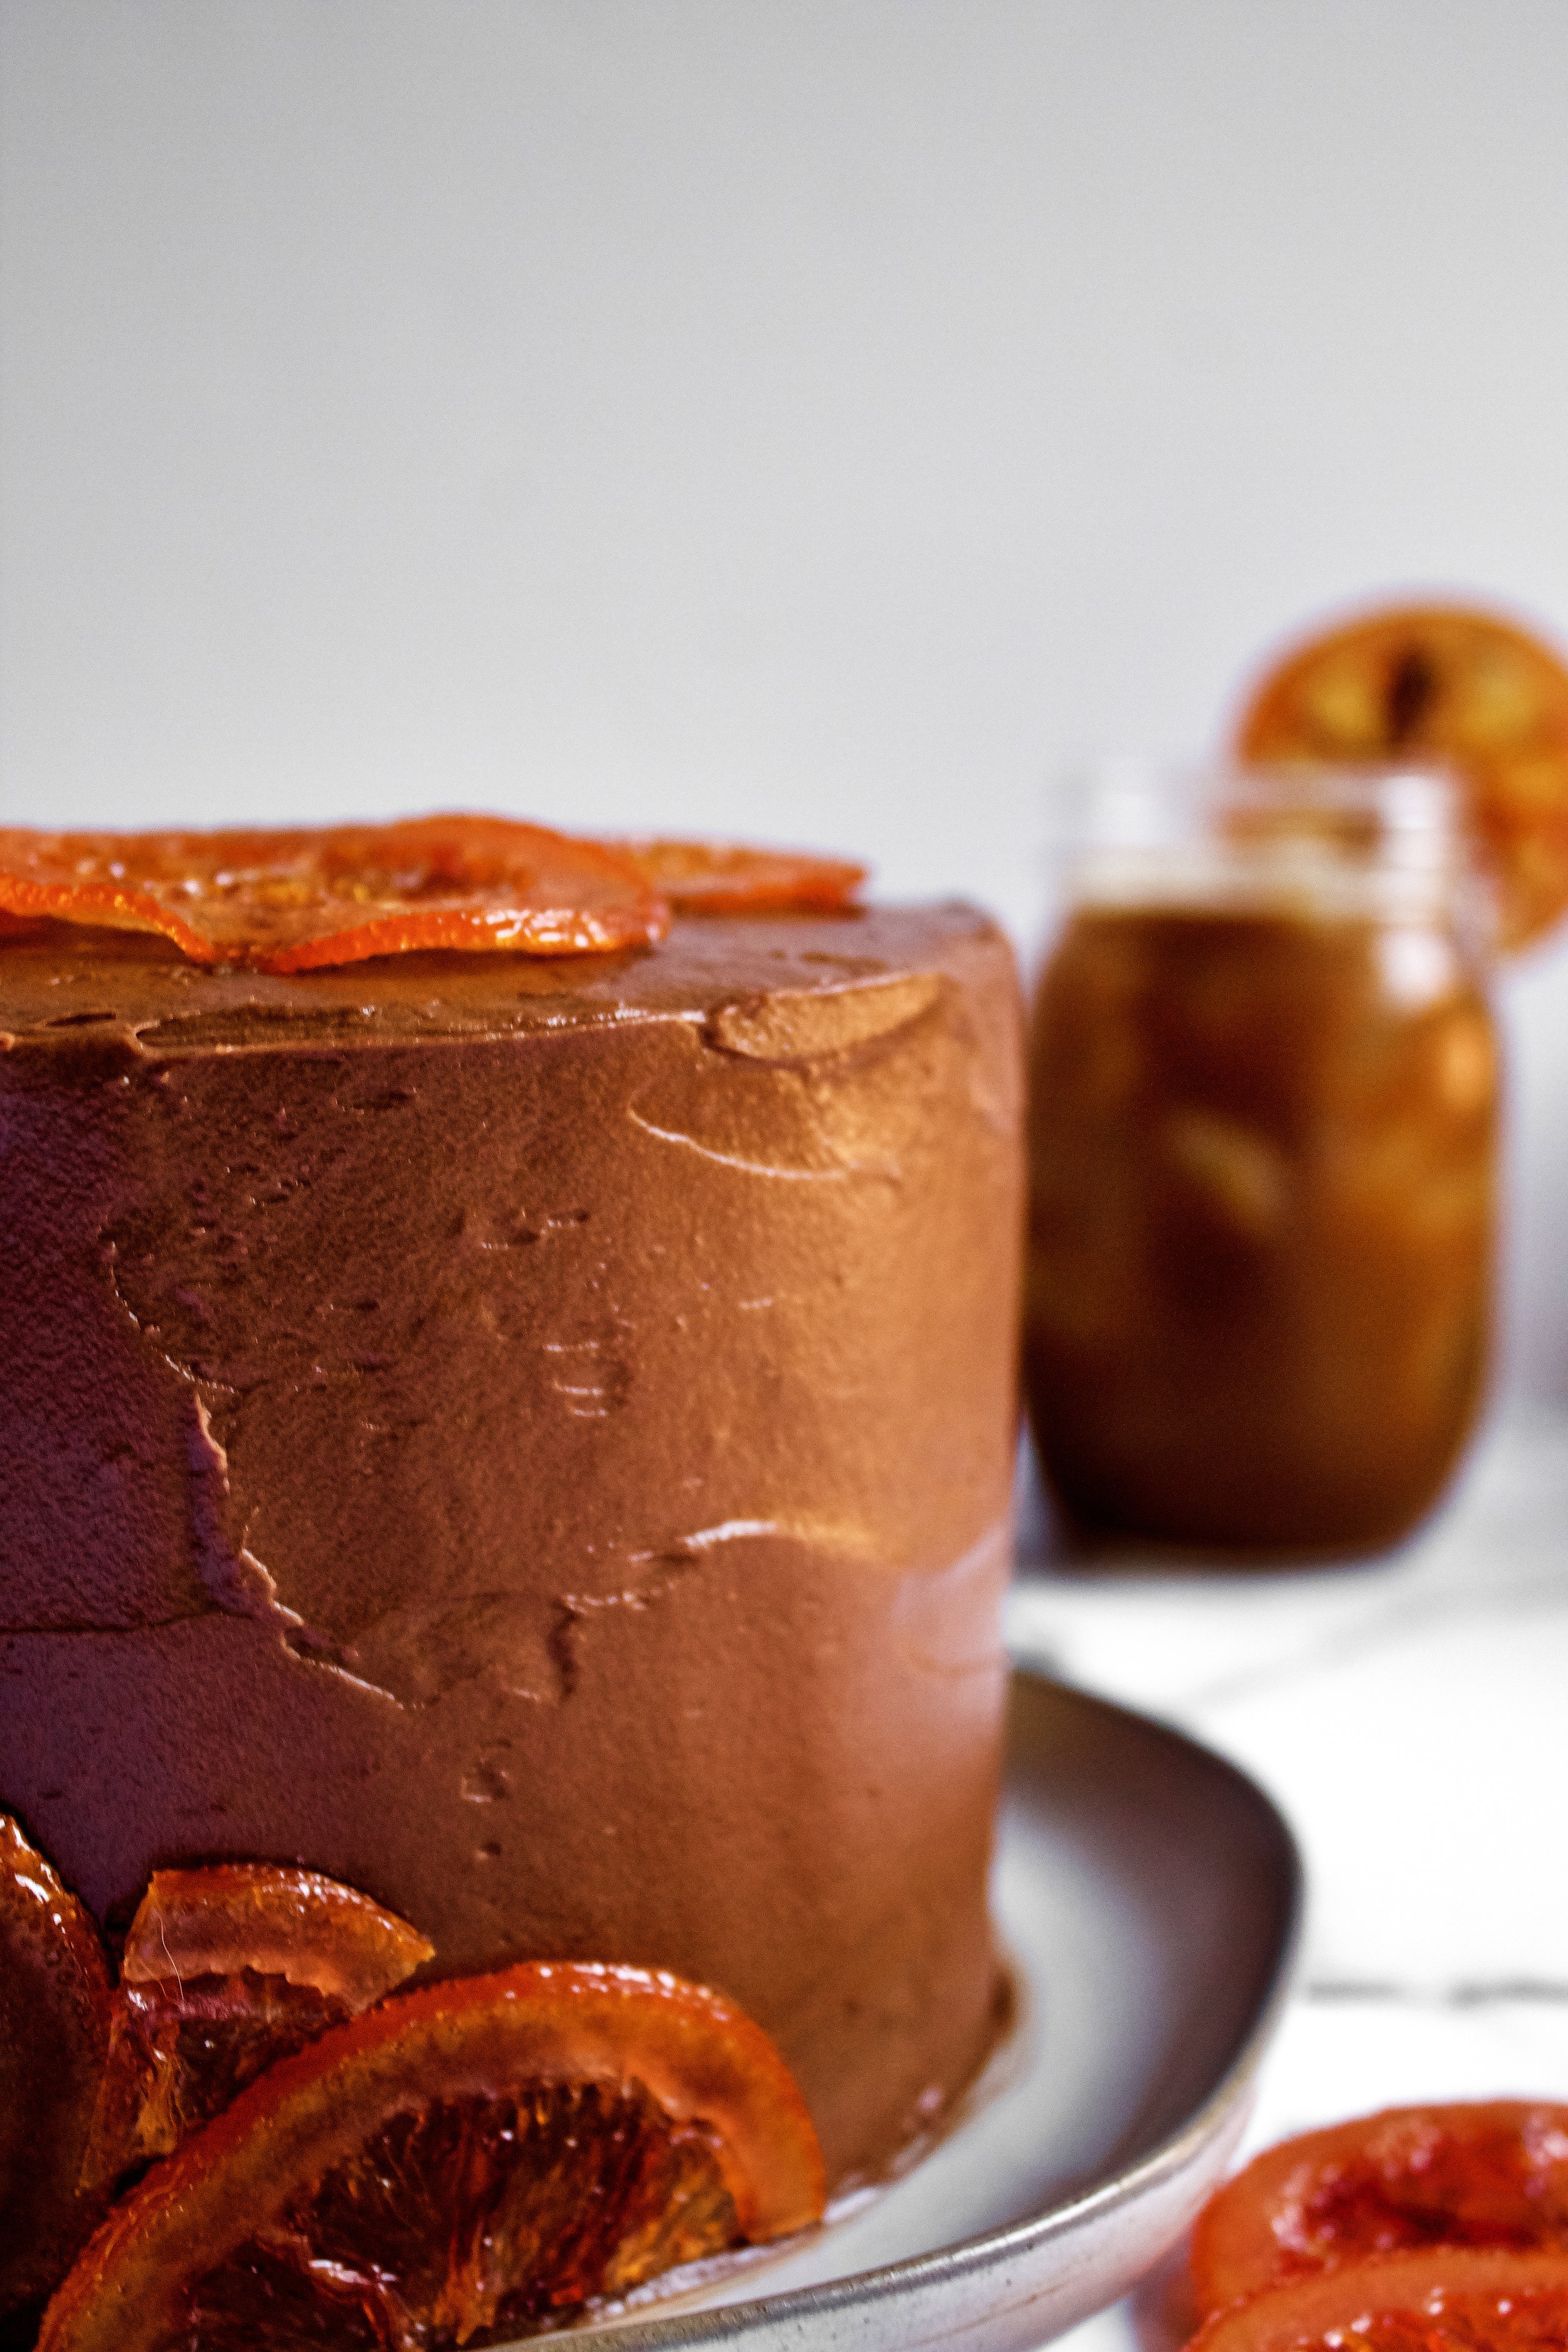
And the candied oranges! They are optional, but they’re so good and look amazing. My recipe only takes a couple hours, as opposed to 24+ hours that traditional candied oranges require. Be sure to slice those oranges as thinly as you can to get the perfect texture.

Key ingredients
Oranges. Try to use fresh oranges, not ones that have been sitting around for a while and are soft, as those can be so much harder to work with.
Milk. Whole milk is ideal, although whatever you have is fine. I haven’t tried this with milk alternatives, but I’ve heard they do work. Just be sure that whatever you’re using is room temperature.
Flour. Be sure to gently spoon this into your measuring cup(s) then level with the back of a knife or other straight edge, so it’s not packed in. Also, be sure you sift! It’s soooooo important in this cake.
Sugar. You can cut back the sugar by a bit and use as little as 1 1/4 cups, but using the full amount is by no means overly sweet. Don’t use less than 1 1/4 cups, as the cake won’t rise properly.
Cocoa powder. Use unsweetened, and be sure you sift this as well! Cocoa powder is notorious for clumping.
Baking powder/soda. The combination helps create a sufficient rise without giving a bitter taste.
Salt. Sea salt, if possible!
Eggs. Use fresh, room temperature eggs.
Oil. I highly suggest avocado (but not one that’s noticeably green—that’ll have too much of an avocado taste) or grape seed (a little green here would be fine). You can also use vegetable or canola, but those aren’t the “healthy” oils.


Vanilla. You’ll use this in every element of this cake (except for the candied oranges), so use a good brand!
Strong coffee. You could sub instant espresso powder dissolved in boiling water, so long as whatever you use is very hot and fairly strong.
Dark baking chocolate. This is KEY to making this a “dark chocolate” cake. You’ll melt the chocolate in the hot coffee, which will make a richer chocolate flavor and will also make the cake a bit sturdier without being dense or dry.
Heavy whipping cream. Be sure it’s cold!
Powdered sugar. This is technically optional in the whipped cream, but I think using a bit really helps balance the richness of the cake.
Orange extract or emulsion. This is optional as well. I actually prefer this cake without it, but if you want a really orange-y flavor, you can add this to the whipped cream. I’ve also included a note about steeping the heavy cream overnight with orange zest to get a more natural orange flavor, if desired.
Chocolate orange buttercream. So silky and creamy and richly chocolatey!
Candied oranges. Optional, but so festive and fun! Plus, if you like candied oranges, these are sooooo good.


How to make dark chocolate orange mocha cake
1. Candy oranges ahead of time. If you want to cold-infuse your whipped cream filling, do this the day before when you candy some oranges.
2. Steep your milks. You’ll need to heat up some whole milk with peeled orange zest for the cake layers and some heavy cream with peeled orange zest for the buttercream. Do this an hour before you’re ready to bake your cake.
3. Mix steeped milk and orange juice. This creates a sort of buttermilk, similar to adding lemon juice to it. It’ll help activate the baking soda to create rise to the cake.
4. Sift and whisk your dry ingredients. Don’t skip the sifting, as this is key for this cake.


5. Thoroughly mix wet ingredients. Omit the coffee at this point—that comes next.
6. Melt chocolate in strong, hot coffee. Whisk well and make sure your coffee is very hot when you do this.
7. Whisk chocolate coffee into wet ingredients. It’s okay if a few bits of the chocolate doesn’t fully melt. It’ll melt when the cake bakes.
8. Mix wet ingredients into the dry. Scrape the bowl once combined then mix on medium for exactly two minutes.


9. Bake. Check early so you don’t over bake it.
10. Make the buttercream. This can be made up to a week ahead of time and refrigerated, but let it come to room temperature on the counter and give it a very good stir to smooth it back out.
11. Make the whipped cream.
12. Assemble the cake. If you only used two cake pans, I suggest cutting each cake layer in half. Also, be sure to pipe a ring of buttercream before filling with whipped cream.
13. Frost and decorate with candied oranges.
Enjoy!


Tips and FAQ’s for this recipe
Cold steep the whipped cream
Don’t heat the cream the same way you do for the buttercream. Because you’re already going to heat it up to make the ganache, it’s fine to heat it twice (once to steep the orange zest and once to melt the chocolate). However, whipping cream that was previously heated can get tricky. If you heated the cream too much or for too long, it’ll likely not whip as easily, and sometimes not at all. Cold steeping also gets a better flavor for whipped cream, keeping it light and fresh tasting.

Split up your work
This cake does have a few elements to it, so I highly recommend making the candied oranges a few days ahead. They will last in the fridge for a while and the freezer even longer. You can also make the buttercream ahead and keep it refrigerated until ready to use, just let it sit at room temperature for a few hours then give it a good stir to make it more spreadable. And if you plan to make orange flavored whipped cream, I suggest steeping that in the fridge the day before so it has a good orange flavor by the time you make it.

Only peel the zest—not the pith
Since you’re using peeled orange zest, it can be easy to accidentally peel some of the pith, which is the white part. That part is bitter and doesn’t give any orange flavor. So be careful to avoid getting this part in your peeled zest.

Do I have to use coffee in the cake?
No! You can make this a chocolate orange cake by using regular blond roast coffee instead of stronger coffee. You could technically use just hot water, but I have never been a fan of how this cake tastes without coffee. Trust me, you will not taste the coffee if you use light roast. If you’re worried, you can make it half strength, which should be enough to bring out the chocolate flavor.
My cake tools
Here are my must-have tools I use for making this cake. Affiliate links provided.
Mesh sieve (because sifting is KEY for a fluffy cake)
All-rubber spatula (this makes scraping the bowl easier so the batter and frosting don’t get all over a wooden handle!)
Silicone liners for 8” cake (or for 6” cakes)
8” aluminum cake pans or 6” aluminum cake pans (I’ve found nonstick doesn’t bake as evenly)
Offset spatula for frosting the cake


Dark Chocolate Orange Mocha Cake
- prep time: 30-35 minutes
- steep time: 1 hour
- bake time: 25-30 minutes
- total time: 2 hours, 5 minutes (including time to make the buttercream; excludes time to make candied orange slices)
servings: 12-16
Ingredients:
for the dark chocolate orange mocha cake
- 2-3 large oranges
- ¾ cup whole milk
- 1 ⅔ cups sugar
- 1 ⅔ cups flour, spooned and leveled
- ¾ cups unsweetened cocoa powder
- 2 teaspoons baking powder
- 1 teaspoon baking soda
- ½ teaspoon sea salt
- 2 large eggs, room temperature
- ½ cup avocado, grapeseed, or vegetable oil
- 1 tablespoon pure vanilla extract
- 1 cup hot, strong, good quality coffee*
- 3 ounces semisweet or dark chocolate chips or chopped baking chocolate
for the filling
- 1 cup (232g) cold heavy whipping cream**
- ⅓ cup (45g) powdered sugar
- ½ tablespoon (6g) vanilla extract
- optional: ½ teaspoon (2g) orange extract or emulsion**
to assemble
- 1 batch chocolate orange buttercream
- 1 batch candied orange slices (make the day before--optional but so fun!)
Instructions:
- Make the candied oranges ahead of time, up to a week ahead, and store in an airtight container in the fridge until ready to use.
- First, be sure to wash the oranges with fruit and vegetable wash or diluted white vinegar to remove wax, dirt, and pesticides, since you’ll be using the zest. Use a vegetable peeler to peel the zest of 2-3 oranges, trying to avoid getting a lot of the pith (white part). Juice half of one of the oranges (save remaining fruit or juice for another bake or to get your vitamin C boost!).
- Steep the zest. Place the peeled zest and milk in a small saucepan. Over medium heat, bring the milk to a simmer, stirring constantly to avoid scalding it. Once simmering, remove from heat and set aside. Stir frequently for the first few minutes after removing it so it doesn’t form a skin. Let steep 1 hour. This is a great time to take your butter and eggs out to warm up as well as to heat and steep the heavy cream and soften the butter for the buttercream.
- When milk is nearly ready, lightly butter and flour (or spray with baking spray) two 8” or 9” or three 6” cake pans and line with parchment or silicone rounds and preheat the oven to 325F/165C.
- Once the milk has steeped and has a good orange flavor, strain the milk to remove the zest, pressing on the orange pieces to get all of the flavor out (this helps get a bit of the natural oils as well, which yields a more orange-y flavor). Add enough fresh orange juice to equal 1 cup milk and juice. Stir and set aside for 5-10 minutes while you prep the rest of the ingredients and make your coffee (make sure you’re able to keep it hot or else wait until you need it to prepare it).
- Sift then whisk together the sugar, flour, cocoa powder, baking powder, baking soda, and salt in the bowl of your stand mixer or a large mixing bowl. Don’t skip the sifting! Fit to the mixer with the paddle attachment.
- Vigorously whisk the eggs, oil, vanilla, and milk/juice for about 30 seconds until very well combined.
- Combine very hot coffee and chocolate chips. Stir vigorously until chocolate is melted. While whisking constantly and quickly, very, very slowly pour the coffee into the other wet ingredients.
- With the mixer on low, slowly add the wet ingredients to the dry. Once combined, immediately turn off the mixer and scrape down the sides and bottom of the bowl. Beat on medium for exactly 2 minutes.
- Divide evenly between your prepared cake pans Bake at 325F/165C for 25-30 minutes, until a toothpick inserted in the middle of each cake comes out with just moist crumbs. Be sure to check both cake layers, as one may bake slightly faster than the other. Check early, around 20 minutes, as bake time varies by oven and climate.
- Let cool in pan 5-10 minutes then remove to cool completely. While cakes cool, make the buttercream.
- When the cake layers are completely cool, make the whipped cream. Place all of the ingredients in a large mixing bowl or the bowl of your stand mixer (chilled, if possible). Using a handheld mixer or the whisk attachment of your stand mixer, beat on medium until frothy then turn up to high until stiff peaks just begin to form. Do not over mix. You’ll know it’s done when it just barely starts to look matte in appearance.
- To assemble the cake, it is recommended to cut each cake layer in half if you only used two cake pans, so that you can fill it with a thin layer of whipped cream that won’t slide. Use a large serrated knife and cake turner to do this. This is optional.
- Assemble the cake by piping a ring of buttercream around the bottom layer of cake. (Optionally, you can spread thin layer of buttercream on the cake before piping the ring.) Spread some whipped cream within the ring of buttercream, no taller than the ring itself. Do not let the whipped cream be taller than ½ inch, as this will cause the cake to slide and/or split. Repeat this until all layers of cake are stacked.
- Gently cover cake in a thin coat of frosting and refrigerate 20 minutes to set the frosting and keep the layers from sliding. Once the frosting is firm, cover in desired amount of frosting.
- Decorate with candied oranges, as desired.
Enjoy!
Keep the cake refrigerated until ready to serve. To serve, leave at room temperature for 20-30 minutes, if desired. Keep leftovers fresh by placing a piece of plastic wrap right up against cut edges, sealing it against the buttercream, then placing the entire cake in an airtight container or covering with more plastic wrap.
*If you are unsure about how to make your coffee strong enough, you could dissolve 1 tablespoon instant coffee or espresso in boiling water to get a bold coffee taste.
**If you’d like to create an orange flavored whipped cream (optional–it’s still delicious with plain whipped cream), you can steep the whipped cream with the peeled zest of 1-2 oranges. I suggest doing this for 12-24 hours in the fridge, as cold-steeping is better if you’re planning to make whipped cream. This will create a more natural orange flavor than extract or emulsion.If you choose to do this, omit the orange extract or emulsion, as both will be too overpowering.