
Homemade Angel Food Cake
Light, fluffy, tender angel food cake that melts in your mouth and can be dressed up so many different ways. Pair with berries and cream or chocolate sauce or layer in a trifle or even eat it plain—it’s that good!
This post may contain affiliate links from which, at no additional cost to you, I may earn a small commission to keep this site running. Only products I myself would or do use are recommended.

Over the years, I’ve discovered that making dessert for a barbecue isn’t quite the same as everyday or special occasion desserts. The reason: people fill up and have no room for dessert.
And the poor bakers of the world always try so hard not to take it personally that no one had room for dessert by the time it was served. This is especially true during the summer, when it’s hot and we’re less inclined to eat through the pain.

And that’s exactly why I made a light dessert for Memorial Day.
Angel food cake is light but just the right amount of sweet. Plus, it’s typically served with fruit, so it’s basically a health food. And the lack of fat makes it a perfect ending to a day filled with sun and food.

Best of all, it’s incredibly simple to make this from scratch! Since you can’t always find it at the store, this is a great recipe to have when you need a light, perfectly delicious dessert.
How to make angel food cake
1. Wipe down your equipment with white vinegar or half a lemon. This is key to help the eggs whip and also help the batter rise in the oven—it removes any traces of fat from previous bakes.
2. Grind the sugar until fine. It should be somewhere between granulated and powdered sugar.
3. Whisk half of the sugar with the flour. Sift at least twice.


5. Beat eggs with the vanilla, salt, and cream of tartar.
6. Add remaining sugar, one tablespoon at a time.
7. Beat until glossy and stiff.


8. Sift flour/sugar over the egg whites. Do this in 3 additions, folding it in gently after each addition. (I prefer my largest fine mesh sieve with a long handle for this.)

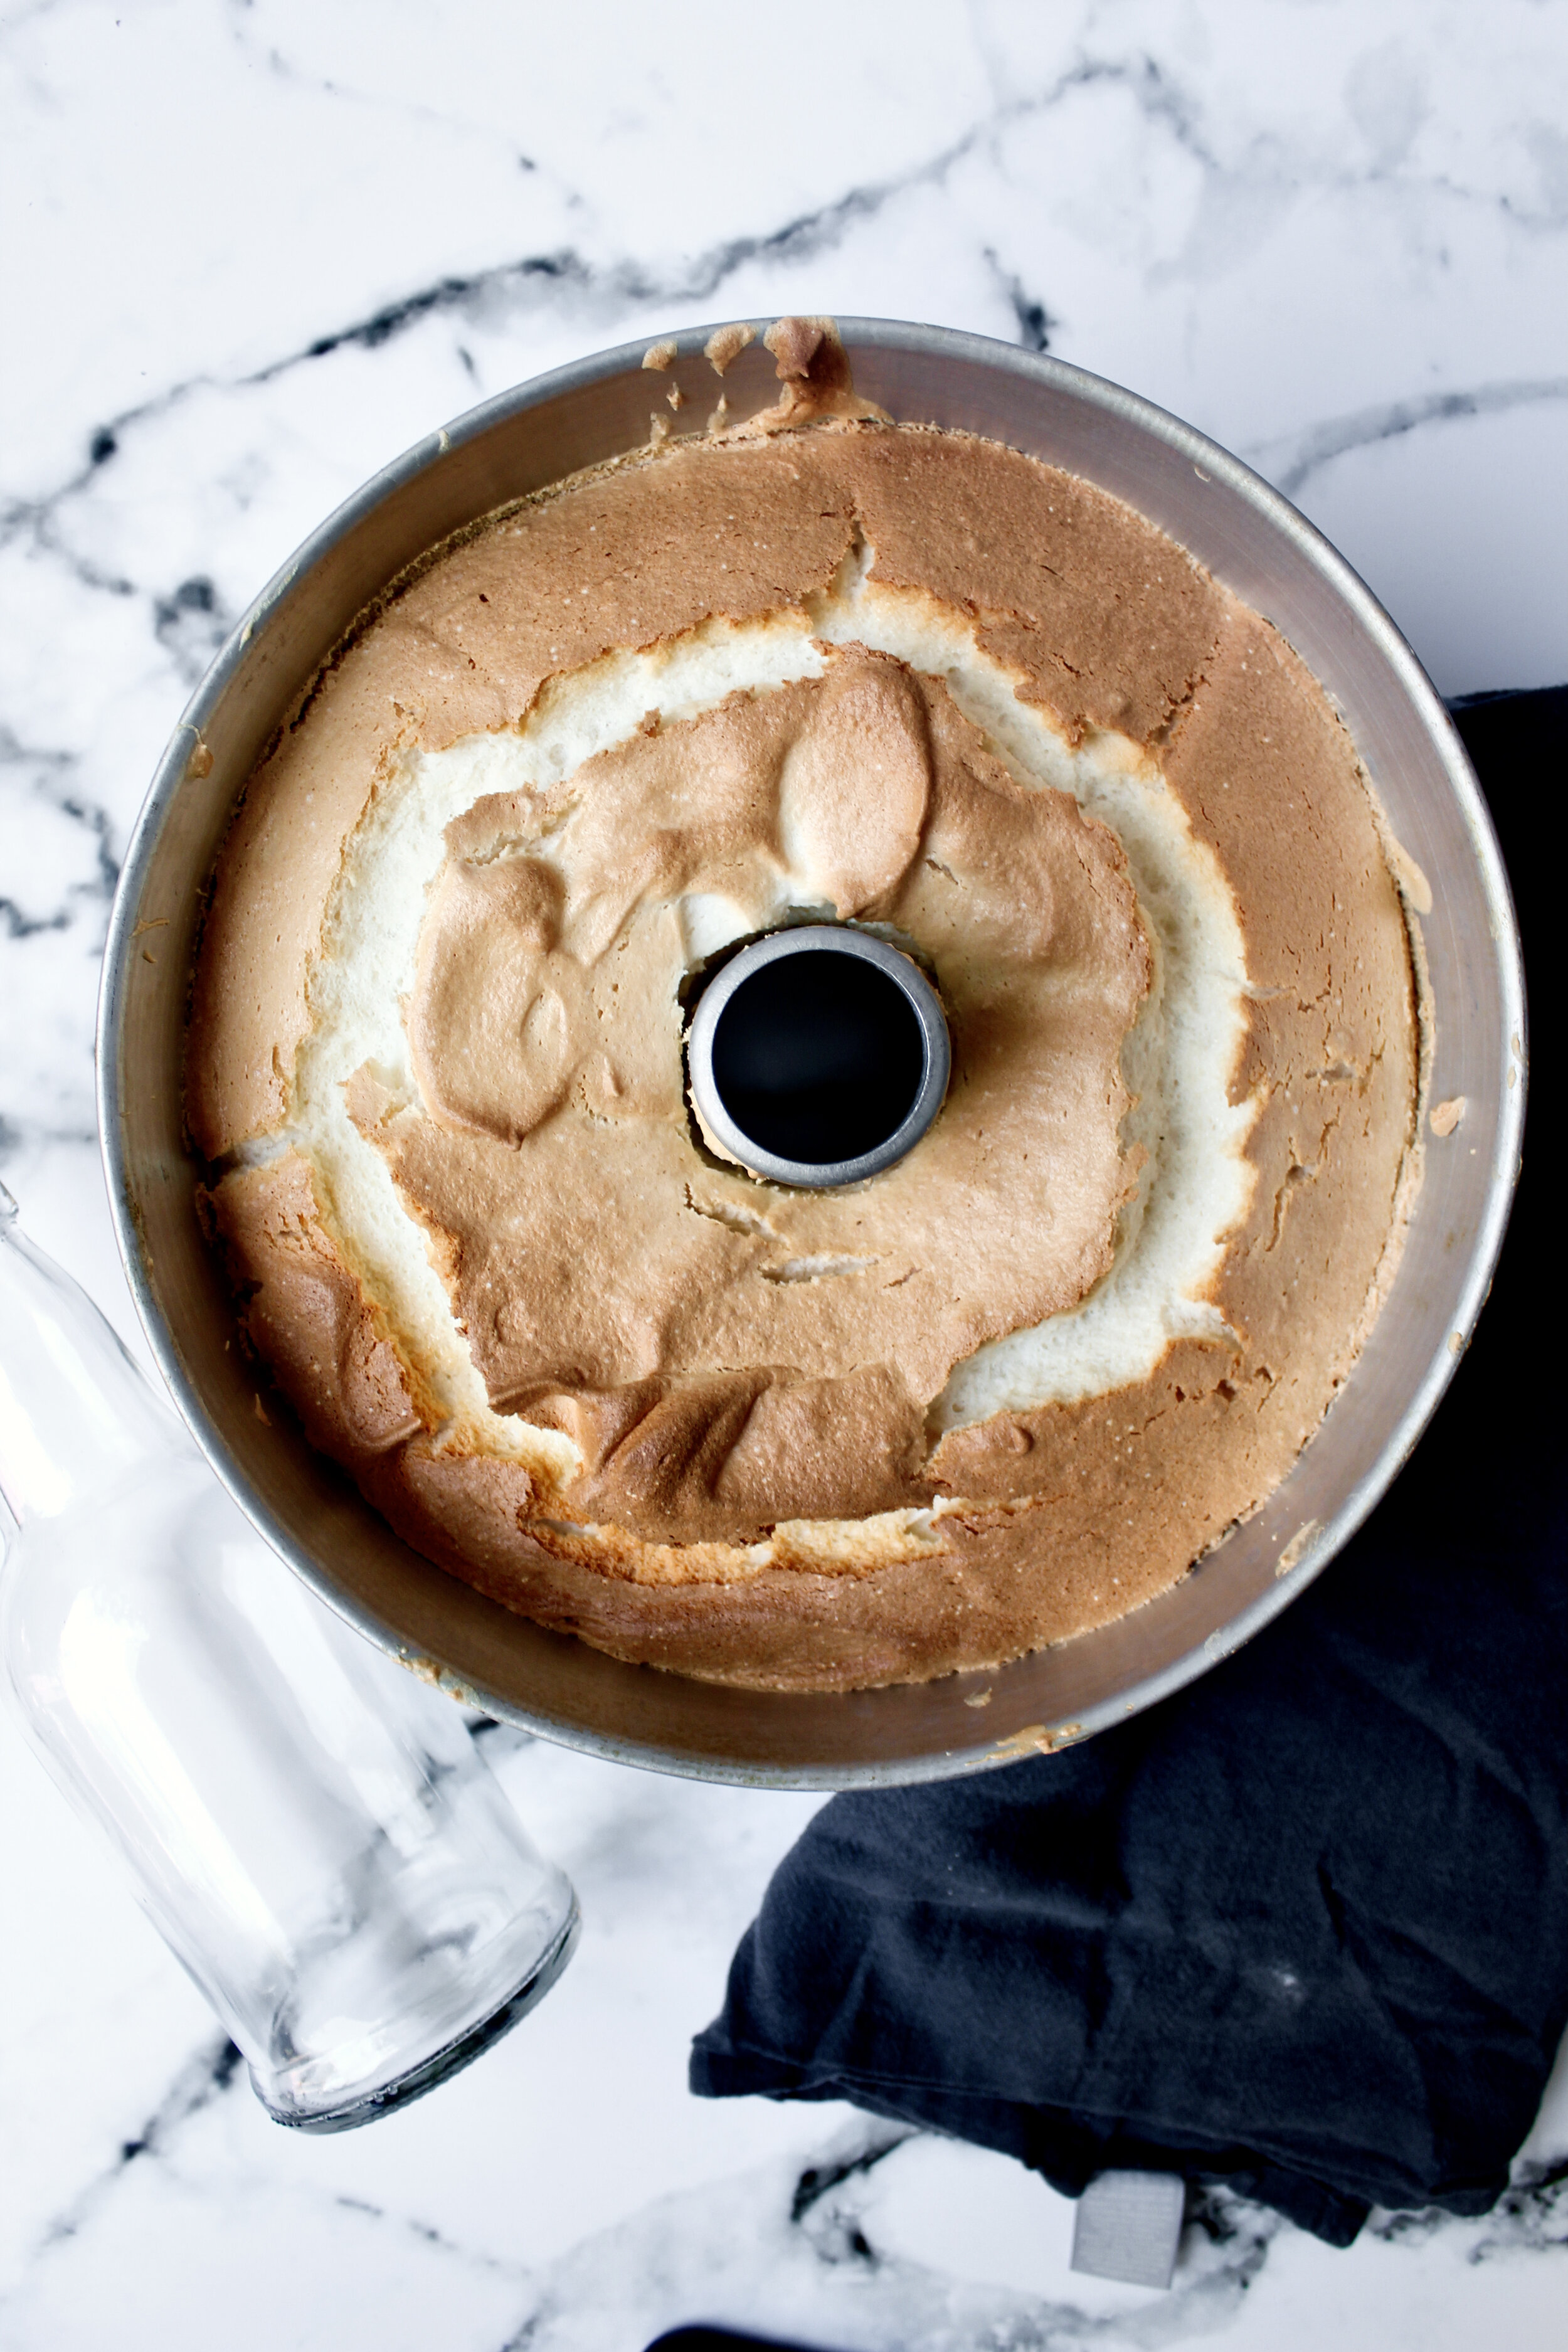
9. Spread in your angel food cake pan and bake. Bake until golden and the top springs back when pressed.
10. Turn baked cake upside down on a glass bottle until cooled.
11. Release cake, using a sharp knife.


Enjoy! Serve with berries and cream or try drizzling homemade jam, coulis, or chocolate sauce!

Tips and notes for this recipe
Add the sugar slowly but continuously
That sounds weird, I know. Basically, you want to pour each tablespoon into the mixer, not just drop it all in at once. But at the same time, you want to do one tablespoon after another. No need to rush, but avoid pausing too long or walking away to do anything, because the eggs can become glossy and stiff before you’re done with the sugar. If this happens, just sift the remaining sugar in with the flour mixture, but try to avoid needing to do that—adding the sugar slowly helps create a fluffy, tall cake.

Mise en place!
I’m a nerd, I know. Mise en place is French for (according to Google Translate) “setting up.” However, it means having everything ready before you start cooking or baking. Not every recipe is this way, but with angel food cake you’re trying to create lift by whipping egg whites in a very specific way. If you have to stop to measure something, the egg whites could start to deflate and lead to a dense, chewy cake. So, everything should be measured, whisked, sifted, and basically ready to go like all of those videos I’m no good at making. Mini prep bowls help tremendously with this!

Make your own cake flour if needed
You can make your own cake flour by putting 2 tablespoons cornstarch in your 1 cup measuring spoon then gently spooning in enough all-purpose flour to equal 1 cup (level it off with the back of a knife and don’t pack it in). Whisk it all together then sift 3 times before using. Crazy, but it makes a difference. However, I’ve never tried this recipe with homemade cake flour so I cannot guarantee it will be as fluffy.

Save those egg yolks!
Yes, it feels like a waste to have 12 unused egg yolks. But don’t worry! They will keep in the fridge in an airtight container for up to 2 days. There are so many things you can make with them: Bavarian cream filling, lemon curd/lemon curd pie, blueberry clementine curd, pumpkin creme anglaise, clementine pastry cream, or blood orange tart (the crust and filling use yolks, and for the filling you can actually sub 2 more yolks for one of the eggs).


Homemade Angel Food Cake
- prep time: 15-20 minutes
- bake time: 40-50 minutes
- total time: 1 hour, 10 minutes (plus 2-3 hours cooling time)
servings: 12-16
Ingredients:
- half a lemon
- 1 ½ cups (300g) sugar
- 1 cup (128g) cake flour (see note in post)
- 12 egg whites, room temperature (see note in post for what to do with yolks)
- ¼ teaspoon (2g) sea salt
- 1 tablespoon (13g) pure vanilla extract
- 1 ½ teaspoons (5g) cream of tartar
- equipment: fine mesh sieve or similar sifting device
Instructions:
Note: be sure to follow the steps as written so you have everything in its place and ready to go, as you do have to work somewhat quickly once you begin whipping the egg whites.
- Preheat oven to 325 and make sure your oven rack is one rung below the middle. Have your angel food cake pan (ideally with a removable bottom) out, but do not grease it.
- Using half of a lemon like a sponge, wipe down your mixing bowl and whisk attachment, rinse and dry, then wipe it all down a second time. This only takes about a minute, and you can even squeeze most of the lemon juice to save for later and just use the mostly-squeezed lemon half to do this. But don’t skip it! You need ALL traces of fat gone from the bowl and whisk before you try to beat those egg whites.
- Using a food processor or blender, pulse the sugar until very fine (somewhere between granulated and powdered sugar). Pour about half of it into a small bowl for step 6.
- Take the other half of the sugar and whisk it with the cake flour then sift everything twice (this does require two bowls). Set aside. Keep the sieve out to use after the egg whites whip up.
- Place the egg whites, salt, vanilla, and cream of tartar into the bowl of your wiped-down stand mixer fitted with the whisk attachment. Beat on medium for about a minute, until frothy. Turn the mixer to medium-high (I have a ten speed mixer and used setting 8). Watch the whites carefully.
- Once the whites turn white and just begin to form very soft peaks, begin adding the sugar, one tablespoon at a time. Try to pour each tablespoon gently so it doesn’t clump up. You can do this continuously without much pausing between additions. Continue beating until glossy with stiff peaks. Optional: once all the sugar is added, stop the mixer and gently run a rubber spatula just along the top edge of the whites to help bring them into the mixture then continue mixing until glossy with stiff peaks. Each mixer is different, and some tend to not pull in what’s on the edge as well as others.
- Once stiff peaks are formed and the egg whites are glossy (not long after the sugar is done being added, so watch carefully), turn off the mixer. Tap the whisk attachment on the side to get the egg whites off. Using the fine mesh sieve, sift ⅓ of the flour mixture over the top of the bowl. Gently this together using a rubber spatula. Sift the next ⅓ over the bowl and fold it in, followed by the final ⅓. You only need to fold it until the flour is incorporated. Don’t worry if it seems a little grainy.
- Gently scoop it into your pan, being sure to spread it evenly on the bottom. You don’t want an air bubble in the bottom corner, since this is usually presented as the top of your cake. I suggest scooping about ⅓ of the batter into the pan, spreading it evenly to fill the corners, then continue with the rest of the batter. Smooth the top with your spatula.
- Bake 40-50 minutes (climate and individual ovens vary), until the top is a nice golden brown and springs back when you press your finger into it. It may not spring back all quickly and happily like a pogo stick, but if it rises back up to you, it’s done.
- Once done baking, take a glass bottle and insert the neck into the middle hole of your cake pan. Then, using oven mitts, turn the whole thing upside down so that the cake pan is suspended upside down on the bottle. It will tilt to the side but shouldn’t fall over (although try to put it somewhere safe in case it is knocked down). Let cool 2-3 hours.
- Once it is completely cool to the touch, gently remove the cake from the pan, running a very sharp, long knife along the inner and outer edges of the pan then also along the bottom if you have a removable bottom pan.
Enjoy!
To serve, slice swiftly and without pressing down too hard, with a very sharp serrated knife. Serve with berries and whipped cream. Or, try drizzling homemade jam, coulis, or chocolate sauce!
Store, wrapped well or in an airtight container, for 3-5 days.
