
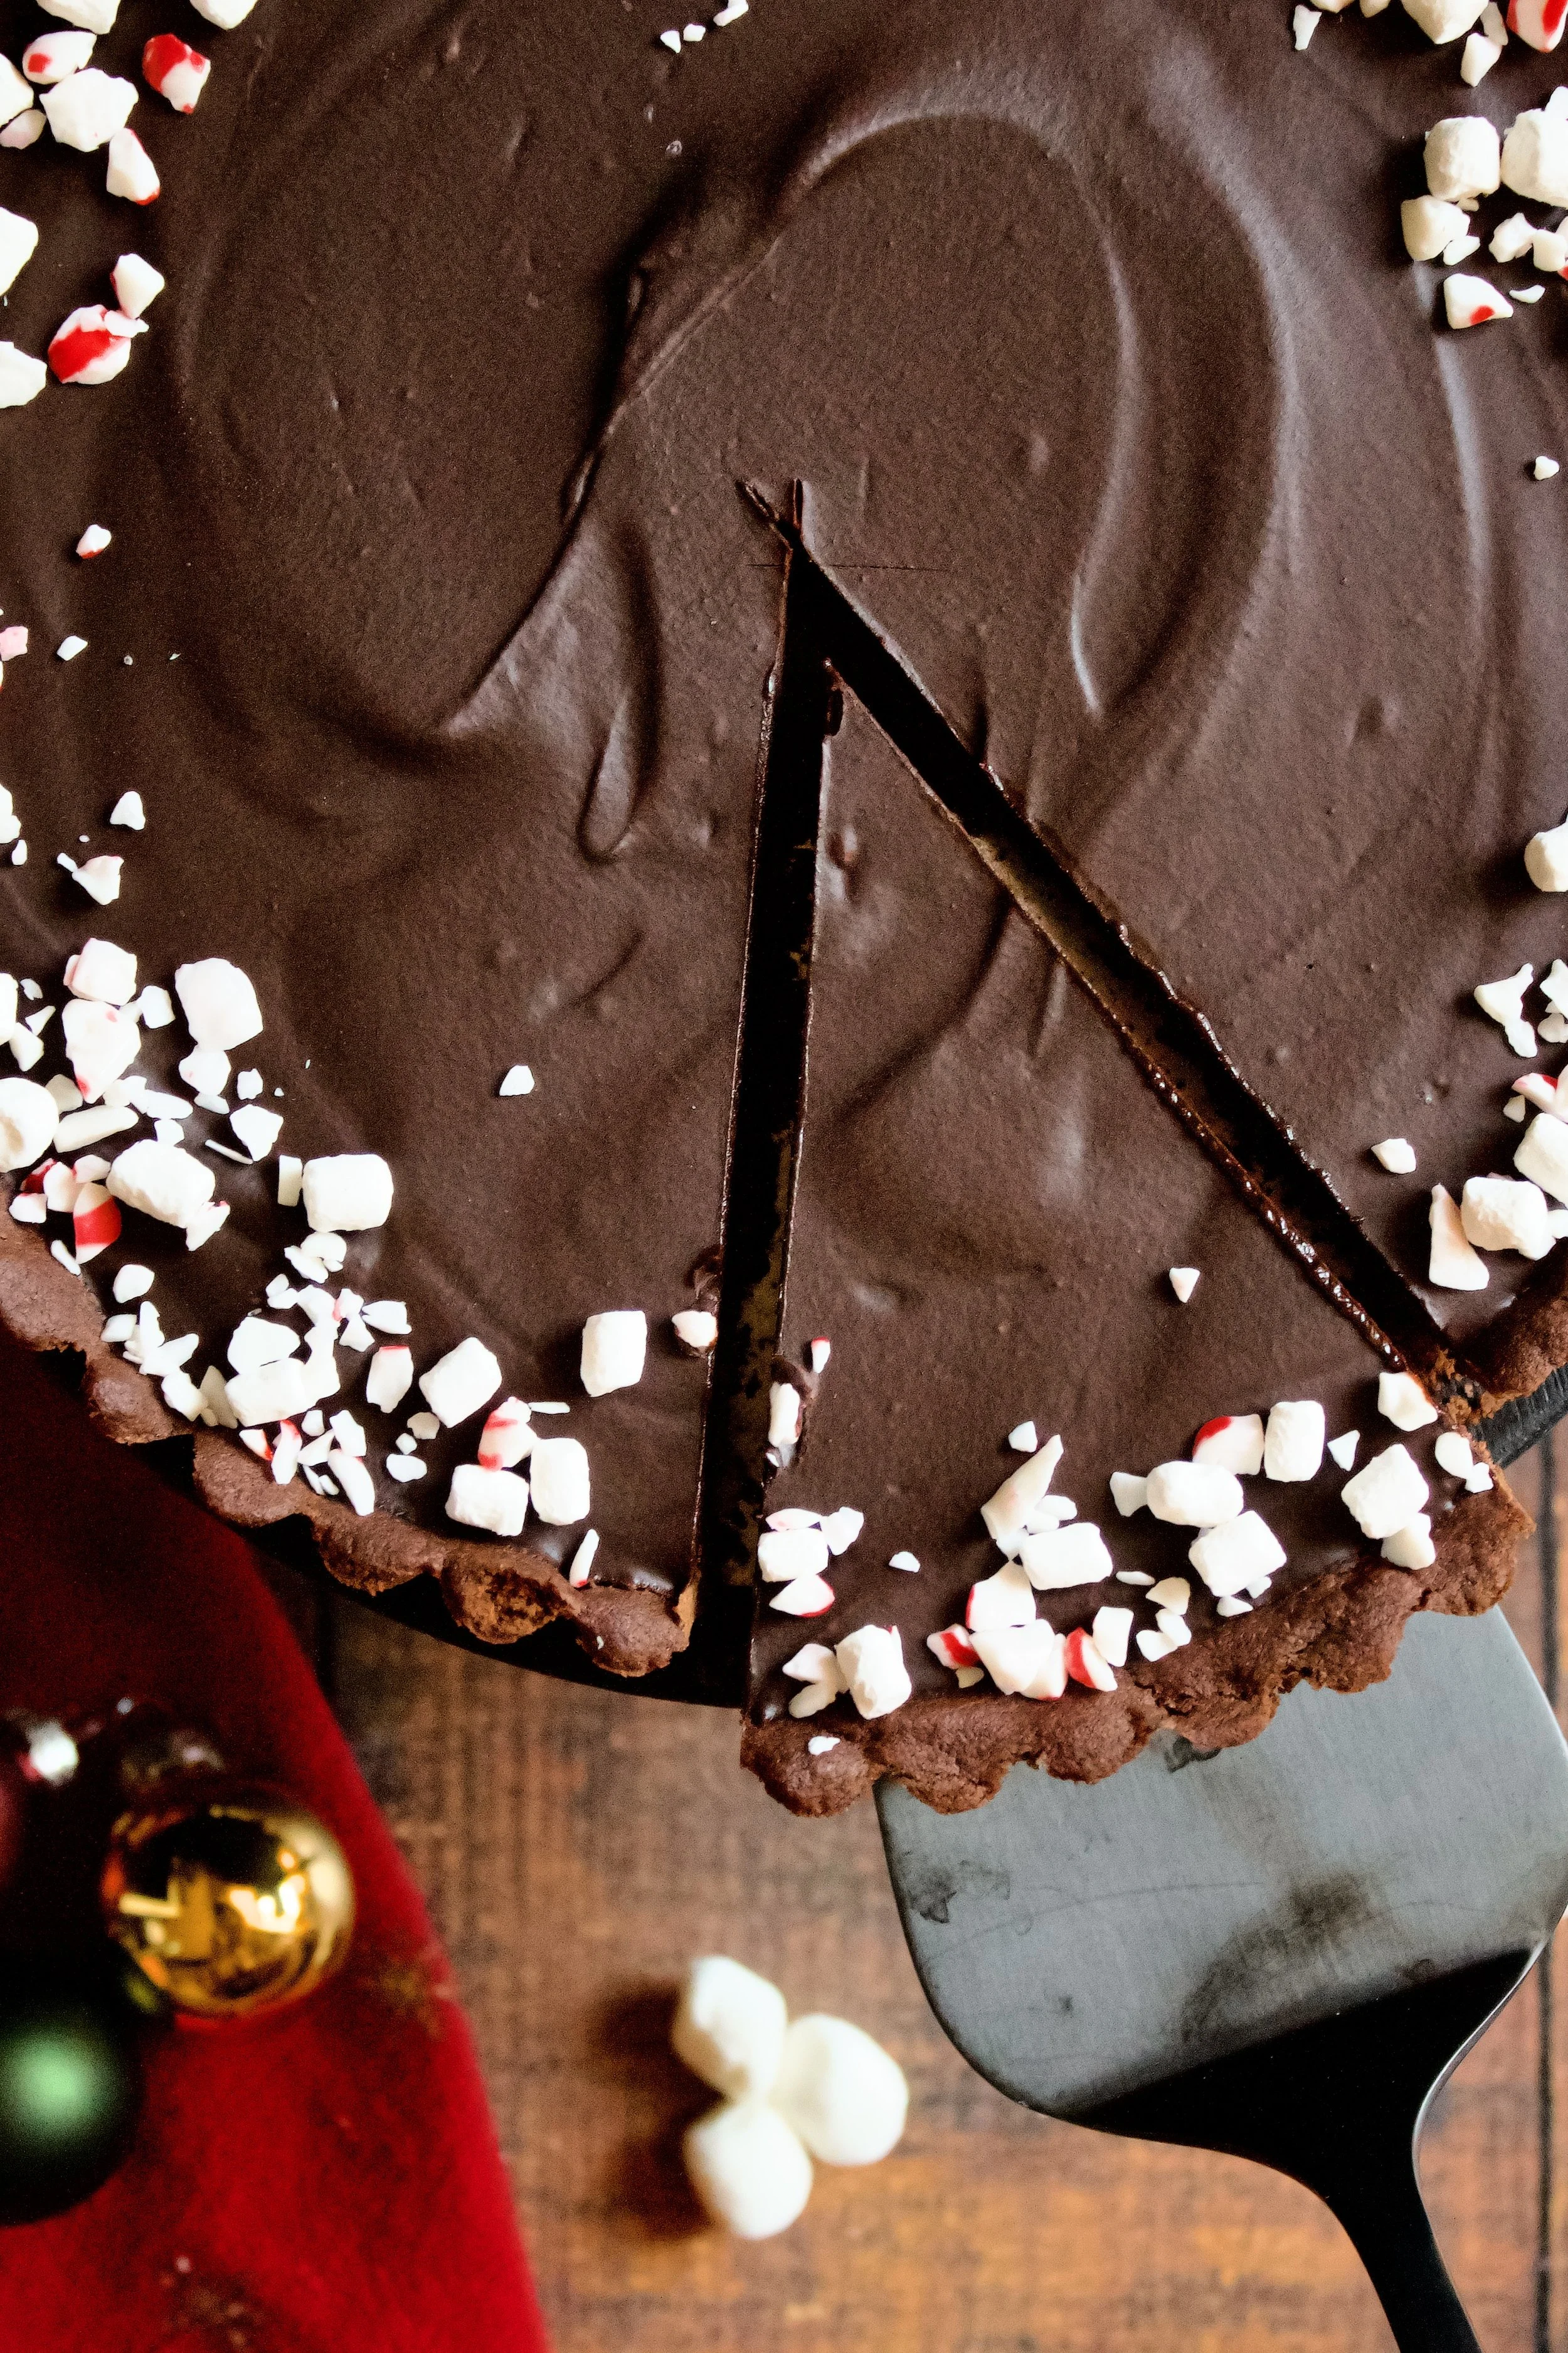
Peppermint Hot Cocoa Tart
Tender chocolate shortbread crust filled with smooth, rich chocolate marshmallow peppermint ganache, topped with mini marshmallows and candy cane pieces. All the best parts about a holiday hot cocoa in a simple tart!
This post may contain affiliate links from which, at no additional cost to you, I may earn a small commission to keep this site running. Only products I myself would or do use are recommended.
Wanna hear something weird? When I started writing this recipe, I was simultaneously taking long walks and trying all the things to encourage my baby to come sooner rather than later. Now, I’m finishing it up with an almost one week old sleeping next to me. Our little Brooklyn is nearly the size of two of these tarts and every bit just as sweet.
What I’m doing differently this time around is prioritizing balance. When Avery was born a month early, it was a lot of extra work, especially all of the rules surrounding feeding her (not too long, or she’ll burn too many calories, but not too little, or my supply will dwindle—which meant giving a bottle and pumping after nursing for every feeding round the clock). Add to that extra appointments with pediatricians and lactation nurses (who literally told me I just wasn’t trying hard enough), being tired all the time, and having to decide which single normal thing I could squeeze in that day—shower or walk? Eat an actually healthy meal or take a nap? Clean up the house a little so I don’t feel chaotic or do something that makes me happy?
It can be a lot. And it’s not talked about much (outside of suggested reels that are now available on social media and honestly help me feel not so alone anymore).
So today, I’m listening to Christmas music, because that is true happiness to me, while writing this post, because productivity (to a healthy degree) and this blog make me happy. And I spent a long time just holding my daughter, but I’m also probably going for a walk later, because my back pain is finally gone and I can walk without limping again. And coffee. There for sure will be coffee because my heartburn is finally gone and I can have coffee again. But I’ll probably walk there wearing my baby in the wrap, because holding her close to my heart is joy itself.
And while none of this has anything to do with a holiday tart, it’s near and dear to me and something I felt compared to share. Now, for delicious peppermint cocoa tart.
Why this recipe works
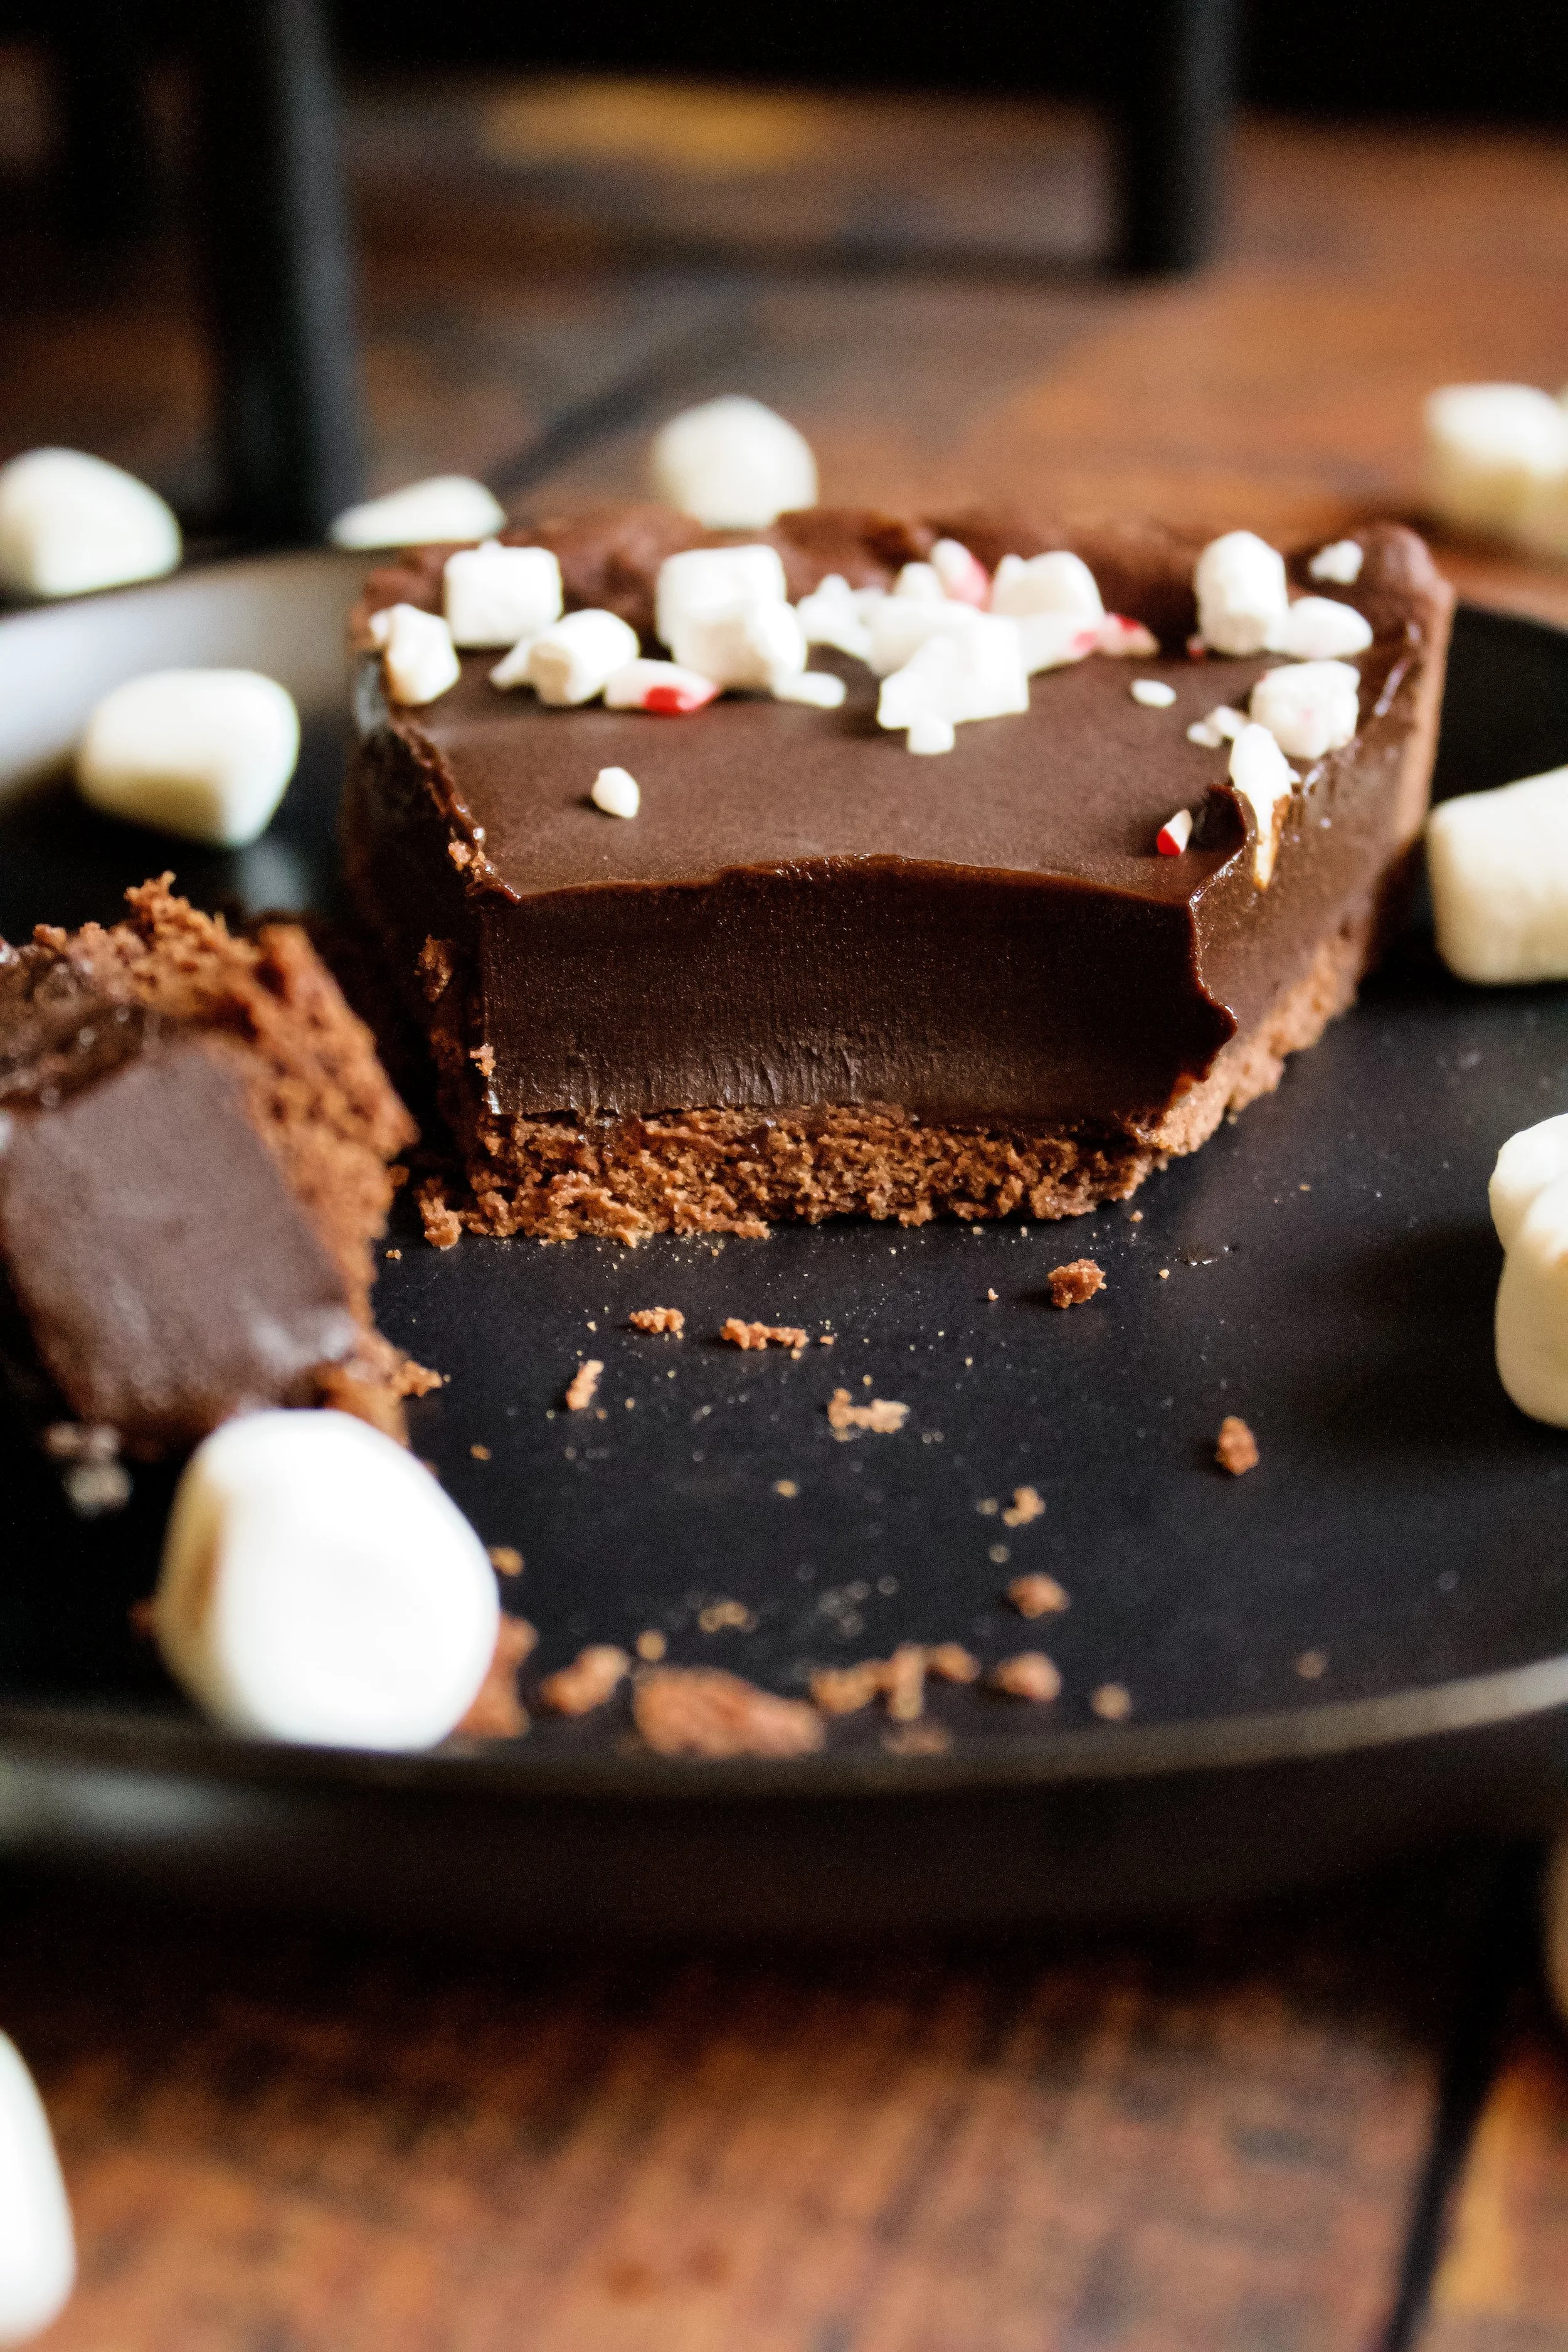
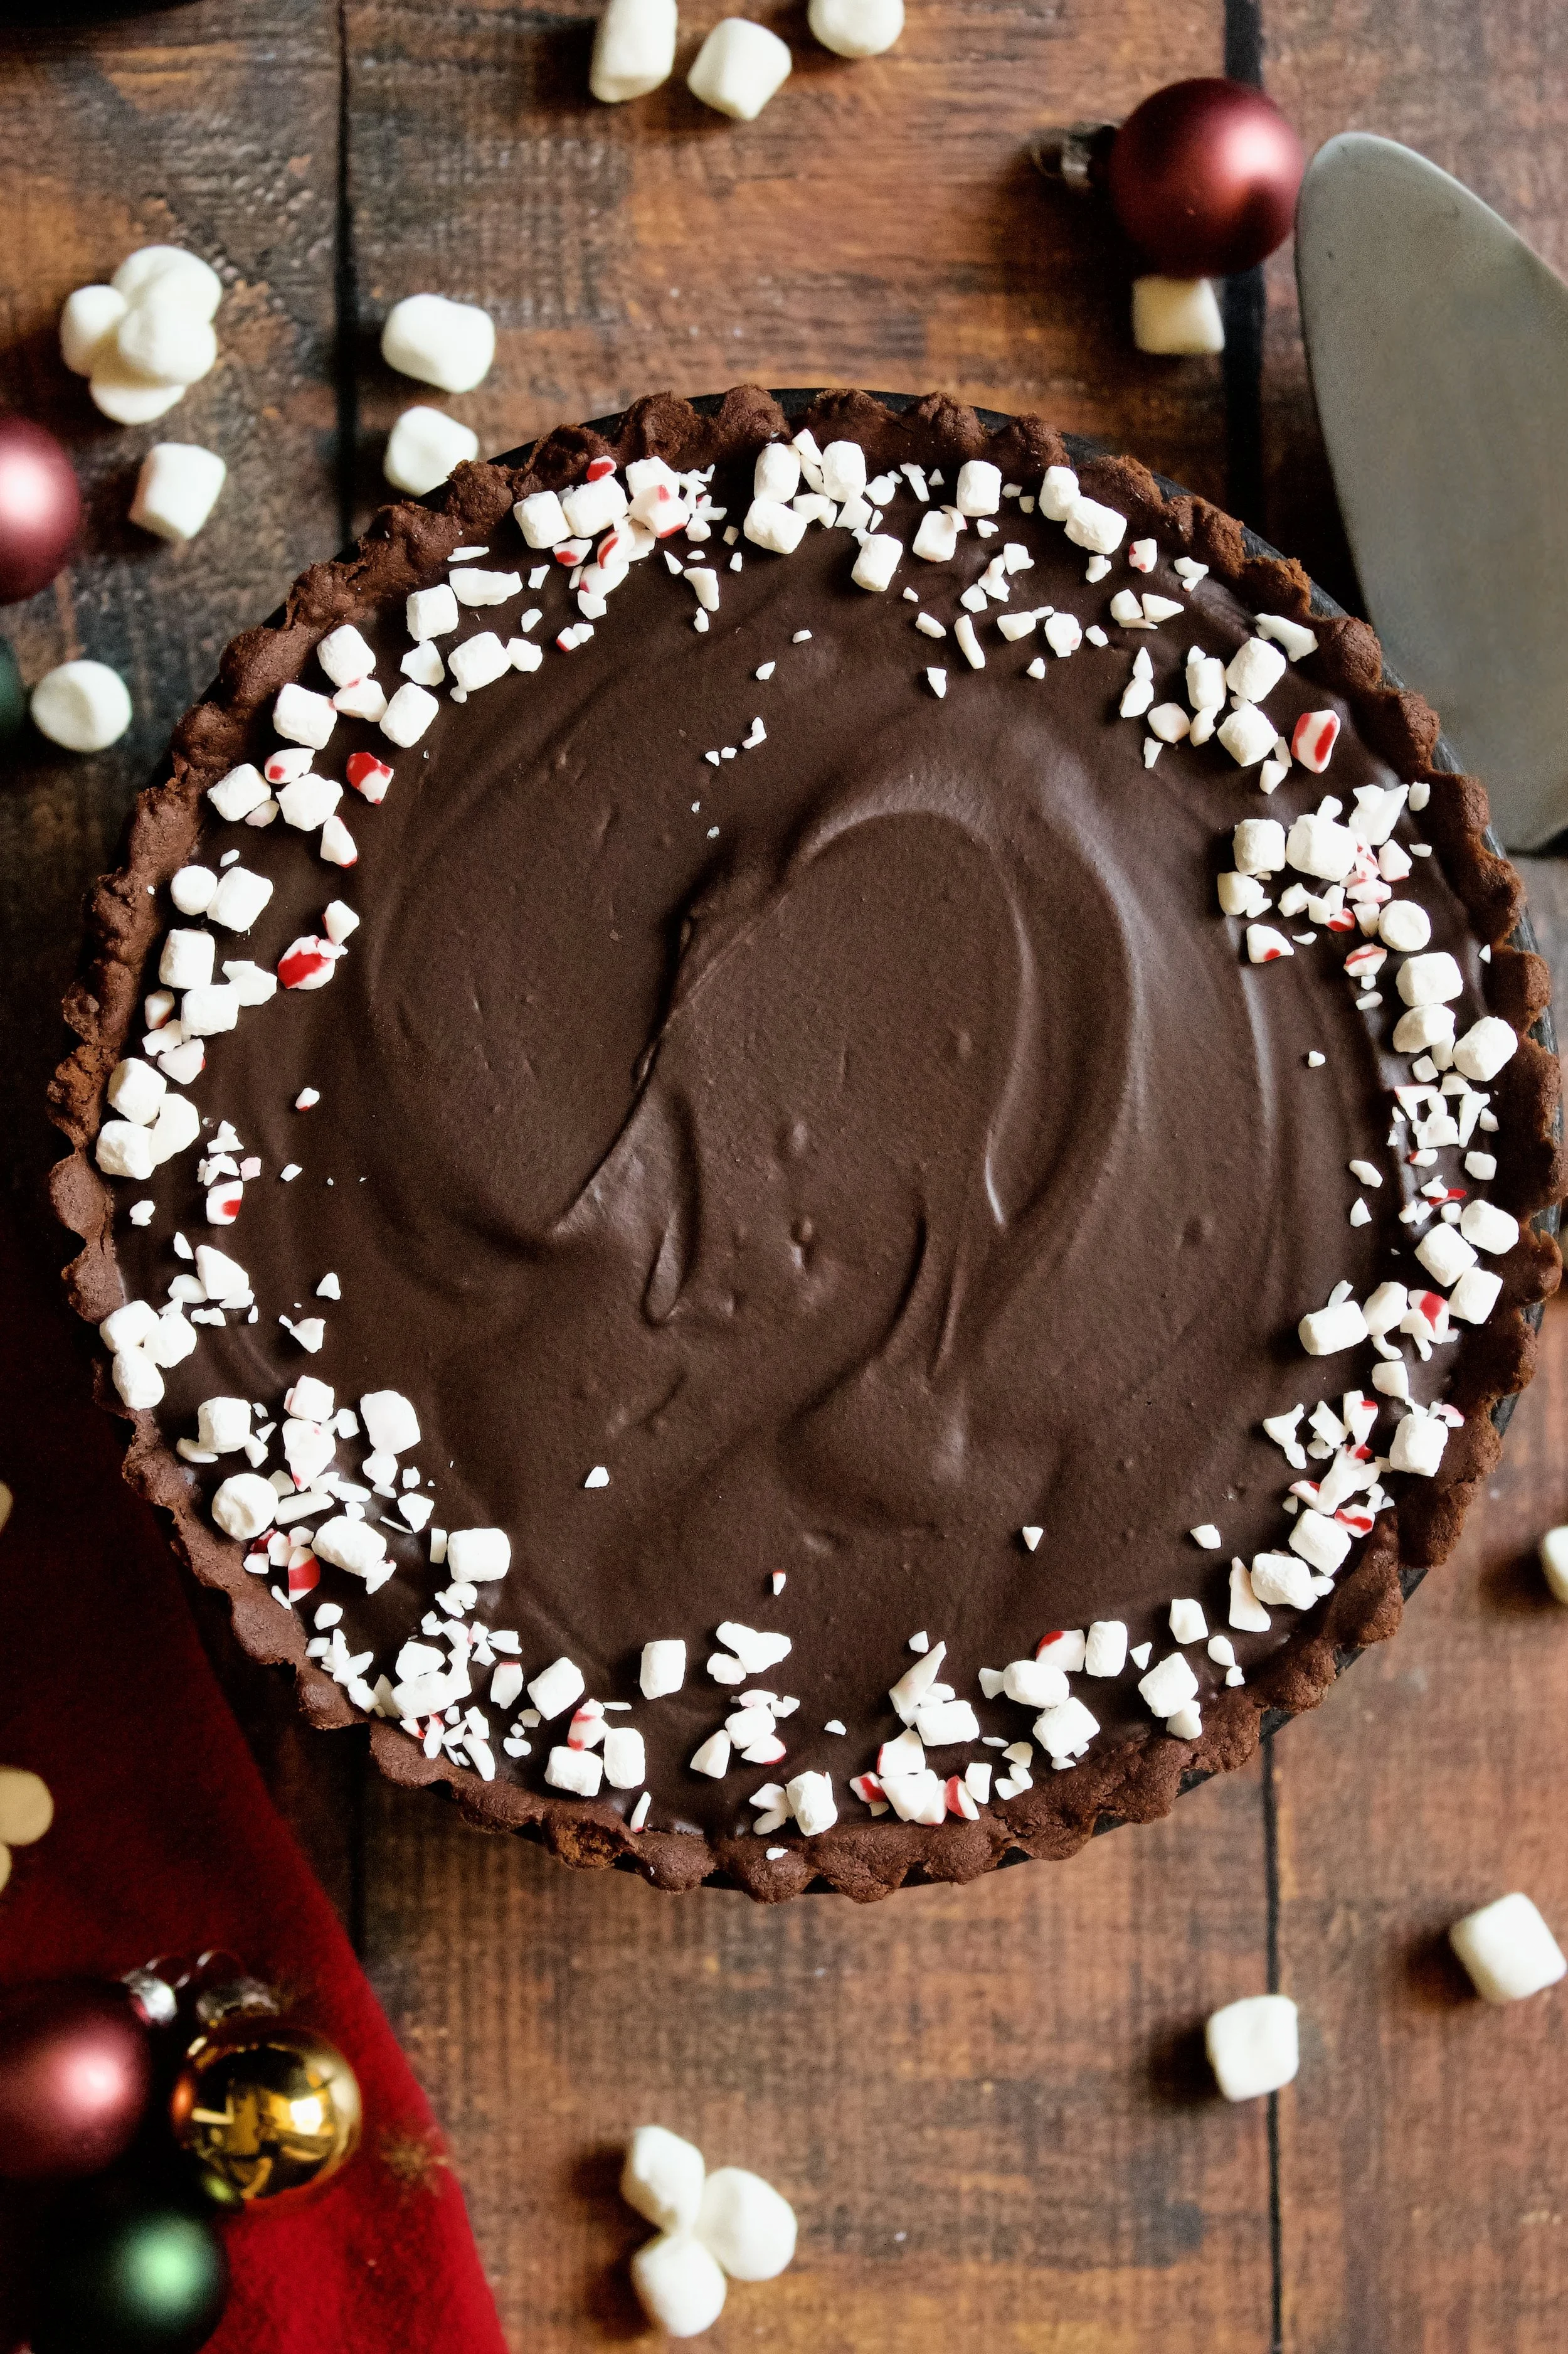
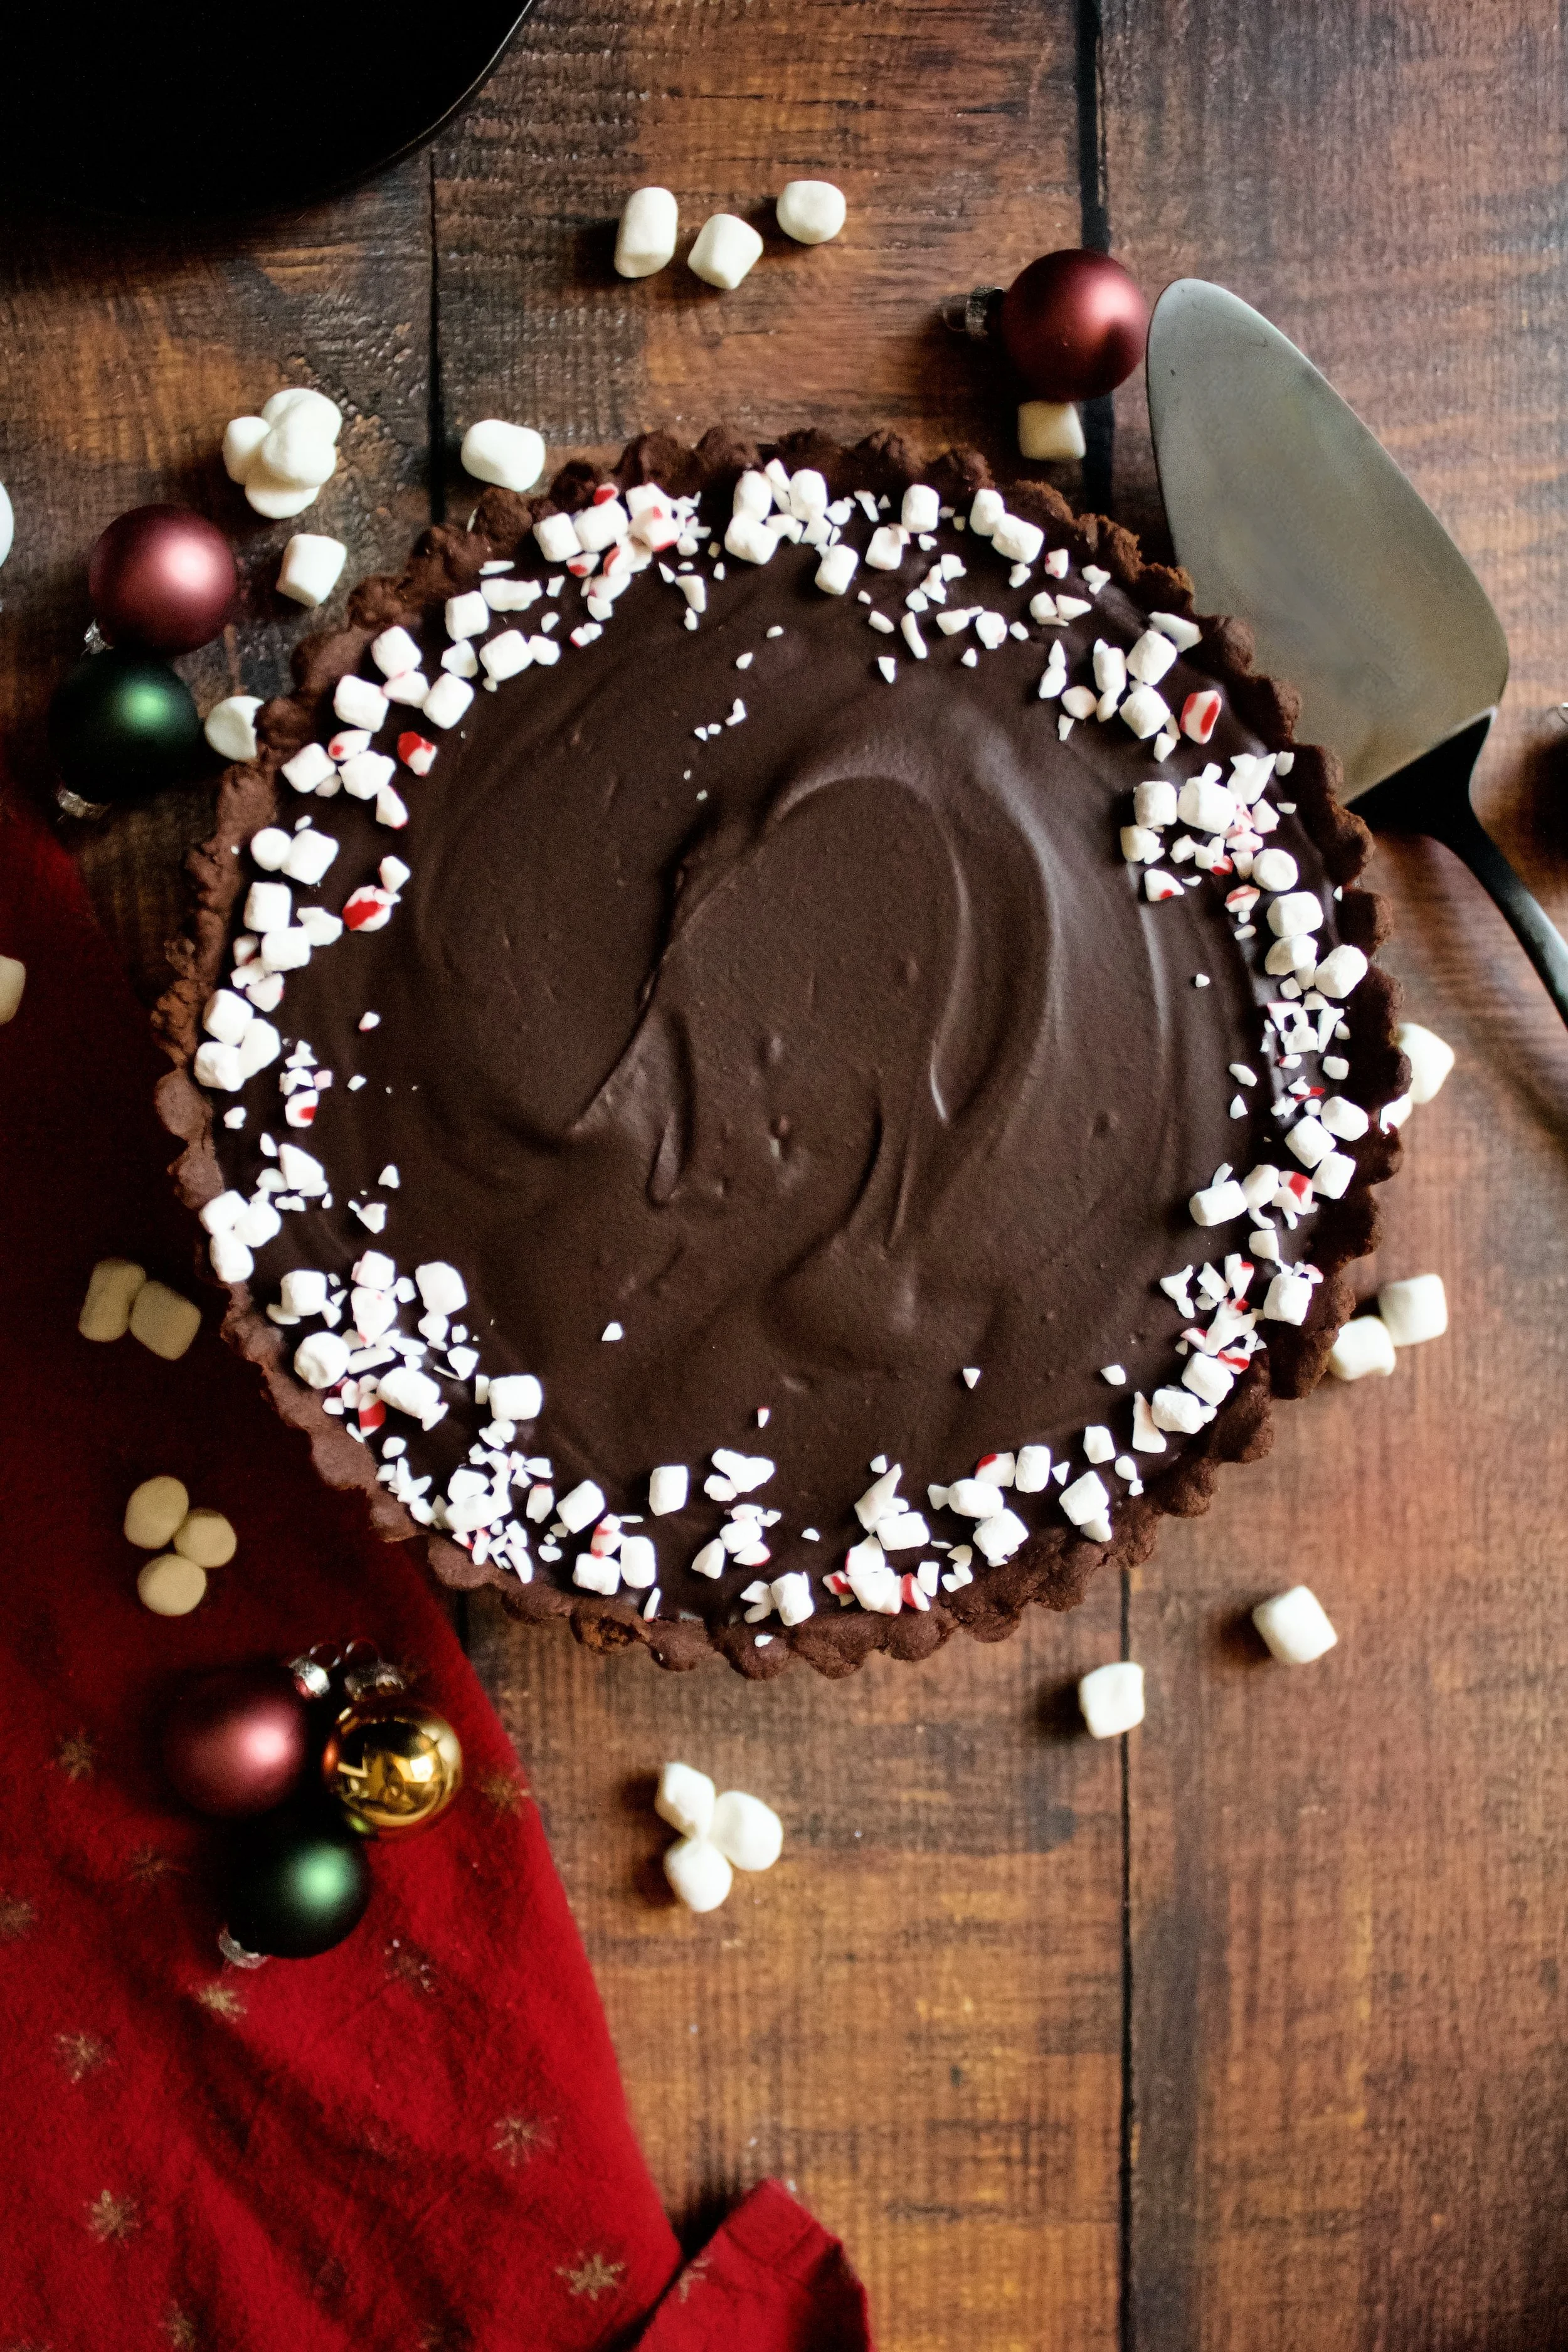
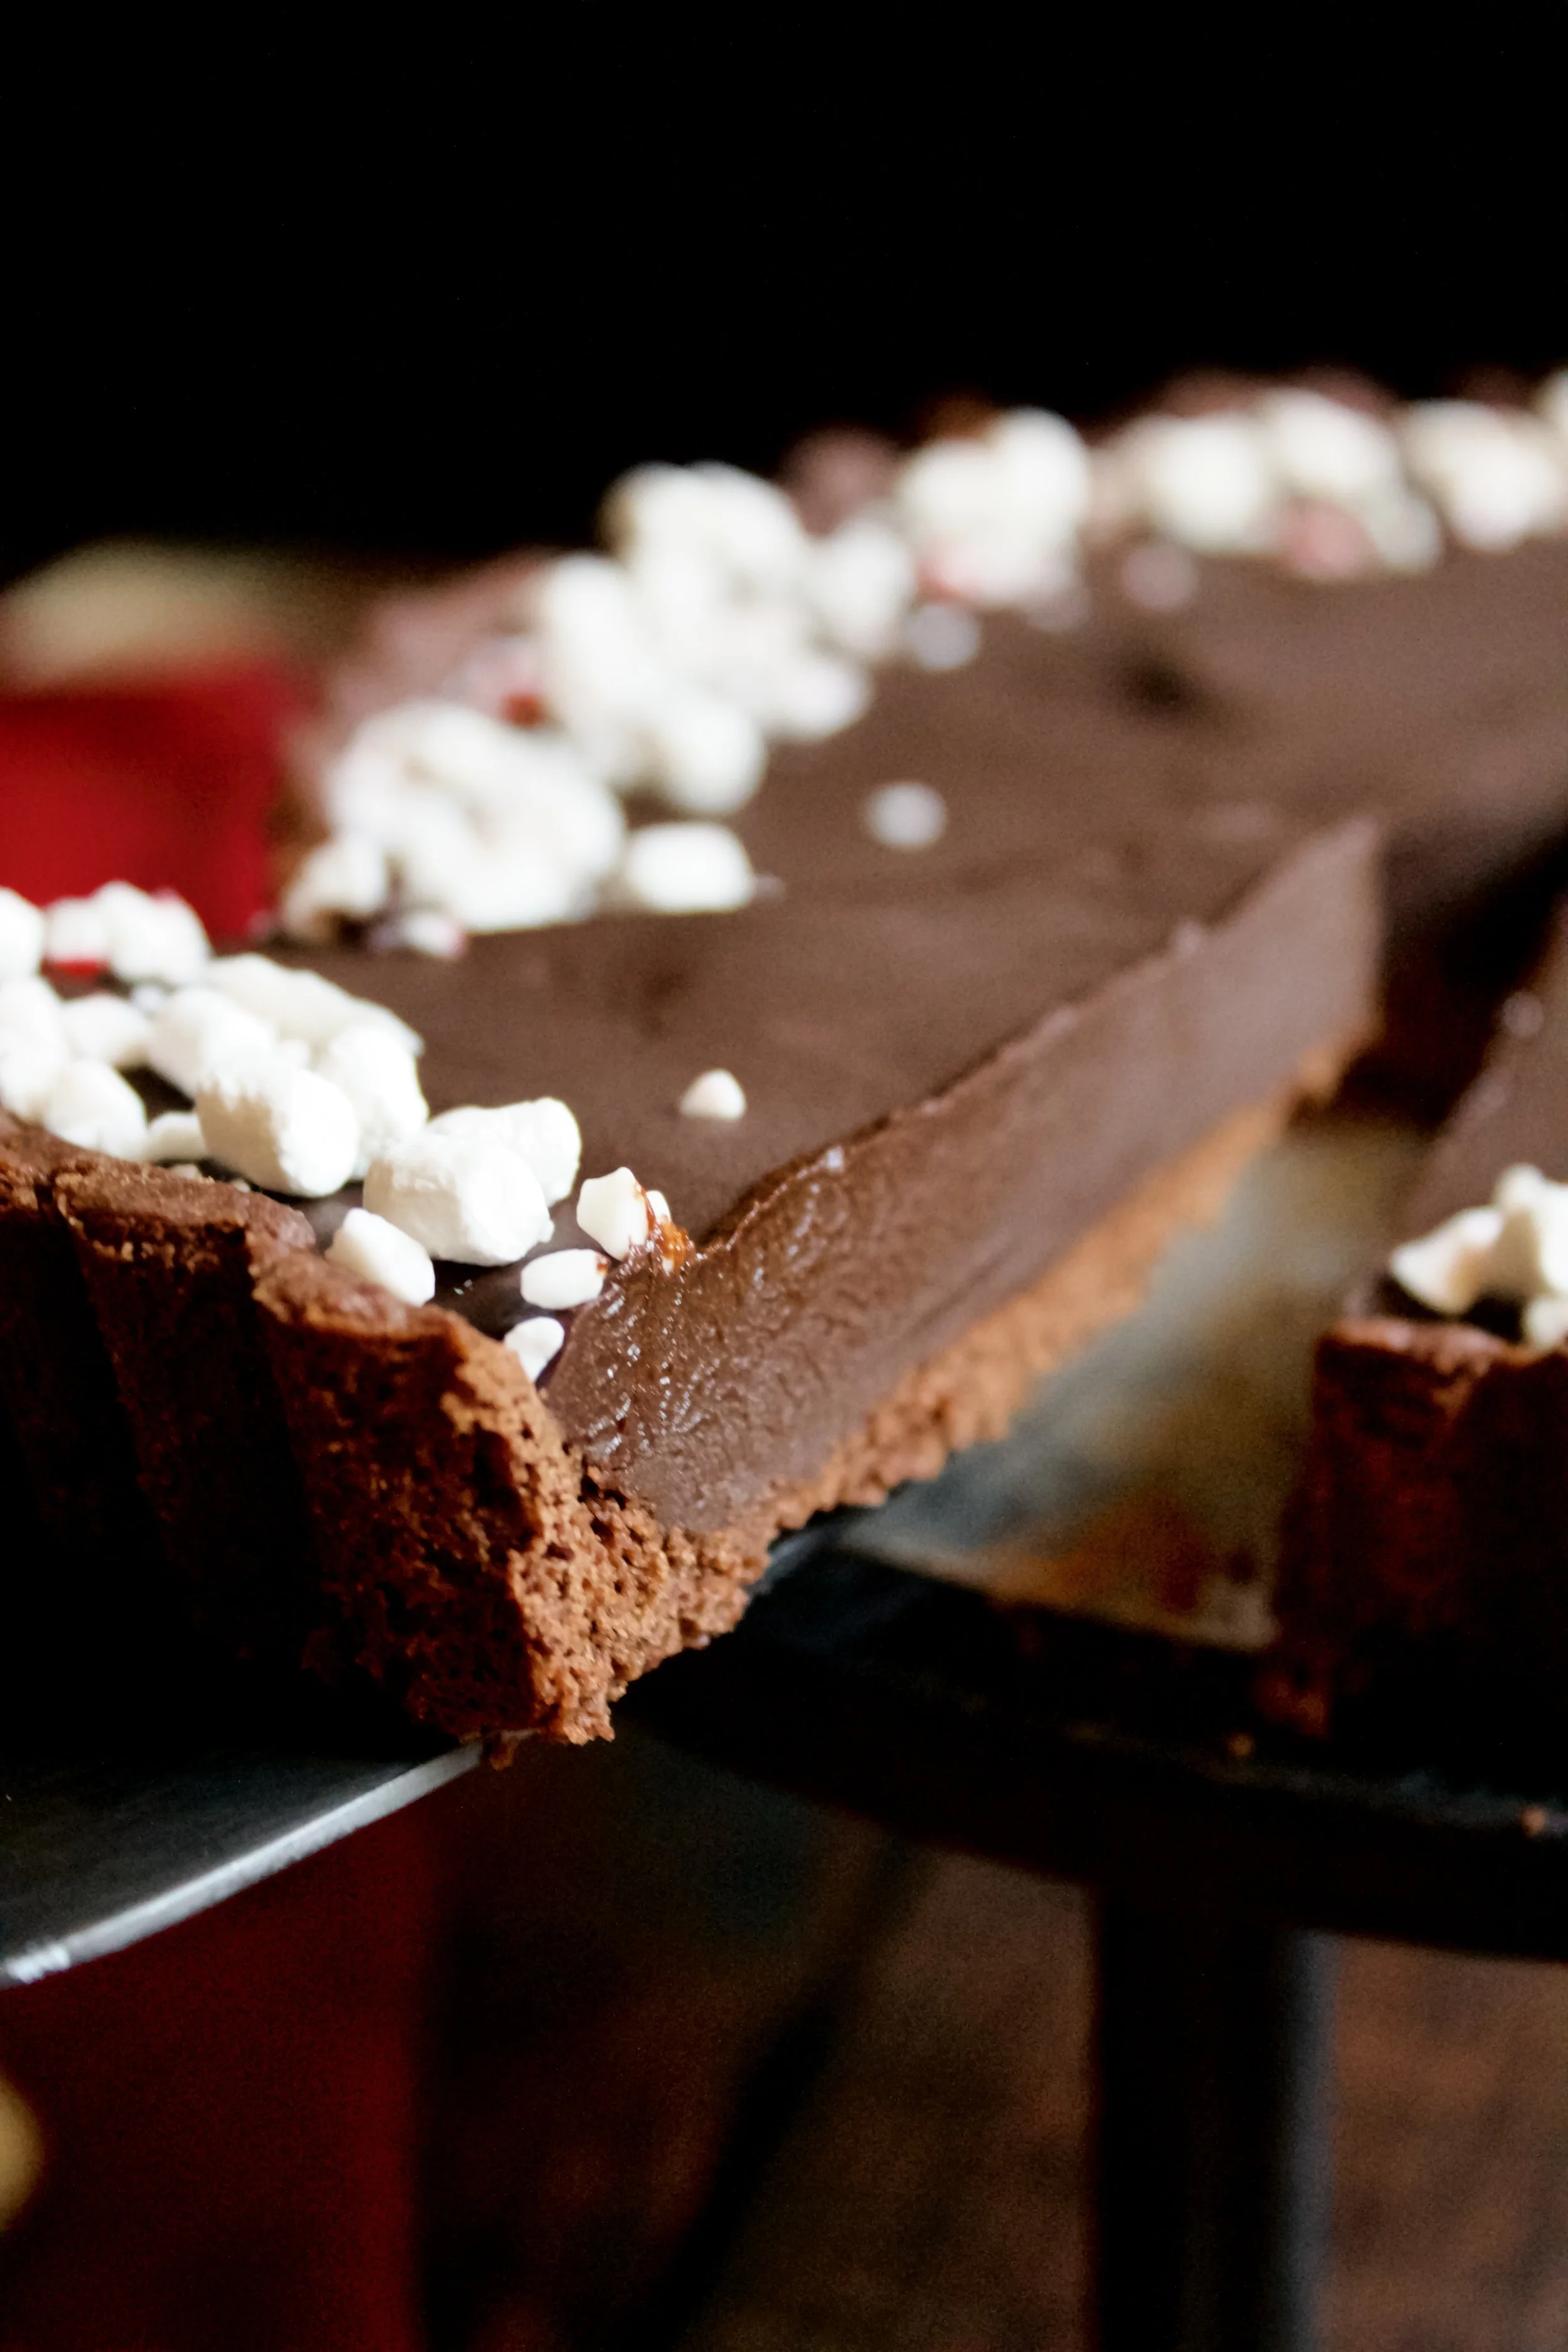
The biggest appeal is how simple this recipe is. For the crust, it’s my simple chocolate shortbread, which you will bake with some pie weights (yes, it’s a little bit of work but it’s pretty foolproof). As long as you don’t overmix the dough and are sure to freeze it first (to keep it from shrinking) then use pie weights or rice to keep it in place while baking, you’ll have an amazing crust that took minimal effort yet was fully homemade.
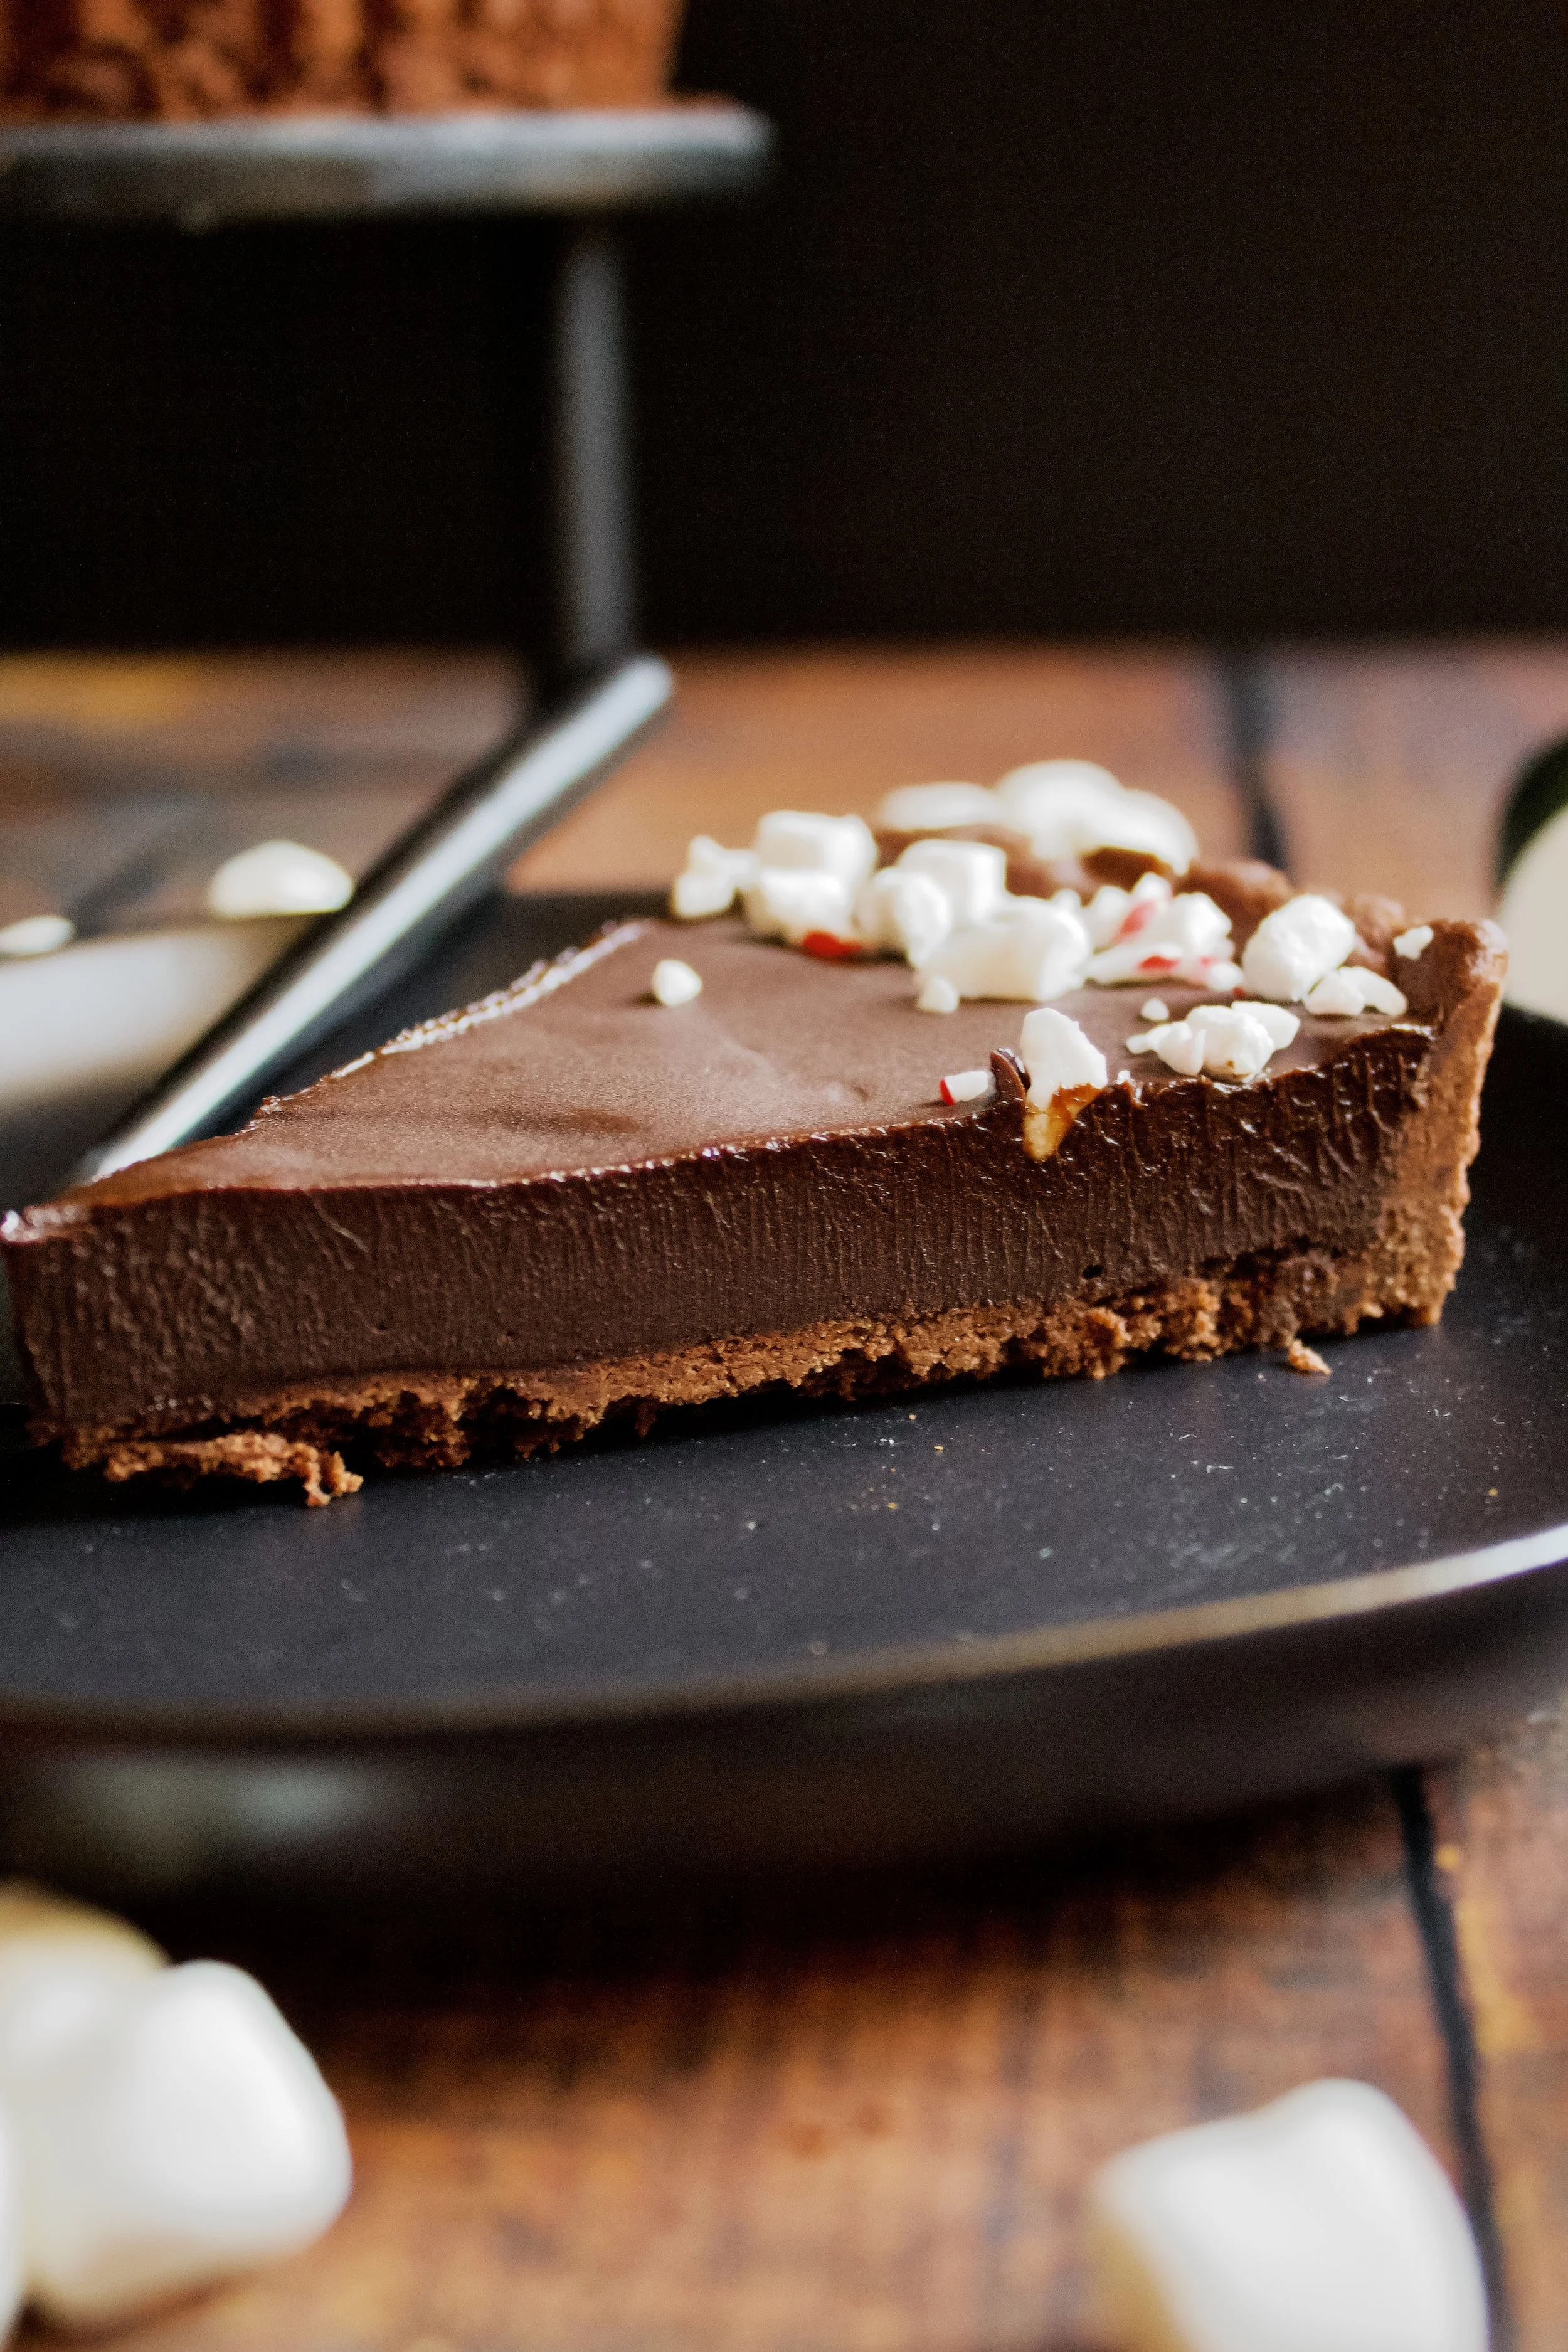
The marshmallow peppermint ganache filling is so simple and so silky smooth and SO delicious. Ganache fillings need something to keep them pliable, usually butter. So I switched that out for a bit of marshmallow fluff, and it was a game changer. And adding just a teeny, tiny bit of peppermint extract (just 1/4 teaspoon) gave it that fresh, Christmas-y pop that makes it so deliciously hot cocoa-y.
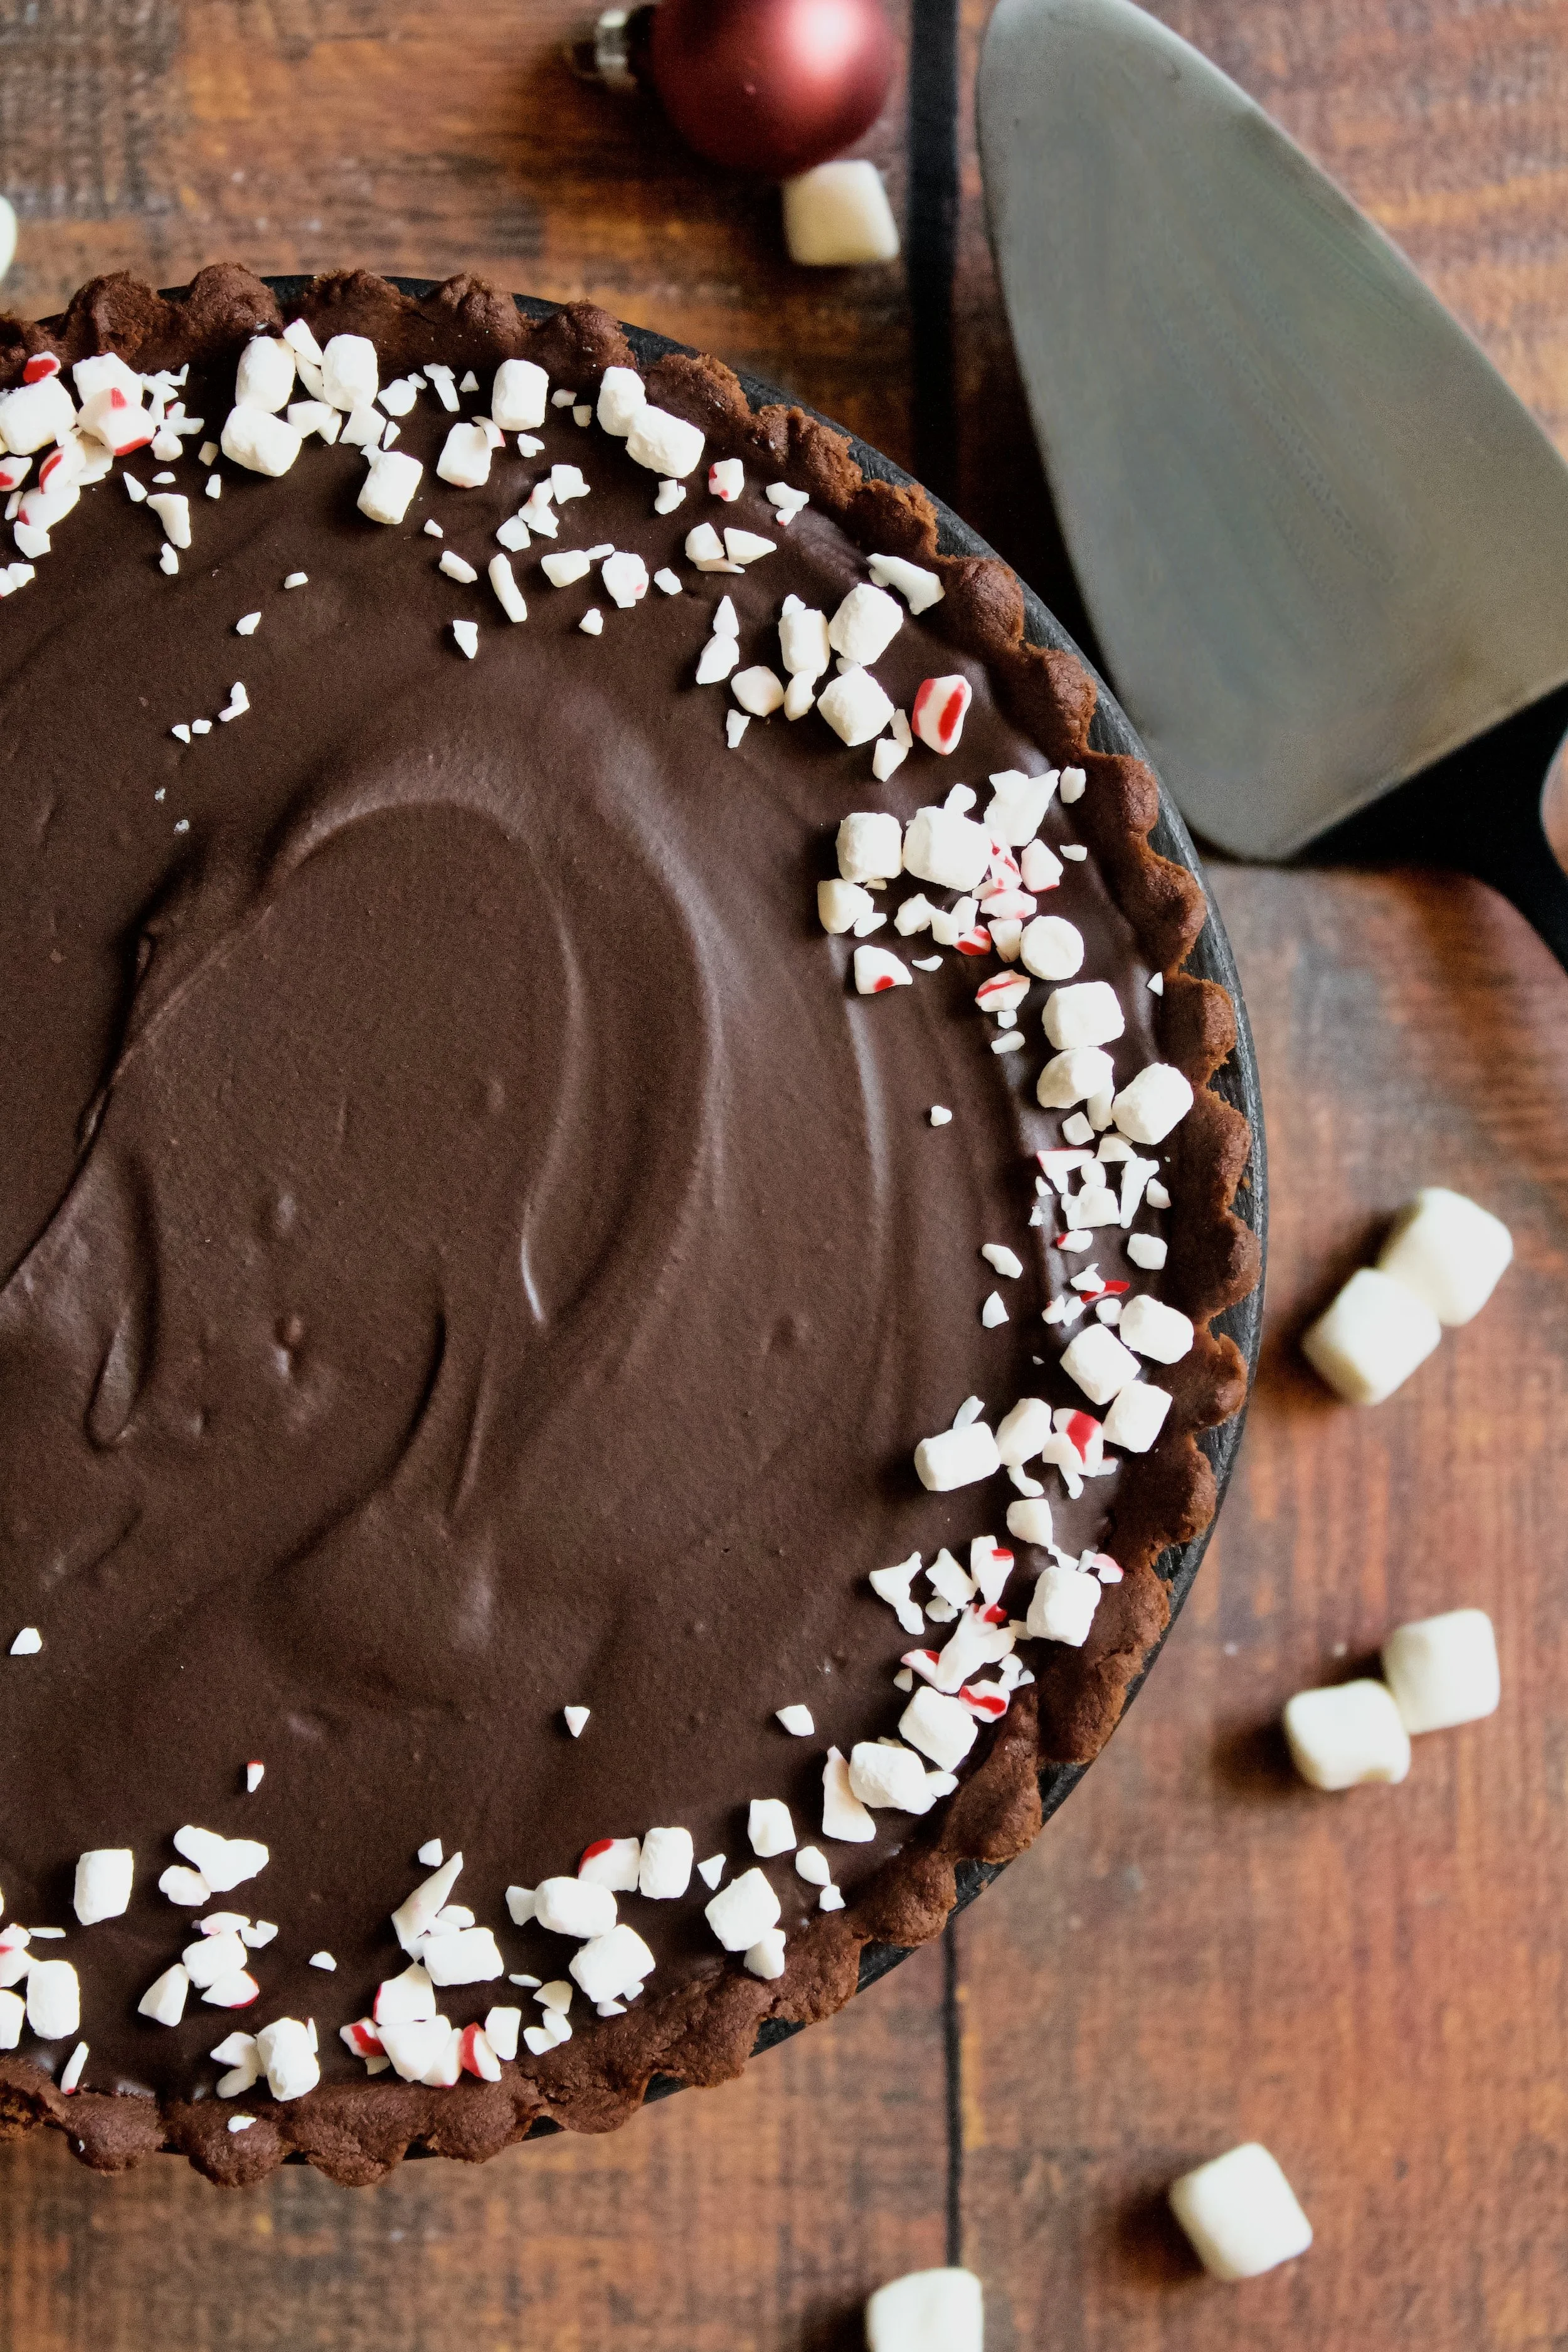
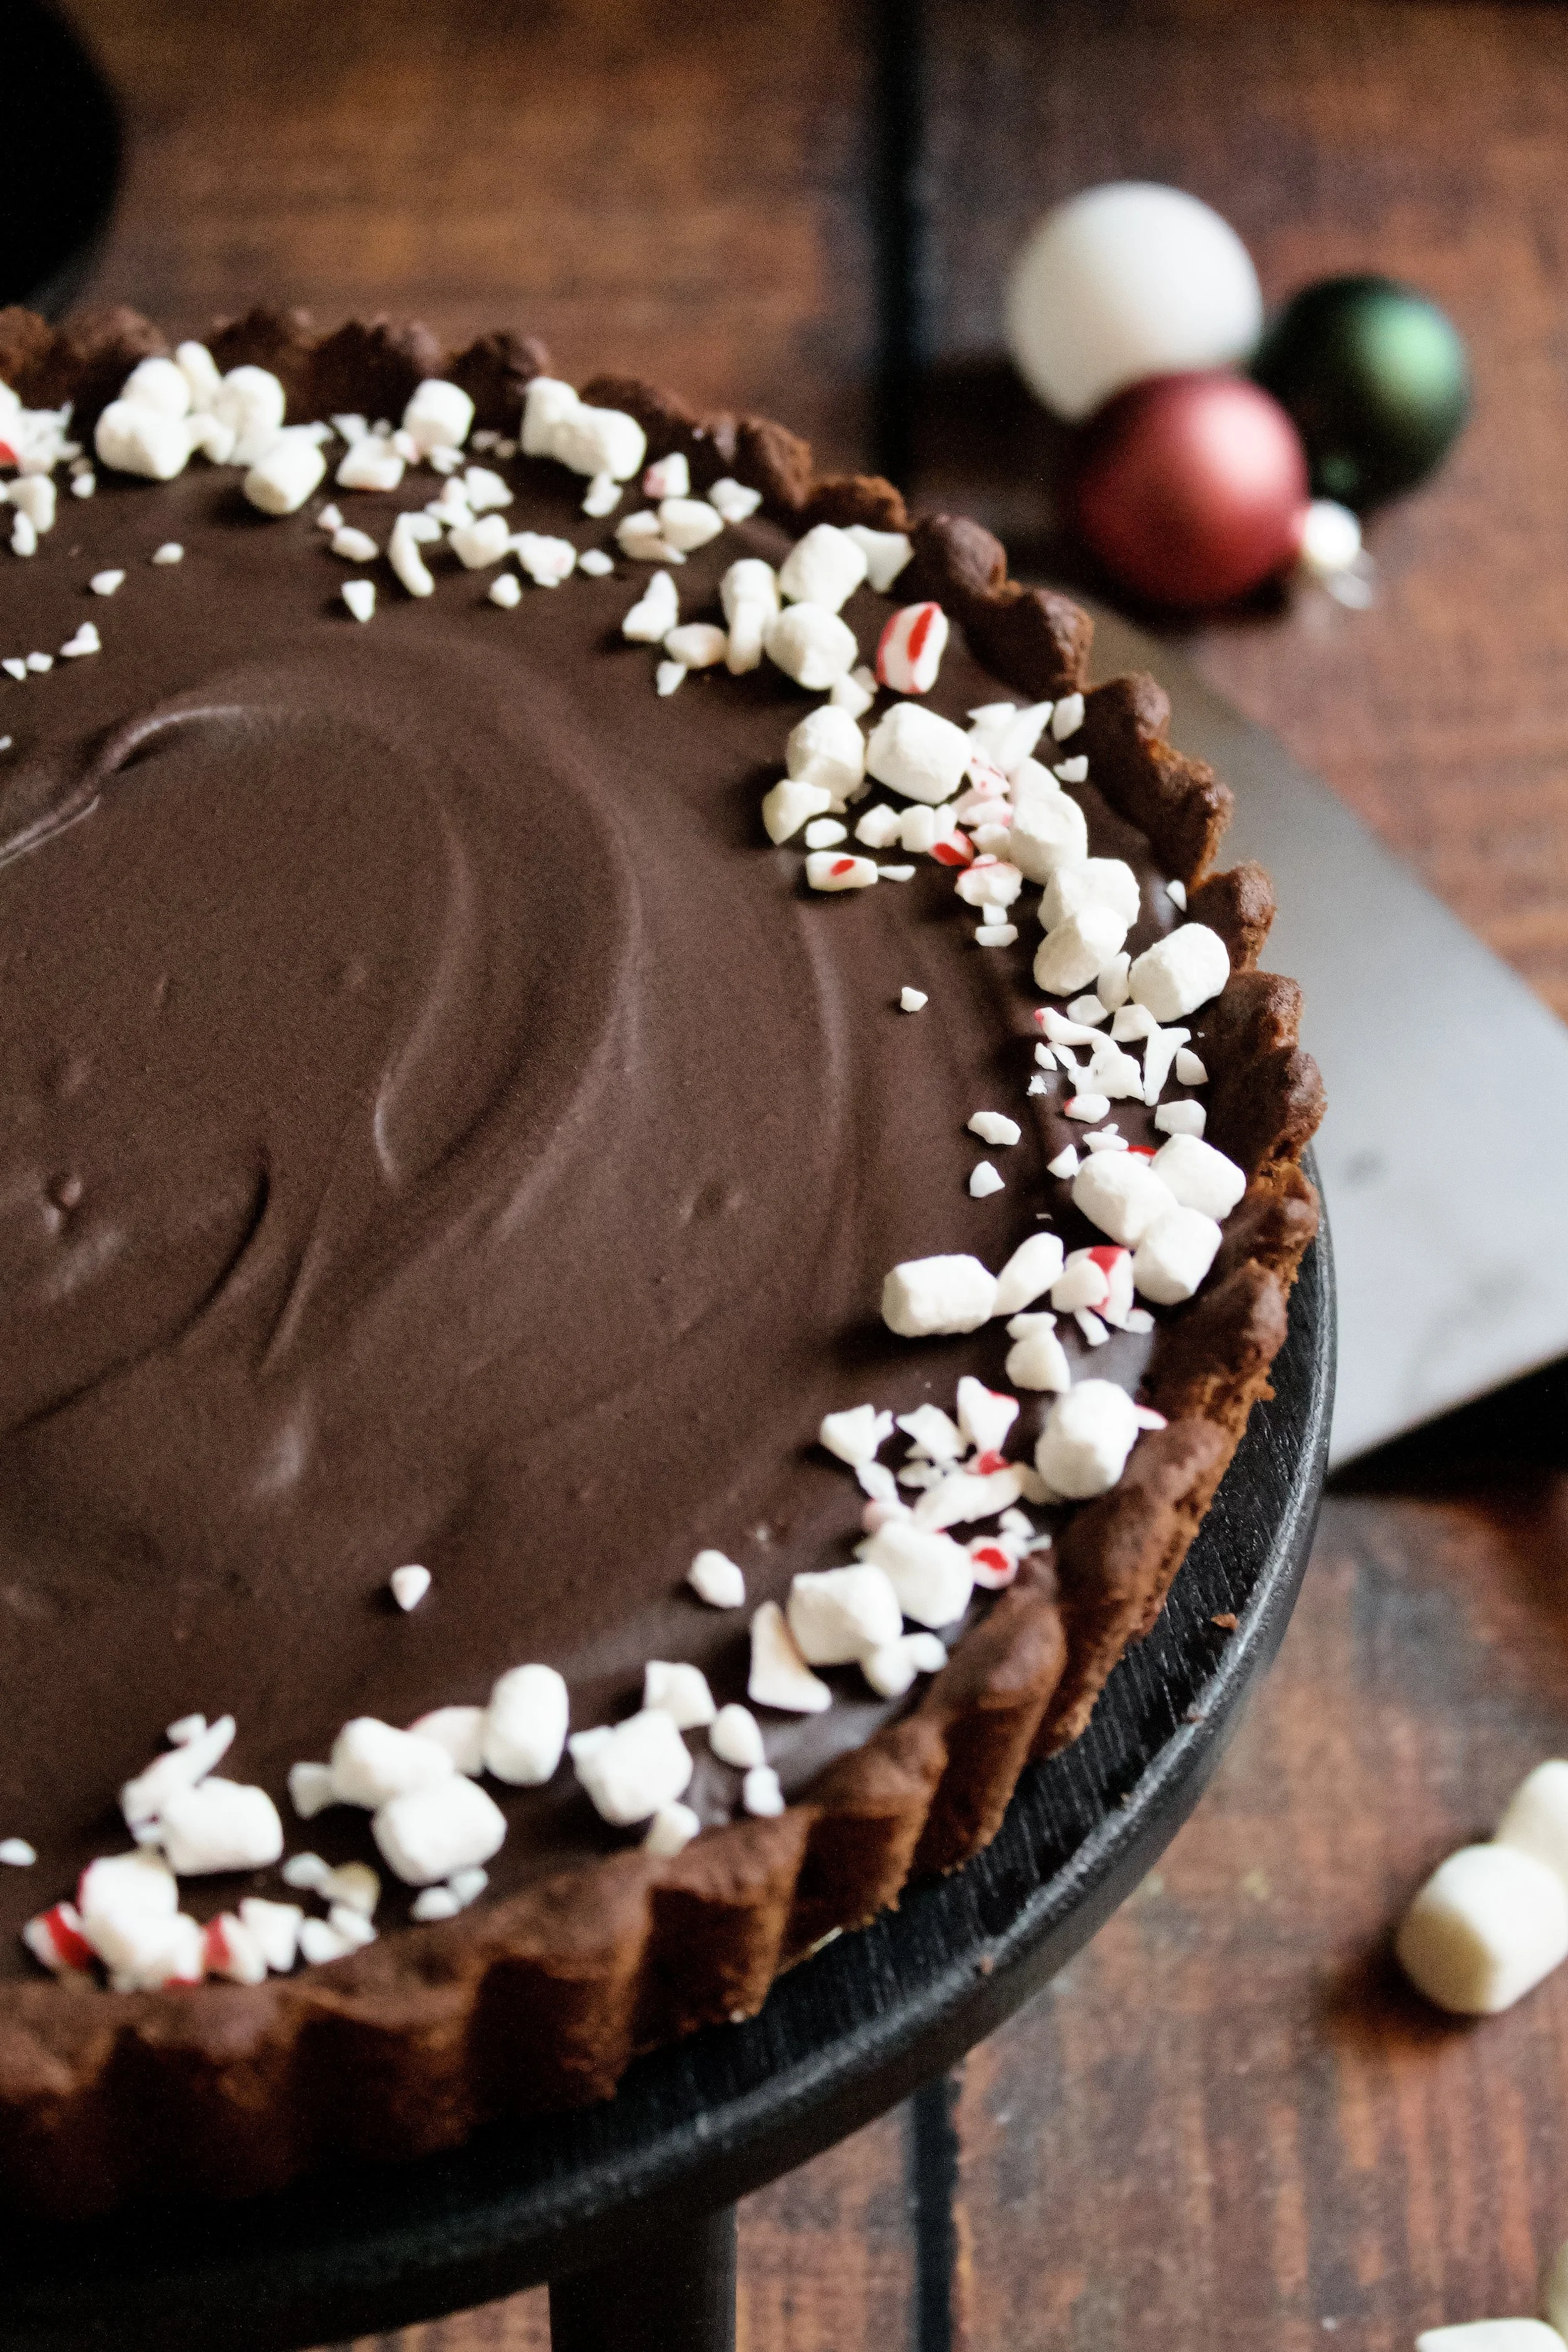
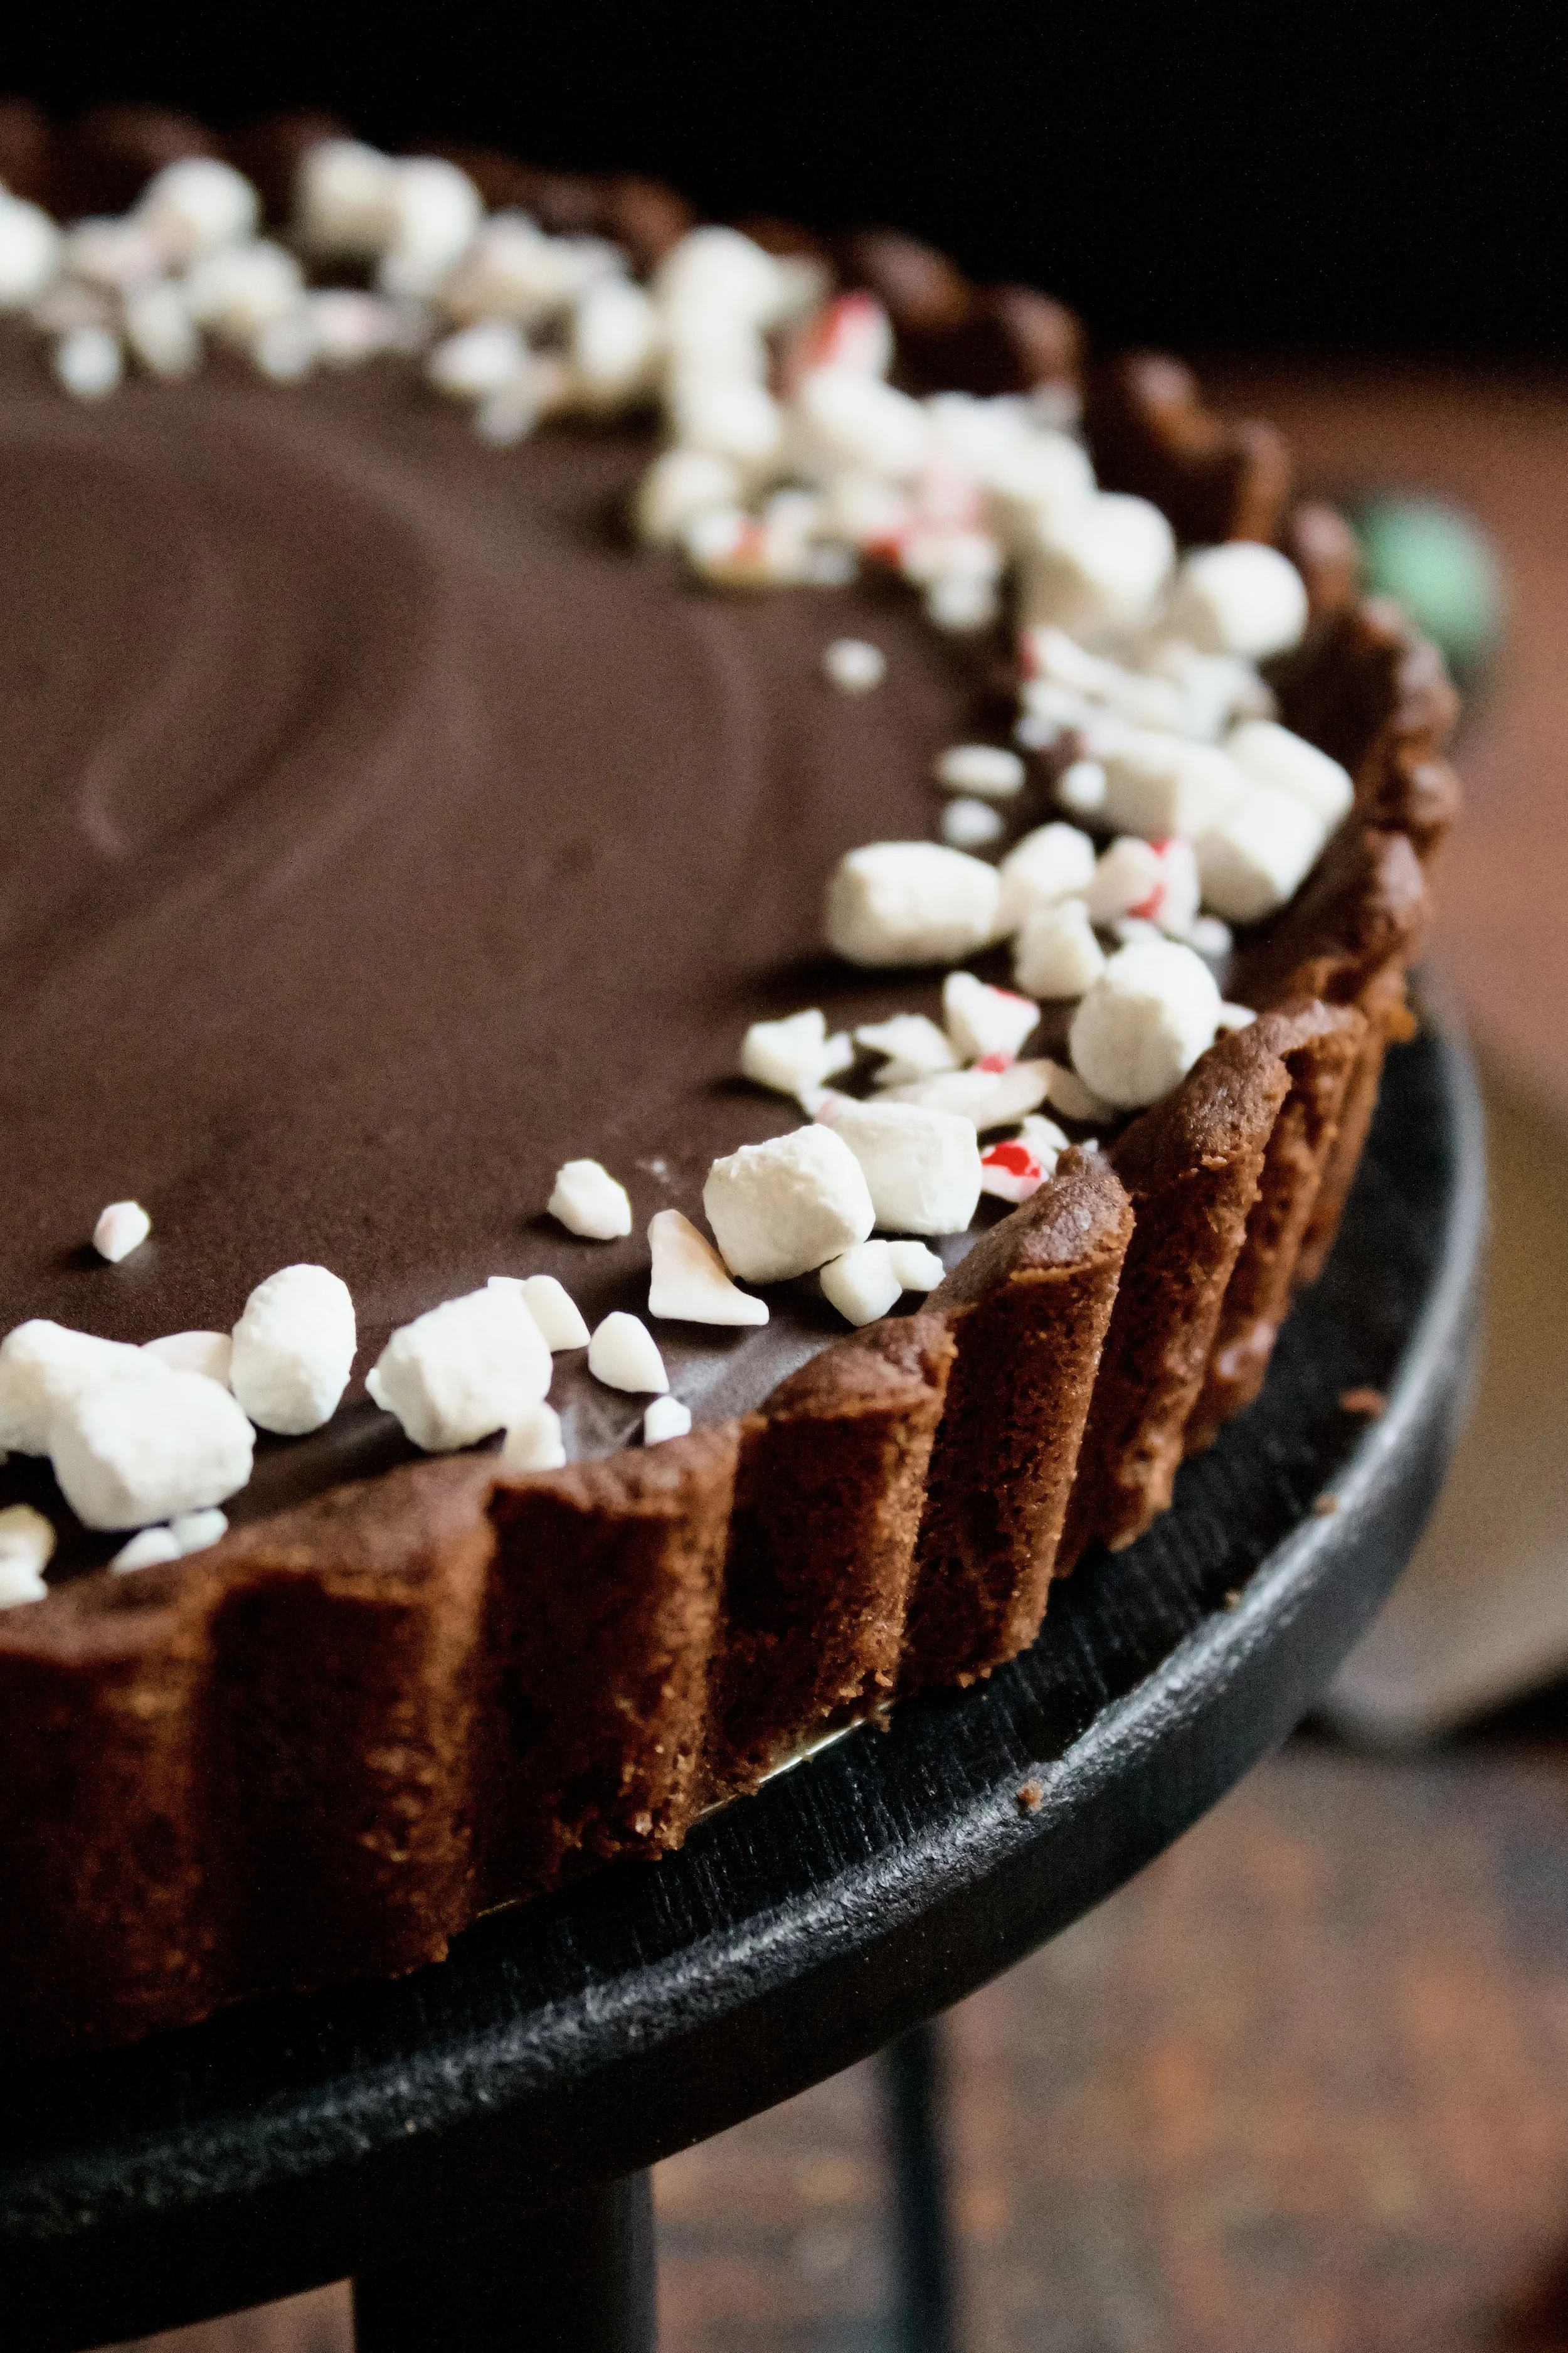
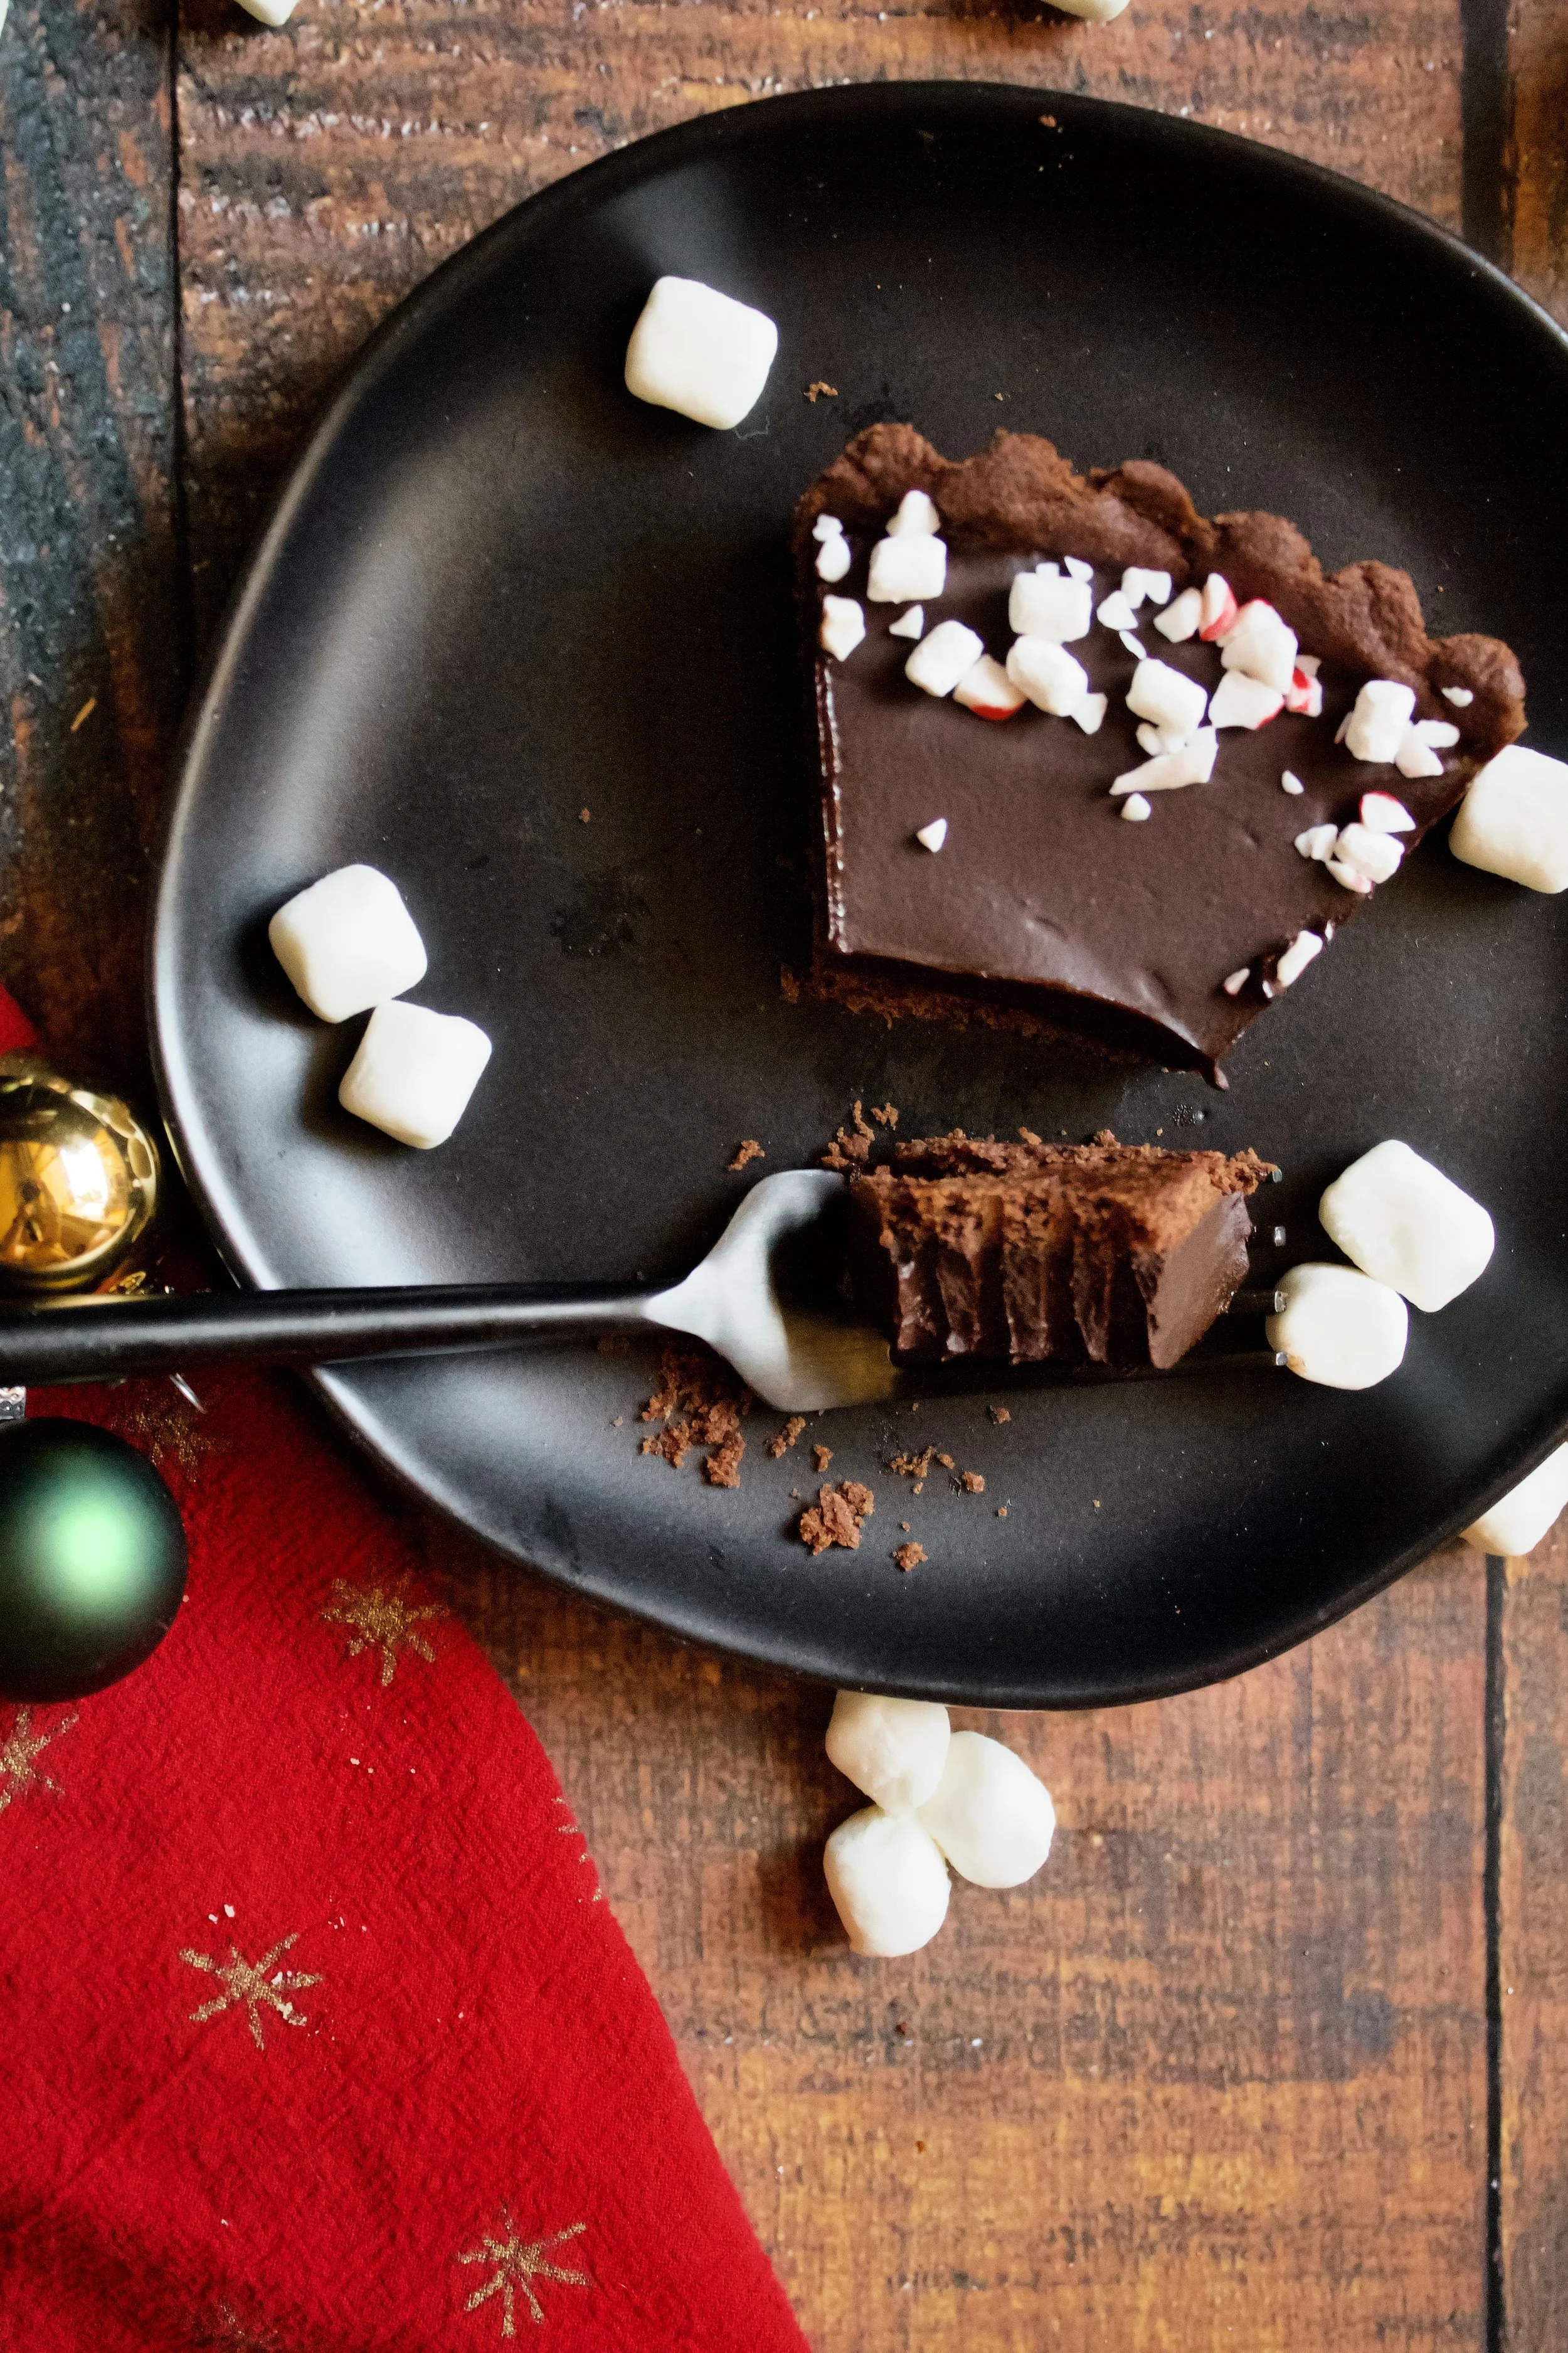
Finally, you can’t have hot cocoa without toppings! While there is much debate about whipped cream or marshmallows, I felt that some marshmallow bits (which you can sub for mini marshmallows) and some crushed candy canes was more fitting for the overall flavor. However, feel free to top with whipped cream and some chocolate shavings!
Key ingredients
Butter. If possible, always use European style butter in shortbread. It’s creamier and has less water.
Confectioner’s sugar. This is the secret to the tender texture and perfect sweetness of the shortbread crust.
Vanilla extract. This helps bring a well-rounded flavor to the crust.
Salt. Only use a pinch or so if using salted butter.
Flour. Optionally, you can sift this before using, making the crust even more tender and delicate.
Cocoa powder. Use unsweetened cocoa powder.
Chocolate chips. Semisweet is ideal, but your favorite type is fine. You can also use chopped baking chocolate.
Heavy cream. You can sub a 14 ounce can of coconut cream, but in that event, omit the marshmallow fluff from the ganache.
Marshmallow fluff. This is actually a very simple recipe, using just a few ingredients and taking about 10-15 minutes total, but you can also use store bought fluff.
Peppermint extract. This is optional, but I loved how it made the tart a bit fresh and light.
Marshmallow bits. You could sub mini marshmallows, I just didn’t want them overwhelming the tart.
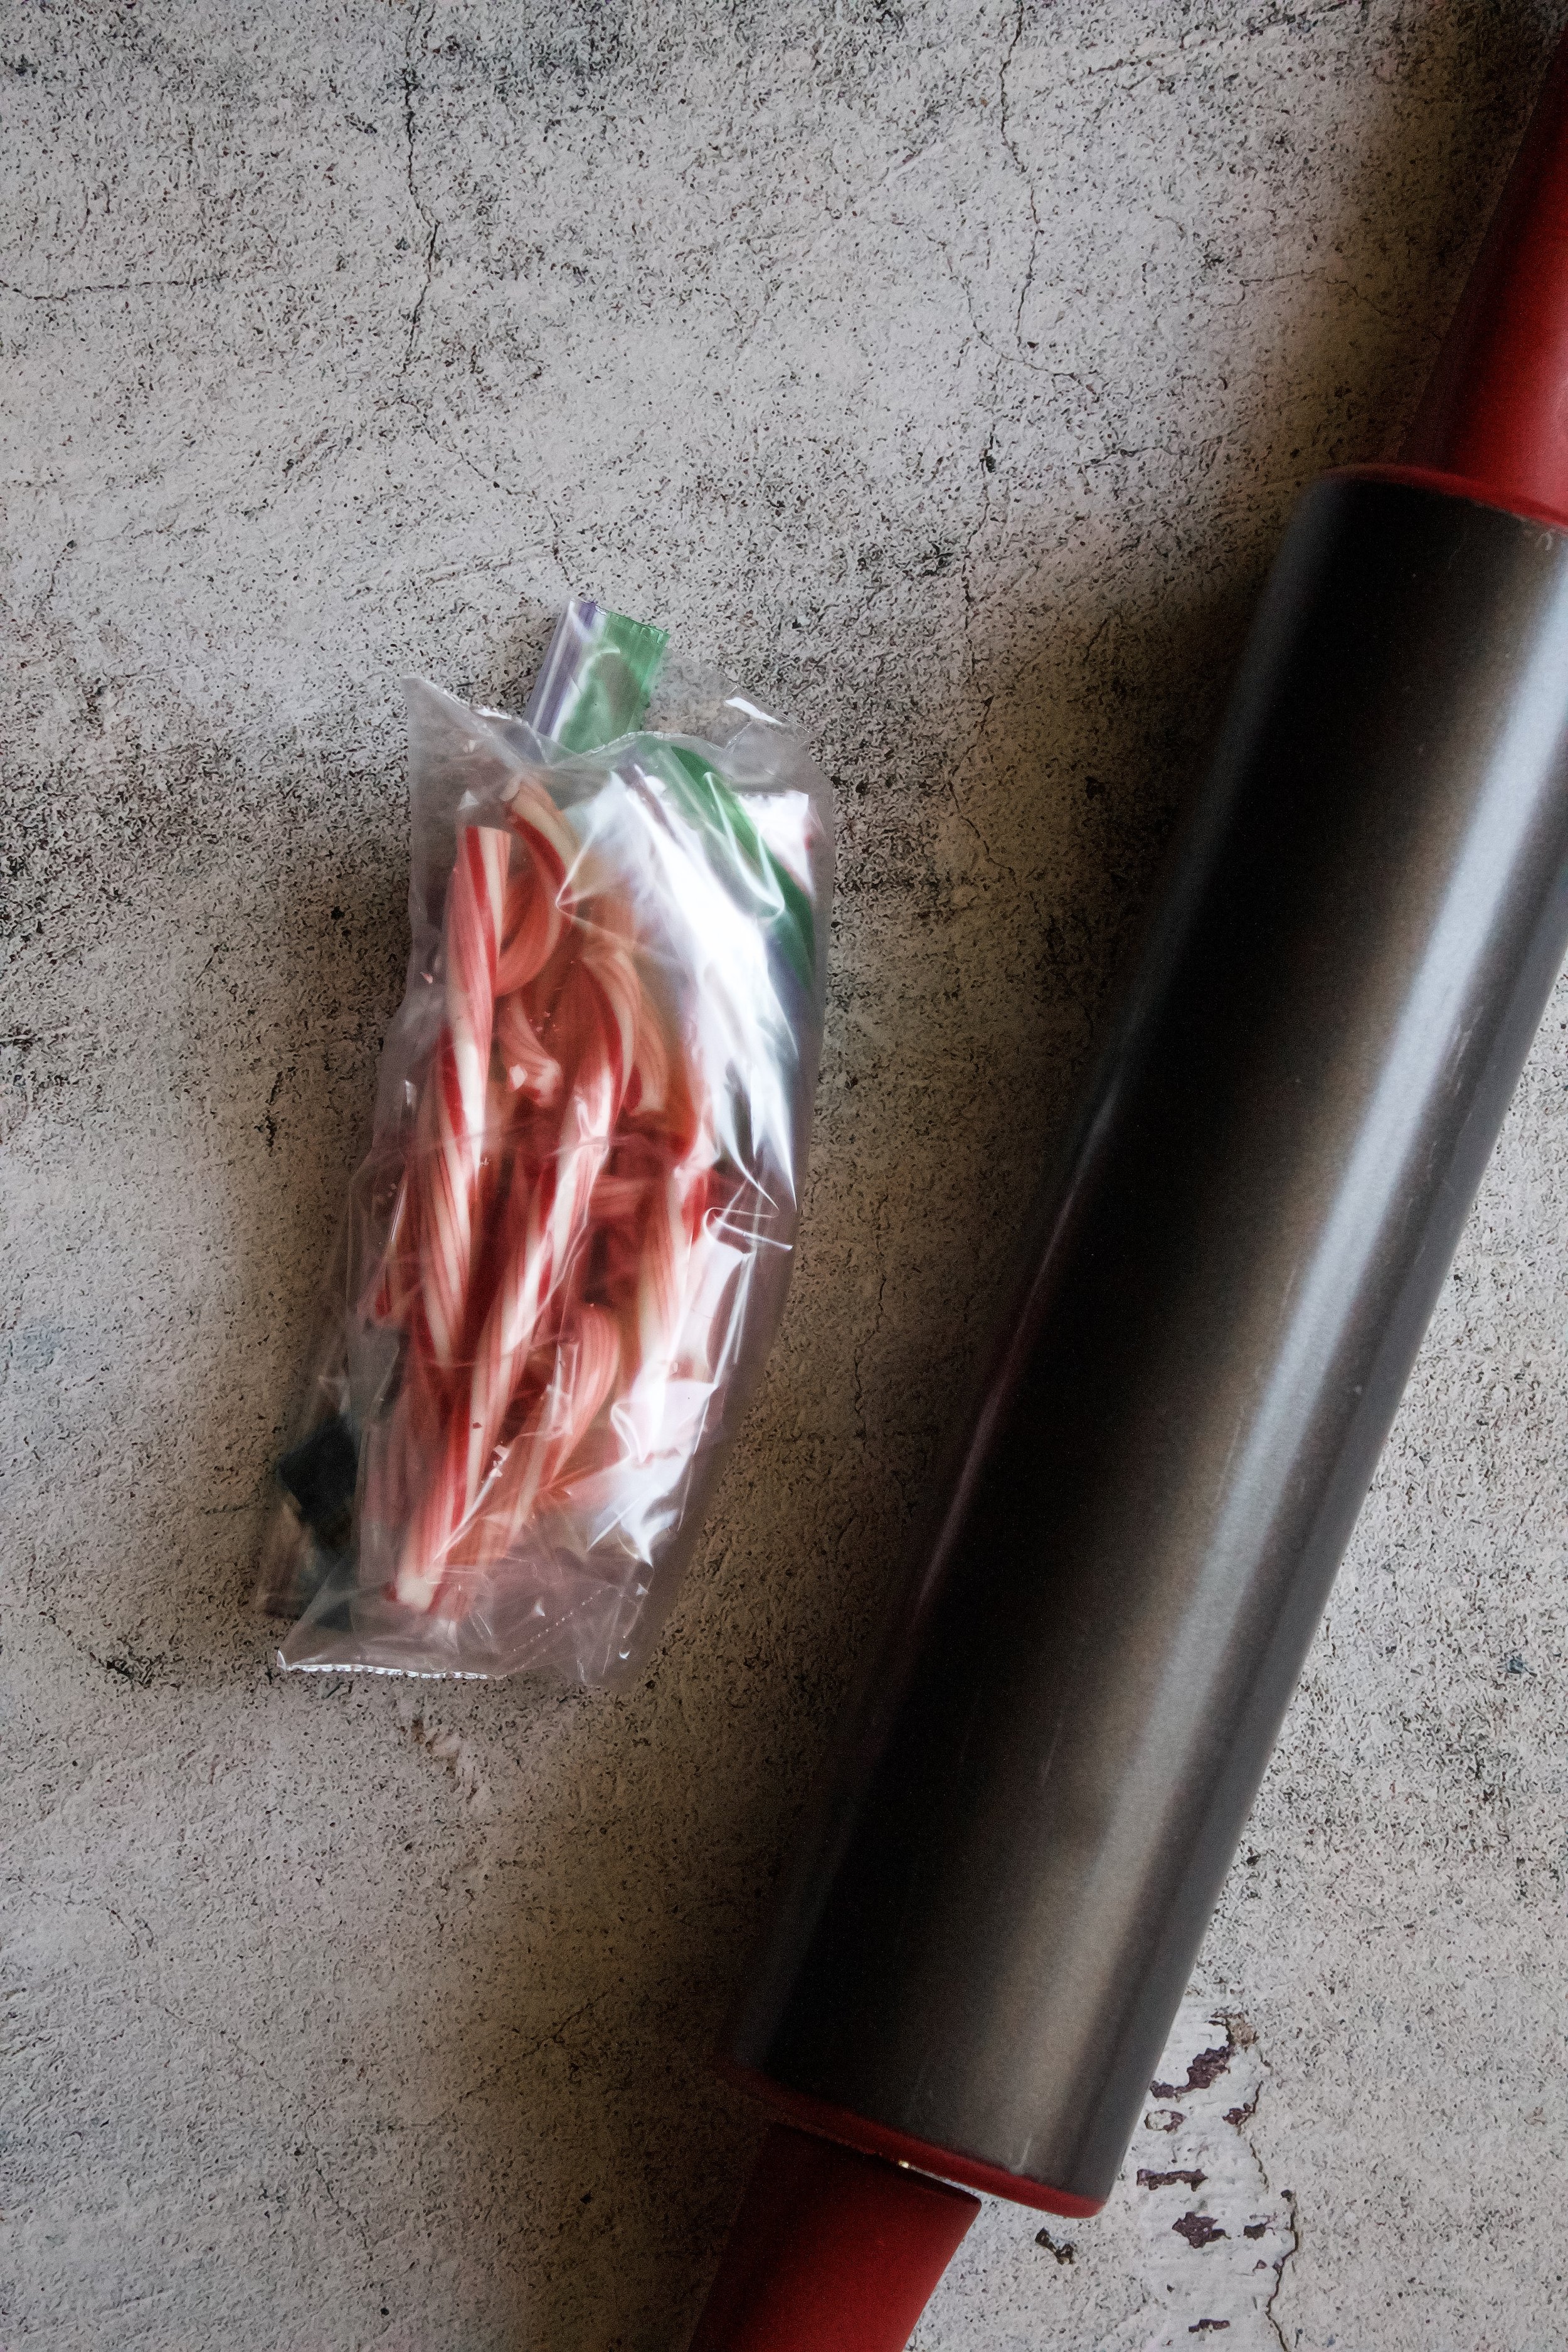
Crushed candy canes. You can buy these or make your own. Make them by placing a few candy canes in a couple freezer proof plastic baggies (one inside the other) and whacking them with a rolling pin until crushed.
How to make peppermint hot cocoa tart
1. Cream butter and powdered sugar. You don’t need to beat it for a long time, just make sure it’s well-combined and perfectly smooth.
2. Add vanilla and salt. Reduce salt to a pinch if you used salted butter. Be sure it’s very smooth so that the flour can be mixed in minimally.
3. Stir in flour. Technically, you could sift and whisk the salt and flour, but that requires an extra bowl, and I just don’t have the patience for more dishes.
4. Press crust into pan and freeze. I use my hands until it’s mostly in place then use a cup to get it nice and firm. Freezing helps it bake evenly, and also makes it easier to line.


5. Line with weights then bake. Use either flour or parchment to line the frozen crust. Pour pie weights, dry beans, or dry rice inside to help keep it from puffing up while baking. Remove after 15-20 minutes and let the bottom finish cooking for 5 minutes
6. Make the marshmallow fluff (optional). You can also use store bought, I just like making a big batch I can use for other things.
7. Melt chocolate, heavy cream, 2 tablespoons fluff, and peppermint extract. I prefer a double boiler (well, a heatproof bowl set over a saucepan with 2” simmering water over low heat). You can also melt this in the microwave at half power in 15 second intervals.
9. Decorate and freeze. Pour the ganache into the set crust and top sprinkle with marshmallow bits and candy cane pieces. Freeze for about 30 minutes or refrigerate for about 60 minutes, until firmly set.
Enjoy!


Tips and FAQ’s for this recipe
Can I make this vegan?
Yes! You’ll need vegan butter for the crust, which should be a one-to-one substitution. For the filling, use 18 ounces of vegan chocolate, such as Guittard, and a 14 ounce can of coconut cream (not milk—use full fat) and melt as directed with the peppermint extract (you’ll omit the marshmallow from the filling, but adding 1 tablespoon vanilla can help soften the coconut flavor). Use vegan marshmallows to decorate (I’ve seen them on occasion, but they can also be made!).
Can I make this gluten free?
Yes! The only gluten in this recipe is the crust, so you can either make it with a one-to-one substitute gluten free flour (it won’t be quite as tender and flakey) or, my personal preference, would be to use an Oreo cookie crust and use gluten free Oreos or similar chocolate sandwich cookies. I’ve done this many times with gluten free Joe Joe’s (Trader Joe’s version of Oreos) and it’s always been great!
Can I make this tart in advance?
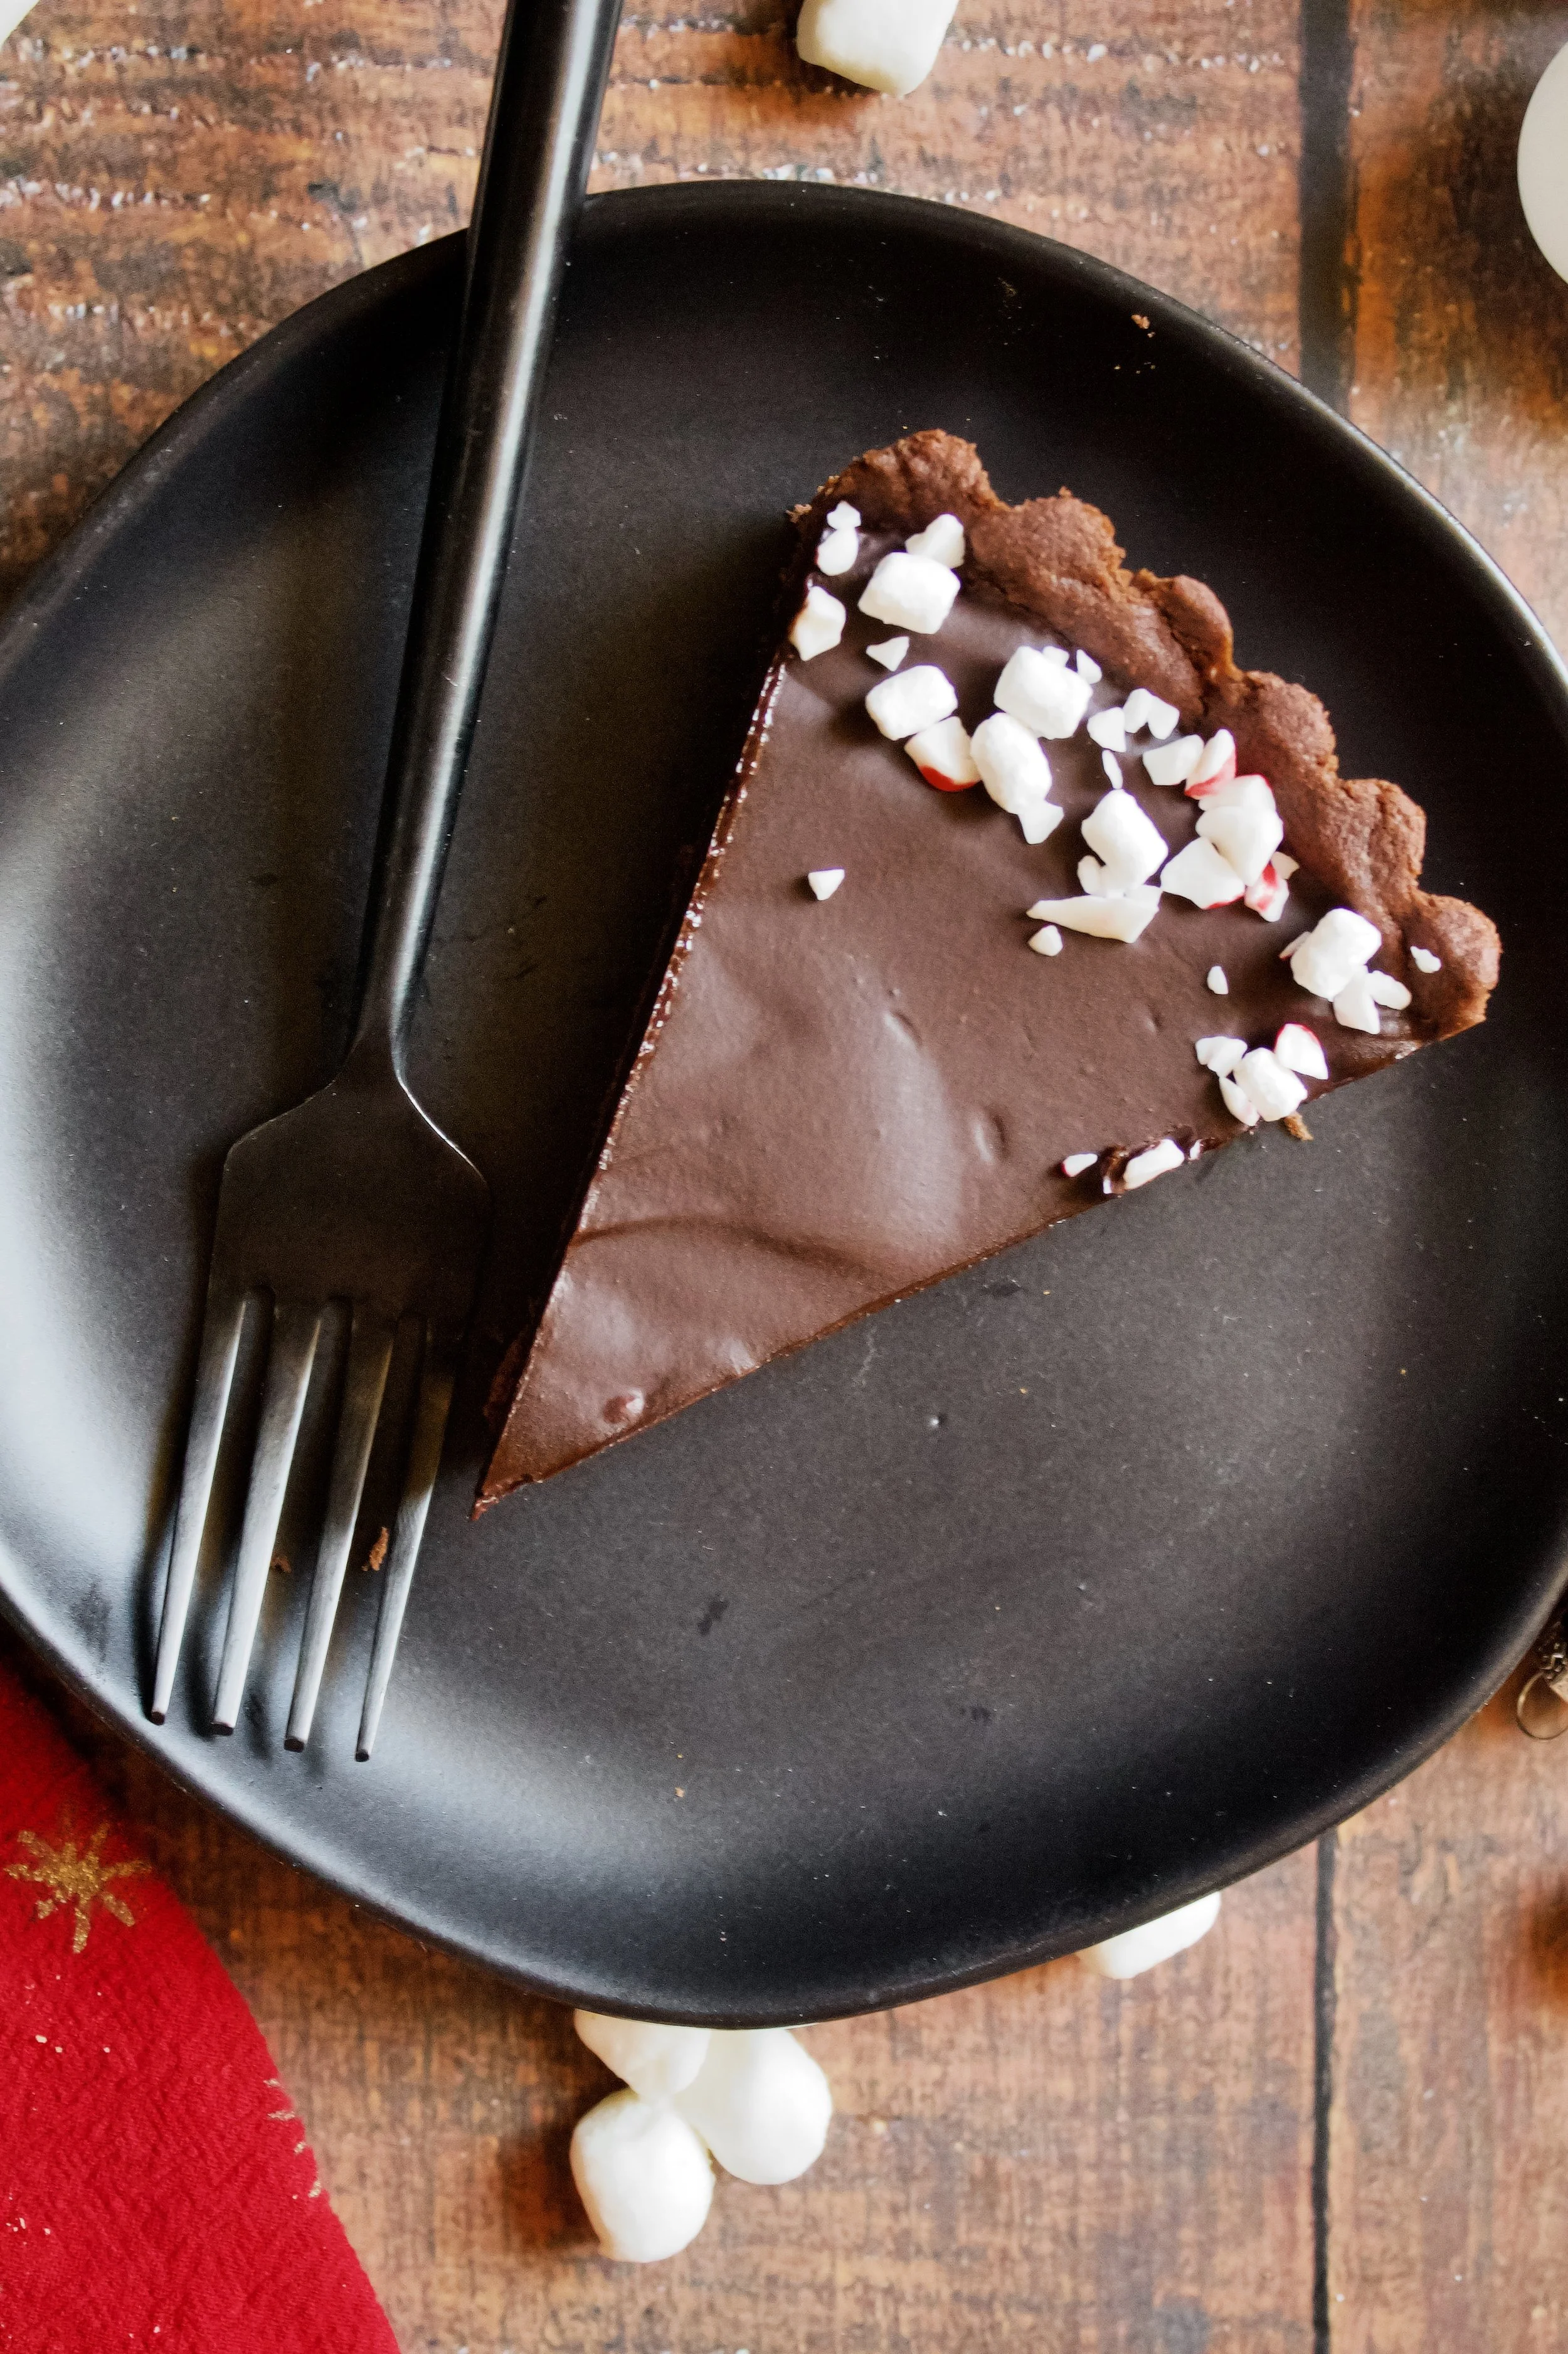
You can make this up to a week in advance. After it’s set, cover well and freeze. Once ready to serve, transfer to the fridge for a couple hours so it’s sliceable. It’s advisable to add the marshmallows and candy cane pieces after defrosting, as they will melt in the freezer.
Does the peppermint brand matter?
Yes! McCormick is a pretty reliable brand, but it can taste like toothpaste if you use too much. I’ve also weirdly had good luck with the Whole Foods 365 peppermint. Nielsen-Massey is another one I’ve had pretty good luck with, but I haven’t tried their peppermint. The key is starting small and adding more as needed. Also, the flavor WILL intensify over time—especially in the fridge, so if you plan to make this ahead of time or more than a few hours before serving your dessert, err on the side of “that’s just right” rather than “yeah I taste that peppermint.”

Can I use any crust?
Yes! I chose to use a chocolate shortbread because 1) I was already making it and 2) it felt so festive. However, you can easily use an Oreo crust. Or, another festive option would be a chocolate candy cane cookie crust! simple and delicious and oh-so-Christmasy!

Can I make this dairy free?
Yes! Use vegan butter in the crust (one-to-one substitution). For the filling, use 18 ounces dairy free chocolate, one 14 ounce can of coconut cream (not milk), and peppermint extract. You’ll omit the marshmallow from the filling, but adding a tablespoon of vanilla can help soften the coconut flavor. Or, alternatively, you could melt the coconut cream (watery part and solids) and portion out just 12 ounces, which will allow you to also include the marshmallow without it altering the consistency.
Is homemade fluff better than store bought?
Confession: I used store bought on the tart in these photos because I was short on time. I still personally prefer homemade fluff. It’s sturdier, so it won’t spread and you can also pipe it or create a fun meringue-y design. I also like having it on hand during the holidays to make my chocolate marshmallow frosting. It’s also a little less sweet, which is more of a personal preference thing. Using store bought meant I could only eat a small sliver of tart at a time, which is probably a good thing…
My tools
Here are my must-have tools I use for making this tart. Affiliate links provided.
Handheld mixer (or stand mixer, for the crust)
Heavy medium pot (ideal for making a double boiler)

Peppermint Hot Cocoa Tart
- prep time: 15-20 minutes
- chill time: 1 hour, 30 minutes
- total time: 1 hour, 50 minutes
servings: 8-12
Ingredients:
- 1 cup (227g) unsalted butter
- ¾ cup (173g) powdered sugar
- 1 tablespoon (13g) pure vanilla extract
- ¼ teaspoon (2g) salt
- 1 ¾ cups (238g) all purpose flour
- ½ cup (43g) unsweetened cocoa powder
- 18 ounces (510g or 3 cups) semi-sweet baking chocolate, chopped (or chips)
- 1 cup (240g) heavy whipping cream
- 2 tablespoons (28g) marshmallow fluff (can use store bought or sub 2 tablespoons (28g) butter and 1 tablespoon (13g) vanilla extract)
- ¼ teaspoon (1g) peppermint extract
- marshmallow bits and candy cane pieces to decorate
Instructions:
- Preheat oven to 350F/175C.
- Make your shortbread by sifting and whisking the flour and salt together. Be sure your flour was spooned and leveled into the measuring cup. Set aside.
- Beat the butter on high until smooth. Add powdered sugar and beat on low then increase to high until very smooth, about 1 minute. Add vanilla and beat until smooth.
- Add flour mixture and beat on low just until combined.
- Press dough evenly into your removable bottom tart pan. Depending on the size of pan, you may have some extra dough.
- Freeze for 10 minutes. Once frozen, line with foil or parchment paper, letting it gently drape over the edge. Fill with pie weights, dried beans, or uncooked rice. Bake for 20 minutes. Remove the foil and weights. Continue baking about 5 minutes more, until the bottom of the crust is matte and the edges are a bit darker. Set on a wire rack to cool completely.
- When the crust is cool, make the filling. You need a small-ish, heatproof bowl and a small-ish saucepan that the bowl can sit on top of and be about halfway submerged in. Fill the bowl with the chocolate, heavy cream, and 2 tablespoons marshmallow fluff. Fill the saucepan with one to two inches of water and bring that to a boil. Once it is boiling, turn the burner to medium-low and set the bowl of chocolate over it.
- Stir the chocolate mixture frequently, adjusting the temperature as needed to keep the water at a steady simmer. Once the chocolate is mostly melted, remove the bowl from the saucepan and stir until the chocolate is fully melted. If it doesn't fully melt, you can always return the bowl to the saucepan as needed.
- Pour the chocolate into the hardened crust. Top with marshmallow bits (or mini marshmallows) and candy cane pieces. Chill for about 1 hour, until the filling is set and matte in appearance. Alternatively, you can freeze the tart to set the filling faster, but it will need to go into the fridge as soon as it’s set to make it slice-able.
Enjoy! Keep tart refrigerated until serving. Tart will last 3-5 days in the fridge. Cover leftovers well to preserve taste (ideally using an airtight container–plastic wrap will stick to the marshmallow fluff).