
Peppermint Chocolate Cookie Crust
A simple, quick recipe for a chocolate peppermint crust. Use it in pies, tarts, individual desserts, and even trifles! This also translates easily to a gluten free dessert!
Does it count as a new recipe if I make the same thing, but with seasonal ingredients? I’m going to say yes. This is my Christmas spin on my equally easy chocolate cookie crust, using peppermint chocolate cookies. Trader Joe’s Peppermint Joe Joe’s are one of my favorites Christmas items. They’re literally just Joe Joe’s (which are basically Oreos) but with crushed candy canes mixed with the filling. You’d think it would be more complicated, with peppermint extract in everything. Turns out many a delicious chocolate dessert was turned Christmas-y by adding nothing more than crushed candy canes.
When it comes to peppermint, sometimes less is more.

I love how quick, simple, and foolproof this crust is. Plus, you can make it into a pie or tart. Or, for easy gifting (and 2020 approved food safety), make a mini mason jar pie! In fact, cookie crusts have kinda made me lazy, which is why I’m making real pie crust my 2021 baking goal. It’s like a New Years resolution, but the opposite of your traditional diet goal. 😂

How to make peppermint chocolate cookie crust
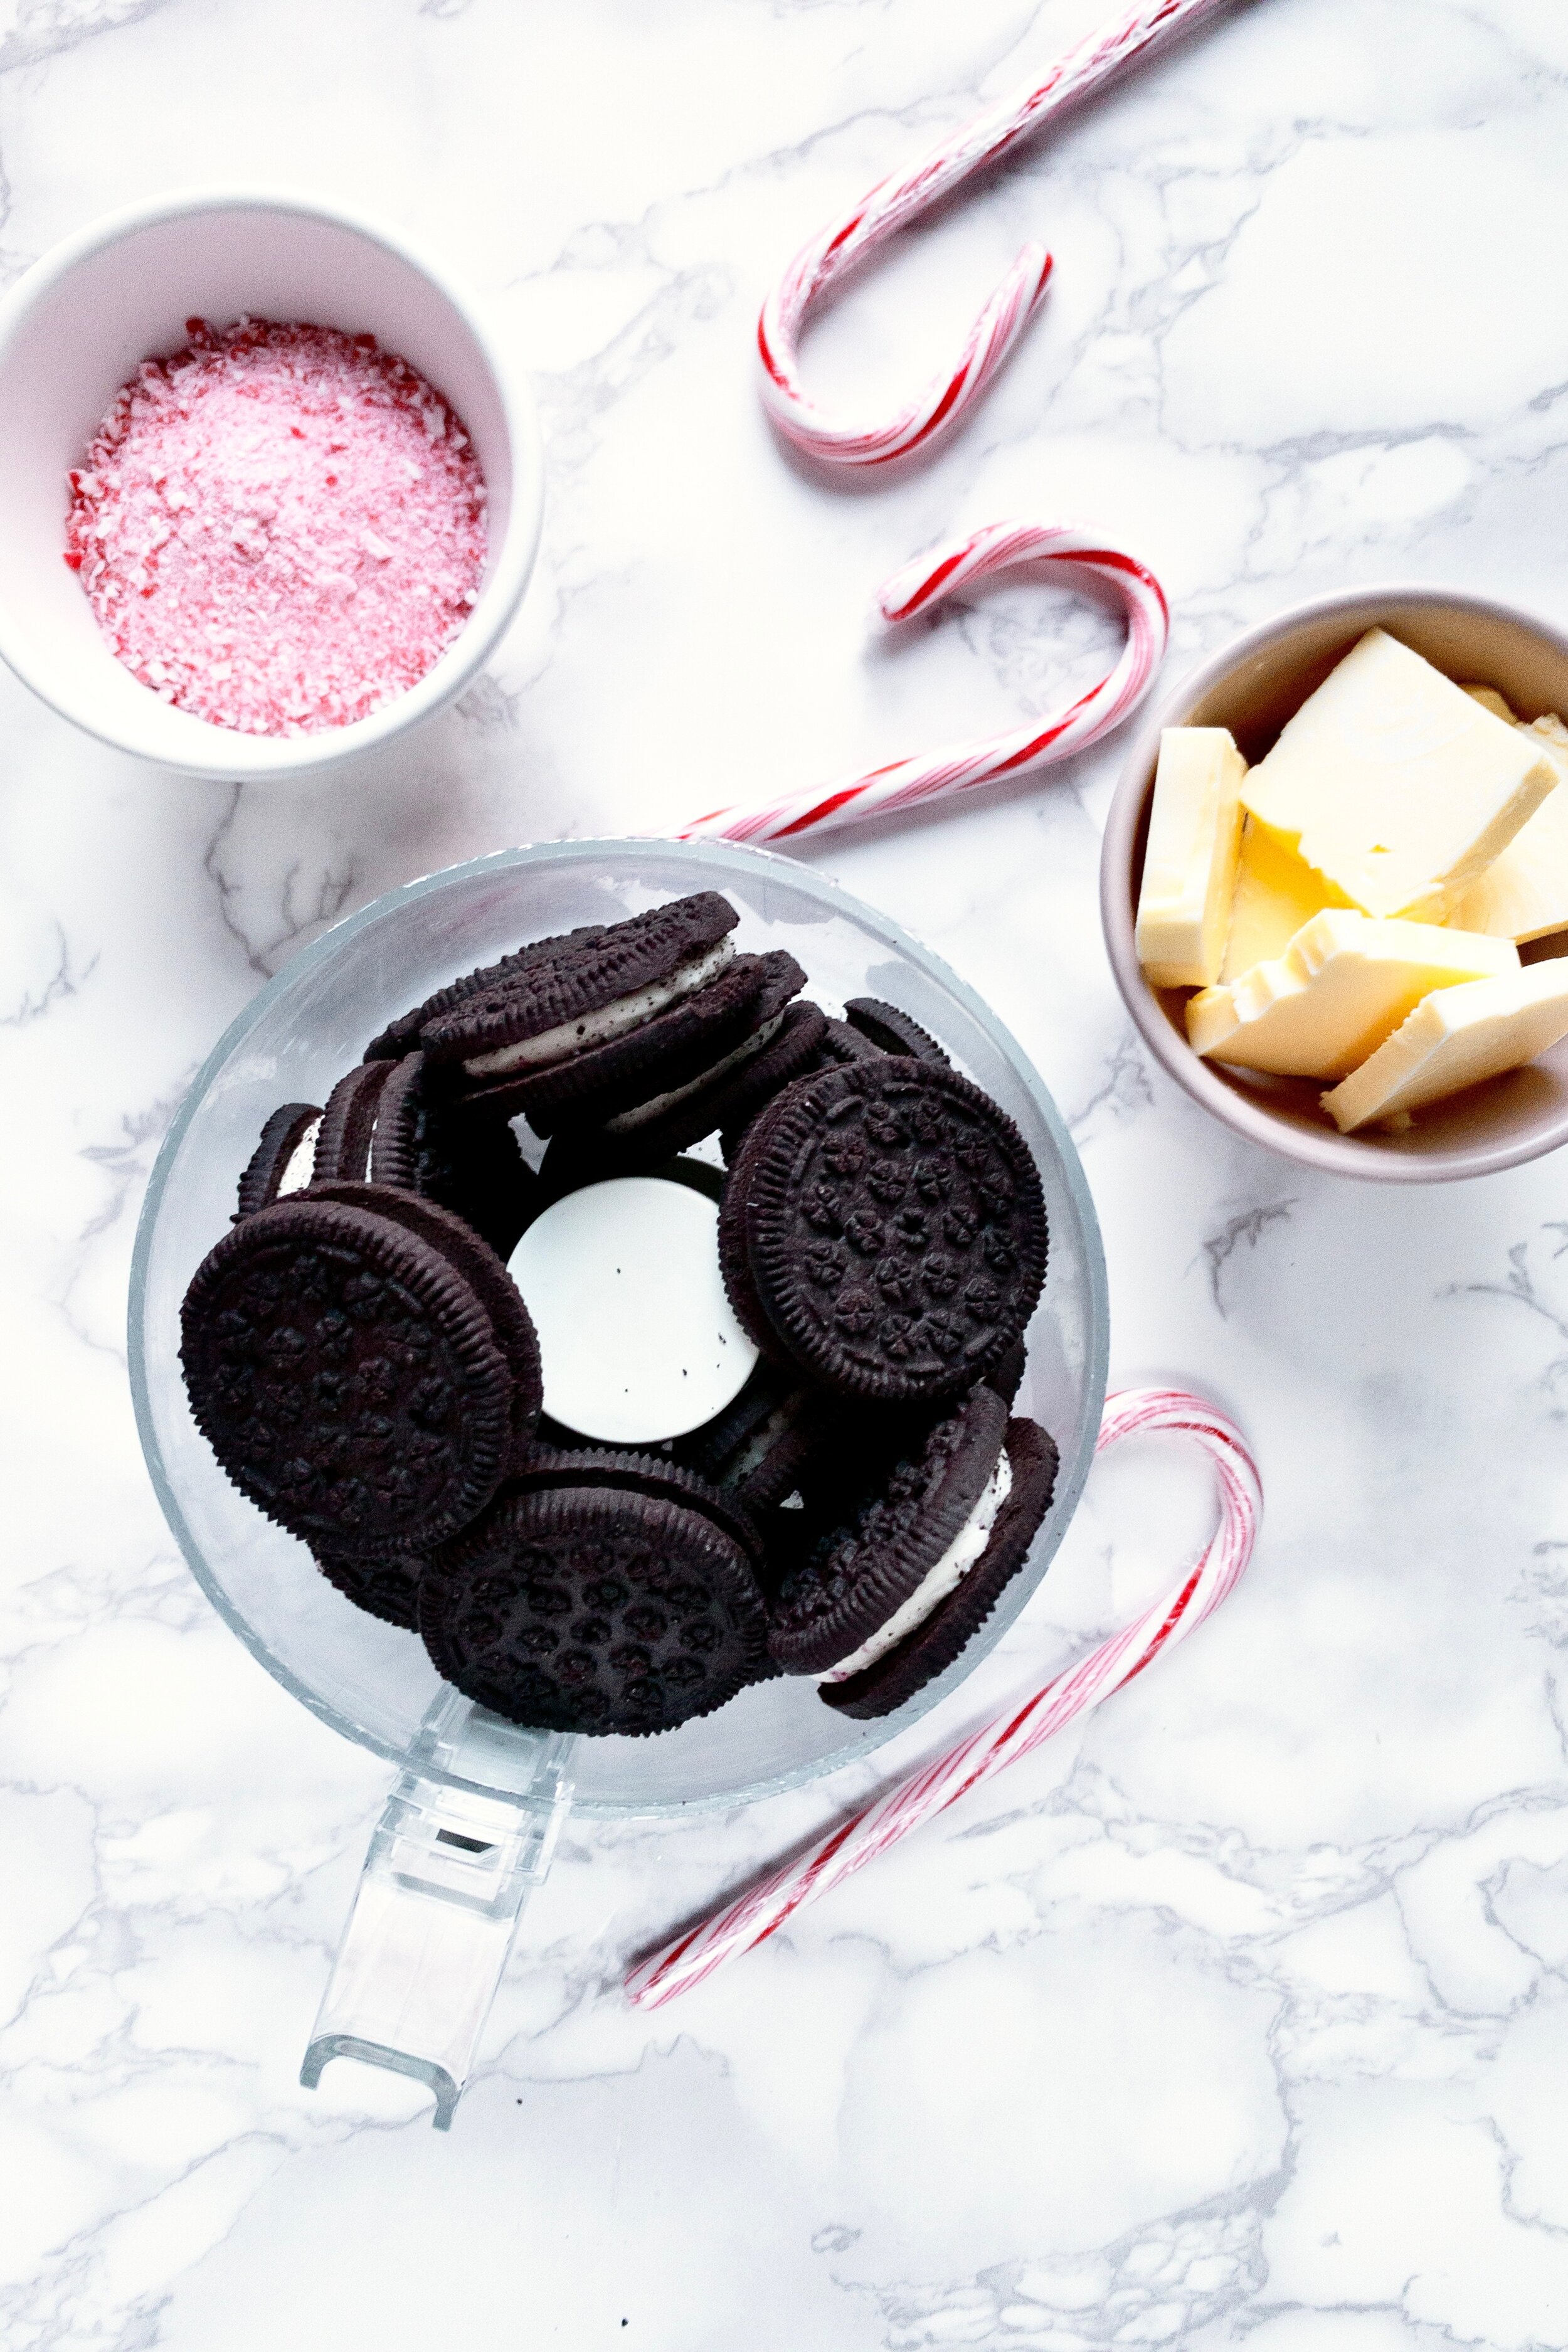
If you have access to peppermint Oreos or Joe Joe’s or the like, use those. If not, you can use plain chocolate sandwich cookies and add crushed candy canes. You can crush them by placing them in a freezer safe plastic bag (they’re more sturdy) and rolling or gently smashing with a rolling pin. You want to pre-crush them so they’re not too much for your blender or food processor.

Add your cookies (and crushed candy canes, if using) to a food processor or blender. You could also use a rolling pin (like with the candy canes above), but you’ll want to be sure to get everything ground up fairly well. Think wet sand texture.

Add the cookie crumbles and melted butter to a bowl and stir to combine. Avoid doing this with the food processor or blender, as it can become gummy due to the candy canes.

Pour it all into your pie or tart pan (or divide evenly between your mason jars) and spread evenly with clean hands or a spatula.

Once it’s spread out, begin pressing it into the pan, first with your fingers to get it somewhat in place and even…

…then with the bottom of a glass or measuring cup to get it packed in nice and tight.

Chill or freeze for at least 10 minutes before filling.
Tips for this recipe
Don’t over process the cookies
If you’re using candy cane or peppermint cookies, there are likely candy canes in the filling. It’s important not to blend/process these too much, the crust will become gummy.
Additionally, don’t try to process large chunks of candy canes if you’re using regular cookies and crushed candy canes. They’ll get stuck to your blades and will also make an unpleasant texture to your crust.

Use with a no-bake filling
This crust pairs best with a no-bake pie or tart filling or even ice cream. In fact, a perfectly quick and easy Christmas dessert in warm weather would be to soften peppermint or chocolate ice cream, spread them in this crust then freeze. Easy ice cream pie! If you want to do a baked dessert, you’ll need to remove the cookie filling first, be sure your candy canes are finely ground, then add a little extra butter to it all. Even then, avoid baking longer than 20 minutes, as the candy canes can melt and crystallize.

Get your edges nice and tight
This takes some practice. I like to use my fingers and the side of the measuring cup I’m pressing the crust down with. Even then, it’s my least favorite part. Don’t stress too much! Just rotate the pan as you go so you have an even crust and can go back over any parts you didn’t press down firmly enough.
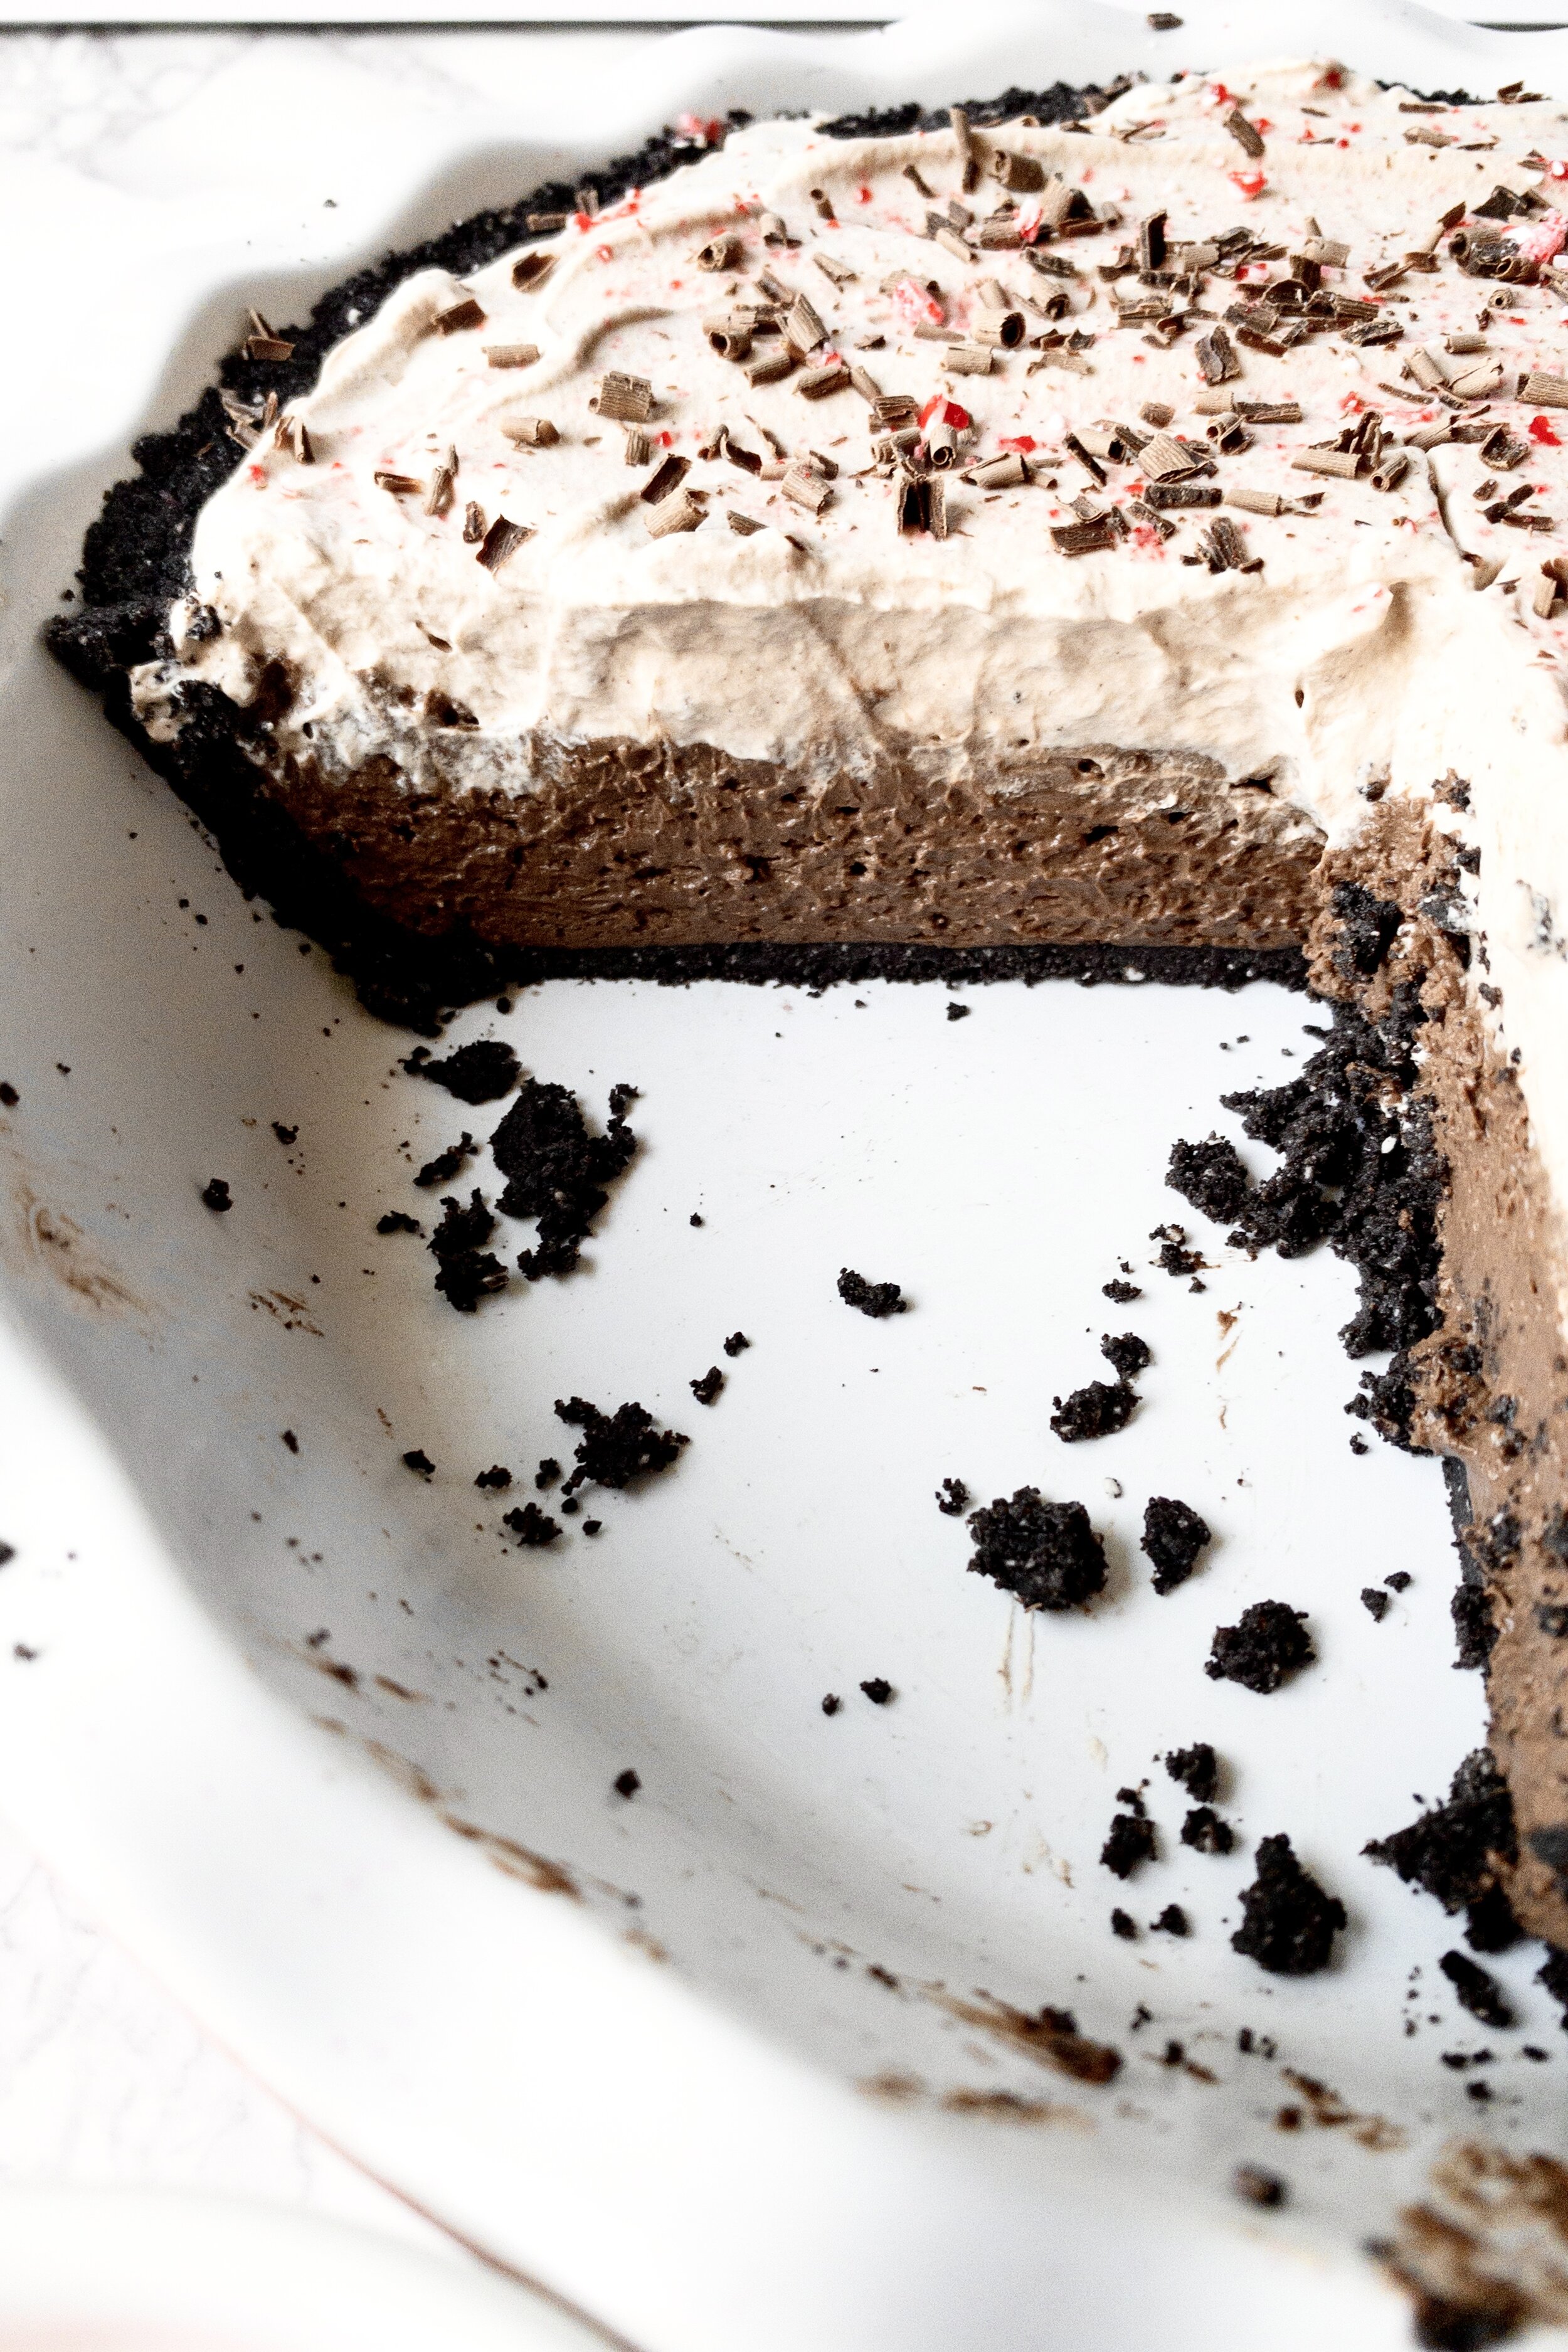
Try with this Triple Chocolate Candy Cane Pie!
I made this crust specifically for this pie, and it’s the best! While many fillings would work, I highly recommend trying this one.

Amount needed varies by pie pan
I made a large batch, with 24 cookies and 4 tablespoons butter, but still had a small amount of extra cookie crumble leftover. I used a fairly large pie pan—a two inch deep 9” pan. Generally, if using the disposable, tin pans like you get from store bought pies, you’ll need 18 cookies and 3 tablespoons butter. If using a more traditional sized pan, use 24 cookies and 4 tablespoons butter.

Peppermint Chocolate Cookie Crust
- prep time: 5 minutes
- chill time: 20-60 minutes
- total time: 1 hour, 5 minutes
Servings: 6-10 (varies by pie pan size)
Ingredients: (see note for amounts you’ll need based on your pie pan)
- 18-24 peppermint chocolate sandwich cookies
- 3-4 tablespoons melted butter
- optional: 1-2 tablespoons crushed candy cakes (if unable to find peppermint cookies)
Instructions:
- Place whole cookies (and crushed candy canes, if using) in a food processor or blender. Blend until completely ground and no chunks remain. It will be a dry, Sandy texture.
- Melt butter in a microwave safe bowl at half power in 30 second intervals or in a small saucepan over medium-low heat.
- Add freshly melted butter to the cookie grounds in a mixing bowl. Stir until fully blended. Do not do this in the processor or blender, as it will become gummy and will not create a proper crust.
- Pour into pie or tart pan or scoop about 2 tablespoons into mini mason jars and spread around and up the sides with a spatula or clean fingers, ensuring it’s evenly spread to avoid a section that’s too thin and breaks or that’s too thick and can’t be sliced.
- Once evenly spread, press firmly into pan. You can use clean fingers, the bottom of a glass cup, or the bottom of a measuring cup (pictured above). The sides are usually easiest using your hands. The edges may take some practice, but the goal is simply that it’s all tightly packed so it will stay together when served.
- Chill in the fridge for 1-2 hours or the freezer for 20-30 minutes, until firmly set. Fill with mousse, custard, ice cream—anything goes!
Enjoy! If not using right away, store in the fridge (or freezer) tightly covered in plastic wrap or foil, to avoid it absorbing the smells of your other food (not that your food is smelly, it’s just a fact of fridges and freezers!). Most of the common fillings for this crust require refrigeration, but it can be kept at room temperature for 2-3 days if need be.
