
Pumpkin Tiramisu
Simple, egg-free tiramisu full of pumpkin and spice and made with easy, homemade ladyfingers. This classic dessert is light yet flavorful and is always a hit at the holidays!
This post may contain affiliate links from which, at no additional cost to you, I may earn a small commission to keep this site running. Only products I myself would or do use are recommended.

Happy pumpkin everything! Yes, I know that mid- to late-October is a bit late in the game to be finally sharing my pumpkin recipes, but it’s been a hectic month for me. I spent hours—countless hours—created thorough, detailed directions for how to teach every single lesson for every single day I will be gone on maternity leave. I pre-created all handouts, assignments, tests, and quizzes for my students, complete with pre-filled grading keys (thank you Google Classroom, for making this easy!). I had to do this for the end of first semester and the beginning of second semester (because December due date with a high chance of preterm labor).
It took me a solid two months to fully prep everything my sub will need, but it is done and I am fully confident she won’t skip a beat.
Which means that as soon as I’m on Thanksgiving break, I can actually BE on break and be done for a few months. It’ll be a completely new experience, since my daughter came a month early and I hadn’t even met my sub or prepped nearly anything useful.
Live and learn.
Why this recipe works
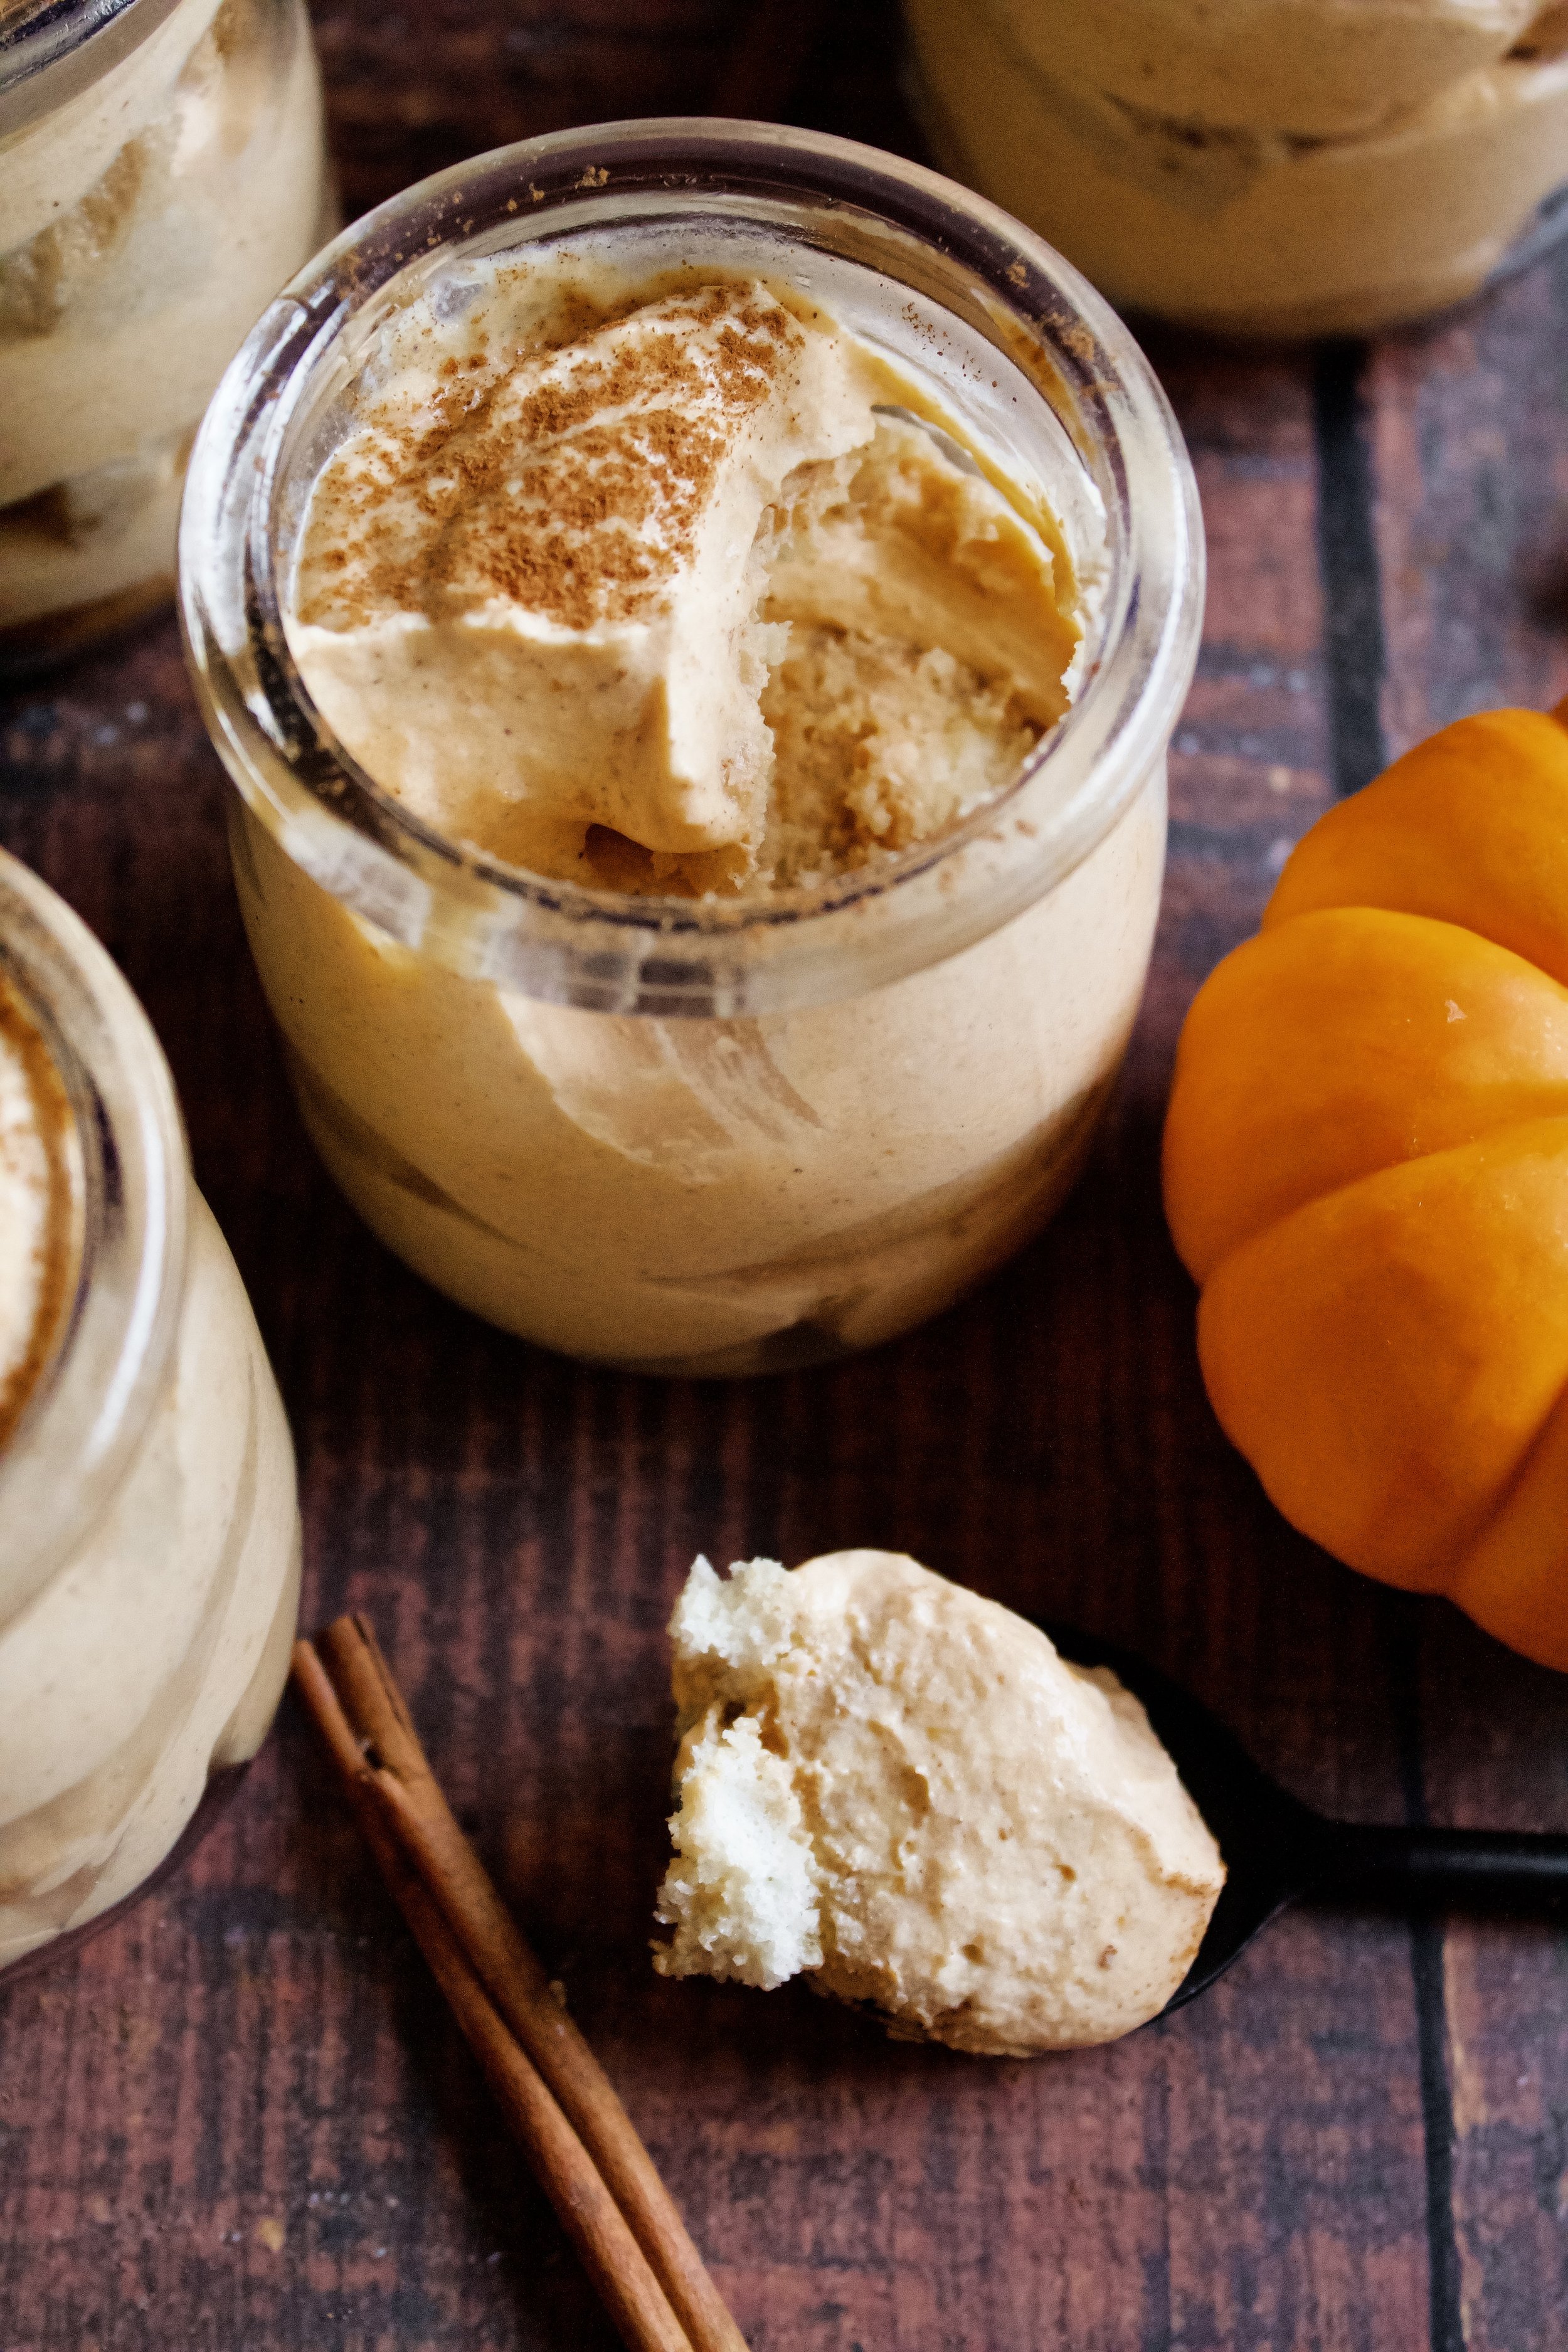
The ladyfingers are SO easy to make and using homemade makes all the difference. If you cannot make them, be sure to buy the soft kind from the store. Too crispy of ladyfingers means your tiramisu will dry up while it sets. The key is to pop them in the freezer for a few minutes before dipping into the espresso soak, so that they do not fall apart.
The pumpkin cream is to die for. I had leftovers that I just ate with a spoon—no regrets. It’s a pretty simple recipe, and you can adjust it to taste. It will seem a bit loose at first, but it will firm up as it sets in the fridge and soaks into the ladyfingers a bit. The only tweak you’d want to avoid is adding extra pumpkin, as this will make the filling too loose. If you really, really do want a lot of extra pumpkin flavor, buy a “drier” brand like Libby’s, which has more of mashed potato texture or use paper towels to blot and dry out looser pumpkin (like Trader Joe’s, which is more like applesauce).

Key ingredients
Homemade ladyfingers. I prefer homemade, as they just have such a light texture and fresh taste. If using store bought, get the soft kind (not the hard ones that are crispy).
Pumpkin puree. Use plain pumpkin, not pumpkin pie filling.
Mascarpone cheese. One important step is not to over-mix the mascarpone, as it will turn grainy. For each step, mix just until combined.
Powdered sugar. This you can definitely adjust to taste. I like a sweeter tiramisu, while some people want it lighter and less sweet.
Vanilla extract. Use pure vanilla, not imitation.
Pumpkin pie spice. Try to use a good brand, as it will have a better (and less bitter) flavor.
Cinnamon. Using a quality cinnamon helps ensure you get a vibrant flavor. I like adding extra for a better balance of flavor, even though pumpkin pie spice has cinnamon in it.
Instant coffee/espresso. You could also make extra strong coffee and pour it over ice—the key is you want a cool coffee soak that’s not just old coffee that went cold.
Coffee or pumpkin liqueur. This is entirely optional, and I usually sub a splash of vanilla instead.
Heavy cream. Make sure you have heavy whipping cream (also known as double cream), not whipping cream.
How to make pumpkin tiramisu
1. Make the ladyfingers in advance. You can use store bought if they are soft. You can also make these up to a month in advance and freeze them—freezing makes it easier to dip them.
2. Prep the coffee soak. You can either make a strong coffee poured over ice or mix espresso powder with cool water. Add the sugar, spices, and either liqueur or vanilla (I usually use vanilla since I have a five-year-old who wants to try all the things). Set aside so it can all dissolve and blend together.
3. Stir pumpkin, sugar, spices, and vanilla then add the mascarpone. Adding the mascarpone after the rest is blended prevents over stirring and causing it to turn grainy.
4. Beat whipped cream until soft peaks. You want soft but sturdy peaks—it should still be shiny but hold its shape a bit. This is enough to give structure without forcing you to over stir the pumpkin mascarpone. If in doubt, go for slightly stiff peaks that will give more structure.
5. Fold whipped cream into pumpkin. I usually do this in 2-3 batches, but you can do it all at once. It’s a personal preference based on what’s easier to do.


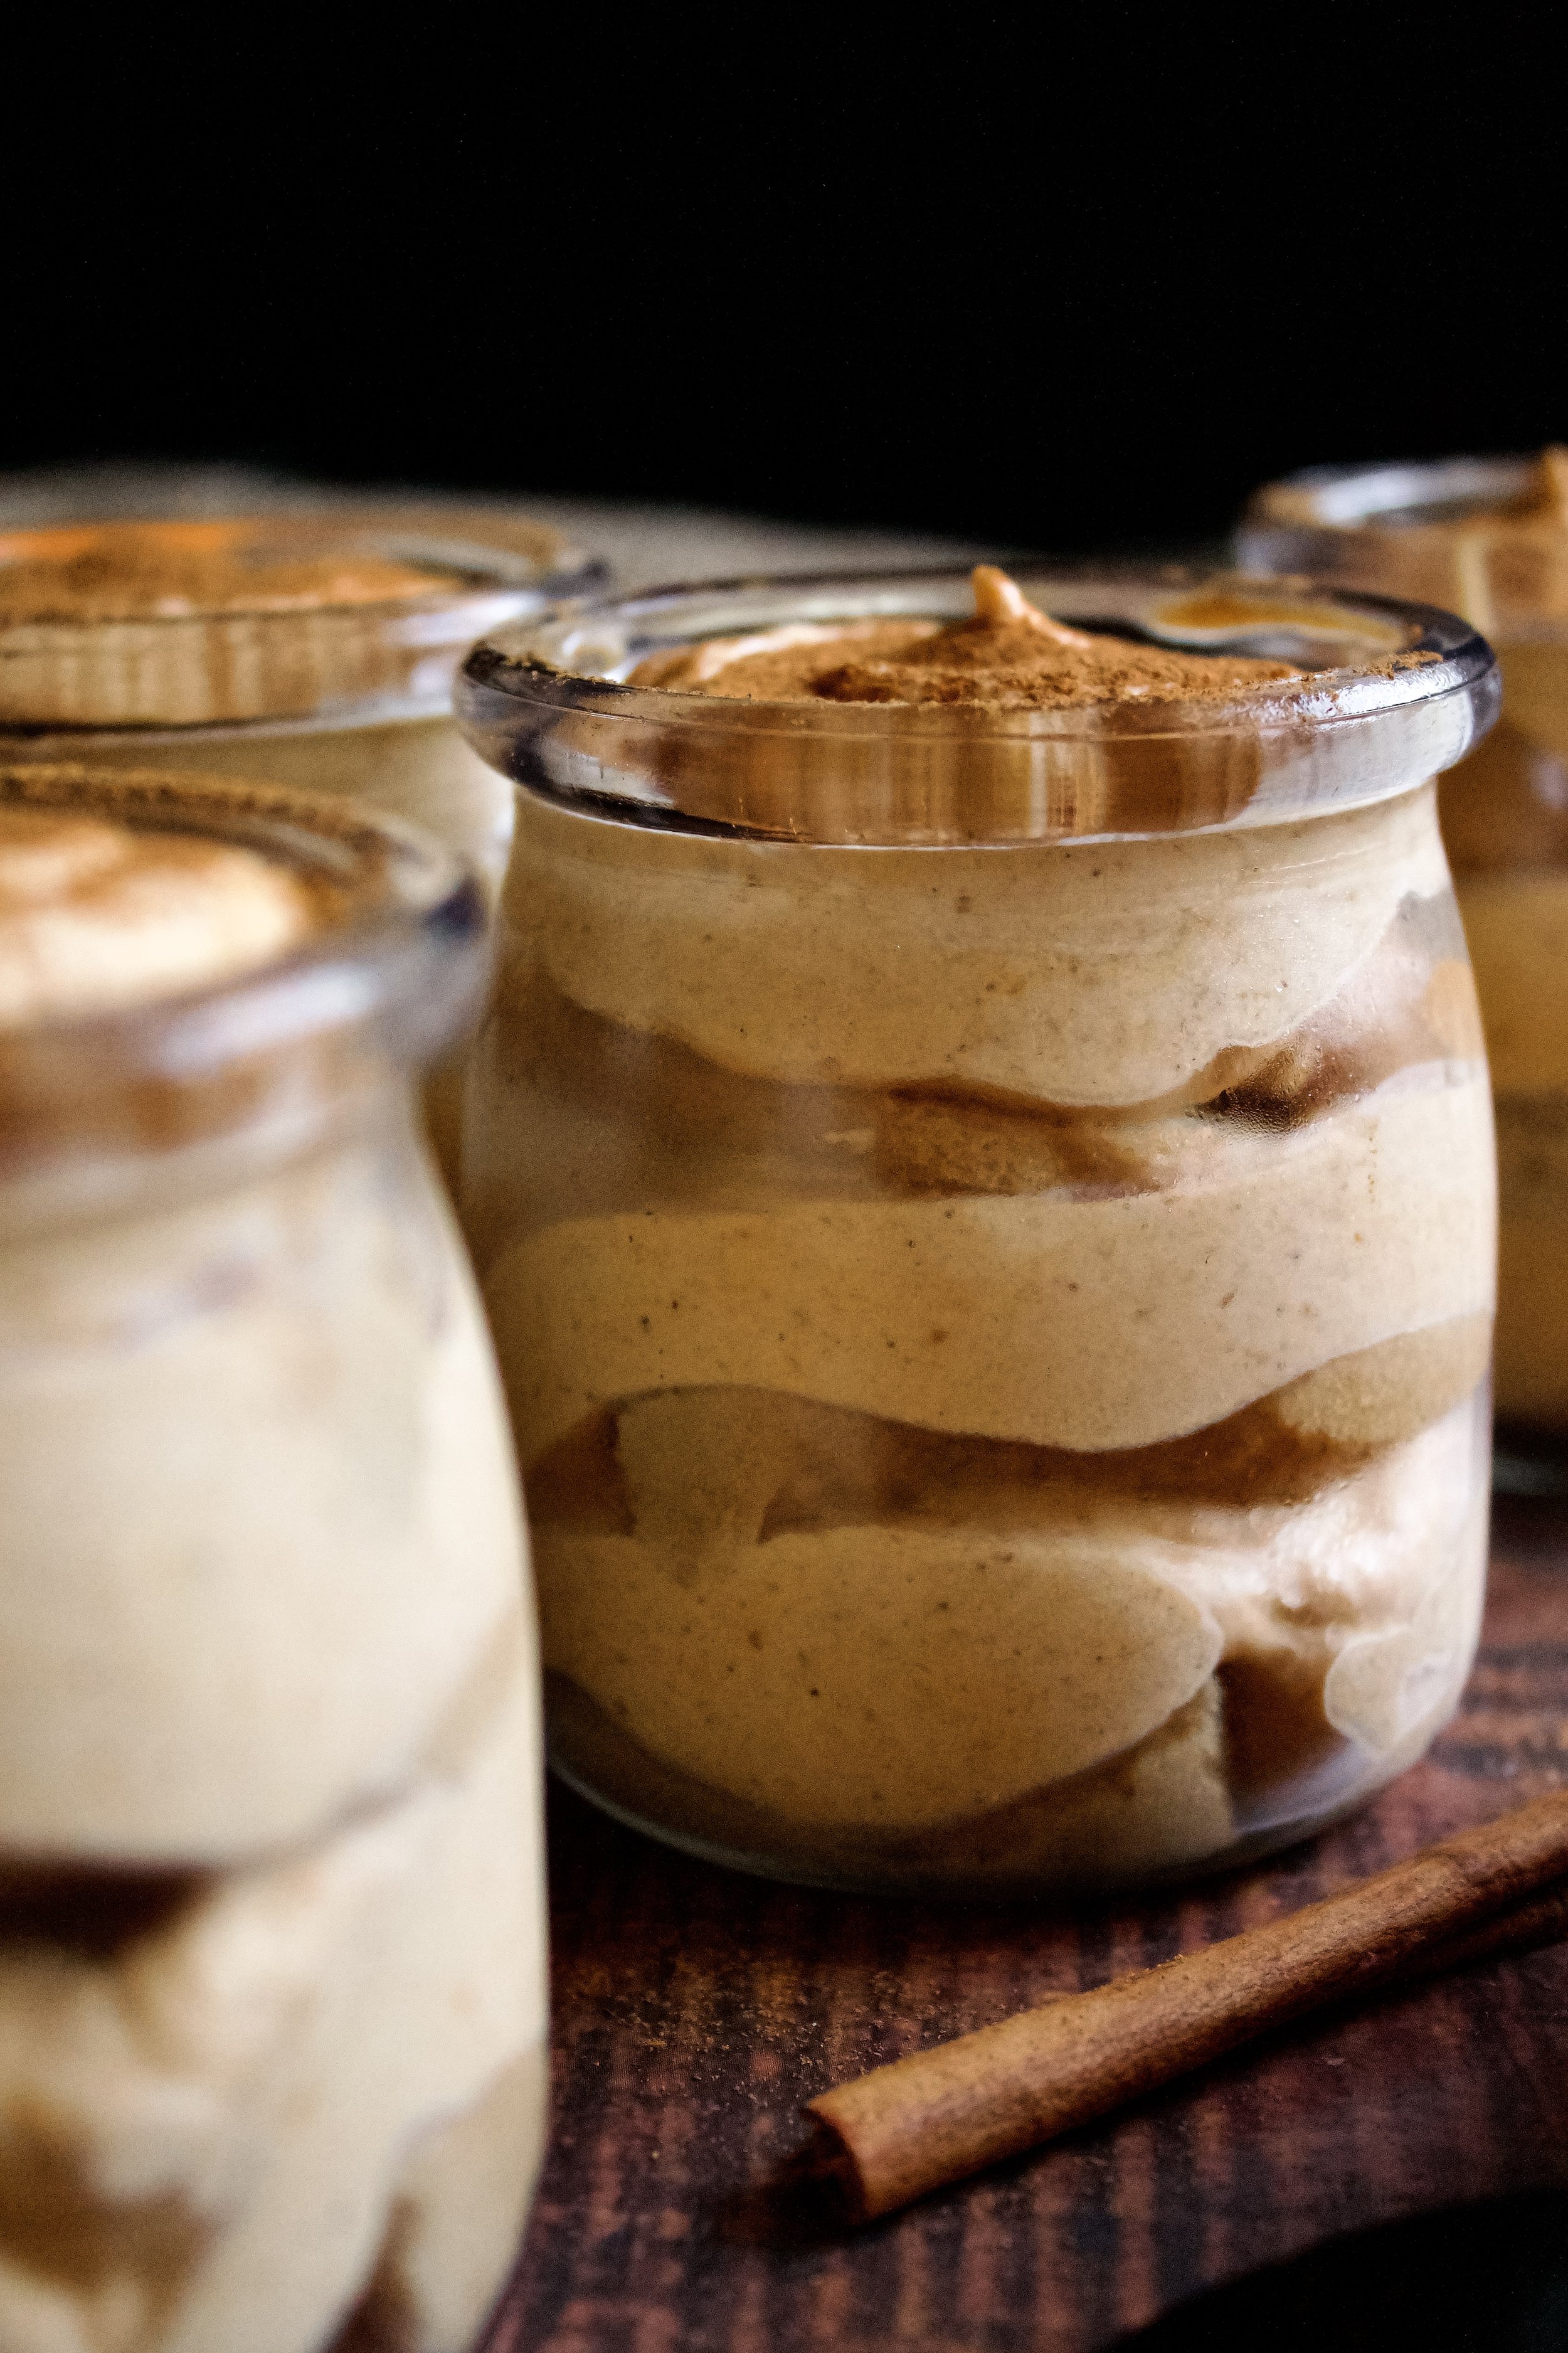
6. Dip ladyfingers into coffee and layer into pan. You’ll use about 1/2 of the ladyfingers. If using an 8x8 pan, arrange in a layer, breaking cookies in half as needed to fill the bottom of the pan. If using individual cups, don’t worry about perfectly covering the bottom, and instead use about 1 to 1.5 cookies per layer.
7. Spread 1/2 of the pumpkin on top. Spoon it gently so you don’t press down on the cookies when spreading it evenly. If using individual glass cups, I suggest piping it, as this creates cleaner lines.
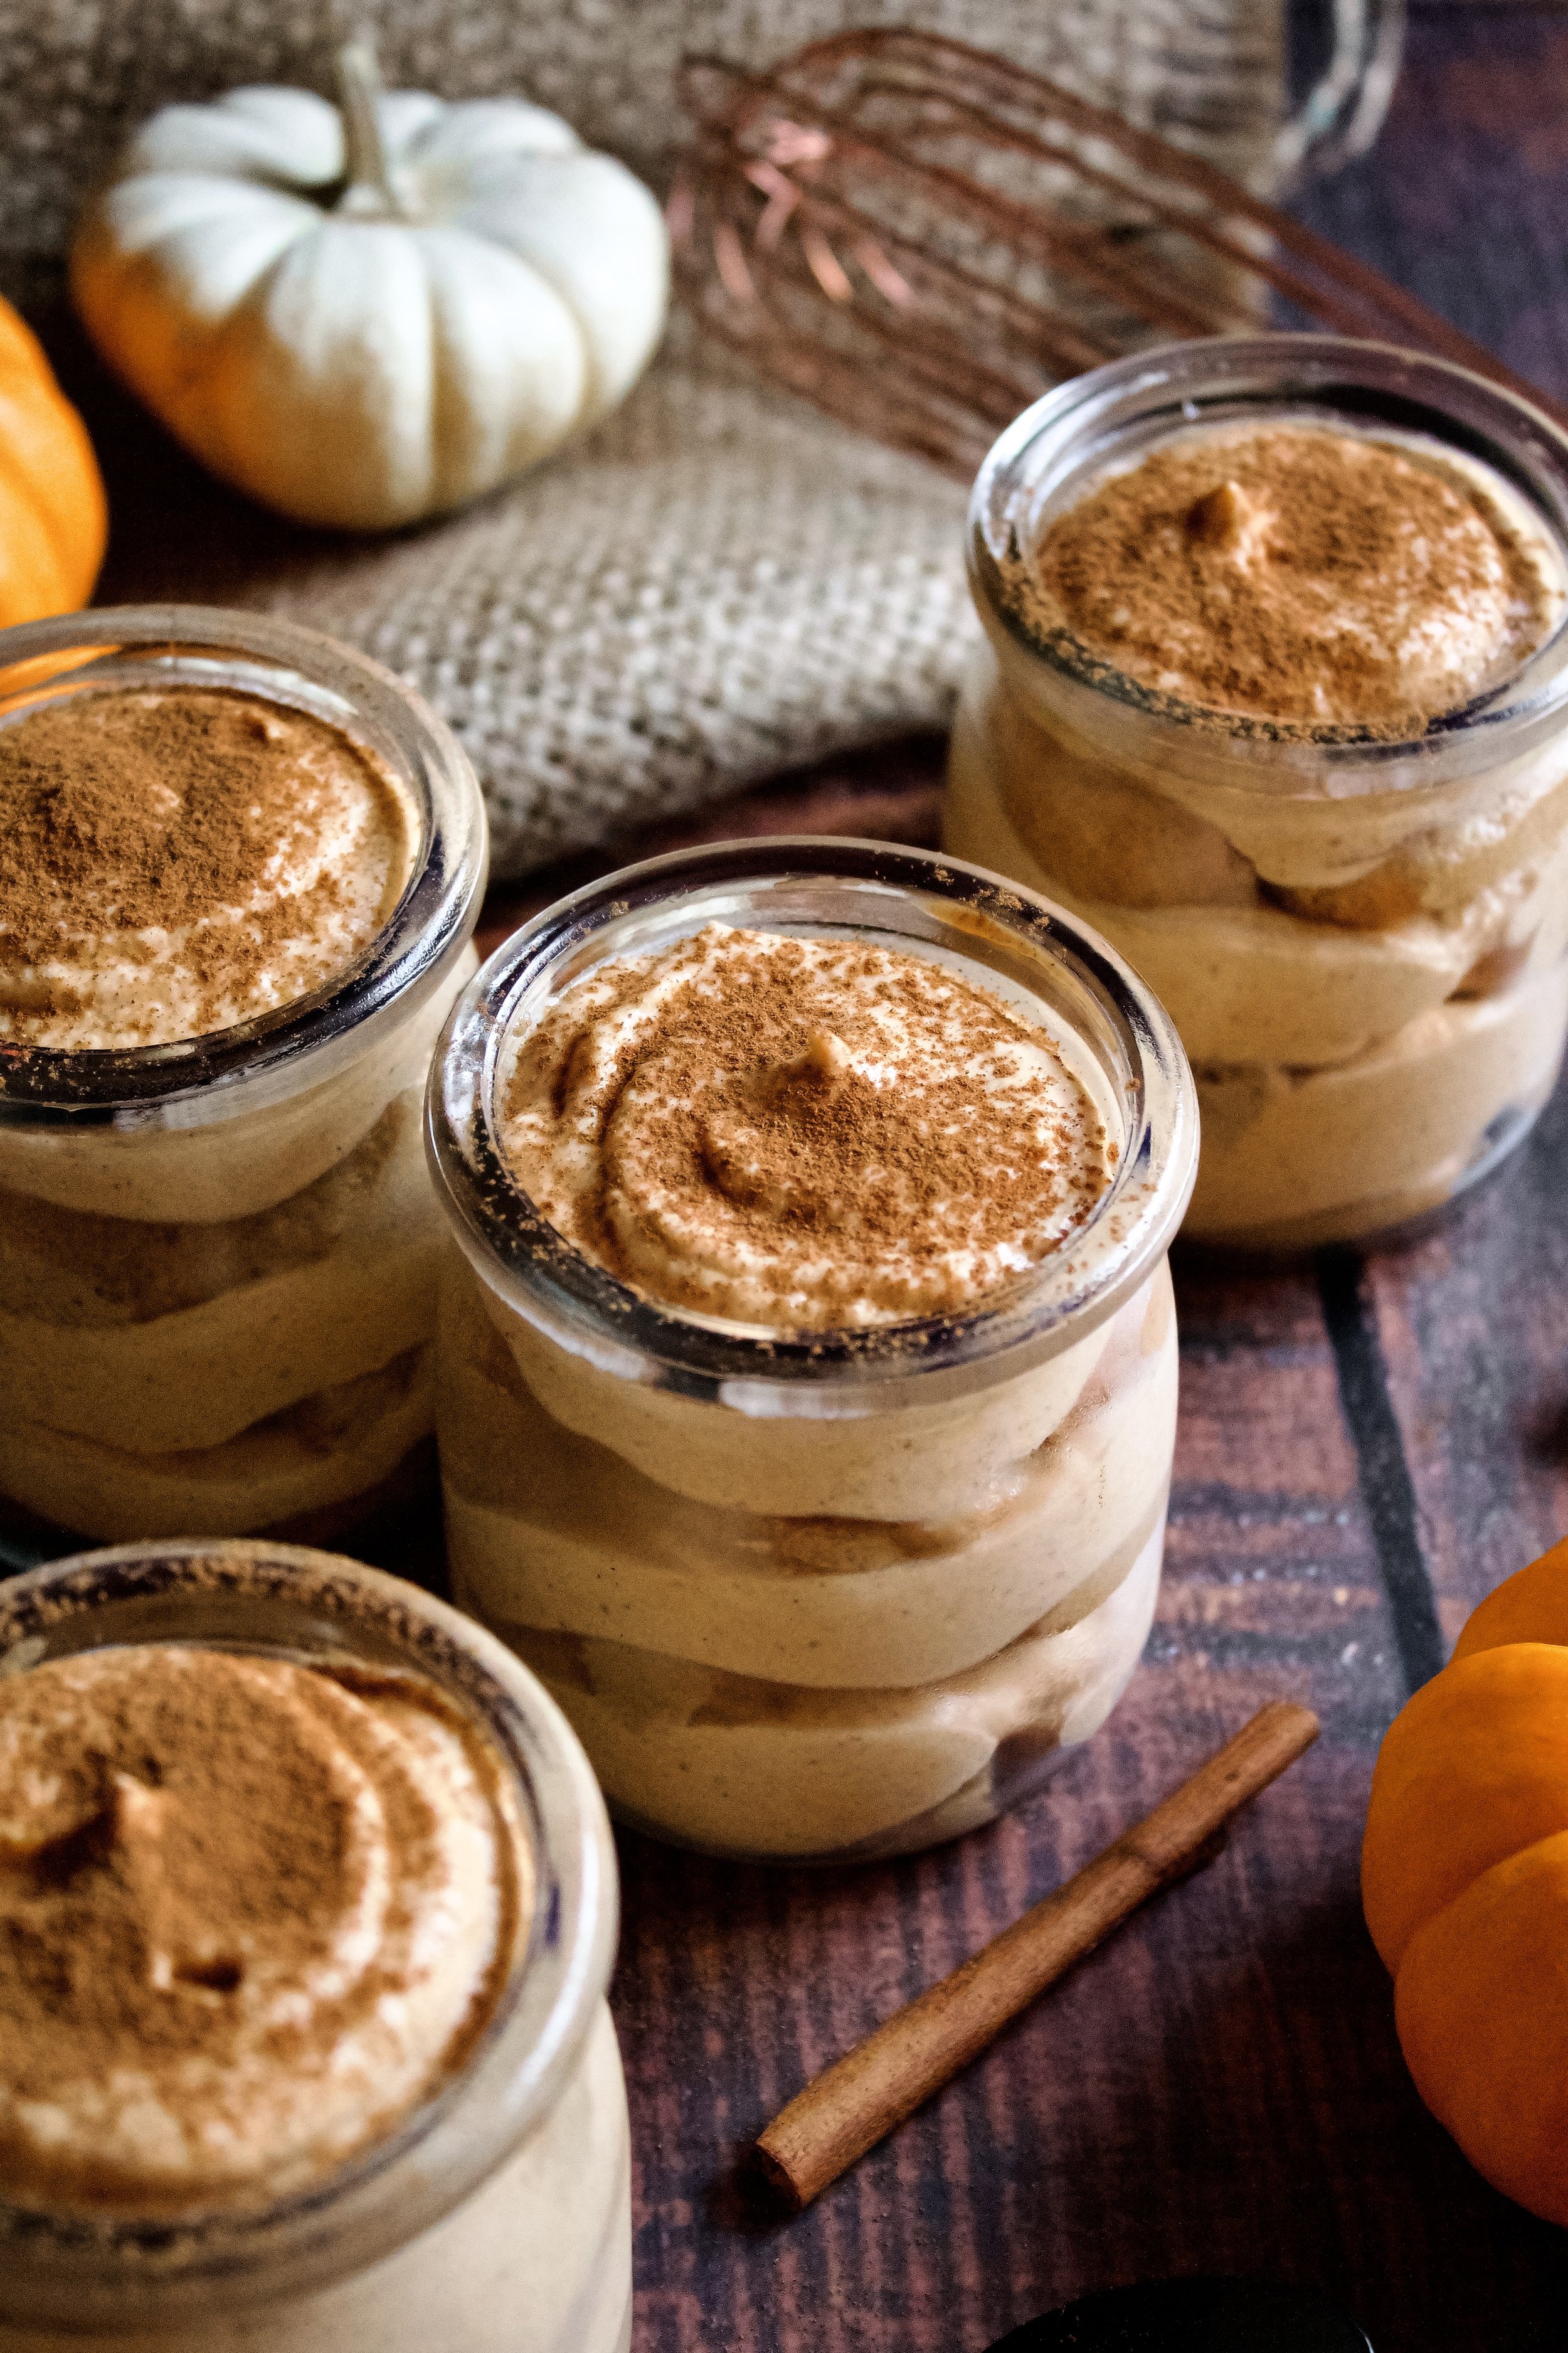
8. Repeat until you have three layers of ladyfingers and pumpkin. If using a glass container, it’s ideal to clean the edges as you go to create that quintessential tiramisu look. Top with a sprinkling of cinnamon (I use a small mesh sieve to get a polished look).
9. Chill at least 2 hours. This is important, as the pumpkin is thinner and requires more time to set up.
Enjoy!


Tips and FAQ’s
Don’t over stir the mascarpone
Don’t stress if you do over stir it. Mascarpone can turn grainy, which isn’t very pretty, but it still tastes the same. I like to stir the pumpkin in just until it’s mostly combined, then as I’m folding in the whipped cream, it will mix it fully. The addition of the cream also helps thin out the mascarpone and stop it from turning grainy as you mix.

Can I make this ahead of time?
Yes! Tiramisu freezes beautifully. Just cover well and freeze. You can do this to a whole pan or individual servings. Let it defrost overnight (or for at least 4 hours) in the fridge before serving. If you aren’t making this well in advance, you can refrigerate it for 1-2 days before serving, as well—again, just cover it well beforehand. For both methods, it’s ideal to save the cinnamon sprinkle on top for when you are ready to serve, as it can bleed into the filling and turn it a weird brown instead of the ideal fancy dusting.

What if my pumpkin is thin?
I used Libby’s for this particular batch (thank you, Costco, for the superfluous amount of pumpkin!), but I usually use Trader Joe’s pumpkin, which is on the watery side. Think of the difference between applesauce and mashed potatoes (the kind you can scoop that will somewhat hold their shape—not potato puree). Both work just fine for me, because they both set up in the fridge. If your pumpkin is more like applesauce, you can optionally blot it with a paper towel to remove some of the moisture, but it’s not necessary.
*Do I have to use espresso powder?
No! You can absolutely used brewed coffee if you know how to instantly cool it. You can sub about 1/2 to 2/3 cup double strength coffee poured over ice (to instantly cool it–you don’t want hot coffee that’s just been left out until cooled). You can also pour about 2-3 shots of strong espresso over ice and add cold water (basically making an iced Americano), until you have about 1 cup of cold espresso. The key is not having any bits of ice left, because they will make dipping the cookies difficult.


Pumpkin Tiramisu
- prep time: 15-20 minutes
- bake time: 10 minutes (for the ladyfingers)
- chill time: 2 hours
- total time: 2 hours, 30 minutes
servings: 9-12
Ingredients:
for the ladyfinger layer
- one batch homemade ladyfingers (or about 30 soft, store bought)
- 1 cup (240g) cool, filtered water
- 1 teaspoon (3g) good quality instant espresso or instant coffee*
- 2 tablespoons (16g) powdered sugar
- ½ teaspoon (1g) pumpkin pie spice
- 2 tablespoons (30g) coffee or pumpkin liqueur (can sub 1 teaspoon vanilla extract)
for the pumpkin mascarpone cream
- ¾ cup (180g) plain pumpkin puree
- ¾ cup plus 2 tablespoons (114g) powdered sugar, divided
- 1 tablespoon (13g) pure vanilla extract
- 1 teaspoon (3g) pumpkin pie spice
- 1 cup (227g) mascarpone cheese, room temperature
- ¾ cup (180g) heavy whipping cream, cold
Instructions:
- Make the ladyfingers ahead of time. They can be stored on the counter in an airtight container for 1-2 days or frozen in an airtight container for 1 month.
- Prep the coffee soak. Mix the water and instant espresso in a medium, shallow bowl until well-blended. See note above* if using regular brewed coffee or an espresso machine. Add the powdered sugar, pumpkin pie spice, and liqueur or vanilla. Stir well then set in the fridge so it fully dissolves while you make the filling.
- Make the pumpkin cream. Stir together pumpkin, powdered sugar, vanilla, and pumpkin pie spice until well-combined. Add the mascarpone and stir just until combined (doing this in two steps prevents a grainy cream).
- In a separate bowl, beat the heavy cream until soft peaks form. You want them to hold their shape a bit but still be a bit soft and floppy. The key is some shape but still shiny. If you’re unsure, it’s okay to go closer to stiff peaks, but as soon as the shine begins to disappear, stop mixing.
- Fold the whipped cream into the pumpkin mixture until fully combined.
- Layer the tiramisu. Have either an 8x8 pan, mini glass containers or mason jars, or a medium trifle bowl (or something of equivalent size) ready. Dip the ladyfingers one-by-one into the soak (very briefly–I just stick one side in then flip it in the bowl to get the other side wet then remove–all within about 1-2 seconds). Set in your pan or mini container. If using an 8x8 or equivalent sized pan/bowl, you’ll use about ½ of the ladyfingers on the bottom layer. You may need to break some in half to get one even layer. If using mini containers or mason jars, place about 1 to 1 ½ ladyfingers on the bottom. It may not be perfectly covered, but that’s okay.
- Next, gently spoon ½ of the mixture on top of the ladyfingers, spreading gently until even. If using mini containers, use a piping bag to pipe a swirl of pumpkin cream–the top of the cream should only reach about ⅓ of the way up the side (unless using a very short container–then go for about ½ of the way up).
- Repeat this process, using the remaining cookies and cream (unless using jars tall enough to create 3 layers).
- Refrigerate at least 2 hours, to set the cream and let everything come together. This ensures a clean slice/serving.
- Dust with a light sprinkle of cinnamon (I use my small fine mesh sieve for this).
Enjoy!
Store in an airtight container.
