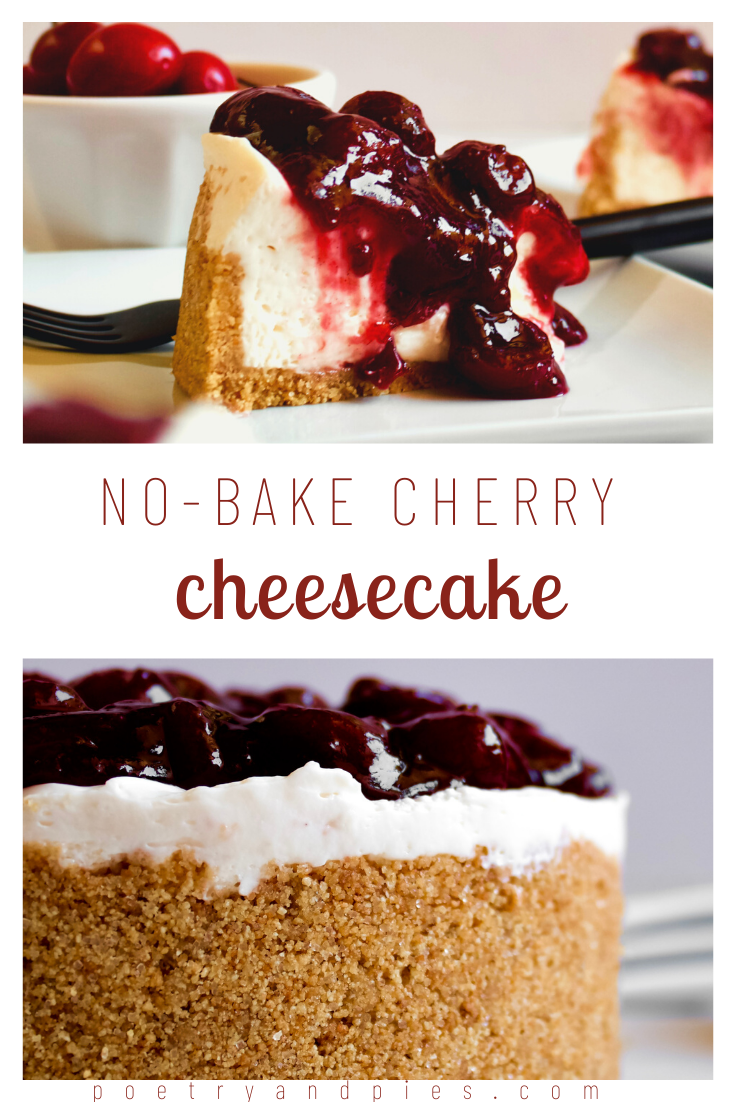
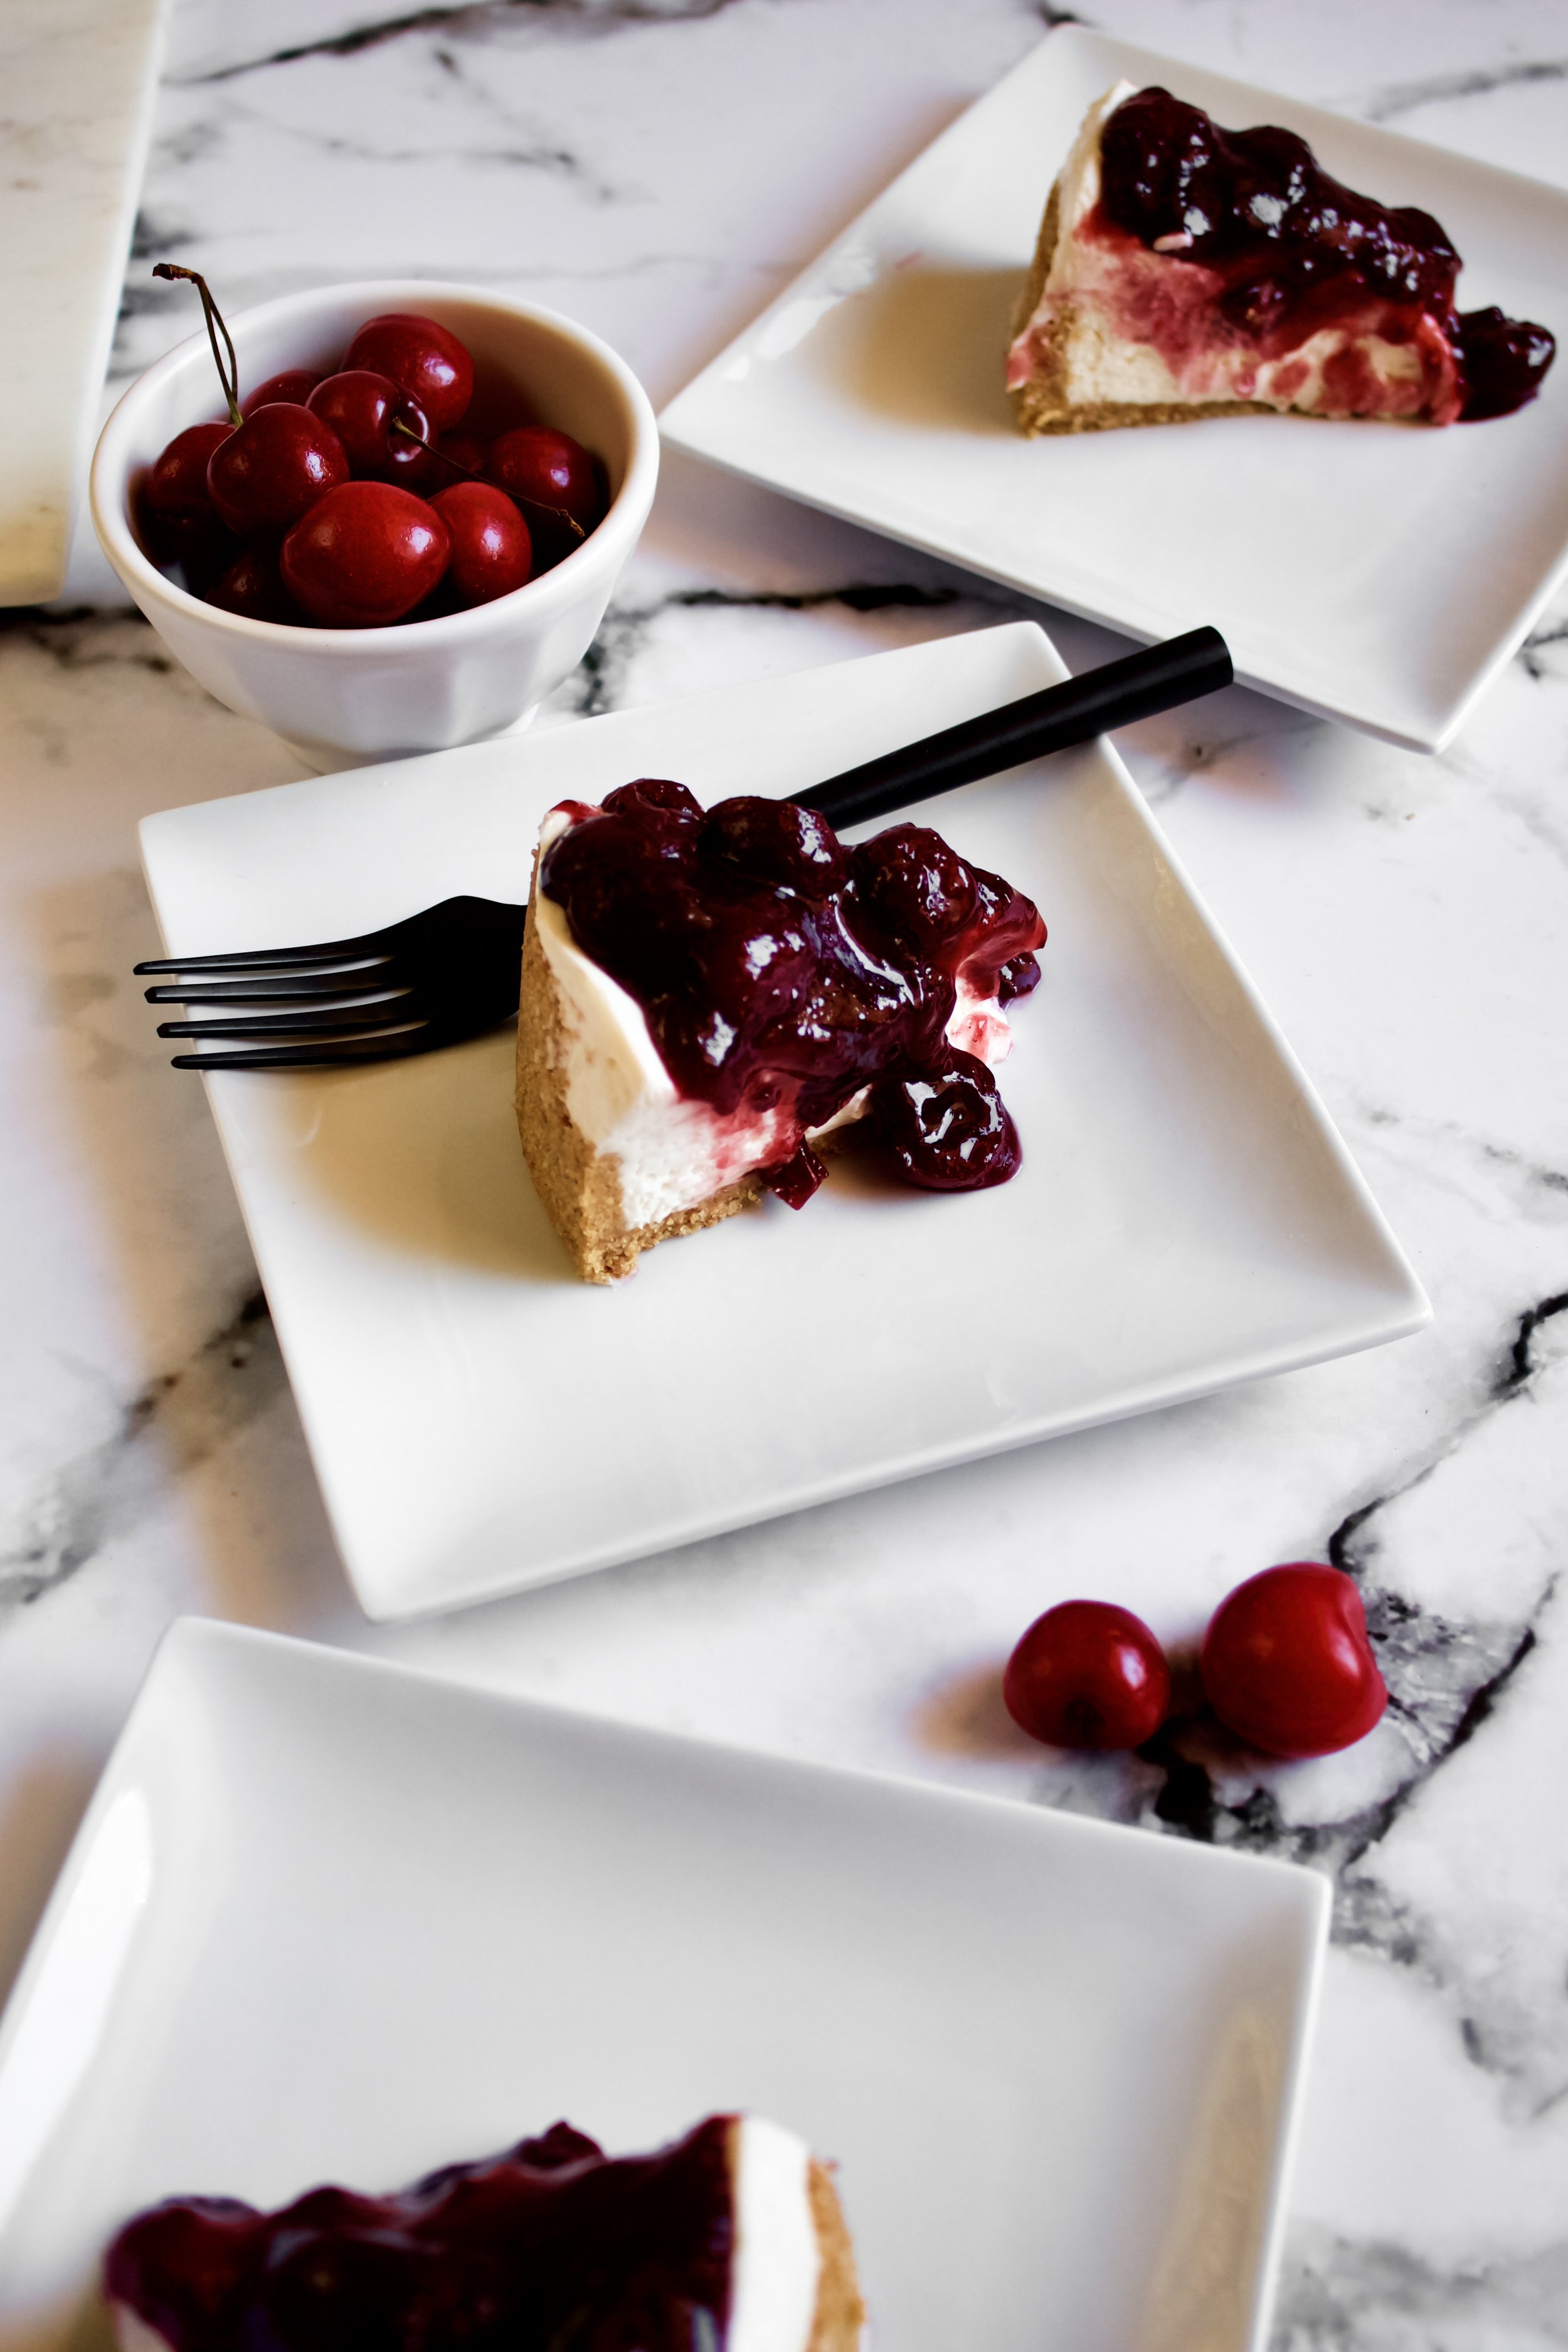
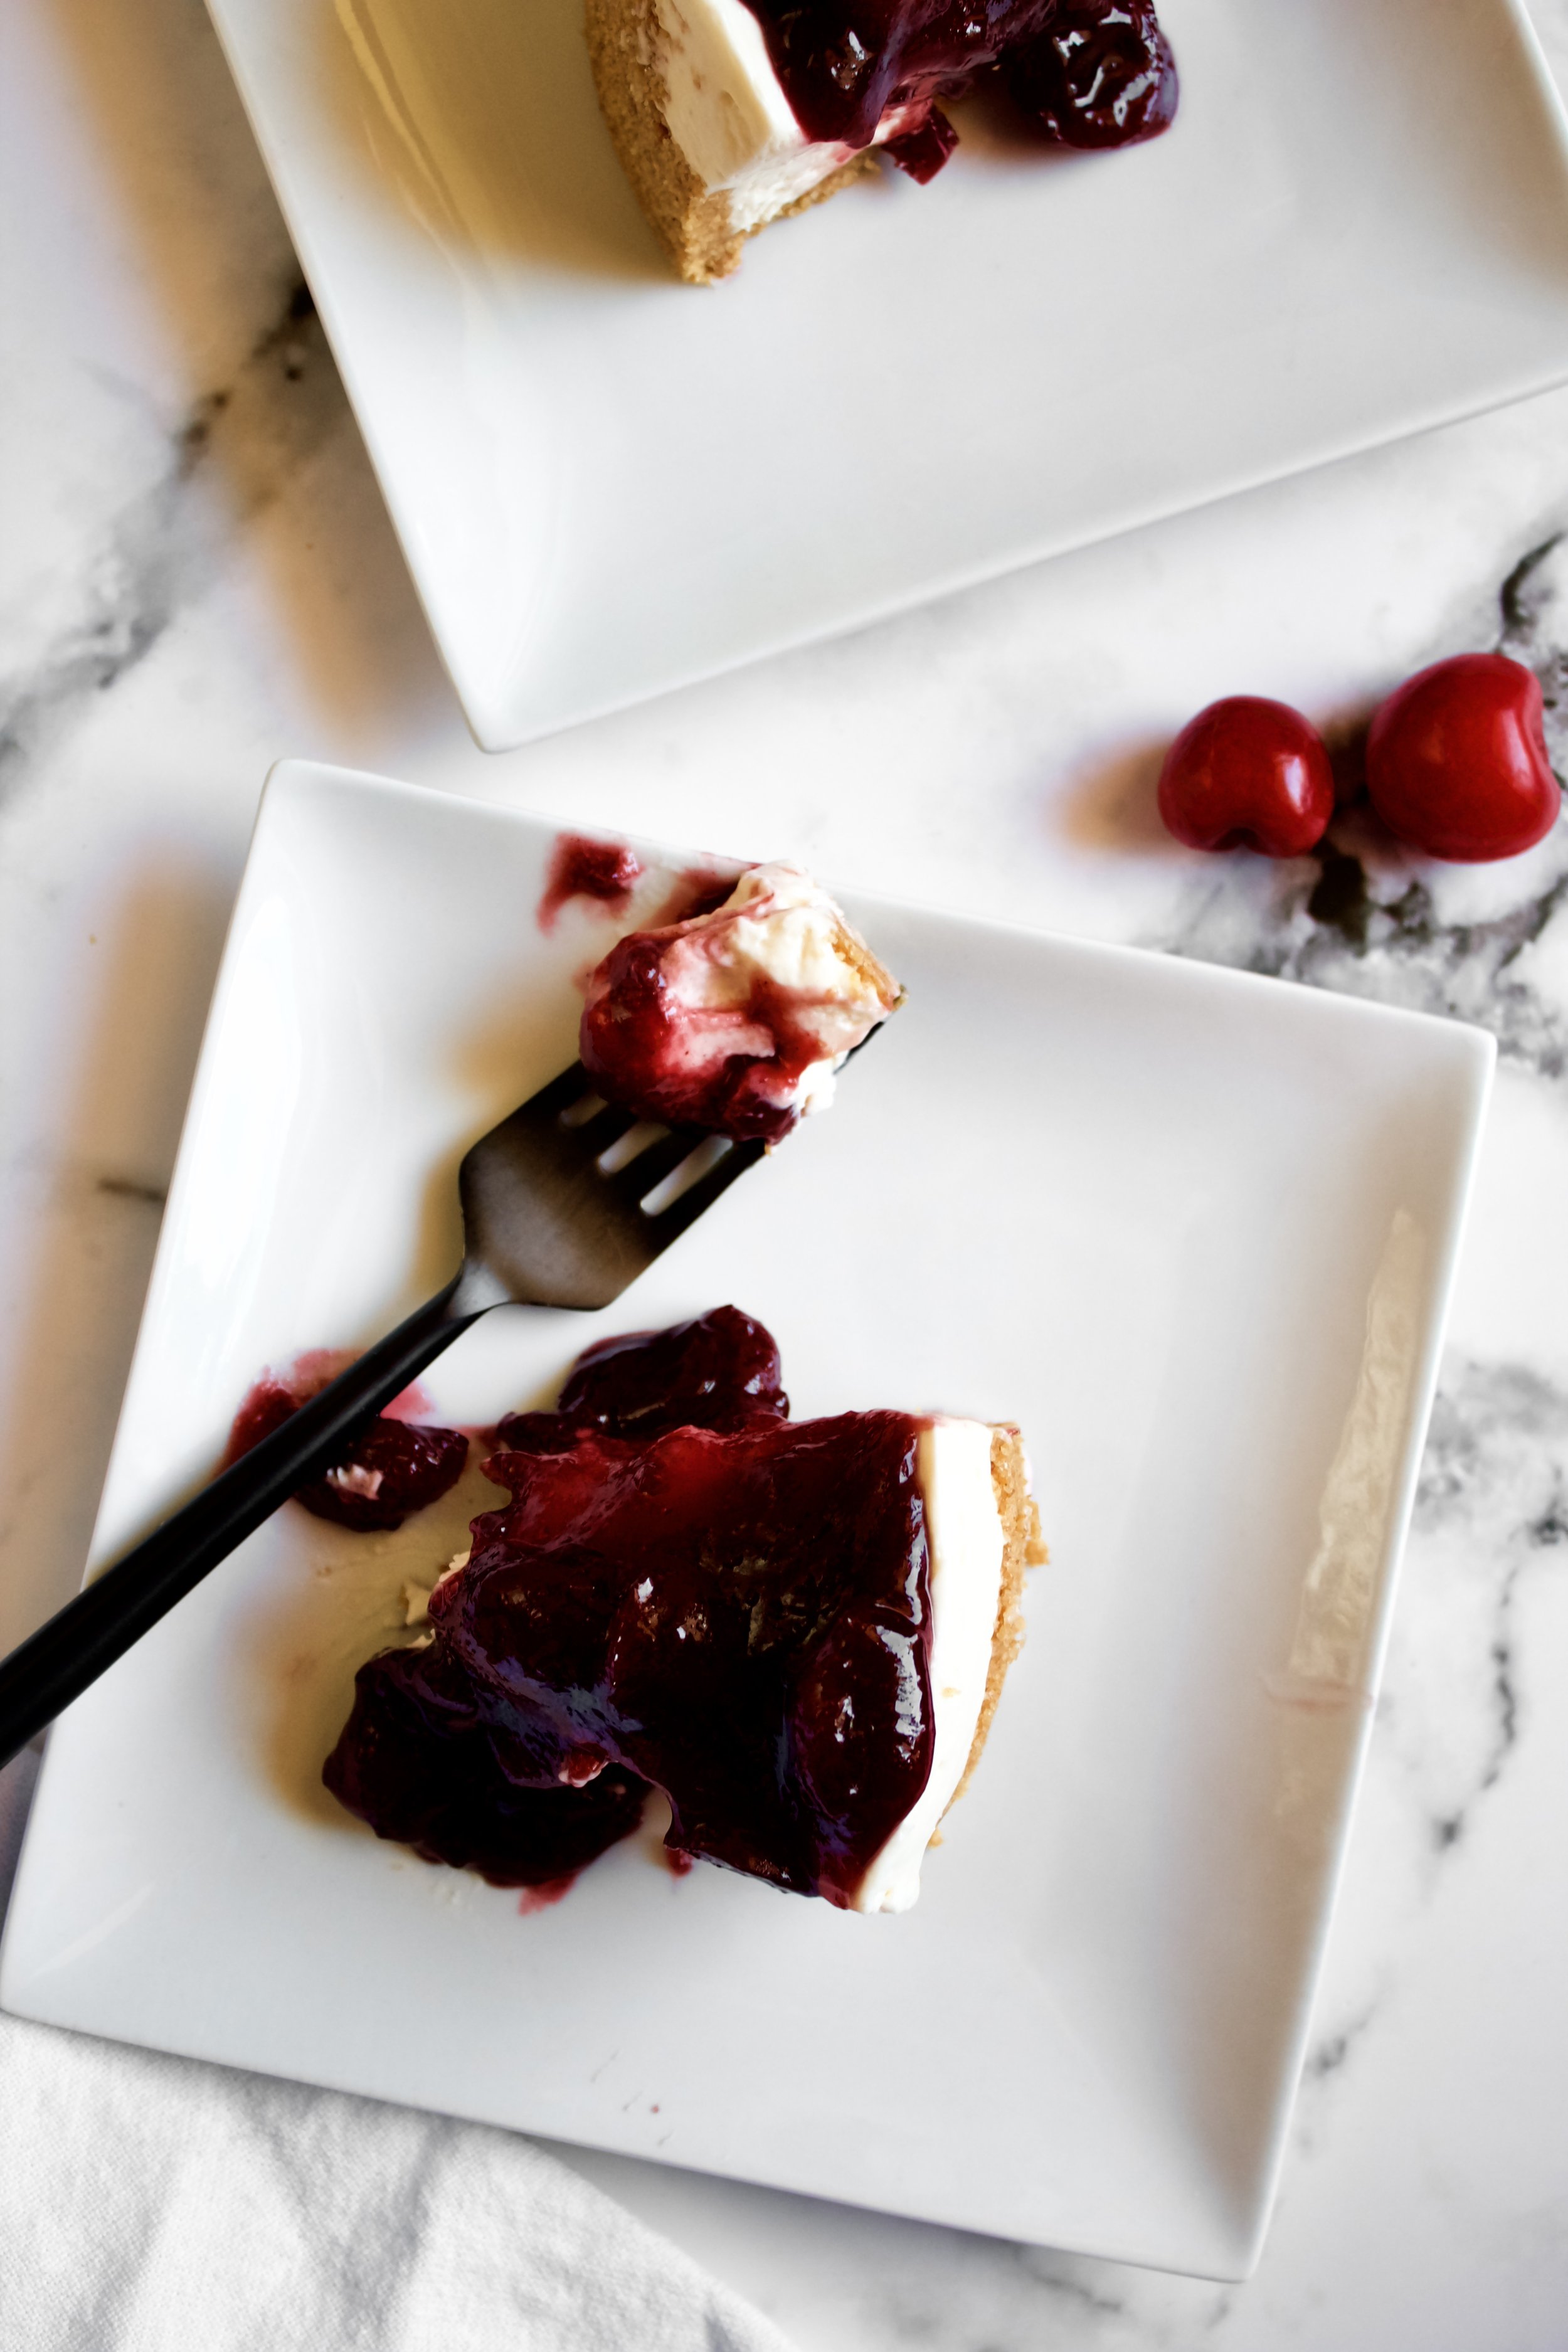
No-Bake Cherry Cheesecake
Simple, delicious cheesecake with a perfectly smooth texture, topped with homemade tart cherry pie filling. This dessert is an easy no-bake way to use up those summer cherries without ever having to turn on your oven!
This post may contain affiliate links from which, at no additional cost to you, I may earn a small commission to keep this site running. Only products I myself would or do use are recommended.

I’ll be perfectly honest: I don’t opt for cheesecake very often. It’s fine and all, but I usually find it too dense. I’ll have a slice from The Cheesecake Factory every few years, but I otherwise avoid most cheesecakes unless it’s the white chocolate cheesecake from Costco. That stuff is amazing. So light, so flavorful, perfectly sweet.
So, when I had an excess of cherries last summer, I decided I’d try making a cherry cheesecake modeled after my Costco favorite. Only it was deathly hot and I had no interest in baking anything.
So, I did some experimenting and found a no-bake cheesecake recipe that was as delicious and light as the Costco treat (which I’m pretty sure is baked with magic, because it doesn’t have that heaviness of an egg-based cheesecake).
I found that the key is the right balance of sugar, cream cheese, and whipped cream. You want it light and fluffy, but not to the point that it’s just a cheesy whipped cream. You want it sweet, but not sickly so. And you need to whip up that cream cheese well so it’s nice and smooth, or you’ll lose all the fluff of the whipped ream.

Why this recipe works
Cream cheese, powdered sugar, and vanilla are mixed well, until the cream cheese is soft and pliable. This makes it simple to fold in whipped cream without losing volume. The simple combination of the two creates that light, fluffy texture while still giving a silky smoothness and vibrant cream cheese flavor. The crust is a simple graham cracker base, which doesn’t have to be baked yet still creates a nice crunch. And the topping is so simple and, for lack of a more “baking friendly” term, meaty. Cutting pitted cherries in half is key to packing in as many cherries into a bite as possible. You end up with less gelatinous sauce and more simple, delicious cherry flavor.

Key ingredients
Cream cheese. I like to use full fat so it’s creamier, but you can use lowfat if you’d like. Be sure it’s room temperature so it blends easily.
Powdered sugar. This is key to making a smooth cheesecake—there’s no need to whip the cream cheese and sugar for forever to dissolve the sugar.
Vanilla. Use pure vanilla, not imitation.
Heavy whipping cream. Cold, fresh, heavy whipping cream is what gives a soft, light texture to this cake.
Graham crackers. You can use any kind, but I prefer plain or cinnamon.
Sugar. Don’t forget to pulse this with the graham crackers to make it nice and fine. Otherwise, the large crystals will cause the crust to crumble.
Butter. Be sure to measure this carefully so your crust isn’t soggy.
Cherry pie filling. You can use any recipe or store bought filling you want, but I prefer homemade because it’s less goopy and more cherry-y.

How to make no-bake cherry cheesecake
1. Grind graham crackers and sugar.
2. Stir in melted butter. For this particular recipe, you can just add melted butter to the food processor and pulse it a few times to mix.
3. Press into pan.* Use a flat bottomed glass or measuring cup to press the graham cracker crust in firmly. Have it got at least partway up the side of the pan, but don’t worry about it being as high as the filling—that won’t seep underneath it. (*See note below if not using a springform pan.)
4. Beat cream cheese, powdered sugar, and vanilla until very smooth. It should be smooth and spreadable like frosting.
5. Whip heavy cream to soft peaks. Avoid stiff peaks (when the cream turns matte and holds its shape firmly).


6. Fold into cream cheese. Fold it in 3 additions to keep the volume and creaminess.
7. Spread over crust. Smooth out the top.
8. Chill. It needs several hours in the fridge, so feel free to make this a day ahead.
9. Top with cherry pie filling. You can make this up to 2 weeks in advance or you can easily make it while the cheesecake chills. Just don’t use hot filling on top of chilled cheesecake!
Enjoy!


Tips and FAQ’s for this recipe
*What if I don’t have a springform pan?
That’s okay! I made a mini cheesecake in these photos, so I used a 6” cake pan and lined it with a strip of acetate that was flush and perpendicular to the sides. After pressing the crust in, I secured it at the top with tape. This ensured I was able to remove the cake from the pan.
Can I make this a smaller or larger size?
Yes! This is written for a 9” springform pan, since that’s the most common kind people own. However, the cake in these pictures was a 6” one. Conversions are below. If you need help converting it, leave a comment and I can do the math for you!
For an 8”, 9”, or 10” pan, keep the recipe the same.
For a 6” or 7” pan, halve the recipe.
If you want a 4” cake for one to two people, use a quarter of the recipe (or divide the full recipe into 4 mini springform pans or 8-12 mini mason jars for individual servings).
If you happen to have a 12” pan you’d like to use (impressive!), you’ll want to double the recipe.

Can I make this in advance?
Yes! The cherry pie filling will keep for 2-4 weeks in the fridge. The cheesecake itself can be refrigerated for 2-3 days, if well-covered, or frozen for 2-3 weeks. Just be sure you’ve covered it very well to avoid freezer burn or any odors from the fridge or freezer seeping into the cake. If you do freeze it, let it defrost in the fridge overnight.
Can I use any cherry filling?
Yes! If you have a recipe you love or a store bought kind you like, go for it! I just really like using halved cherries and a less gelatinous filling. It holds its shape but isn’t goopy or overly thick or sickly sweet. But it’s all about personal preference!
My cheesecake tools
Here are my must-have tools I use for making this cheesecake. Affiliate links provided.
Acetate strips or a springform pan
Handheld mixer (or a stand mixer)
All-rubber spatula (this makes scraping the bowl easier as the filling doesn’t get all over a wooden handle!)
Cherry pitter, citrus juicer, and microplane zester for the pie filling
Mini food processor for the graham cracker crust

No-Bake Cherry Cheesecake
- prep time: 45-50 minutes (includes making the cherry pie filling)
- chill time: 5-8 hours (overnight is ideal)
- total time: 8 hours, 30 minutes
servings: 12-16
Ingredients:
- half a batch of tart cherry pie filling (or 14 ounces store bought)
for the graham cracker crust
- 12 full graham crackers
- 6 tablespoons (25g) sugar
- 6 tablespoons (28g) butter, melted
for the cheesecake filling
- 24 ounces (681g) cream cheese, room temperature
- 1 ½ cups (195g) powdered sugar
- 1 tablespoon (13g) pure vanilla extract
- 1 cup (240g) heavy whipping cream
Instructions:
- Ideally, make the cherry pie filling ahead of time so it can cool and set. It will keep for 2-4 weeks in the fridge, if well-sealed. You can also make it while the cheesecake sets, just be sure to give it an hour or two to chill and set.
make the graham cracker crust
- In a small food processor or blender, grind the graham crackers and sugar until a sandy texture. Add melted butter and pulse a few times until blended.
- Pour out mixture into a springform pan or a cake pan lined with a strip of acetate that is flush with the edges and overlaps by about an inch (you’ll press the crust against the acetate as you build up the sides).
- Using clean fingers or a spatula, spread the mixture evenly over the bottom and build up a bit along the edges. Then, switch to a flat bottomed glass or measuring cup. Gently press it around the middle of the crust, helping get the crust evenly distributed as well as firmly pressed into the pan and about an inch or so up the sides. Go slowly, pressing more firmly as the crust takes shape. Be patient! This can take a few minutes, but a perfectly even and firm crust is worth the effort!
- Freeze the crust while you make the filling. If you used acetate, place a piece of tape along the top part to keep it upright while freezing.
make the cheesecake filling
- Place the heavy whipping cream in a large mixing bowl. Beat with a handheld mixer (or use the whisk attachment and bowl of a stand mixer) on medium until frothy. Increase speed to high and beat until soft peaks form. It should hold its shape slightly if you turn the beaters upside down but should still be a bit floppy and shiny. Place in the fridge.
- In a medium bowl, combine the softened cream cheese, powdered sugar, and vanilla. Beat with a handheld mixer (or use the whisk attachment of a stand mixer–for either option you don’t need to wash the beaters/whisk) on medium until combined. Turn up the mixer to high and beat for about 1-2 minutes, until very soft and fluffy and smooth, similar to frosting that is easily spread on a cake.
- Fold in the whipped cream ⅓ at a time, using a rubber spatula and mixing until fully blended each time. It will deflate after the first addition but should be very smooth and fluffy by the third addition.
- Pour into your prepared crust and smooth out the top. Cover with plastic wrap or foil (if using acetate, it may be easiest to simply wrap the whole pan so there’s something for the wrapping to grab onto).
- Refrigerate at least 5 hours, or up to 2 days.
- Spread the chilled cherry pie filling on top before cutting and serving.
Enjoy!
Cheesecake will last, covered in the fridge, for 3-5 days.