
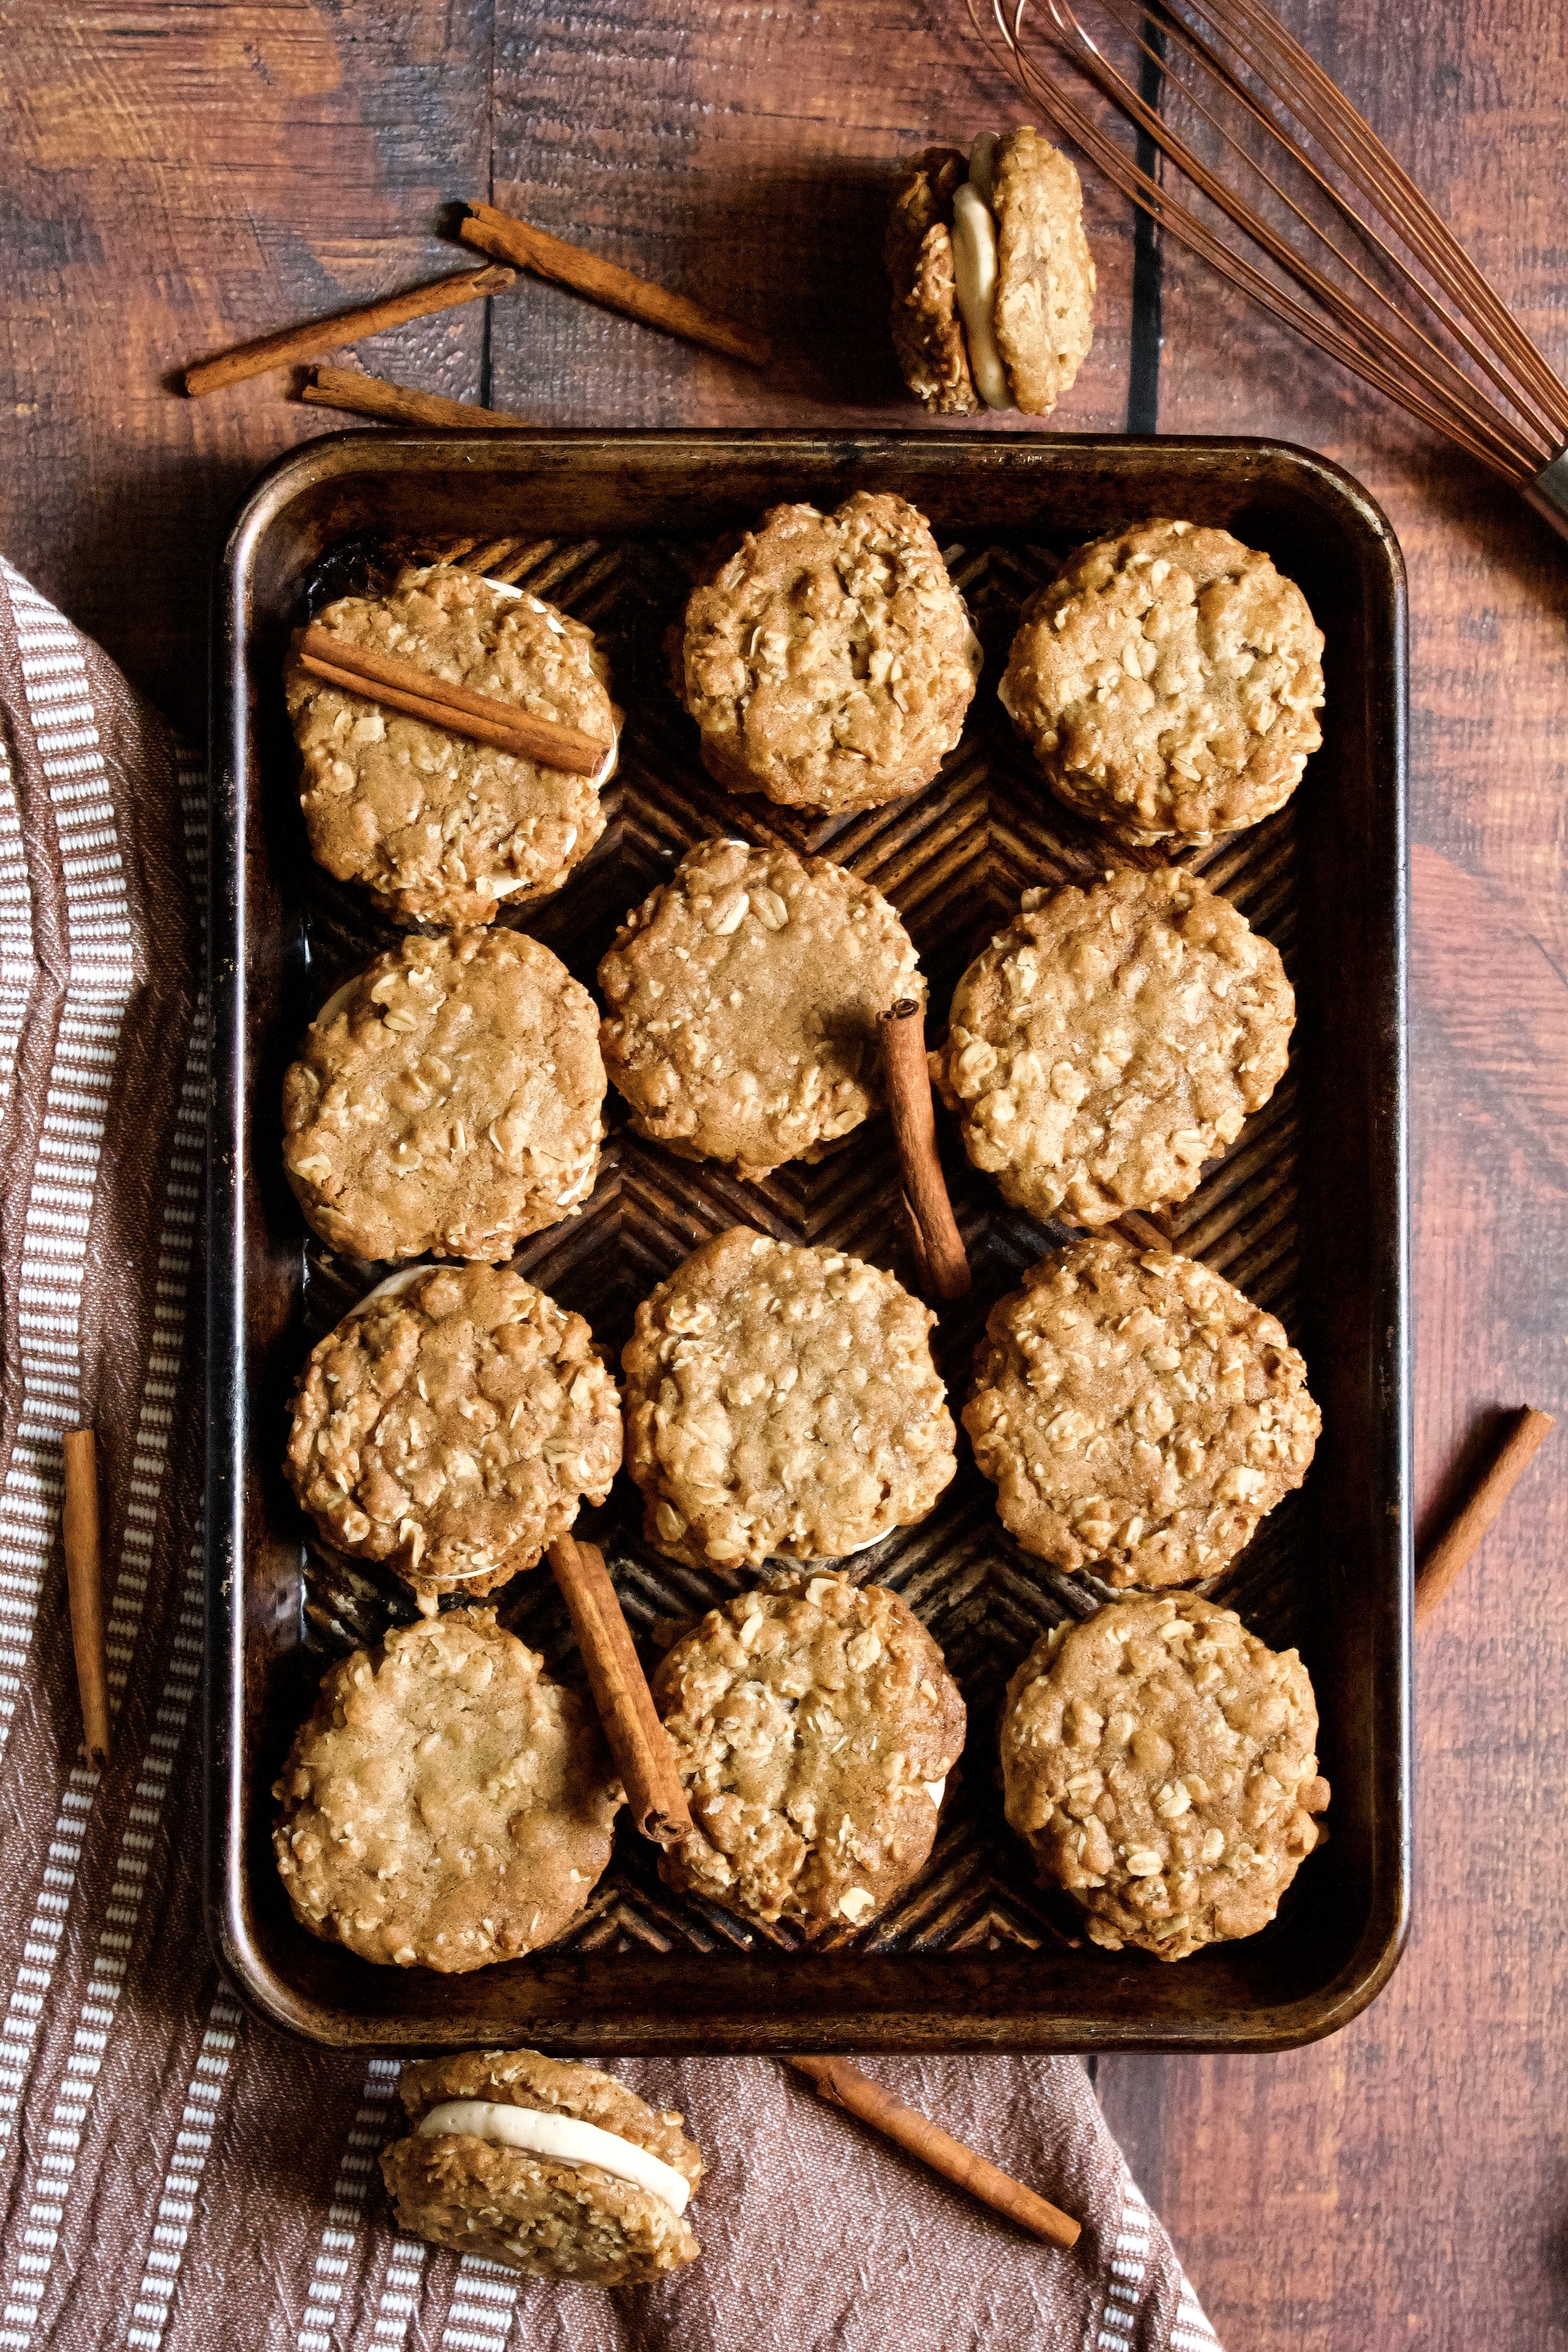
Spiced Oatmeal Sandwich Cookies
Chewy, perfectly spiced oatmeal cookies filled with cinnamon buttercream. Inspired by Little Debbie Oatmeal Creme Pies yet distinctly their own, with a chew texture and crispy edges and a flavorful, all-natural filling. Your beloved childhood treat just got an upgrade!
This post may contain affiliate links from which, at no additional cost to you, I may earn a small commission to keep this site running. Only products I myself would or do use are recommended.

Very important question: team Hostess or team Little Debbie? Personally, I loved both as a kid, but I think I lean Little Debbie. I was always torn between the Swiss Rolls and the Oatmeal Creme Pies. Both of them are just so nostalgic for me.
So naturally, as a baker, I had to eventually try my hand at recreating some of these childhood favorites. Especially now that I have two little girls to share my favorites with. Which is why I decided to start this grownup-versions-of-childhood-treats journey with these cookies, to celebrate Brooklyn turning 4 months old!

This month, in a word, was sunshine.
Literally (we had an entire week of warm sunny days!) and figuratively (B has blossomed into a happy, social baby!). Sure, we’ve had some rain. And yes, B still hates the car and is now in the 4 month sleep regression, which is famously fun. But overall, she’s just this little ray of sunshine that I can finally laugh with and bond with and snuggle with.
So, happy four months, little B!

Why this recipe works
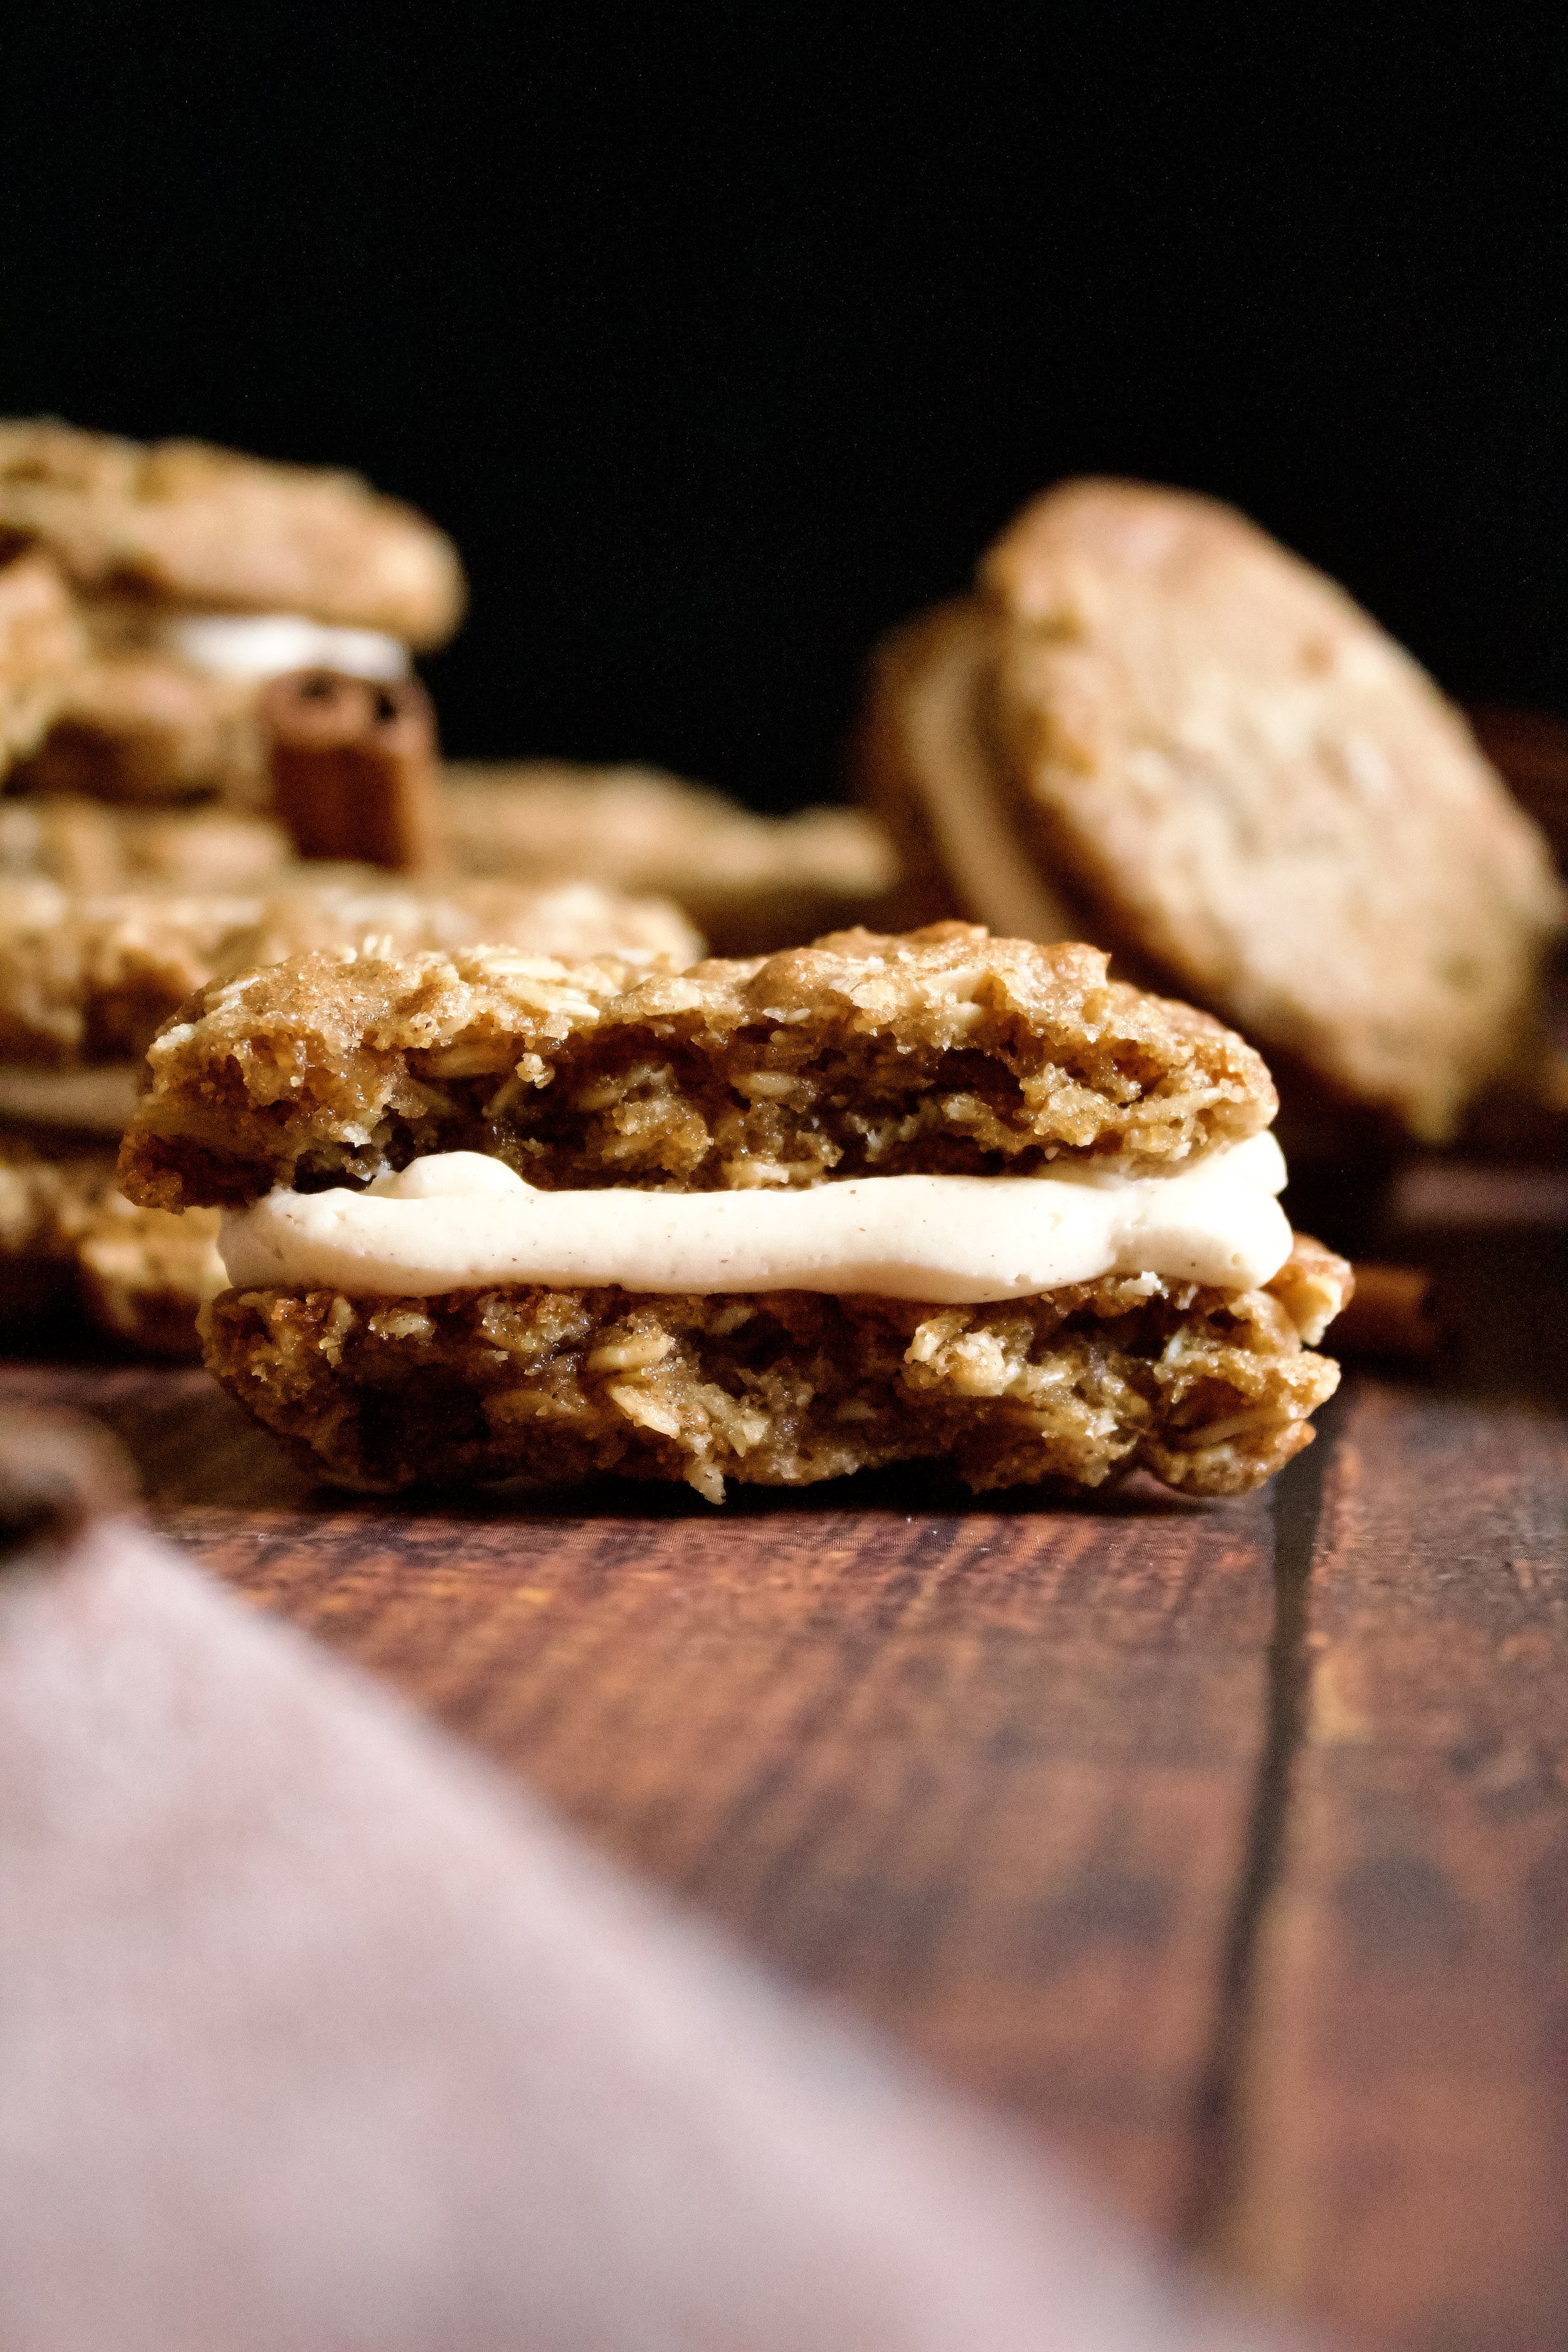
The cookies are based on one of my signature recipes. It’s a perfect balance of crispy and chewy, thanks in part to using just the right amount of oatmeal but mostly thanks to refrigeration. Yes, you can bake these the day you make them. However, I’ve experimented extensively and found that 24-72 hours of refrigeration is the key. The oats soften just enough to still give some texture while creating a chewy center with a crispy edge. It’s just sturdy enough to be filled without falling apart but not so sturdy the filling squishes out the sides.
And that’s the other wonderful part of these cookies. I used a cinnamon buttercream, which is definitely a deviation from Little Debbie. I really wanted to have a brightly spiced cookie, so adding cinnamon to the buttercream was key in rounding out that flavor. Plus, that contrast of chewy, crispy cookie and creamy buttercream is perfection!

Key ingredients
Flour. Be sure to spoon then level your flour or you will have too much and will end up with dry, dense cookies.
Old-fashioned rolled oats. I’ve tried quick oats and rolled (also called old-fashioned), and I vastly prefer rolled. Quick oats turn mushy quickly, even if you bake your cookies right away.
Baking soda. Be sure it is fresh—not open for longer than 6 months (it will lose potency after that, regardless of the listed expiration date).
Salt. I prefer sea salt in my cookies, but table salt works, too.
Cinnamon. Use a fresh, high quality cinnamon, which will have a noticeably better taste.
Unsalted butter. Use European style butter, as it has less water and is needed to make these have the perfect texture.
Brown sugar/sugar. Don’t be tempted to increase the sugar, as it turns to liquid when baking and will make the cookies go flat.
Eggs. Be sure your eggs are fresh and room temperature.
Vanilla. Use pure vanilla extract (or vanilla bean paste).
Cinnamon spice buttercream. Just a half-batch will do, but if you prefer to make a full batch, you can save the rest for later.

How to make spiced oatmeal sandwich cookies
1. Brown your butter. This will take about 10 minutes over medium heat. Be sure to use a medium to large pan, because the butter will bubble up to about 10x its original volume. Learn from my greasy, buttery messes and use a larger pan than you think you’ll need! Once the bubbling starts to calm down and you see brown streaks as you stir and smell a nutty aroma, it should be cooked. Let cool completely (it will become opaque).
2. Sift and whisk dry ingredients. Sifting is technically optional, but I think it helps prevent over mixing.
3. Beat butter and sugar. You want the sugar slightly dissolved and the mixture to be light and fluffy, so mix at least 3 minutes.
4. Add eggs and vanilla. Beat until well-blended after each addition, about 30 seconds on medium.
5. Mix in dry ingredients. Mix on low until mostly combined but still with some dry streaks of flour.


6. Stir in oats. I prefer doing this by hand, as a stand or handheld mixer usually breaks up the oats.
7. Chill. This step is technically optional, but highly recommended. It softens the oats just slightly and helps the cookie bake up perfectly—crispy edge, chewy center, sturdy enough for filling.
8. Bake. Place cookies 2” apart on your prepared cookie sheet and bake until no longer matte on top and the edges begin to darken. I usually flatten them slightly after scooping.
9. Fill with buttercream. I chose to pipe my frosting. Also, I suggest pairing up your cookies before you fill them, so you can match them by size and shape.
Enjoy!


Tips and FAQ’s for this recipe
Is chilling necessary?
I think it is. It creates the perfect balance of crispy edge and chewy center. You get just enough crunch and structure on the bottom and edges to hold the buttercream without a super hard cookie. Plus, it helps them maintain their shape well during baking, meaning you won’t have overly flat, thin cookies that bake too crispy to enjoy.
If you do choose to bake right after making the dough, freeze the shaped cookies for 10 minutes before putting them in the oven to help them maintain their shape.

Pair same-size cookies before filling
I’ve learned this the hard way over the years. Even when using cookie cutters, not every cookie bakes the same. The last thing you want is to get to your last few cookies and find that they in no way match up in size. However, if that does happen, you can always just eat those last remaining cookies or dip them in frosting. There’s really no wrong way to eat a cookie here.

Press your dough down
This dough is a little thicker, so I suggest pressing it down slightly with your palm so that it flattens properly. Otherwise, it’ll be too thick to use as a sandwich cookie. If you bake them right after making the dough, do a test cookie first, as non-chilled dough tends to flatten out more than chilled, and you don’t want to flatten them then have them spread even more.

Can I make these ahead of time?
Yes! The dough will last up to 3 days in the fridge or at least a couple months in the freezer, depending on how well-sealed they are. I like to scoop my dough out and shape it, place it on a cookie sheet and let it freeze for an hour, then place the frozen cookie dough balls into freezer safe bags. Be sure to label the dough with the date so you don’t keep them too long. If you want to bake and fill the cookies ahead of time, they will last about 3-5 days at room temperature, if well-sealed. You can freeze them after baking and/or filling, but this is not recommended as frozen baked cookies do tend to taste stale and defrosting filled cookies is likely to cause the inside to turn mushy.

Can I use a different frosting?
Yes! If you want a more “Oatmeal Creme Pie” taste, I suggest my homemade marshmallow fluff (piping is a must for that) or my marshmallow buttercream. Other yummy ideas are vanilla bean, cinnamon vanilla bean, brown sugar spice, brown butter frosting, or maple spice.
Do I have to use European butter?
Personally, I think it makes a huge difference. It’s creamier and has a very different consistency than sweet cream butter. Since you only have a few ingredients here, you want to make sure each one is of the highest quality. But don’t worry—you can often find it at places like Costco on sale!

How do I brown butter?
This is actually pretty simple! You’ll just cook it over medium heat in a medium/large saucepan, stirring constantly with a rubber spatula (be sure to get the bottom and sides). It’ll start to bubble then foam. Once this starts to calm down a bit, you’ll start to smell a nutty aroma and notice some golden streaks coming through as you stir (you may not be able to see the bottom). This means you’re almost done—keep stirring until the entire thing starts to take on a golden color, but watch carefully and stir constantly, as the bottom is always darker than what you see on top.

Spoon then level your flour
Don’t scoop your flour! I never knew this until I started blogging, but it seriously makes a big difference. You will end up with roughly 25% more flour than the recipe called for if you just doonk (official baking term right there) your measuring spoon into the flour container and scoop. Gently spoon your flour into your measuring cup then level it off with the back of a knife. Trust me! It makes a difference.
My tools
Here are my must-have tools I use for making these cookies. Affiliate links provided.
Mesh sieve (because sifting is KEY for a perfect shortbread cookie)
Silicone baking mats or parchment paper
Reusable silicone piping bags (These are super easy to clean—just turn inside out, wear like a mitten, and wash! I stand mine like a cone hat on my tea kettle to dry.)


Spiced Oatmeal Sandwich Cookies
- prep time: 25-30 minutes (includes making buttercream)
- bake time: 10-12 minutes
- total time: 42 minutes (plus 10 minutes to 72 hours of chilling time)
yields: 18-24
Ingredients:
- 1 cup (227g) unsalted European style butter*
- 2 cups (272g) all-purpose flour**, spooned then leveled (see note)
- 1 tablespoon (6g) ground cinnamon
- 1 teaspoon (5g) baking soda
- 1 teaspoon (6g) sea salt (reduce to ⅛ teaspoon if using salted butter)
- 1 ⅓ cup (266g) brown sugar, packed
- ⅓ cup (67g) granulated sugar
- 2 eggs, room temperature
- 1 tablespoon (13g) pure vanilla extract
- 2 cups (about 210g) old-fashioned rolled oats
- half a batch of cinnamon buttercream
Instructions:
- First, brown the butter in a medium saucepan (deeper than you’d think you need) over medium heat, stirring occasionally, until golden brown and nutty in flavor. It will bubble and fizz for a bit then start to brown underneath all of the foam, so stir in order to see to the bottom.
- Add browned butter to the bowl of your stand mixer (or large mixing bowl). Let cool until semi-soft, about the consistency of softened butter. It’ll be a little looser and shinier than softened butter. This will take at least an hour or so on the counter or about 30-60 minutes in the fridge. Either way, stir occasionally to help speed up the cooling process. You can also do this ahead of time and refrigerate it until ready to use, letting it soften on the counter about 30 minutes.
- Next, whisk together your flour, baking soda, cinnamon, and salt. Set aside.
- In the bowl of your stand mixer fitted with the paddle attachment (or a large bowl, using a hand whisk), beat the browned butter on high until smooth, about 30 seconds.
- Add the sugars and beat on high for at least 3 minutes, until it gets lighter and fluffier and the sugar starts to dissolve. Scrape the bowl as needed, at least once during this 3 minutes.
- Add the eggs, one at a time, and beat on medium until well blended, about 30 seconds. Add the vanilla and beat on medium until blended.
- Add the flour mixture and beat on low until nearly combined. Don’t worry if there are some streaks of flour, as the next step takes care of that.
- Using a sturdy spatula or wooden spoon, stir in the oats.
- Now chill! Ideally chill for around 48 hours. If unable to do so, shape your cookies and freeze them for 10 minutes before baking.
- Once the dough is chilled, preheat oven to 350 and line a cookie sheet (or sheets) with parchment (or use a silicone mat to help reduce your carbon footprint!). Use a spoon or cookie scoop to scoop about 1 ½ tablespoons. Form it into a ball then flatten slightly. (I recommend baking a test cookie to know how flat to make them–elevation and individual ovens can greatly impact how much these spread during baking).
- Bake for 10-12 minutes, until the tops of the cookies are no longer shiny and the edges begin to brown.
- Let cool on the pan about 10 minutes then remove to a wire rack to cool completely.
- While the cookies cool, make the buttercream. You can optionally make a full batch and save half of it. Place buttercream in a piping bag or plastic bag, snipping off a small bit of the corner.
- Pair up cooled cookies by size. Place one cookie of the pair upside down and pipe a layer of frosting no thicker than the cookie itself. Top with the other cookie.
Enjoy!
Store leftovers in an airtight container on the counter.
*European butter is best! It has less water and makes a better cookie, in my opinion. **Be sure to spoon then level the flour into your measuring cup OR weigh it to prevent packing it in and ending up with too much.
