
Chocolate Peanut Butter Tart
Flaky peanut butter shortbread crust filled with a silky, rich chocolate peanut butter ganache. This tart was created as an homage to all the best Easter candies but is honestly perfect for any occasion!
This post may contain affiliate links from which, at no additional cost to you, I may earn a small commission to keep this site running. Only products I myself would or do use are recommended.

Guys, I’m so sorry. I have been very inconsistent with posting here lately (and A LOT inconsistent at posting on Instagram…). It’s research paper season, and I also had a few baking jobs recently that took up a lot of my free time. In fact, I had a panic attack after one long, stressful day of grading way too many outlines at once.
It turns out panic attacks are not fun.
But one thing I missed was the creative outlet of sharing my baking with you all. It’s a passion and something that I love doing. And something I end up pushing to the side when I’m overwhelmed.
But I’m past the hardest bit of the quarter and hopefully back into a rhythm of baking and posting. :)
Why this recipe works
The shortbread is so, so simple! The basic shortbread I used here is one of my most popular recipes because of the use of powdered sugar and European butter. Both make these incredibly tender and delicate, and the butter gives that addictive buttery taste that you just can’t get enough of. Switching out some of the butter for peanut butter maintains that soft, delicate texture while adding a wonderful nutty taste.

Then the filling. Wow. I’ve shared the vegan version and salted caramel version before. Adding peanut butter not only brings in an addicting flavor but also helps make the filling sturdy-yet-sliceable. Together, it’s silky smooth, which complements the texture of the crust beautifully. Be sure to use creamy, unsweetened peanut butter to get the right texture and flavor.

Key ingredients
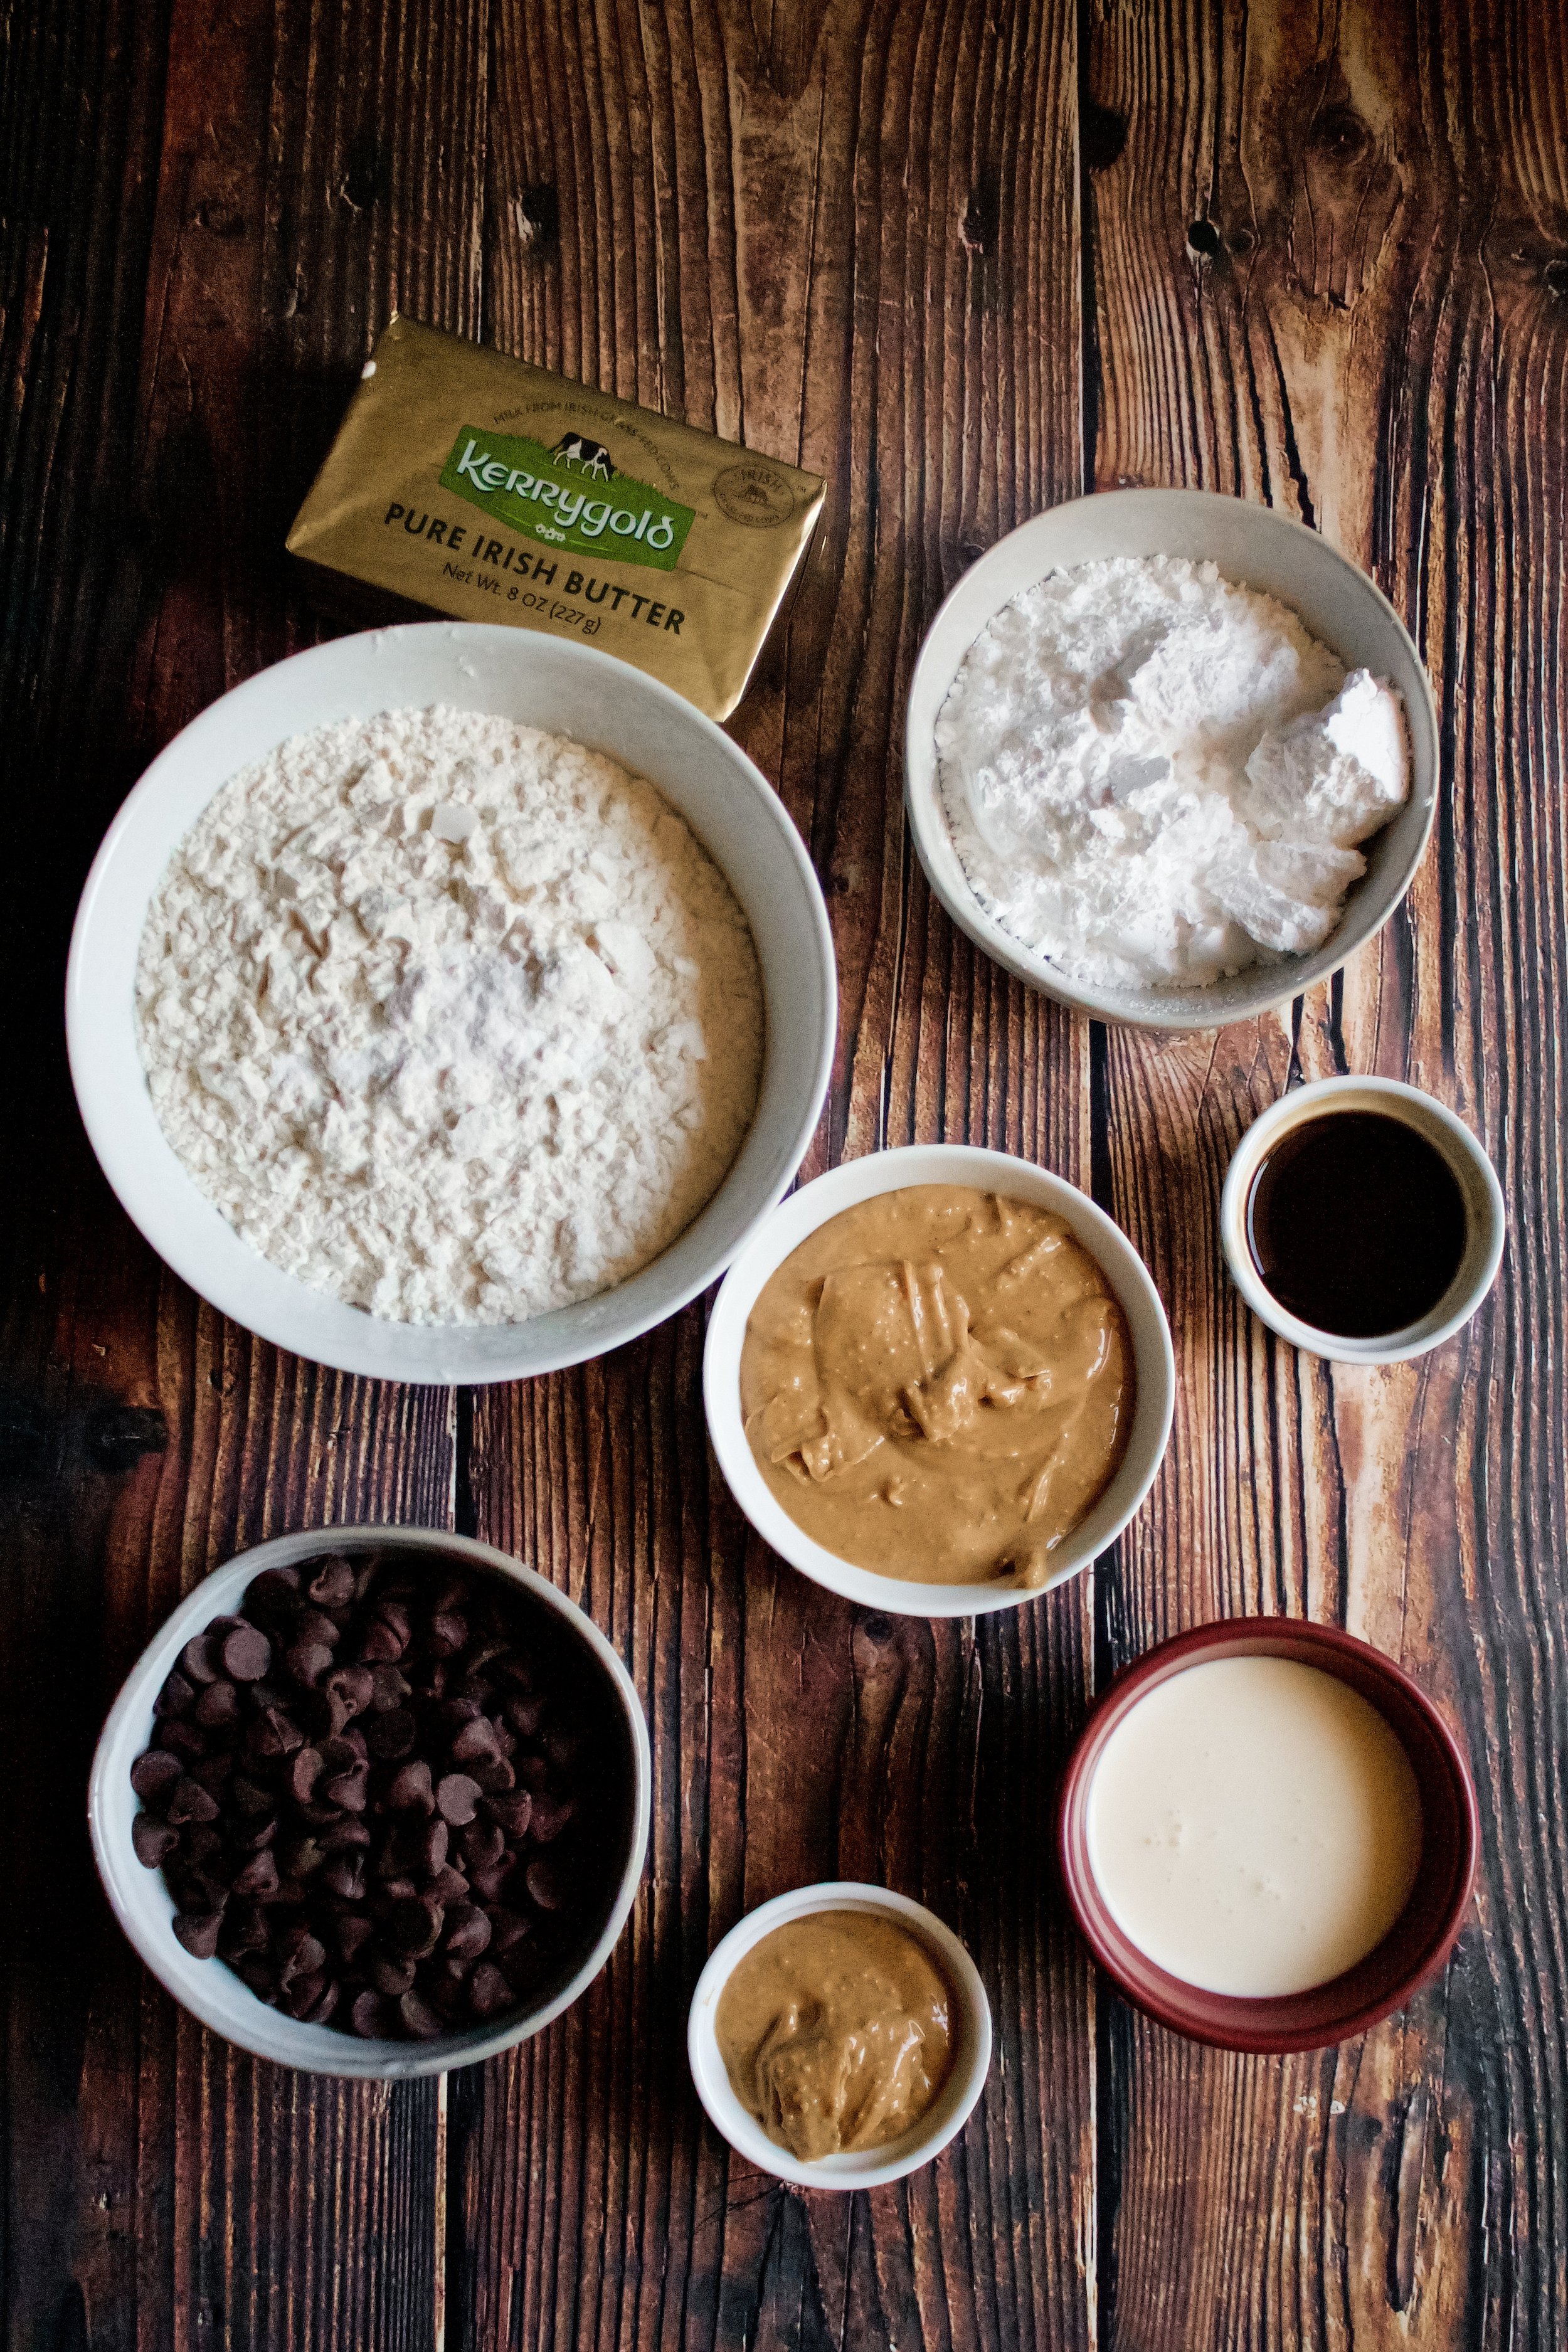
Butter. As mentioned above, always use European style butter in shortbread. It’s creamier and has less water.
Peanut butter. Be sure to use creamy, not chunky. And try to use a natural one, so you don’t add anything but pure peanut butter flavor. I used a natural peanut butter, which didn’t have a purely smooth texture but still worked well.
Confectioner’s sugar. This is the secret to the tender texture and perfect sweetness of these cookies.
Vanilla extract (optional). I usually add this, but it’s optional and not as traditional, but I think it adds the something special that these cookies need.
Salt. Only use a pinch or so if using salted butter.
Flour. Optionally, you can sift this before using, making the cookies even more tender and delicate.
Chocolate chips. Any brand will do, and you can also use chopped up baking chocolate.
Heavy cream. Be sure you have heavy cream or heavy whipping cream, also known as double cream. Using just whipping cream or cream won’t yield the right texture, as that has less fat.
How to make chocolate peanut butter tart
1. Cream butter and peanut butter. Mix until fully blended.
2. Beat in powdered sugar. You don’t need to beat it for a long time, just make sure it’s well-combined and perfectly smooth.
3. Add vanilla and salt. Reduce salt to a pinch if you used salted butter. Be sure it’s very smooth so that the flour can be mixed in minimally.
4. Stir in flour. Technically, you could sift and whisk the salt and flour, but that requires an extra bowl, and I just don’t have the patience for more dishes.


5. Press crust into pan and freeze. I use my hands until it’s mostly in place then use a cup to get it nice and firm. Freezing helps it bake evenly, and also makes it easier to line.
6. Line with weights then bake. Use either flour or parchment to line the frozen crust. Pour pie weights, dry beans, or dry rice inside to help keep it from puffing up while baking.
7. Melt chocolate, cream, and peanut butter. You can taste once it’s melted and add more peanut butter if needed.
8. Pour into crust and chill. Once the filling is smooth, simply pour it into the frozen crust and refrigerate for at least 1 hour (or freeze 30 minutes then transfer to the fridge).
Enjoy!


Tips and FAQ’s for this recipe
How do I know when the crust is baked?
You don’t want these to brown, like chocolate chip cookies. You want them to be completely matte in appearance, with some cookies along the edge beginning to turn lightly golden on their edge. That’s it! These are an incredibly tender cookie, so avoid over baking them.
Do I have to chill the dough?
Yes! This is key to helping it bake without spreading or going flat. It’s not that long, and I usually preheat the oven while the dough chills.

Do I have to use European butter?
Personally, I think it makes a huge difference. It’s creamier and has a very different consistency than sweet cream butter. Since you only have a few ingredients here, you want to make sure each one is of the highest quality. But don’t worry—you can often find it at places like Costco on sale!
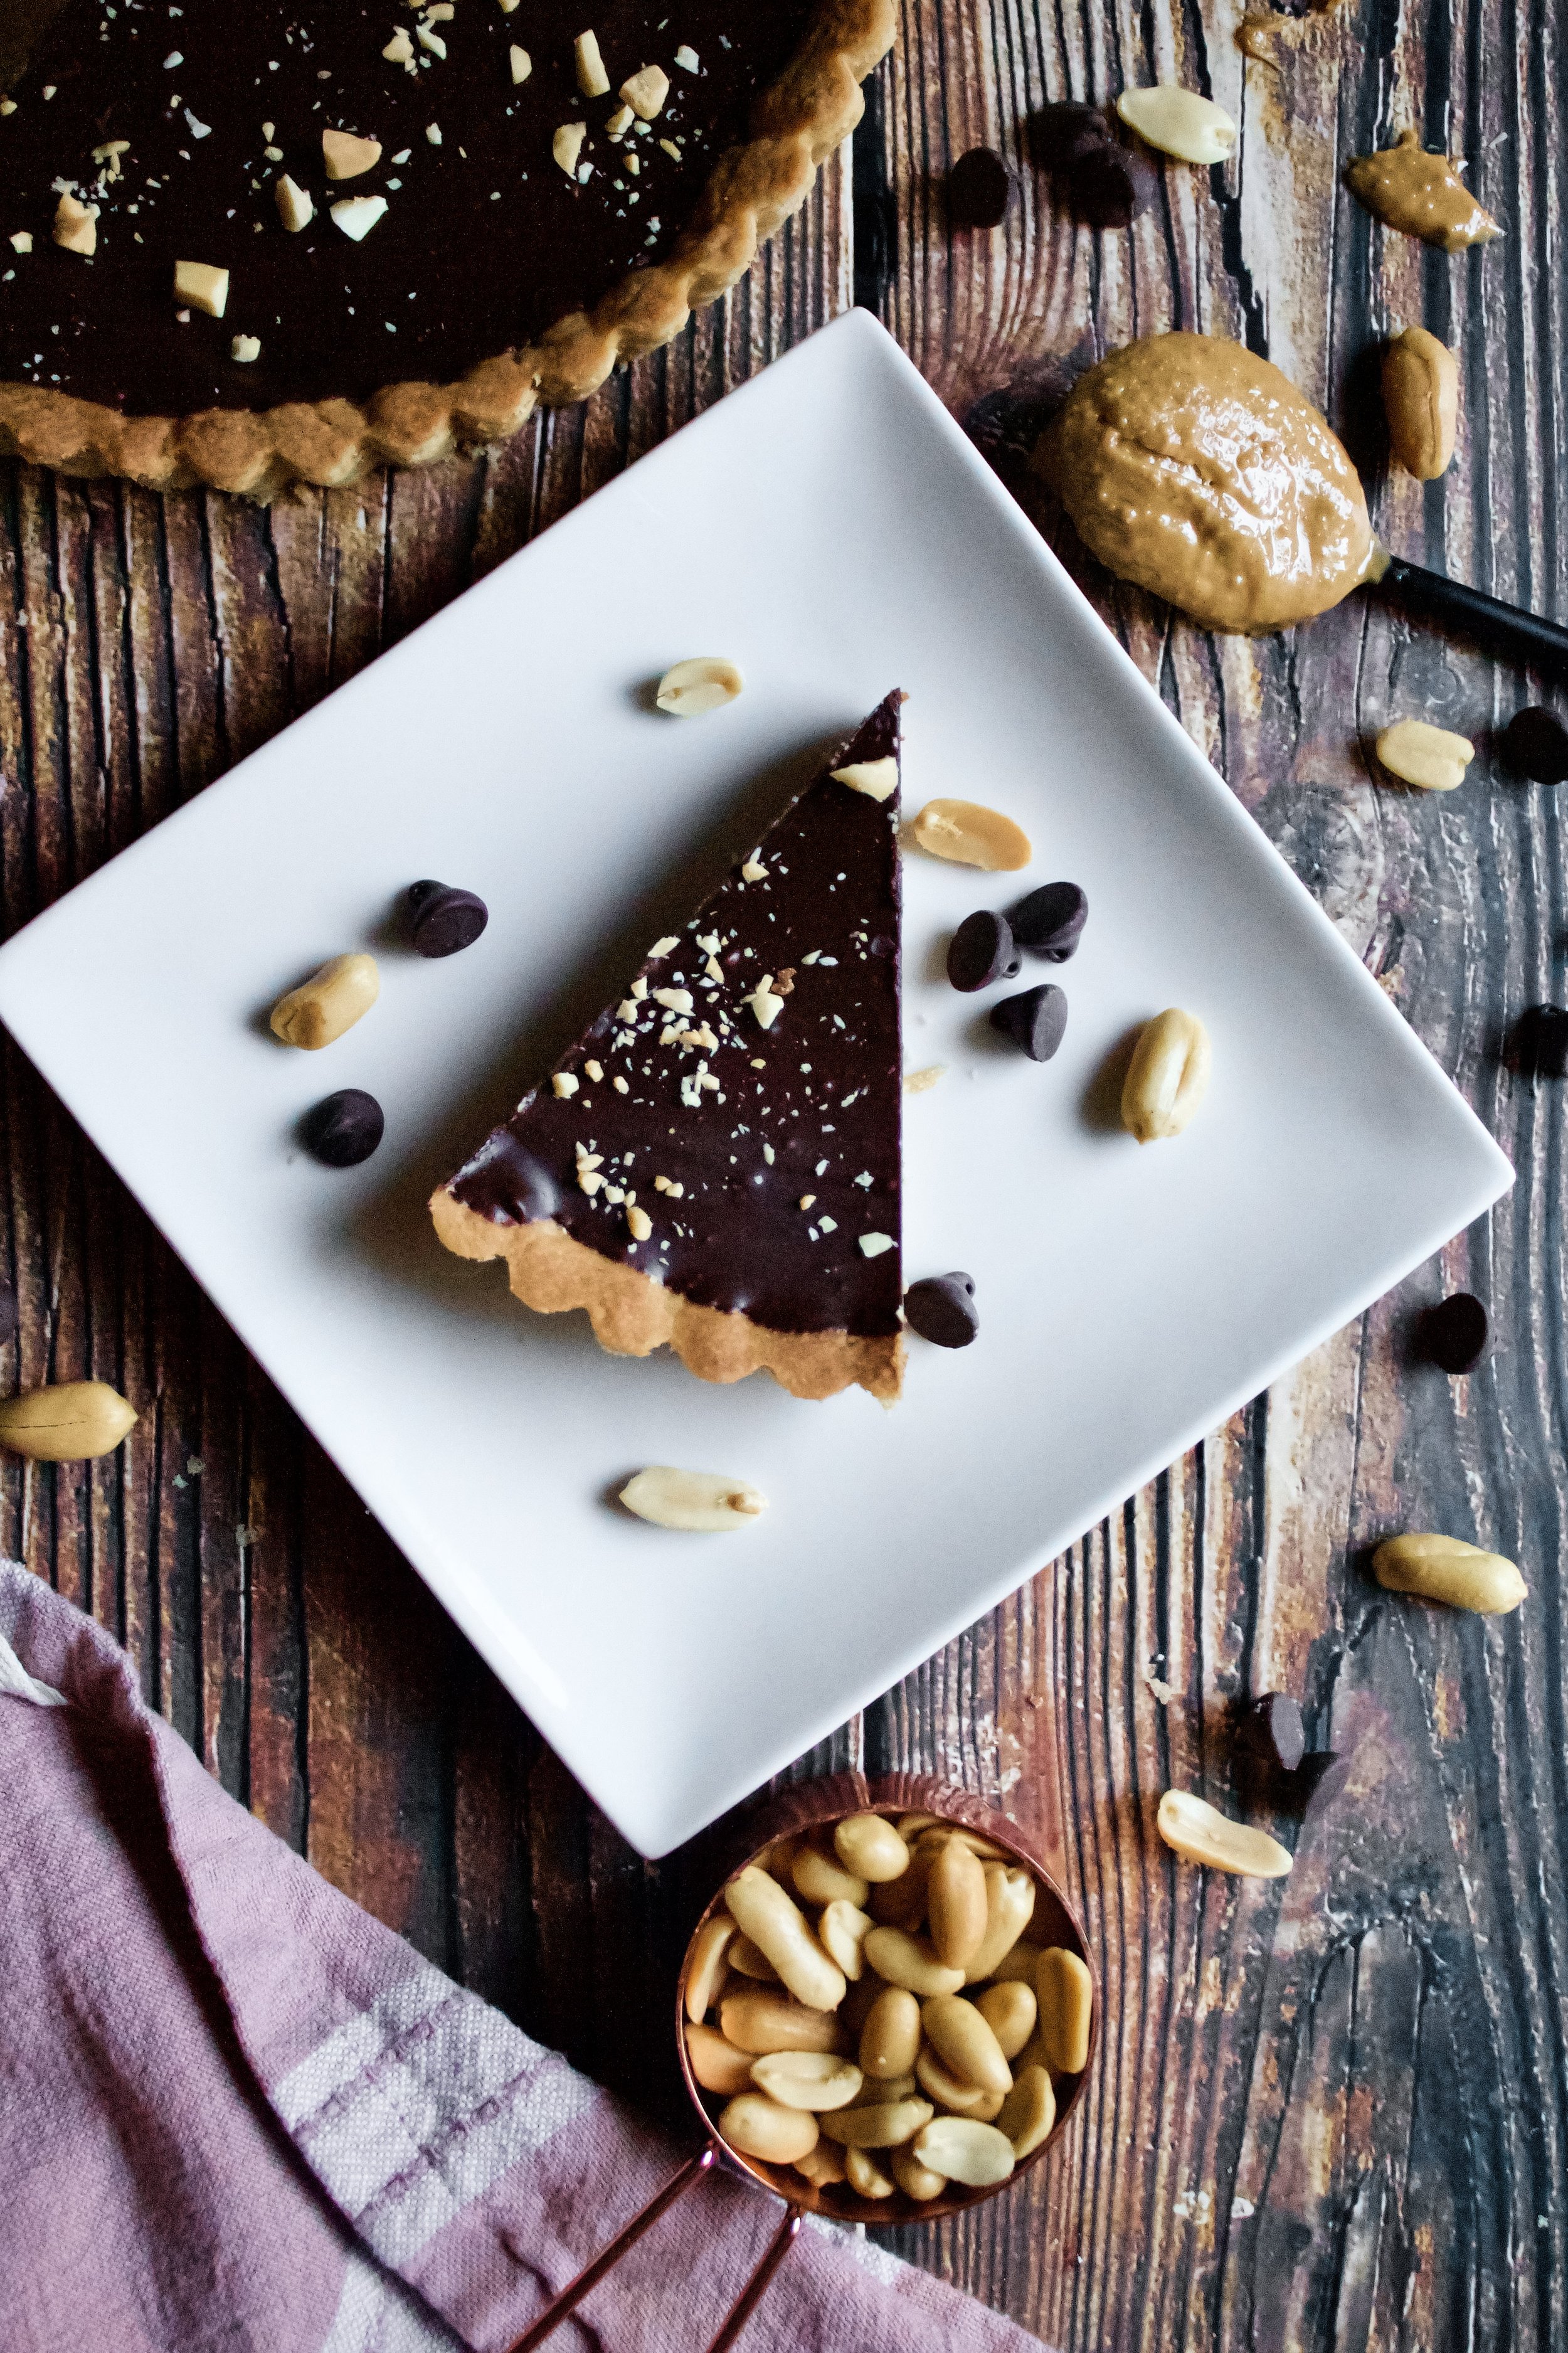
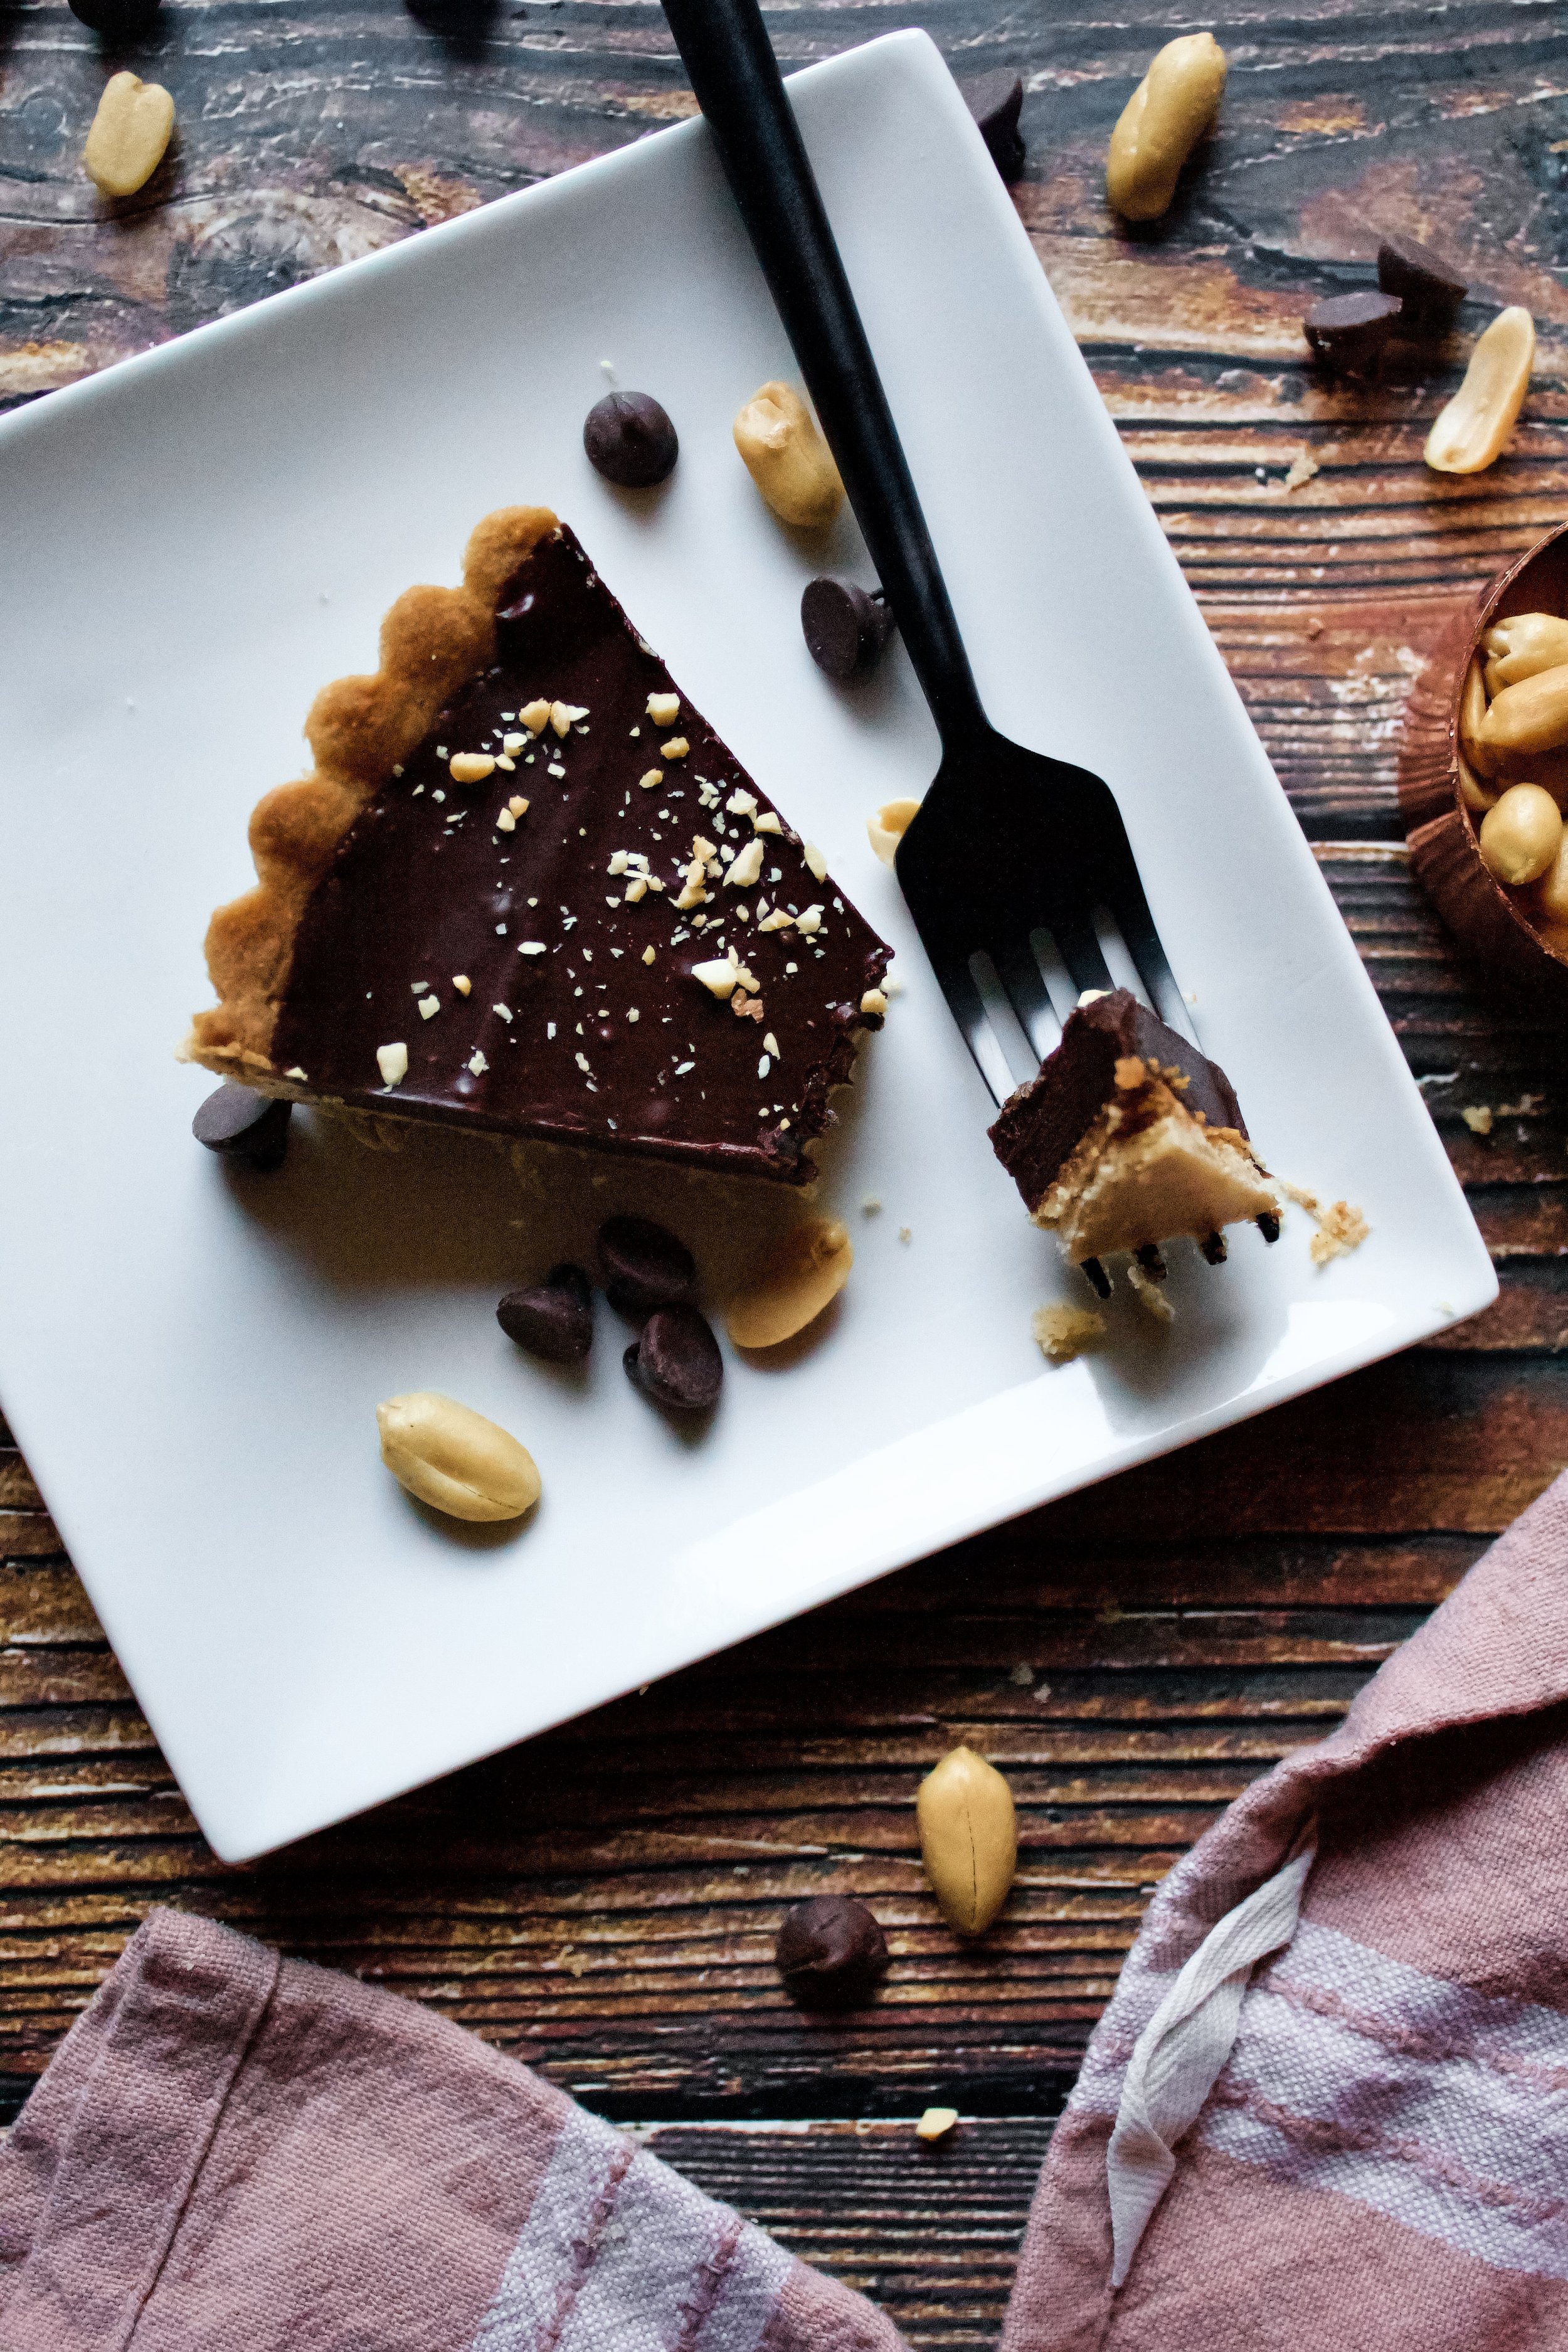
Top with chopped peanuts
I debated drizzling these with peanut butter or sprinkling with chopped peanuts. In the end, peanuts were less messy and actually provided just a hint of crunch that was delicious. It’s entirely up to you—these are delicious plain, too!
Can I make this tart in advance?
You can make this up to a week in advance. Make the crust and fill it with the ganache. After it’s set, cover well and freeze. Once ready to serve, transfer to the fridge for a couple hours so it’s sliceable. Top with crushed peanuts before serving.
Can I make this gluten free?
Yes! The only gluten in this recipe is the crust, so just use gluten free flour and you’re good to go! It will be a one-to-one substitution. It may require more care when pressing into the pan, and freezing is a must so it bakes properly, but I’ve had good luck with using Bob’s Red Mill one-for-one gluten free flour.

Can I make this dairy free/Vegan?
Yes! Use vegan butter in the crust (one-to-one substitution). For the filling, use 18 ounces dairy free chocolate and 12 ounces (1 1/2 cups) of canned, full fat coconut cream (not milk). You’ll need to melt the coconut cream down before using, as one can has 14 ounces.
Can I use any crust?
Yes! I really liked the shortbread in this recipe, but you’re welcome to substitute another recipe or a no-bake crust if desired. In fact, peanut butter Oreos would work well with this no-bake crust.

My tools
Here are my must-have tools I use for making these cookies. Affiliate links provided.
Mesh sieve (because sifting is KEY for a perfect shortbread cookie)
Heavy medium pot (ideal for making a double boiler)


Chocolate Peanut Butter Tart
- prep time: 15-20 minutes
- bake time: 25-30 minutes
- chill time: 1 hour
- total time: 1 hour, 50 minutes
servings: 10-12
Ingredients:
- 2 cups (272g) flour, spooned and leveled then sifted
- ¼ teaspoon (2g) finely ground sea salt
- ¾ cup (170g) unsalted butter, softened
- ⅓ cup (85g) creamy peanut butter (unsweetened)
- ⅔ cup (87g) powdered sugar
- 1 tablespoon (13g) vanilla extract
- 18 ounces (510g or 3 cups) semi-sweet baking chocolate, chopped (or chips)
- 1 cup (240g) heavy whipping cream
- ¼ cup (70g) creamy, unsweetened salted peanut butter (stir well if using natural)
Instructions:
- Preheat oven to 350F/175C.
- Make your shortbread by whisking the flour and salt together. Be sure your flour was spooned and leveled into the measuring cup then sifted. Set aside.
- Beat the butter and peanut butter on high until smooth. Add powdered sugar and beat on low then increase to high until very smooth, about 1 minute. Add vanilla and beat until smooth.
- Add flour and beat on low just until combined.
- Press dough evenly a tart pan, ideally with a removable bottom. Depending on the size of pan, you may have some extra dough.
- Freeze for 10 minutes. Once frozen, line with foil or parchment paper, letting it gently drape over the edge. Fill with pie weights, dried beans, or uncooked rice. Bake for 20 minutes. Remove the foil and weights. Continue baking about 5 minutes more, until the bottom of the crust is matte and the edges are golden. Set on a wire rack to cool completely.
- When the crust is cool, make the filling. You need a small-ish, heatproof bowl and a small-ish saucepan that the bowl can sit on top of and be about halfway submerged in. Fill the bowl with the chocolate, heavy cream, peanut butter, and a pinch of salt (add ⅛ teaspoon if using unsalted peanut butter). Fill the saucepan with one to two inches of water and bring that to a boil. Once it is boiling, turn the burner to medium-low and set the bowl of chocolate over it.
- Stir the chocolate mixture frequently, adjusting the temperature as needed to keep the water at a steady simmer. Once the chocolate is mostly melted, remove the bowl from the saucepan and stir until the chocolate is fully melted. If it doesn't fully melt, you can always return the bowl to the saucepan as needed.
- Taste, adding a bit more salt or a small bit of extra peanut butter, as needed.
- Pour the chocolate into the cooled crust. Chill for about 1 hour, until the filling is set and matte in appearance. Alternatively, you can freeze the pie to set the filling faster, but it will need to go into the fridge as soon as it’s set to make it slice-able.
- Once the tart is set, you can top with some chopped peanuts and a drizzle of peanut butter, if desired.
Enjoy! Keep tart refrigerated until serving.
