
Browned Butter Espresso Chocolate Chip Cookies
Espresso and chocolate play perfectly off of each other in this tender cookie with a chewy center and slightly crispy edge. The rich flavors pair well with the balanced sweetness in a recipe that will have any coffee lover coming back for more!
This post may contain affiliate links from which, at no additional cost to you, I may earn a small commission to keep this site running. Only products I myself would or do use are recommended.

Soooo…I go back to work tomorrow. This week is teacher in-service, and students are back in exactly one week from today. And in that one week the Olympics will end and it all makes me really sad. Not that I don’t love teaching. Last year was one of the most fun years I’ve had with my students. It was also one of the hardest years in terms of my workload (and in terms of how many all-nighters I pulled).

But one thing that makes me happy in all of this is the outpouring of support for Simone Biles and awareness being brought to mental health. After the year and change we’re somehow still having (seriously, get #vaccinated), we need this reminder that PEOPLE matter more than success.
It’s a reminder I needed so very much. Okay, rant over.

Browned butter espresso chocolate chip cookies
Holy wow. These cookies. I honestly thought I’d have to experiment with the recipe for a while until I found the right balance. It’s what I had to do when these chocolate macadamia nut cookies turned out flat the first time (turns out extra cocoa is always a good idea).

But somehow these cookies turned out as my favorite cookie ever on my first try. It was kismet.
These cookies have that perfect texture, thanks to the browned butter. And there’s just the right amount of espresso!

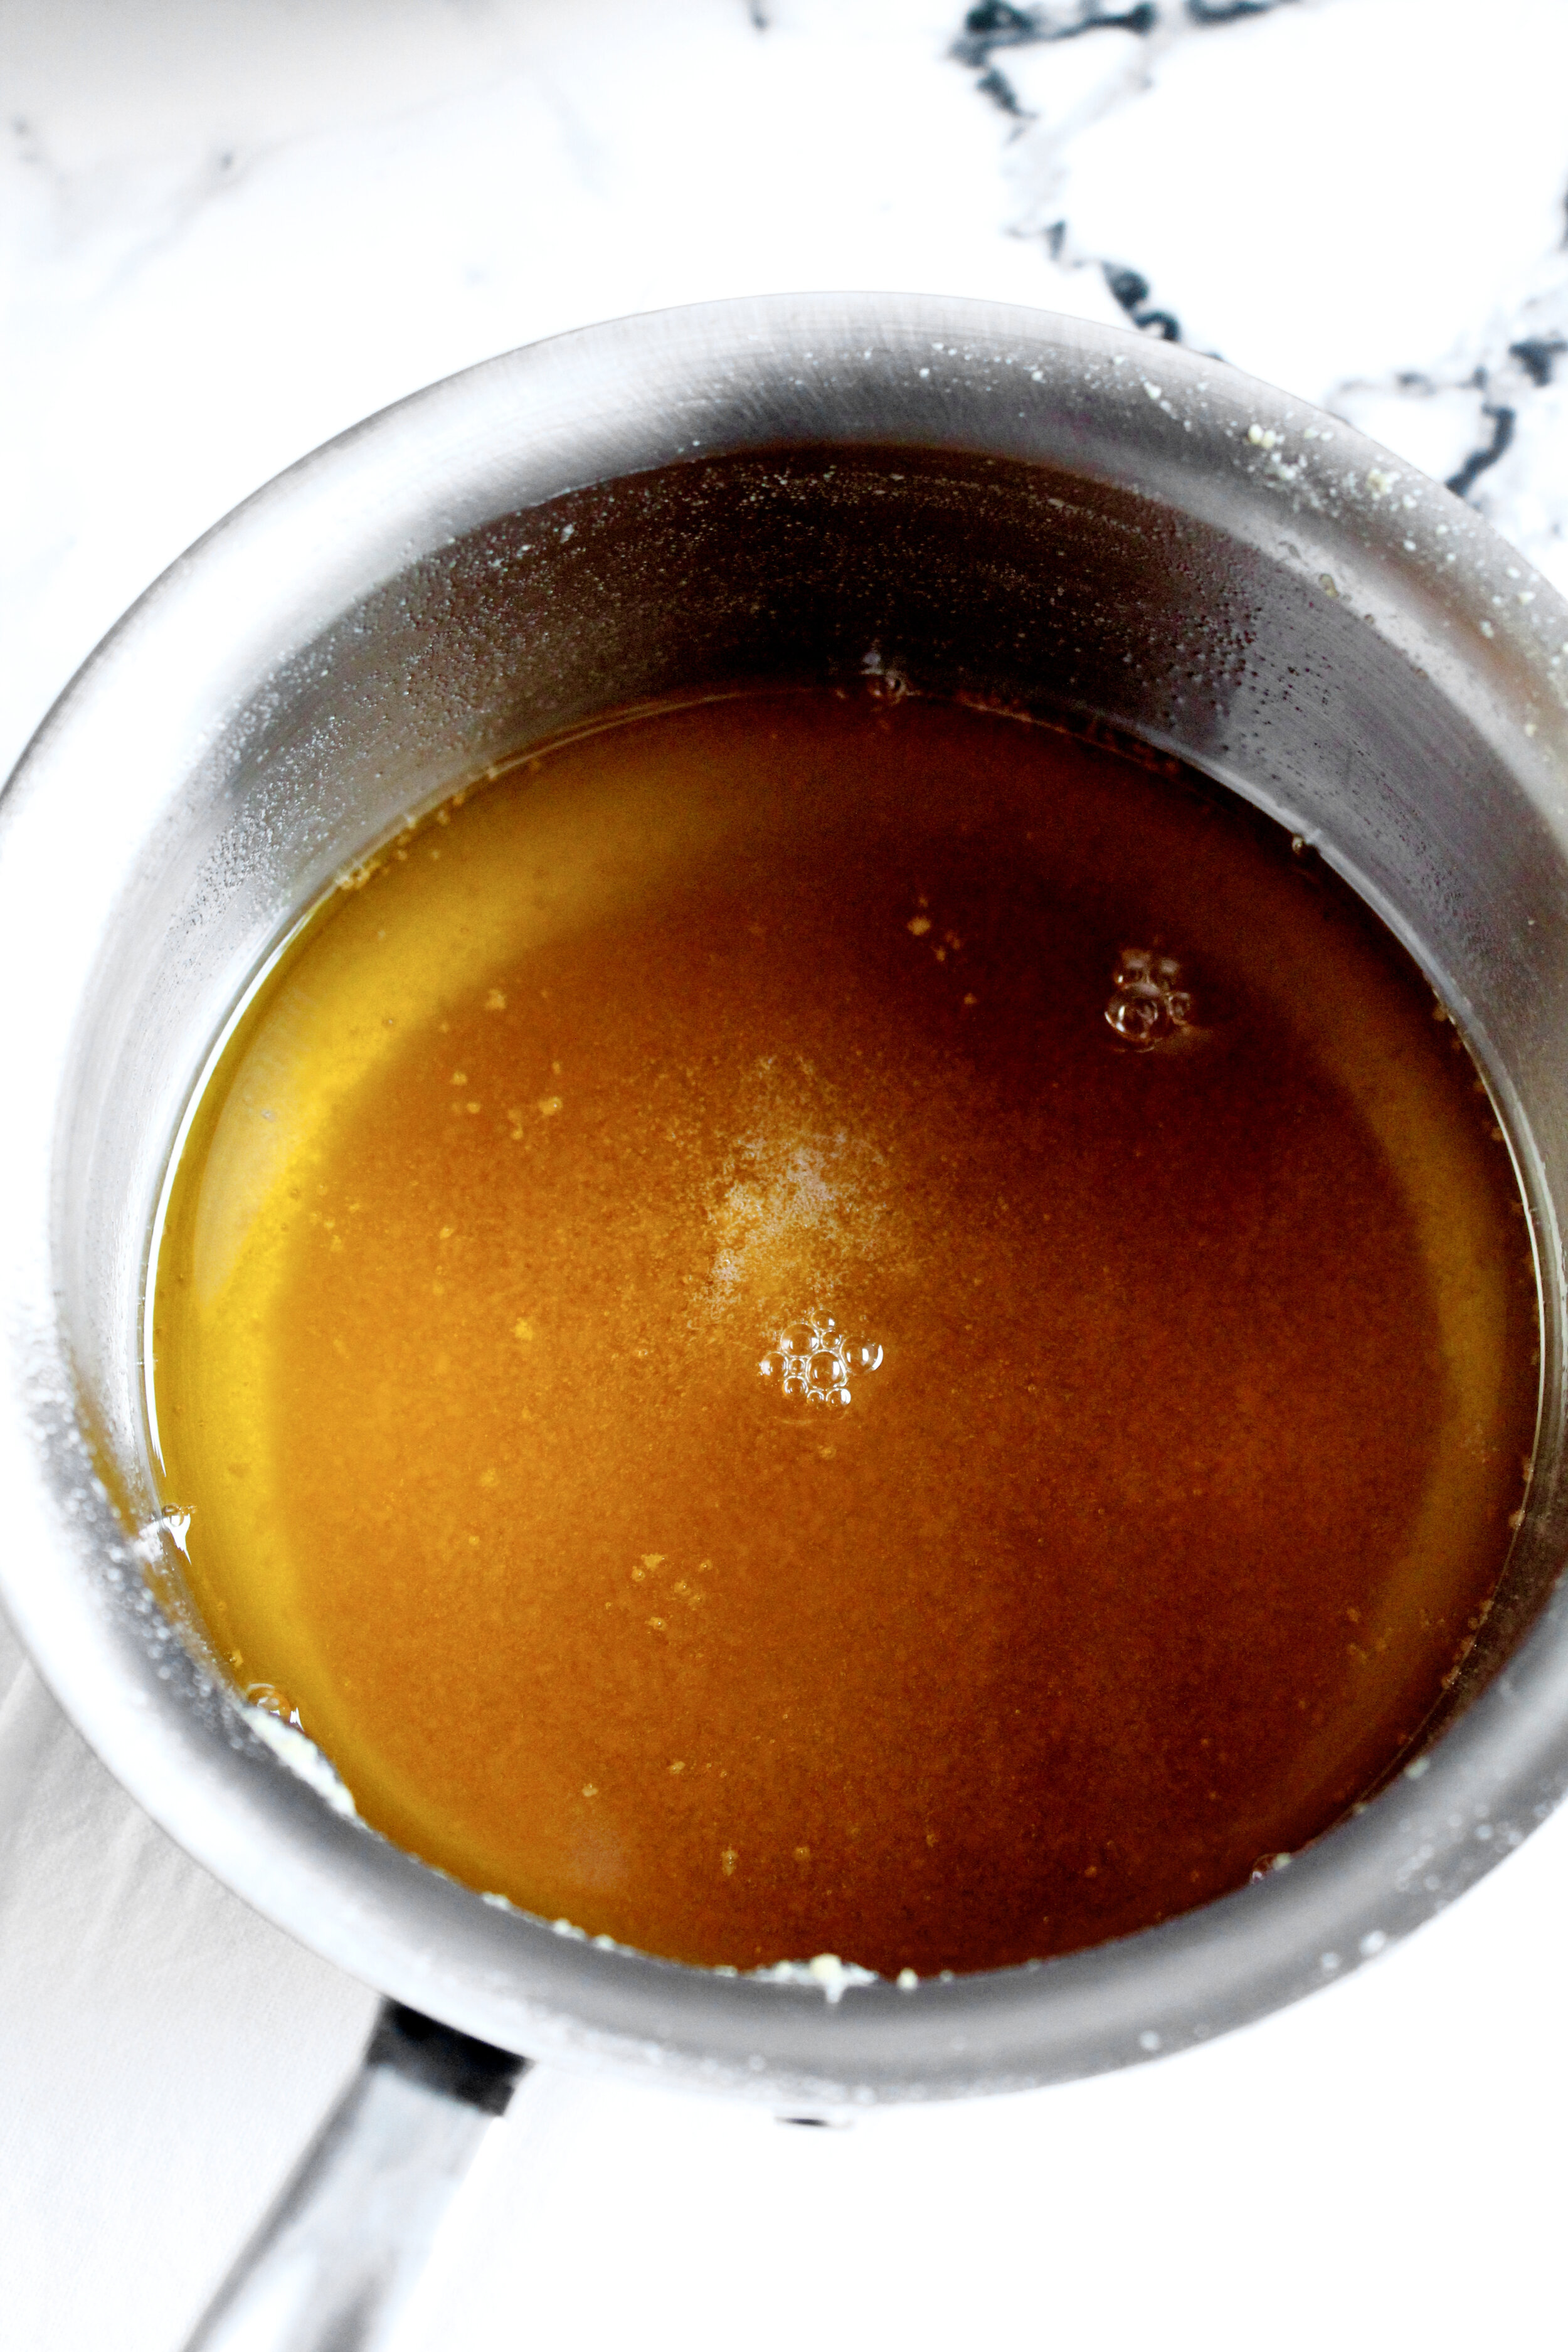
Browning butter
Browning butter is actually pretty simple. Here are my easy tips for browning butter: 1) use a deep pan (or one larger than you’d expect) 2) cook over medium heat 3) stir occasionally 4) a few minutes after the bubbling calms down to a general fizz, it’s usually done.
Simple!

What kind of espresso powder
I used Starbucks Via Pike Place, which isn’t actually espresso but is strong enough in baking to have the right flavor. It was perfection. For authentic espresso cookies, I recommend King Arthur espresso powder.
To make these decaf, I recommend a decaf coffee powder like this one, unless you have a high quality decaf espresso powder that’s local to you. As long as you use a higher quality espresso or coffee powder, decaf should taste just the same. Which does mean some kids may not appreciate these (my daughter was obsessed with them). And remember that you have one serving of instant coffee in the entire batch, so you may be fine using regular!
How to make browned butter espresso chocolate chip cookies
1. Brown your butter and let it cool until soft-solid (like softened butter). This takes an hour or two on the counter, or 30-60 minutes in the fridge.
2. Cream butter and sugars.
3. Add eggs and vanilla.


4. Whisk dry ingredients and stir in. Don’t stir all the way yet—leave some flour streaks.
5. Stir in chocolate chips. This will stir in the last of the flour.
6. Chill at least an hour, or overnight.
7. Form into cookies and bake. I highly suggest a cookie scoop—no need to roll the cookies!


8. Let cool.

Enjoy!
Tips and notes for this recipe
Brown the butter ahead of time
The chilling time for browned butter can vary, depending on your house’s temperature and even your fridge. I’ve had it take over an hour in the past—when my fridge was already super packed with other stuff and I’d been opening and closing it a lot for other baking and cooking. So, I like to brown the butter ahead of time and come back to it when I’m ready. This time around, I made brownies in between. Highly recommend.
Alternatively, you could try using the freezer to speed things up, but watch carefully! The butter can freeze solid pretty quickly, so set a timer and stir every few minutes.

Freeze unbaked dough
My new favorite thing is to make a full batch of cookies and freeze most of it. That way, you can have freshly baked cookies whenever you want, instead of trying to finish an entire batch before it goes stale. Just form cookies into balls (or use a cookie scoop), place on a baking sheet and freeze 10 minutes. Place frozen dough into an airtight container or freezer safe bag. Be sure to label and date it. If you’re like me, you have several baggies full of cookie dough in your freezer…

Measure chocolate chips with your heart
This is my new life motto. I was telling my best friend about these cookies and mentioned I always use the Nestle cookie recipe as my base for new cookies (obvi) but always make a few tweaks, like extra chocolate chips. And she said chocolate chips should always be measured with the heart. I knew we were best friends for a reason.


Browned Butter Espresso Chocolate Chip Cookies
- prep time: 15-20 minutes
- chill time: 2 hours
- bake time: 10-12 minutes
- total time: 2 hours, 30 minutes (see recipe for how to speed or break this up)
yields: 3-4 dozen cookies
Ingredients:
- 1 cup (227g) unsalted European style butter*
- 2 ⅓ cups (316g) all-purpose flour**, spooned then leveled (see note)
- 1 teaspoon (2g) instant espresso or coffee powder
- 1 teaspoon (5g) baking soda
- 1 teaspoon (6g) sea salt (reduce to ⅛ teaspoon if using salted butter)
- 1 ⅓ cup (266g) brown sugar, packed
- ⅓ cup (67g) granulated sugar
- 2 eggs, room temperature
- 1 tablespoon (13g) pure vanilla extract
- 3 cups (510g) semi-sweet chocolate chips (or your favorite kind)
Instructions:
- First, brown the butter in a medium saucepan (deeper than you’d think you need) over medium heat, stirring occasionally, until golden brown and nutty in flavor. It will bubble and fizz for a bit then start to brown underneath all of the foam, so stir in order to see to the bottom.
- Add browned butter to the bowl of your stand mixer (or large mixing bowl). Let cool until semi-soft, about the consistency of softened butter. It’ll be a little looser and shinier than softened butter. This will take at least an hour on the counter or about 30-60 minutes in the fridge. Either way, stir occasionally to help speed up the cooling process. You can also do this ahead of time and refrigerate it until ready to use, letting it soften on the counter about 30 minutes.
- Next, whisk together your flour, baking soda, espresso powder or instant coffee, and salt. Set aside.
- In the bowl of your stand mixer fitted with the paddle attachment (or a large bowl, using a hand whisk), beat the browned butter on high until smooth, about 30 seconds.
- Add the sugars and beat on high for at least 3 minutes, until it gets lighter and fluffier and the sugar starts to dissolve. Scrape the bowl as needed, at least once during this 3 minutes.
- Add the eggs, one at a time, and beat on medium until well blended, about 30 seconds. Add the vanilla and beat on medium until blended.
- Add the flour mixture and beat on low until nearly combined. Don’t worry if there are some streaks of flour, as the next step takes care of that.
- Using a sturdy spatula or wooden spoon, stir in the chocolate chips.
- Now chill! Cover and chill the dough at least an hour or up to 2 days. I found that chilling overnight was perfect. If you’re in a rush, you could form them into balls and freeze them for at least 20 minutes, but they may still end up a little flat (but still delicious!).
- Once the dough is chilled, preheat oven to 350 and line a cookie sheet (or sheets) with parchment (or use a silicone mat to help reduce your carbon footprint!). Use a spoon or cookie scoop to form the dough into balls about 1 to 1 ½ inches in diameter. The dough should be stiff to the point that you really do need a scoop or a little elbow grease to scoop them.
- Bake for 10-12 minutes, until the tops of the cookies are no longer shiny (or there’s just a tiny bit of shine around the chocolate chips).
- Let cool on the pan about 10 minutes, then either enjoy or remove to a wire rack to cool completely.
Enjoy!
*European butter is best! It has less water and makes a better cookie, in my opinion.
Store leftovers in an airtight container on the counter.
**Be sure to spoon then level the flour into your measuring cup OR weigh it to prevent packing it in and ending up with too much.
Note about making these ahead: you could optionally chill the dough until it’s no longer sticky and thus easier to form into a ball. Form into single cookie balls and place on a cookie tray and freeze for 10 minutes. Once firm, you can transfer the dough balls to an airtight, freezer safe container or bag and keep frozen for up to 2 months. You can bake them straight from the freezer!
