
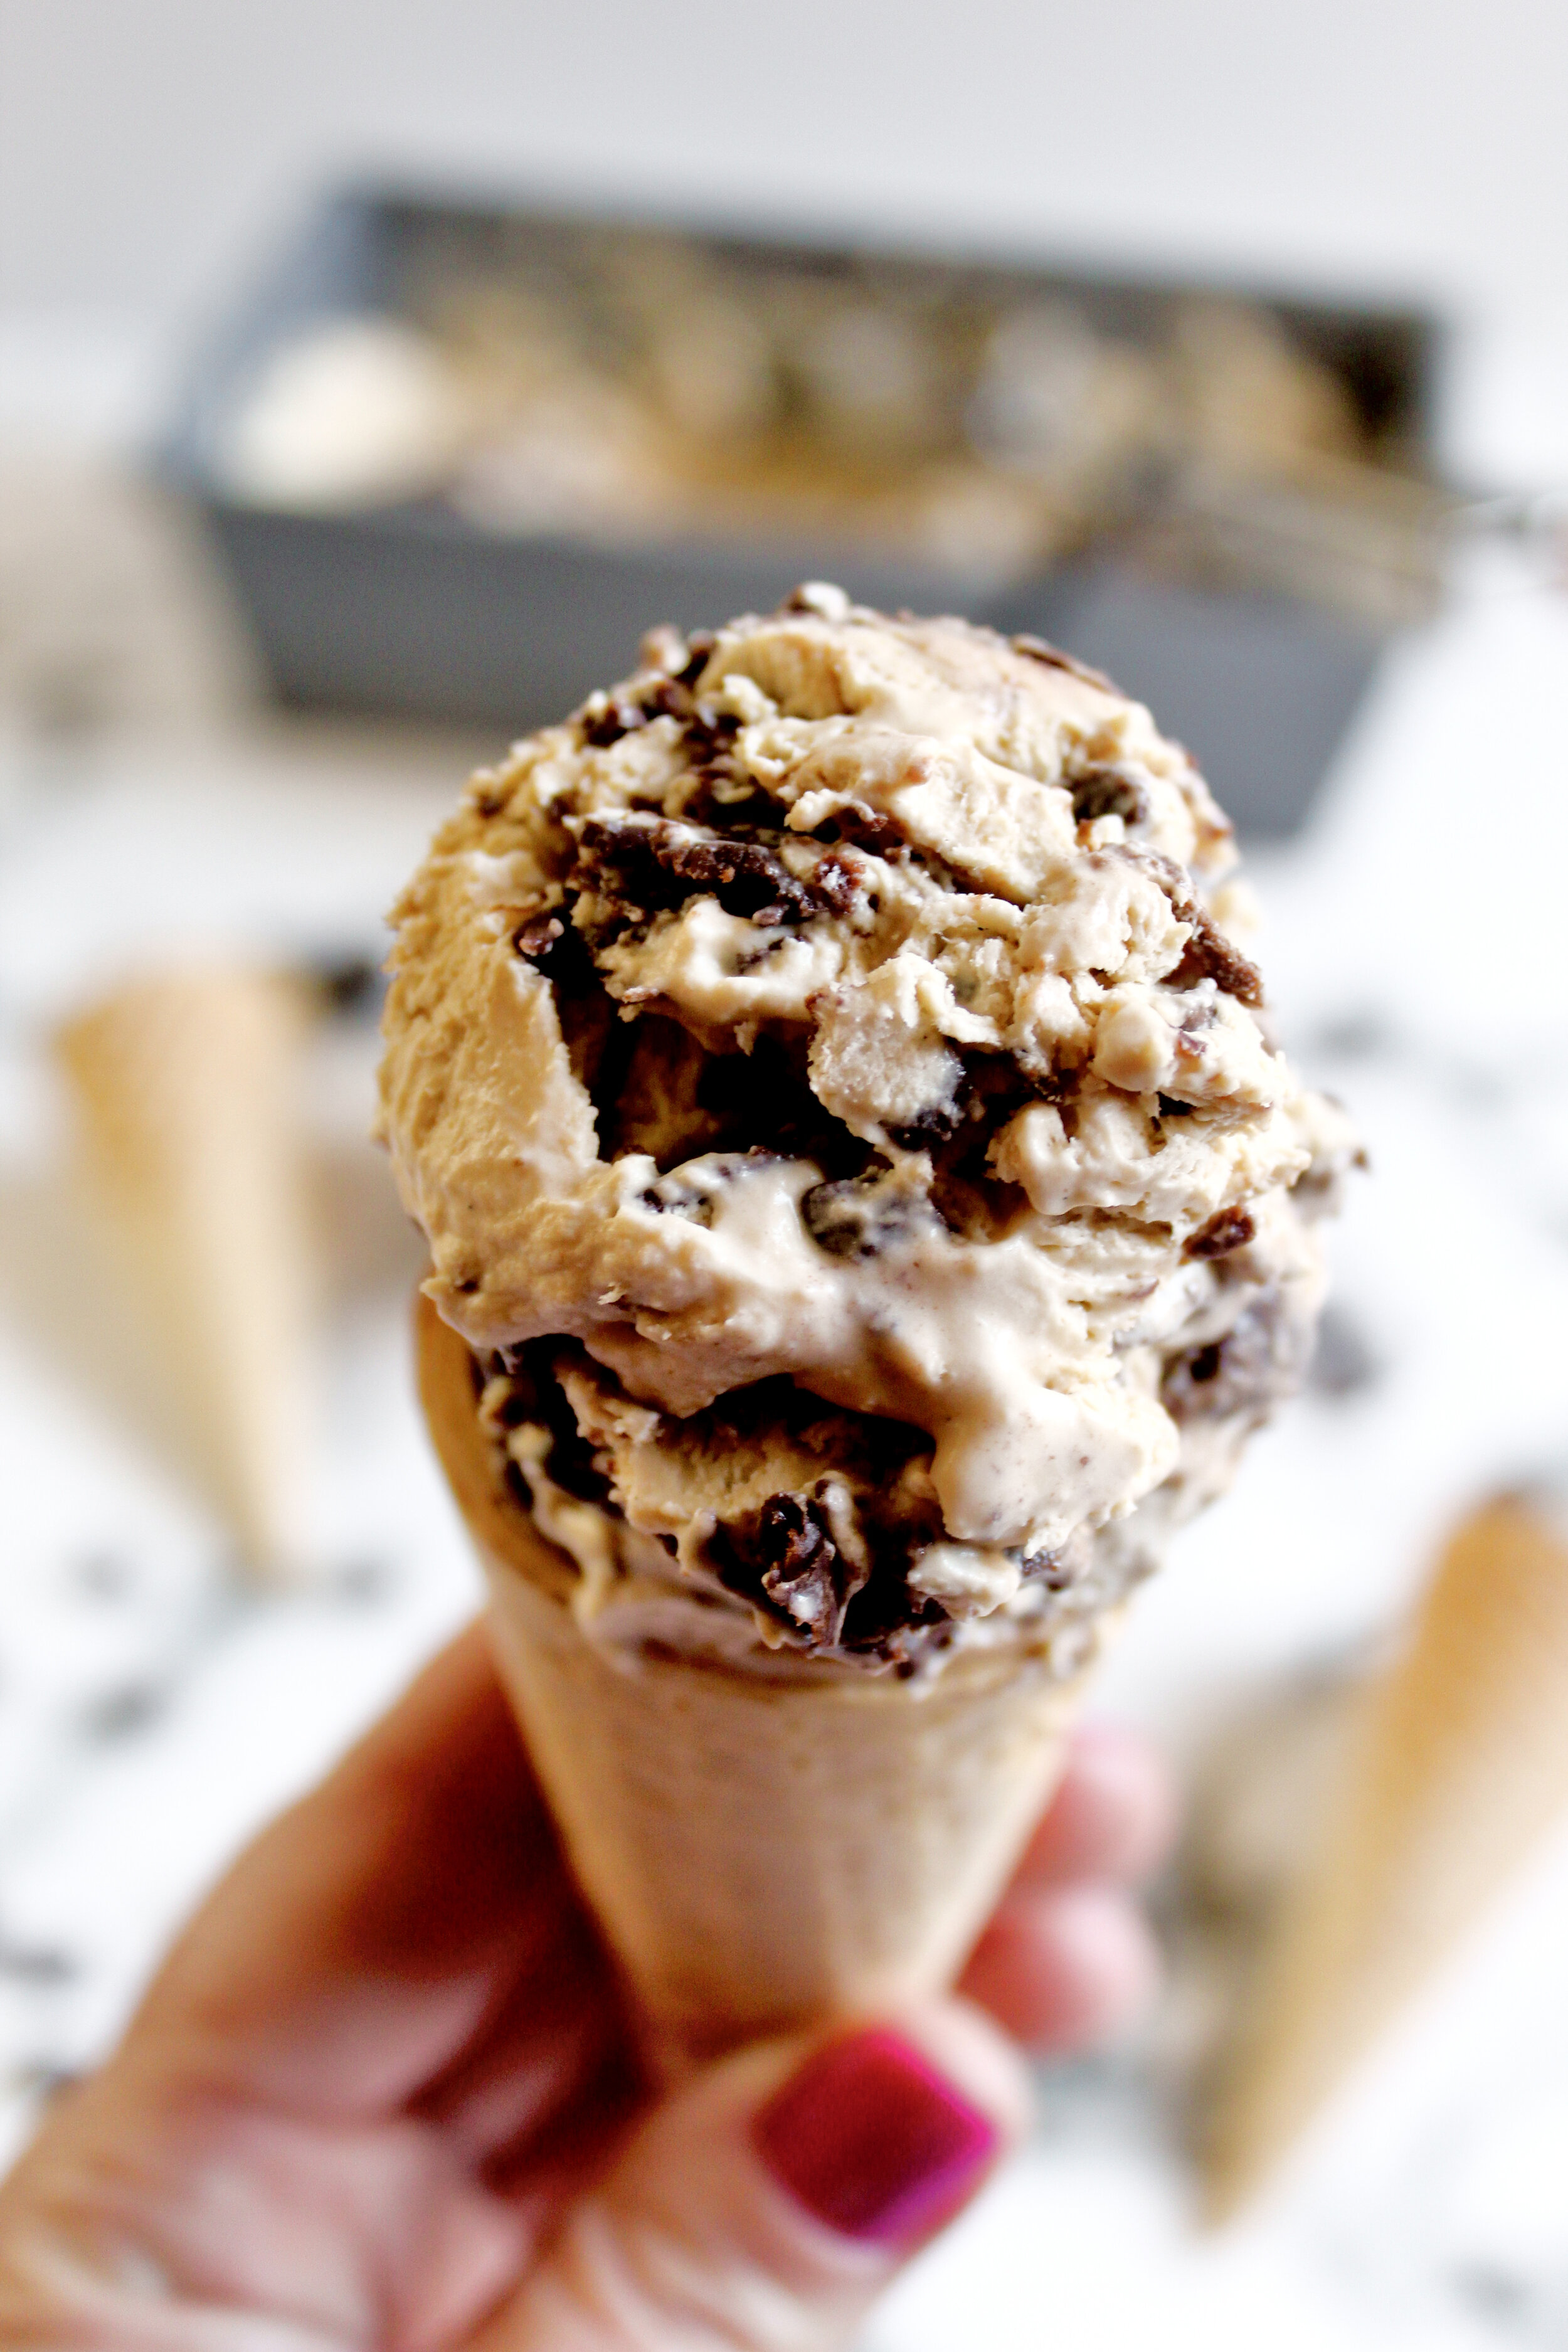
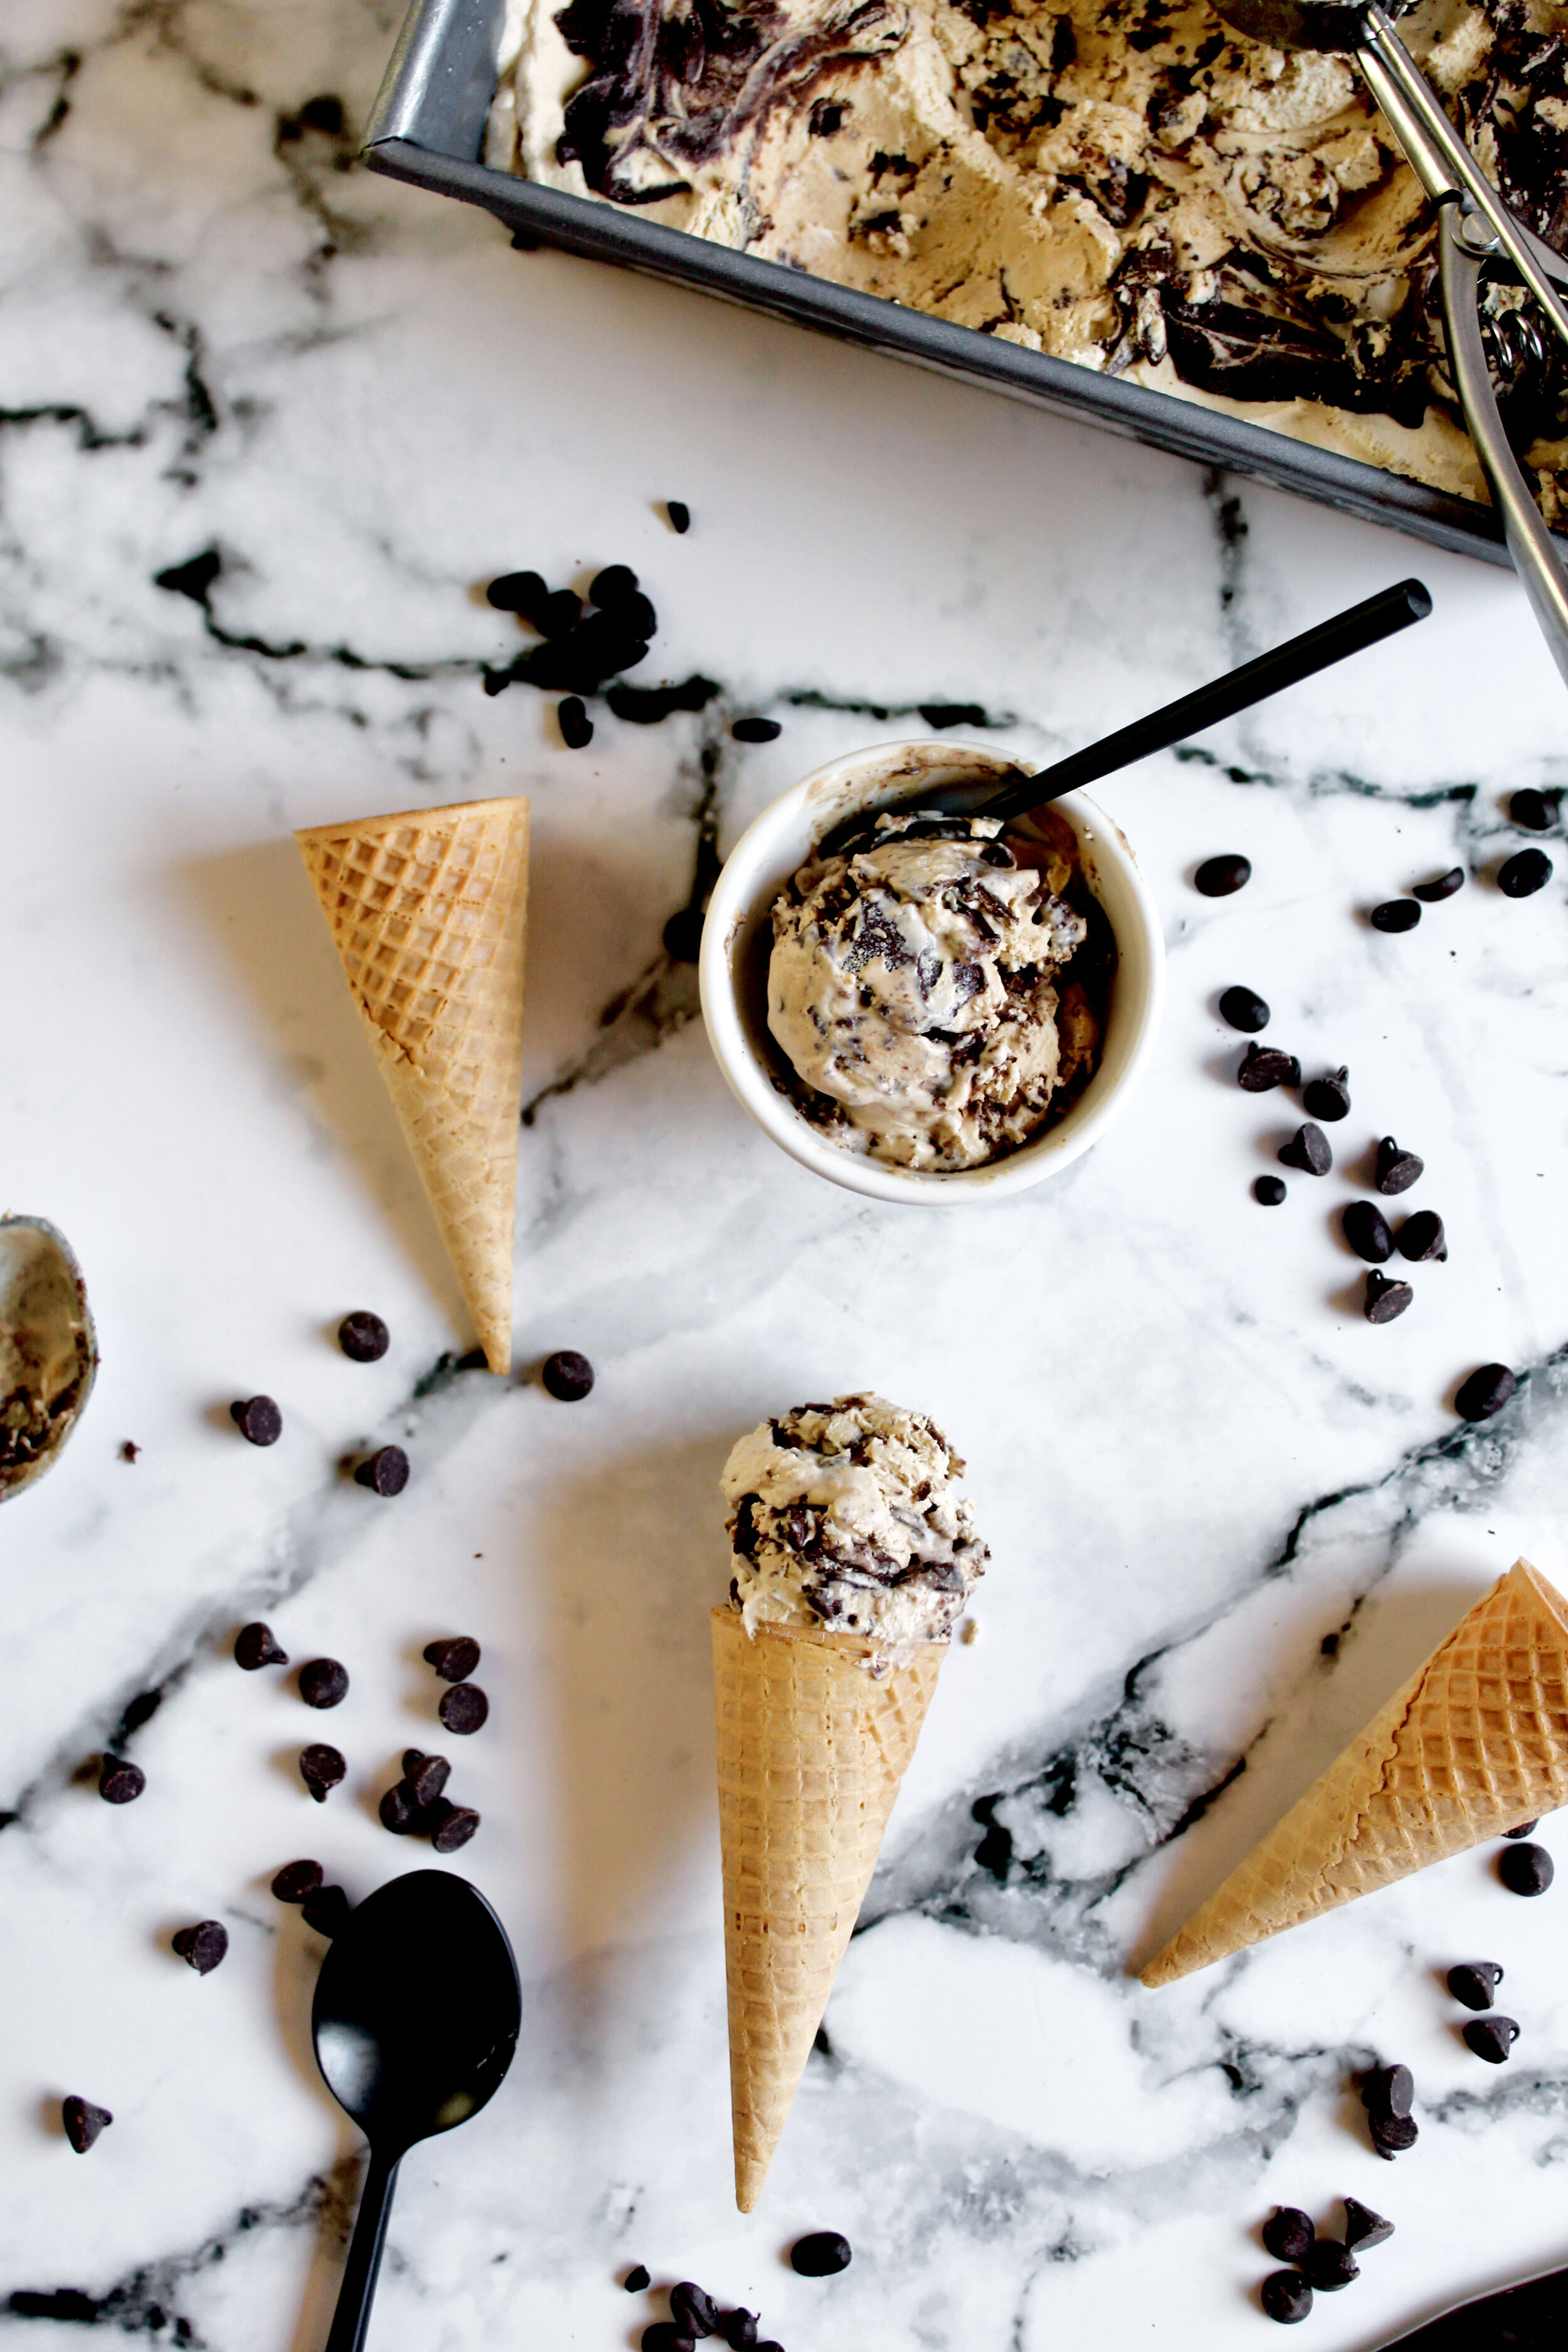
No-Churn Coffee Mudslide Ice Cream
Perfectly bold coffee ice cream with just the right amount of sweetness, filled with chocolate chips and a rich chocolate swirl—all without any special equipment! You can get that creamy, slow-churned texture without ever breaking out your ice cream maker. Plus, the bold flavors of coffee and chocolate make this ice cream a coffee lover’s DREAM.
This post may contain affiliate links from which, at no additional cost to you, I may earn a small commission to keep this site running. Only products I myself would or do use are recommended.

Those who know my husband and me know we are ALL about ice cream. We bonded over ice cream on our first date. Like a trooper, he used to trek out to Berkeley (okay, not trek—it’s like a 20 minute drive) to get this artisan ice cream that I love. And when we realized we couldn’t do ice cream at our wedding due to lack of freezer space, we decided to do an ice cream bar at our rehearsal dinner.

We also own three ice cream makers, a dedicated milkshake machine, and more specialty ice cream dishes and scoopers than is probably normal.


We also tend to go out of our way to find good ice cream on our summer trips—from standing in crazy lines in Paris to wandering for longer than most would until we found a very hidden but popular gelateria in Venice. We’ve been to Tillamook, Oregon twice in the last three years—and the factory is like 90% of what there is to do in that town.

Suffice it to say, we LOVE ice cream. Good ice cream—the kind that doesn’t need to be obscenely sweet to be amazing. We can even be ice cream snobs and have had long conversations with our friends about flavors.


In fact, I got so carried away thinking about ice cream that I forgot I was supposed to be sharing a recipe with you. Oops.

Anyway, this ice cream is inspired Hawaii. We always get lots of Roselani’s Ice Cream while we’re there, and on our most recent visit I branched out and tried something new: Kona Mud Pie. Holy wow. One of the best ice creams I’ve ever had. Even my two year old loved it. Usually, I’m a “sharing is caring” type mom, but this time I was hoarding my ice cream and sending her to steal from her dad instead.


So, one of the first things I did when we got home was recreate this little bowl of ice cream heaven.

How to make no-churn coffee mudslide ice cream
1. Melt chocolate and cream for the chocolate swirl. Set aside to cool.
2. Stir sweetened condensed milk, vanilla, and instant espresso or coffee powder. Set aside and stir a few times while the cream whips in the next step.
3. Whip heavy cream to just-barely stiff peaks.


4. Fold the whipped cream into the condensed milk in 3 batches. Add the chocolate chips in with the final third of the whipped cream.
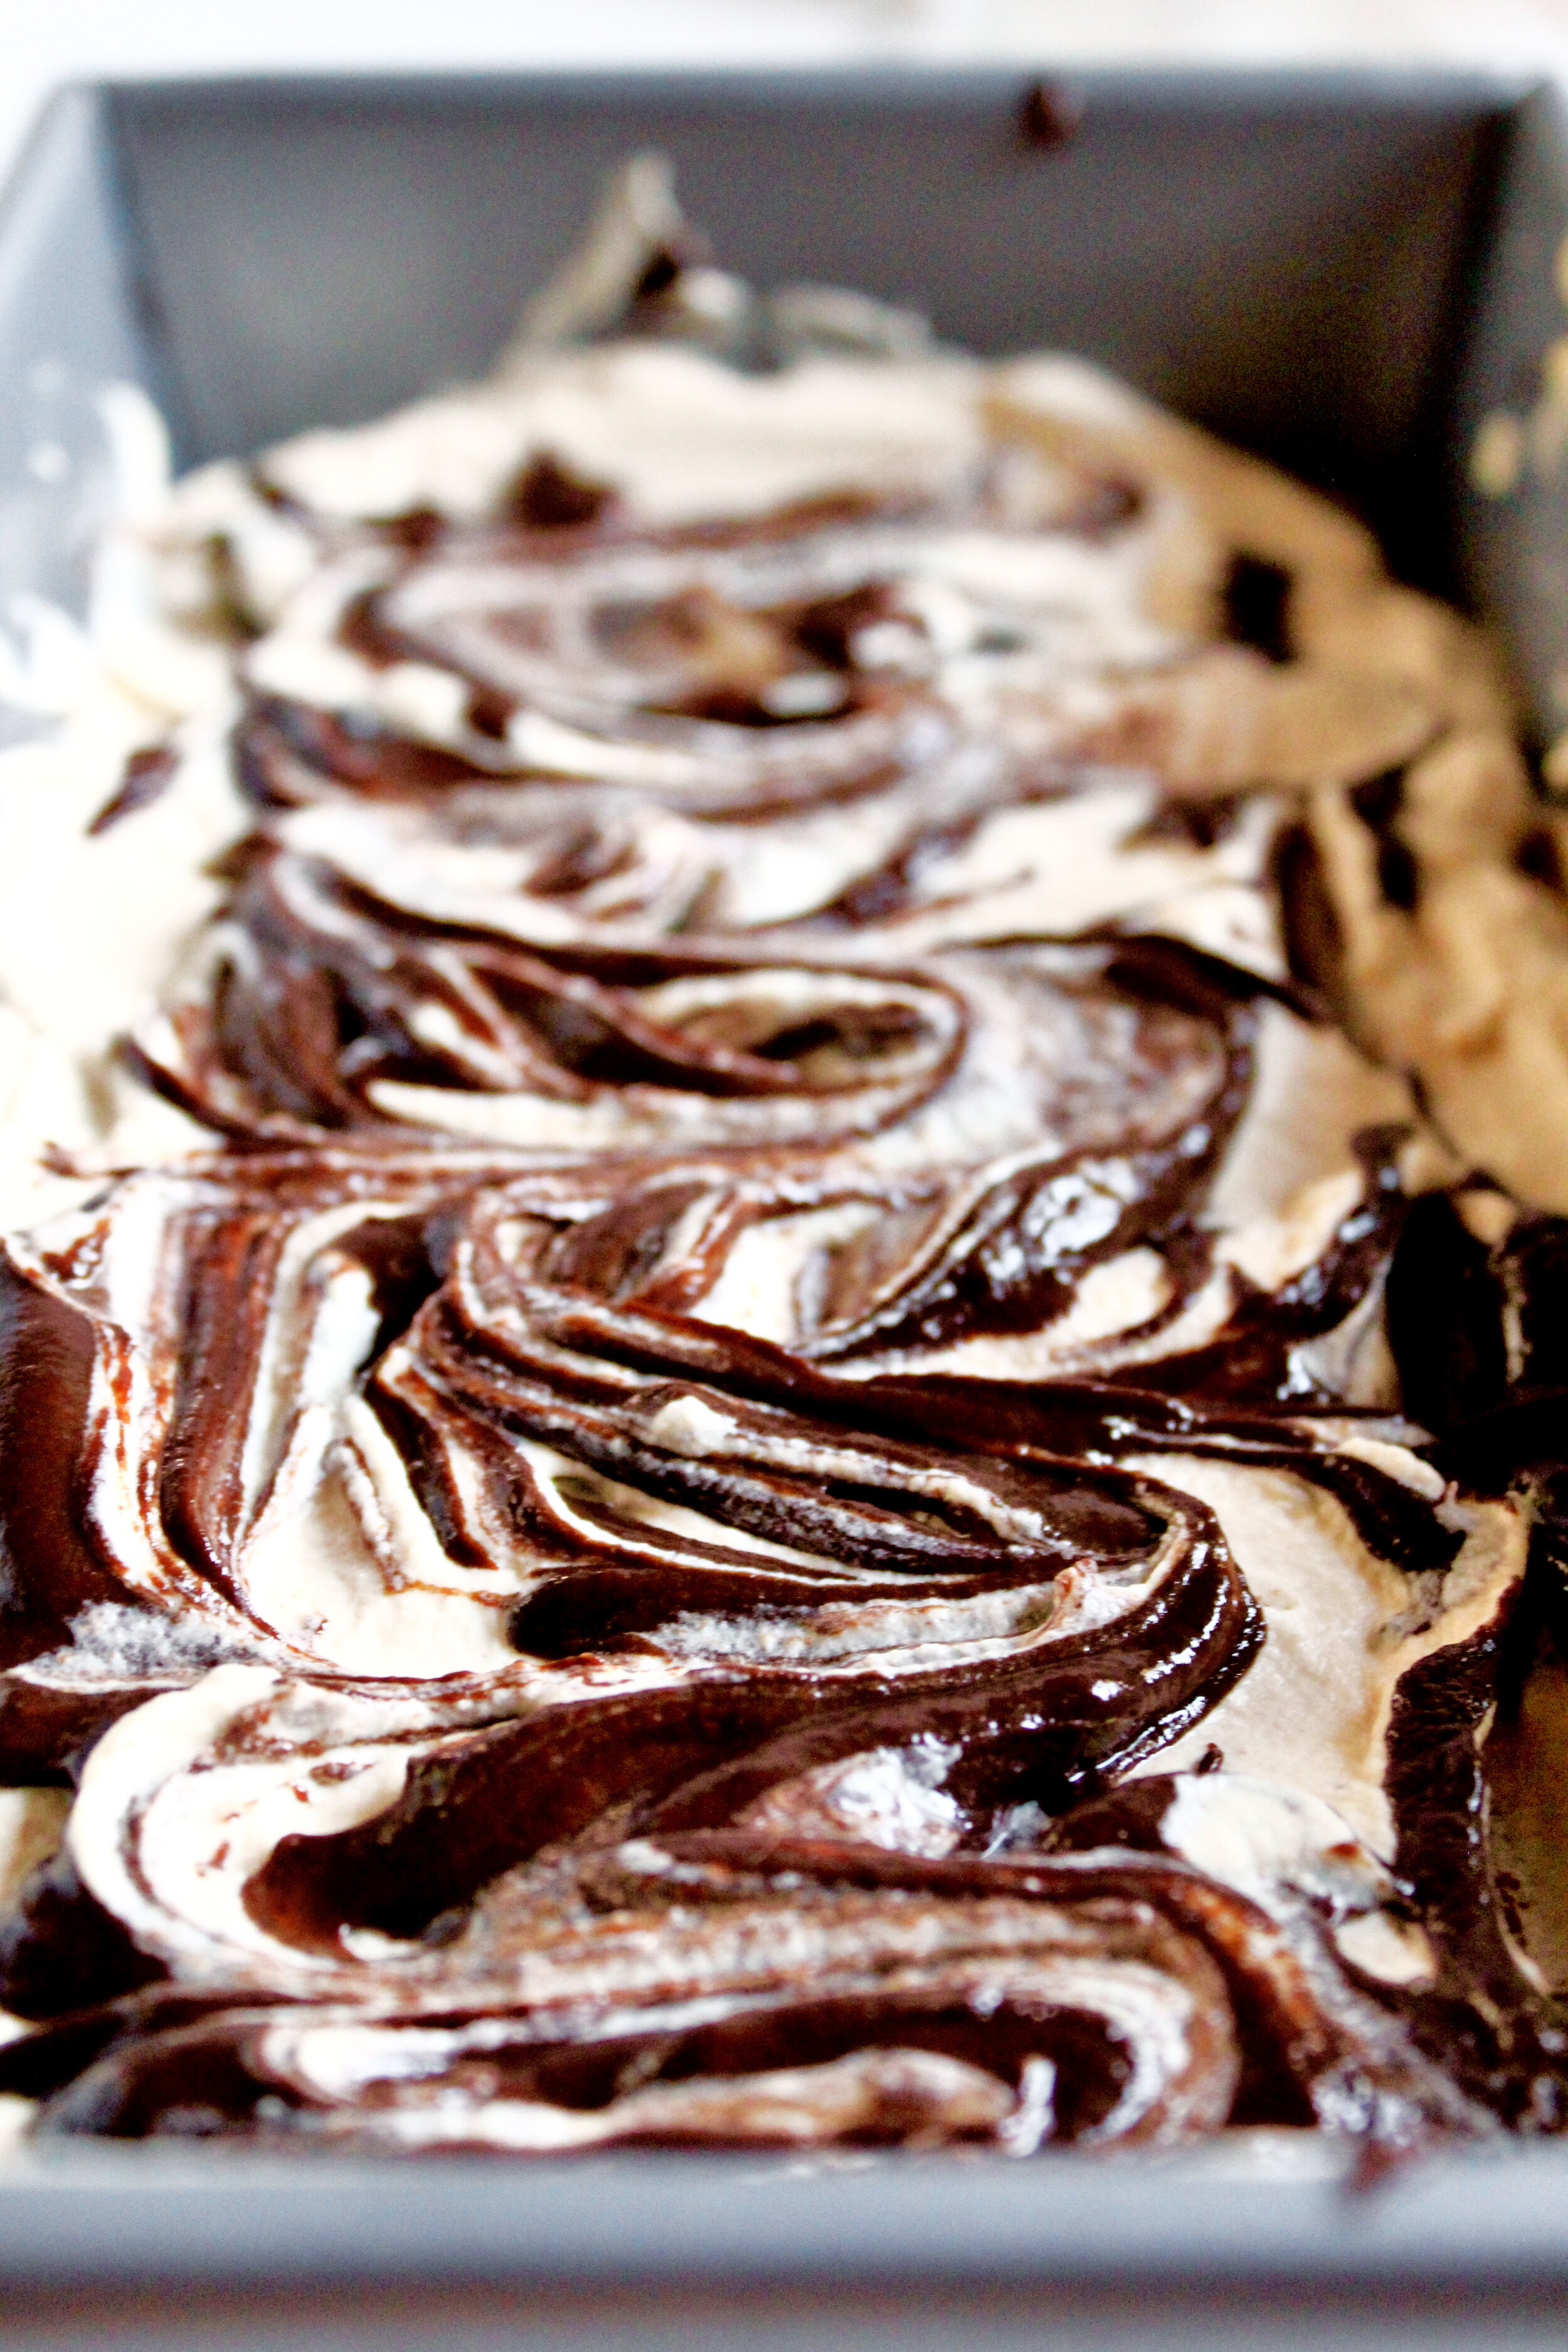
5. Layer ice cream and cooled chocolate in a bread loaf pan.
6. Freeze 4-5 hours, or overnight.


Enjoy!

Tips and notes for this recipe
Let the chocolate swirl cool completely
If you swirl hot chocolate into what’s basically whipped cream, you’ll get soup. I found that the chocolate was the perfect temperature when I was ready to use it, but I’m stopping to take photos and videos. So, if you’re an ice cream wizard and work quickly, just don’t work too quickly and swirl hot melted chocolate into your ice cream base.
Sub chopped sandwich cookies for the chocolate chips
Technically, Kona Mud Pie has chocolate sandwich cookies and not chocolate chips. But I was planning to use this in an ice cream sandwich and felt there’d be enough cookie going on. Plus, I wanted to use up the mini chocolate chips taking up space in my cupboard. Thus, Coffee Mudslide Ice Cream—every bit as good with just a bit more crunch.

Let soften before scooping
This part really depends on your freezer and ice cream scoop. You may be able to scoop it immediately. However, I tried using my cute, old fashioned scoop for photo purposes and had a hard time of it. So, don’t think you did something wrong if it’s too hard to scoop—just let it sit on your counter for about 5 minutes and you should be golden.
My ice cream making tools
Here are my must-have tools I use for making ice cream. Affiliate links provided.

You might also like:
Macadamia Nut Ice Cream (you can see a trend in my ice creams being inspired by Hawaii…)

No-Churn Coffee Mudslide Ice Cream
- prep time: 15-20 minutes
- chill time: 4-5 hours
- total time: 5 hours, 20 minutes
servings: about 12
Ingredients:
for the chocolate swirl (this will make a little extra--save it to use as hot fudge on a sundae!)
- 5 ounces (140g) baking chocolate, chopped
- 3 ounces (86g) heavy whipping cream
for the coffee ice cream
- 3 cups (693g) heavy whipping cream
- 14 ounces (397g) sweetened condensed milk
- 1 tablespoon (13g) pure vanilla extract
- ½ tablespoon (3g) instant espresso or coffee powder
- ½ cup (86g) mini chocolate chips (or chopped baking chocolate)
Instructions:
- First, make the chocolate swirl so it can cool. Use a double boiler or create one by placing 1” to2” water in a medium saucepan and finding a bowl that can sit on top without the bottom touching the water. Bring the water to a boil then turn down to low and place the bowl on top.
- Place the chopped chocolate and heavy cream in the bowl and stir constantly, until the chocolate is about 75% melted. Remove the bowl from the saucepan and stir vigorously until smooth. If it stops melting, you can place it back on the saucepan for about 30 seconds, stirring constantly. Set aside to cool, stirring occasionally as you make the ice cream. Be sure it is room temperature before you use it in step 8.
- Next, stir together your sweetened condensed milk, vanilla, and espresso powder in a medium to large mixing bowl for about a minute. It will still look speckled, like the espresso won’t dissolve. It just needs some time to absorb. Set aside.
- Add the 3 cups heavy cream to the bowl of your stand mixer fitted with the whisk attachment (or a large mixing bowl, using handheld beaters). Beat the cream on medium until frothy and bubbles start to form, about 30 seconds. Slowly turn it up to high (you can start out on high, but you’ll most likely get quite a bit of splatter on you and your kitchen). Let mix for 1-2 minutes, until stiff peaks just start to form. Watch it carefully, as your mixer and kitchen temp can alter the time it takes.
- While the heavy cream beats, stir the condensed milk some more. By now the espresso powder should be more dissolved, with only a few clumps.
- Once the heavy cream just starts to form stiff peaks, turn it off. If needed, continue to stir the condensed milk until the espresso powder is mostly dissolved.
- Add about ⅓ of the whipped cream to the condensed milk and stir/fold it in gently until fully combined. Add another ⅓ of the whipped cream and fold it in gently until fully combined. Add the remaining ⅓ along with the mini chocolate chips and fold it until fully combined. (Doing this in 3 additions helps keep it fluffier and get that “slow churned” texture without actually churning your ice cream.)
- In a bread loaf pan or similarly sized dish, spread about ⅓ of the ice cream on the bottom. Drizzle about ¼ of the cooled melted chocolate on top, swirling it a little. Don’t go overboard on the chocolate, as it will make it difficult to scoop if you use too much. Spread another ⅓ of the ice cream, followed by another ¼ of the melted chocolate. Repeat this one last time with the remaining ice cream and another ¼ of the chocolate.
- Cover and freeze at least 4-5 hours, or overnight, until set. Depending on your freezer, you may need to let it sit on your counter about 5 minutes before scooping.
Enjoy!
Store leftovers in an airtight container. Ice cream should last at least a month, but this can vary depending on your freezer and how well-sealed it is.
