
Double Vanilla Cake with Edible Gold Accents
Ring in the new year with this glamorous vanilla cake. Moist, bakery-style vanilla cake frosted with the perfect vanilla buttercream and gilded with edible gold leaf. This simple, stunning cake is perfect for any special event, but especially for New Years Eve!
This post may contain affiliate links from which, at no additional cost to you, I may earn a small commission to keep this site running. Only products I myself would or do use are recommended.
As “shower season” is upon us (well, in my world, it’s all the baby showers, but I know bridal showers are in full swing right now, too), I thought I’d share one of my favorite shower cakes. It was actually made for a boho themed baby shower, but it’s honestly an ideal cake for any shower.
The thing that’s so great about this cake is that it’s universally loved. I’ve made it several times for this particular mama-to-be, including her wedding and gender reveal, which made this cake even more fun to make.
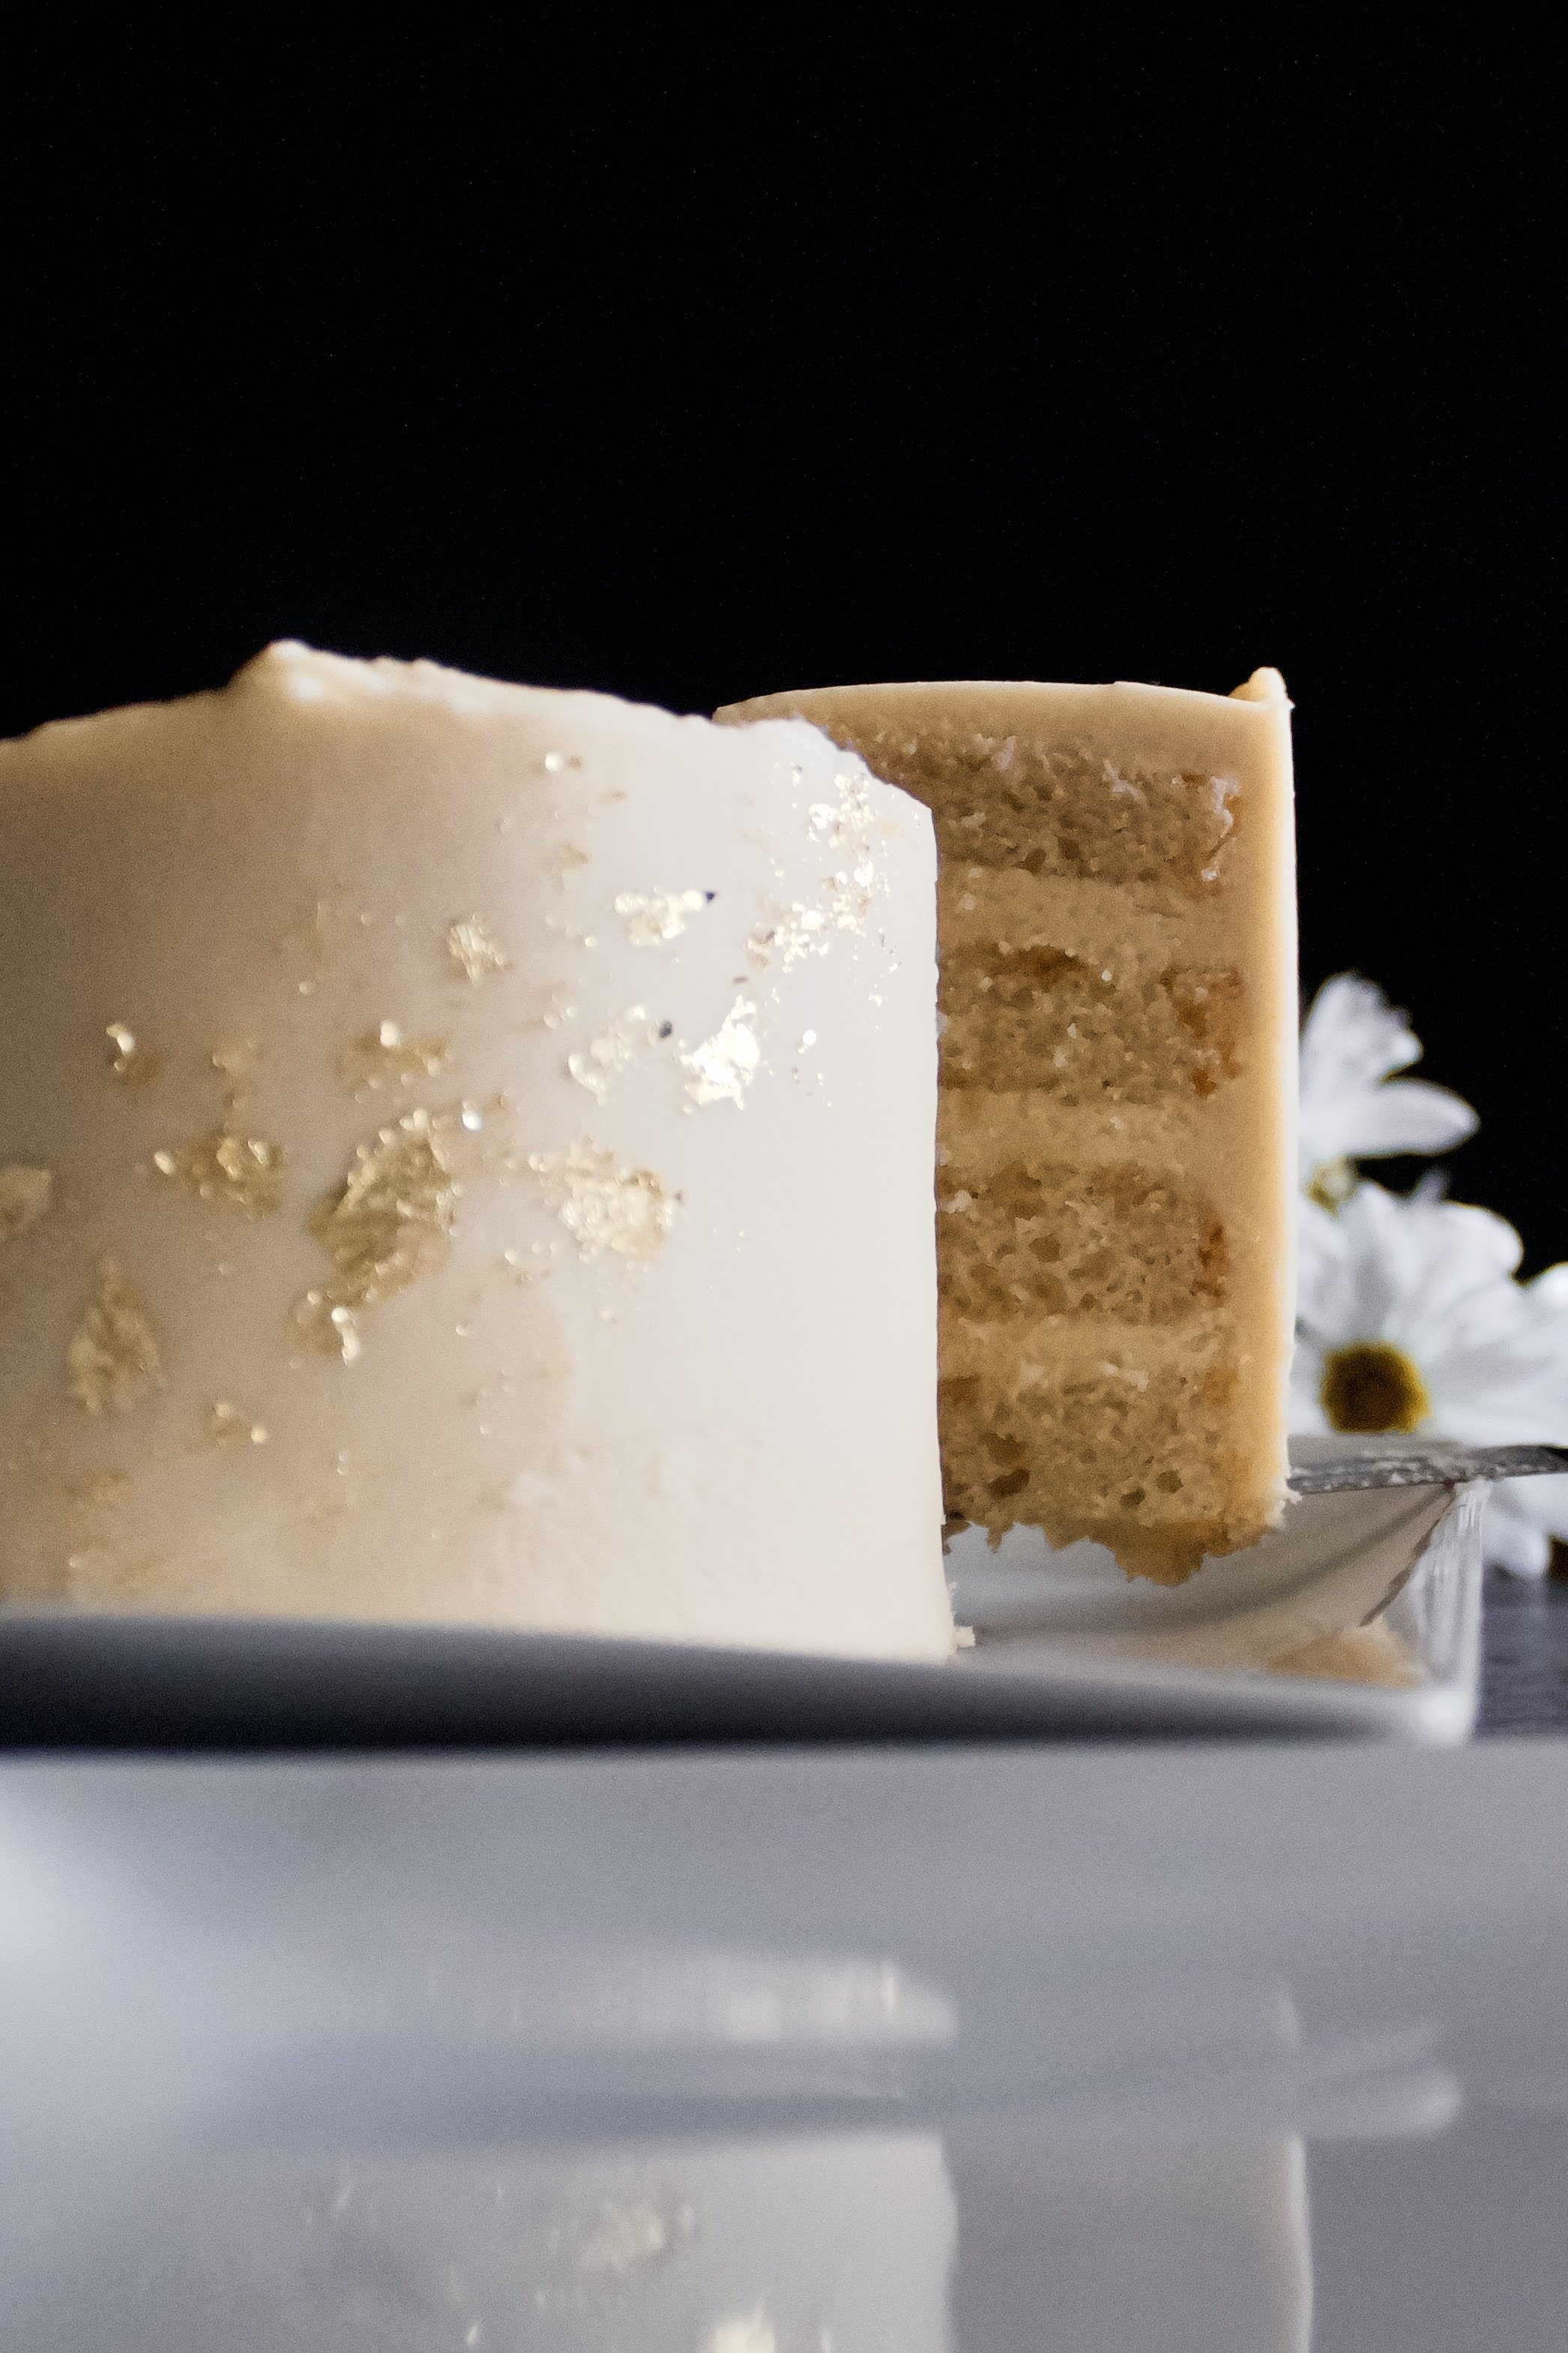
The pictures don’t do it justice. The cake is super moist and a little dense but somehow still light. It pairs so, so well with my vanilla buttercream, which isn’t super sweet like most American buttercreams and has a rich vanilla flavor.
And it’s SO versatile to decorate! I’ve made this for many baby and bridal showers as well as birthdays. I’ve made it into cupcakes and put rainbow frosting on it. I’ve made it into a sprinkle cake. I’ve made it into cupcakes and filled it with raspberry jam or lemon curd. I’ve used it for quite a few first birthday smash cakes. So, it was super easy (and fun) to make this simple, boho golden cake!

Why this recipe works
First, the cake. This is one of my favorite cakes, modeled after a local bakery we have that makes these deliciously old-fashioned, slightly dense yet fluffy cakes. I make mine less sweet, but it still has this beautifully moist, spongy texture. It’s not light and fluffy like a boxed cake, but it’s also not dense and chewy. Instead, it has this wonderfully soft texture that’s super moist. And it actually has flavor! The vanilla actually shined through, instead of the general taste of sugar.

The frosting is simple—just vanilla American buttercream. However, one of my secrets is adding extra vanilla to get a nice, rich (but not cloying) flavor. Also, to make it not too sweet yet still sturdy (because the sugar usually adds the stability), I use a combination of beating it for several minutes to make it fluffy, stir it to release the air bubbles, then refrigerate it as I frost the cake to keep things nice and sturdy. This method also helps the color lighten to a near white. I usually use Plugra or a similar butter (not my go-to Kerrygold) when I want it super white, because it’s naturally less yellow.
Key ingredients
Flour. Be sure to spoon then level this so it’s not packed in and don’t skip the sifting.
Baking powder and soda. Be sure both are fresh and don’t skip sifting them, as they tend to clump up.
Salt. Sea salt is best!
Eggs. Use fresh, room temperature eggs.
Plain, whole milk Greek yogurt. Be sure it’s room temperature, which usually takes about 30-60 minutes. You can also sub full fat sour cream.
Oil. I prefer avocado (light, not the super expensive, extra virgin—that will turn the cake green) or grape seed oil. They are healthier fats and have a very light taste. Vegetable or canola oil would work, too.
Vanilla. Use pure extract, not imitation, because in a double vanilla cake that’s the only flavor you’re getting!
Buttermilk. You can make your own by combining 1 cup room temperature whole milk with 1 tablespoon white vinegar 5-10 minutes before you make the cake.
Sugar. Not a ton, but just the right amount to create a perfect sweetness and help the cake rise.
Vanilla American buttercream. You could use any white/nearly white frosting you want, but I really, really love the combination of plain vanilla with this cake.
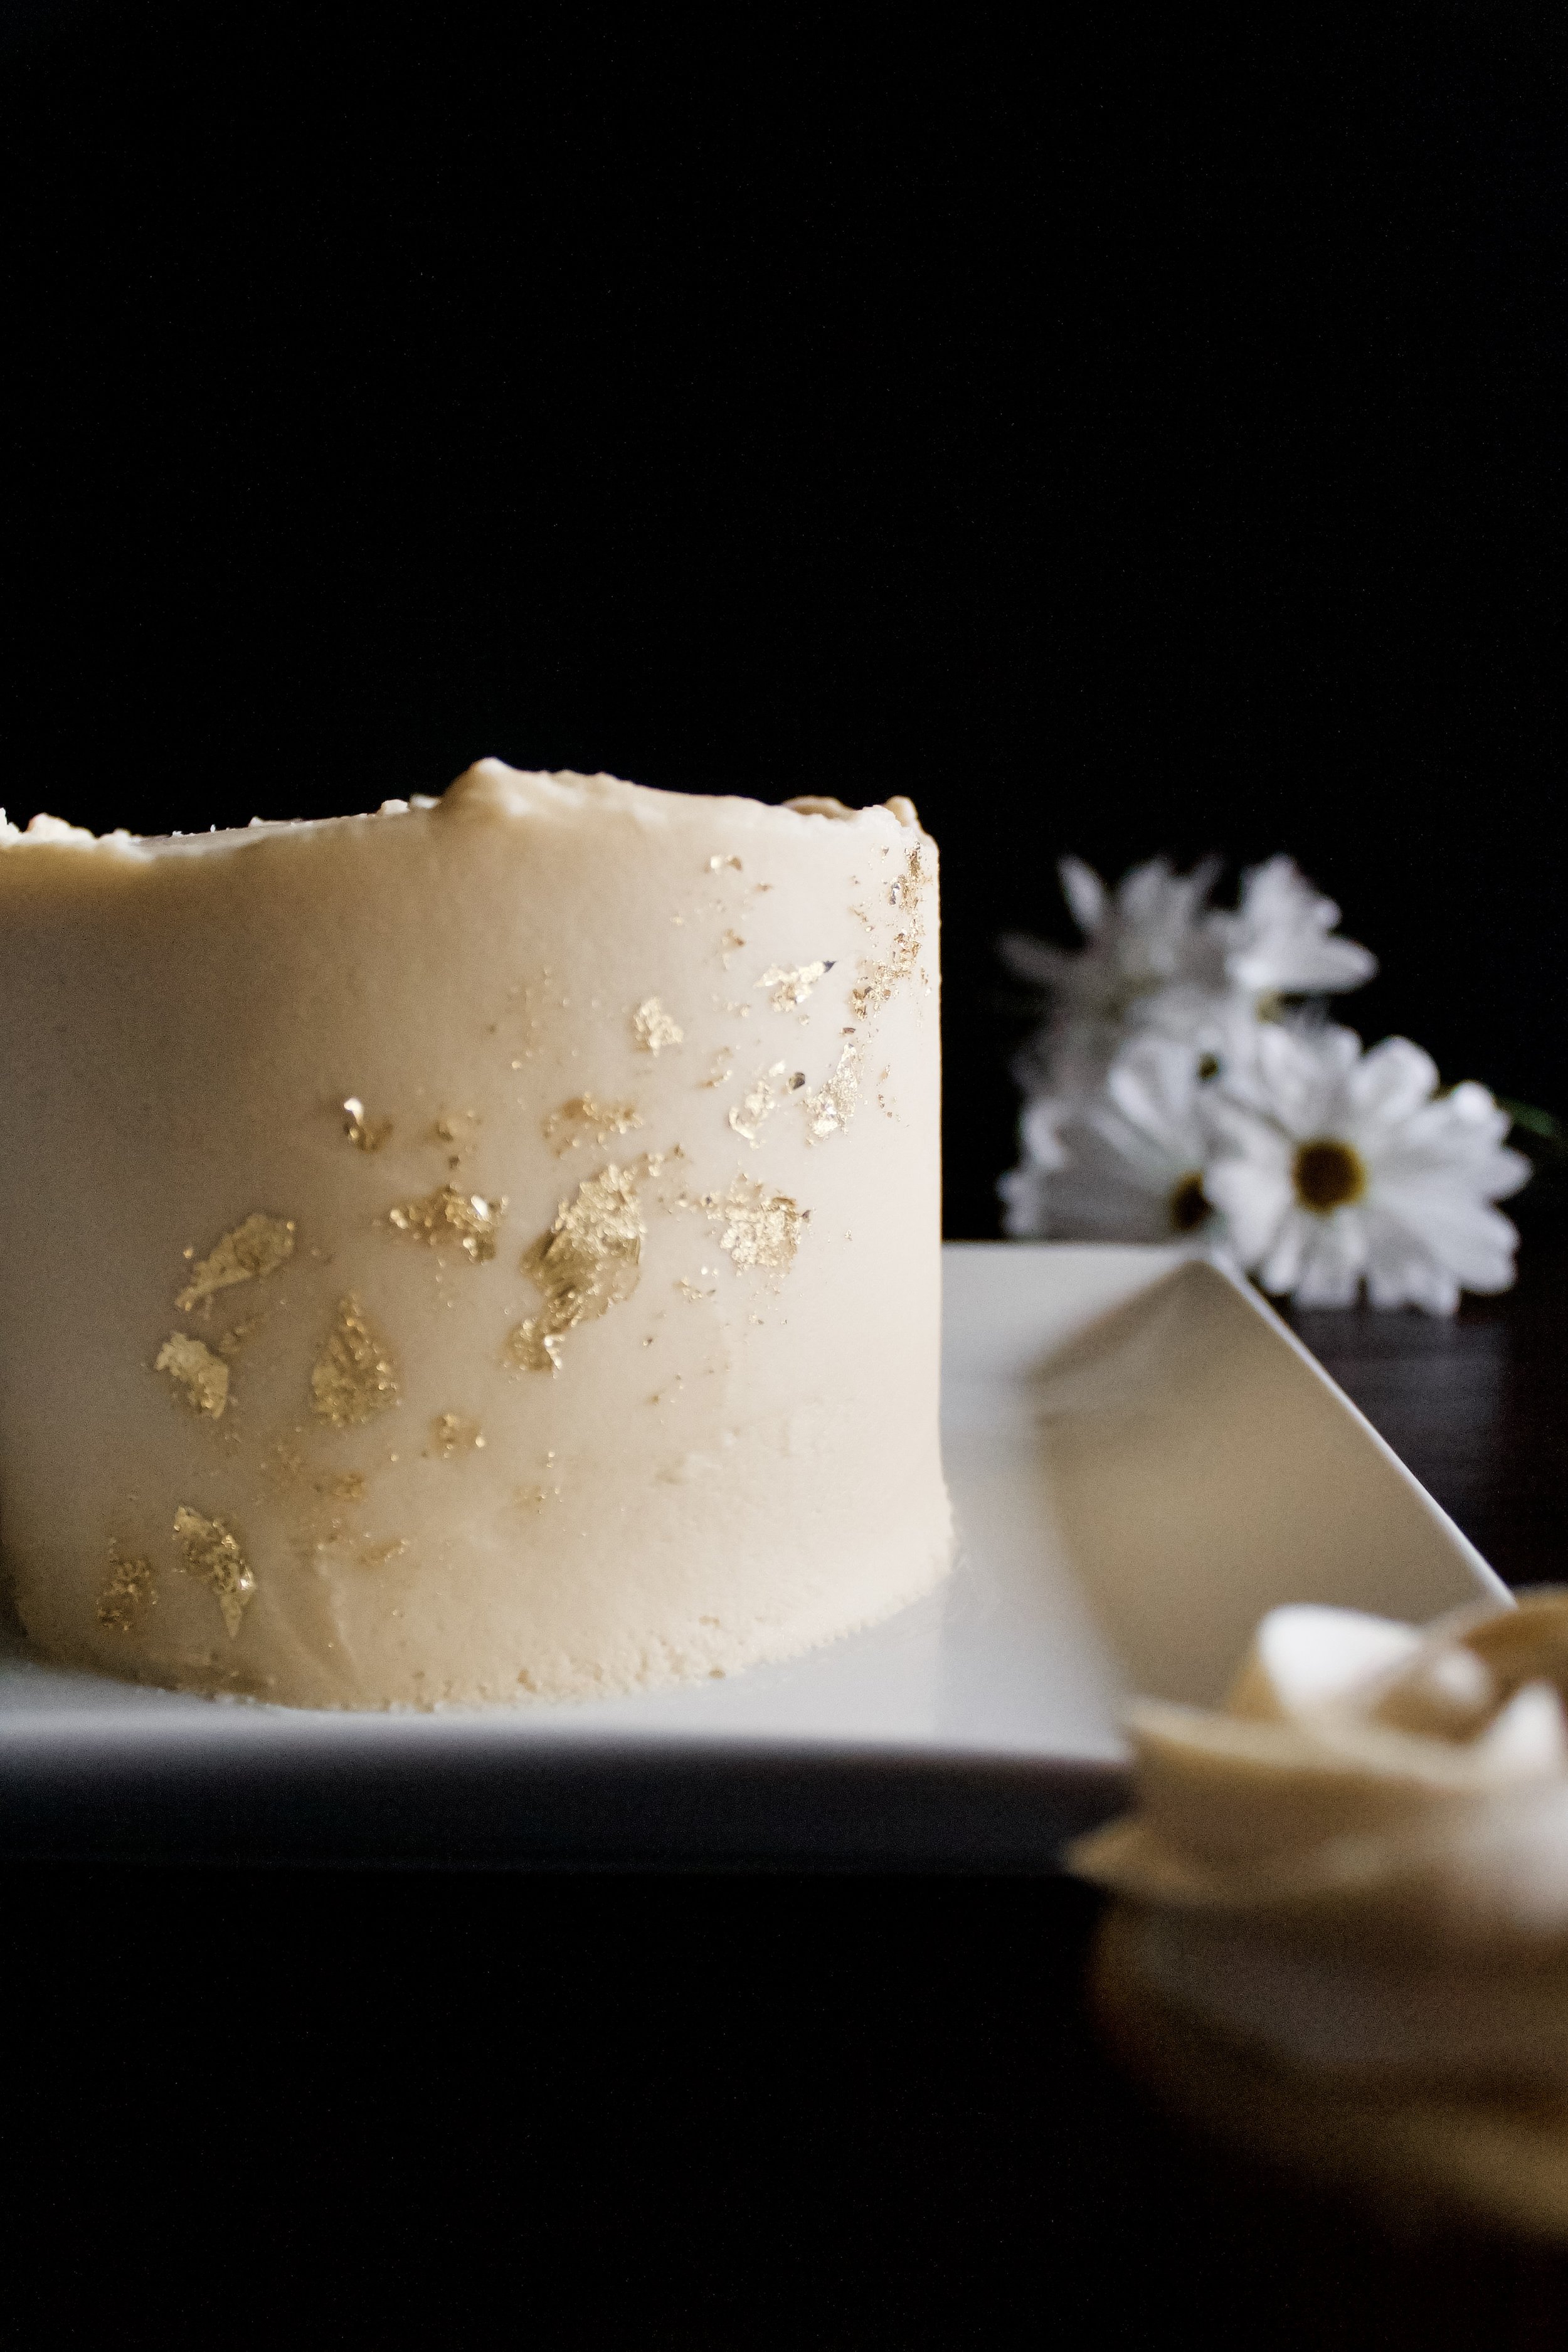
Edible gold leaf. I chose a larger package because I knew I might mess up (and I did). I also like this type, because it comes on a sheet of paper that you can press against the cake to minimize handling the gold.

How to make double vanilla golden cake
1. Sift and whisk the dry ingredients. Set aside.
2. Whisk the wet ingredients well. Whisk well, until fully emulsified (meaning no separation of ingredients—everything should be one homogenous mixture).
3. Whisk in the sugar. Whisk for about a minute, until most of the sugar is dissolved.
4. Fold in the dry ingredients. It will be slightly lumpy—don’t worry, it’ll bake just fine.
5. Bake. Bake in prepared pans until a toothpick inserted in the middle of each cake comes out with just moist crumbs—no raw batter, but also not clean (this means it’s over baked). Check each layer individually to ensure event baking.


6. Make the buttercream. I like to do this when the cake is nearly cooled. It takes about 15 minutes to get it light and fluffy and pure white, and it’s easiest to work with right after I’ve stirred out the large air bubbles.
7. Frost and chill cake. Chilling is necessary so the frosting can withstand pressing the gold into it to adhere.
8. Add gold accents. Be gentle and try pressing the gold against the chilled cake still attached to the paper. Once you start touching and messing with it, it can shrivel up and become unusable.
Enjoy!

Tips and FAQ’s for this recipe
Where do I get edible gold?
I bought mine on Amazon. I’ve actually never seen it at in a store, but we don’t have many specialty baking stores nearby. I suggest getting more than you think you’ll need, as using it can have a learning curve (see below). Having extra will ensure you don’t run out if you do have issues using it at first (like I did).

How do I get the gold to cooperate?
Use tweezers and go slowly! I don’t own food tweezers, although I really should. I ended up using a very sharp steak knife then switched to pressing the paper that the gold comes on against the cake to get it to transfer directly. One big problem is that as you move the gold through the air, it starts to wrap up on itself, which is why paper to frosting is ideal. I was also okay with it being a little messy, because that’s part of the aesthetic. But I recommend using something sharp to handle the gold and also be okay with a little mess as you learn how to use it.

How do I get the rustic edges on top?
That part is SO easy! You simply frost the cake, smoothing out the top first. Then, work on the sides, getting it even and smooth (or as smooth as you can—don’t stress too much). As you smooth out the sides, some frosting will naturally rise up and create that rough, rustic edge. Usually, you want to smooth it out. And of course you’re welcome to! However, this was perfectly in line with the aesthetic I was going for, so I left them rustic and natural (and WAY easier to make!).

Can I use nonfat Greek yogurt?
Personally, I wouldn’t. You would be adding milk solids without fat, which would make the cake more dense and less moist. I’ve used lowfat before, and even that came out with a drier, more crumbly texture. So, I suggest sticking to full fat, which isn’t even that much when you consider how much is in one serving of cake!

Don’t over mix
This is one of those elusive rules that doesn’t always make sense. Just follow the directions as listed, which includes time frames for mixing everything. When you add the flour, you want to just barely mix it, which is completely different than when making chocolate cake. It might still be a little lumpy, but that’s okay! It’ll bake out nice and smooth.

Don’t over bake
This is a bit easier to follow, as you just need to check the cake early. If it’s still jiggling, it’s not done. If a toothpick comes out with raw batter, it’s obviously not done. You want to catch it at that perfect time when some moist crumbs come off on the toothpick, not clean. Also remember to remove it from the pan after 5-10 minutes of cooling so it doesn’t cook more.

My cake tools
Here are my must-have tools I use for making this cake. Affiliate links provided.
Mesh sieve (because sifting is KEY for a fluffy cake)
All-rubber spatula (this makes scraping the bowl easier as the batter and frosting doesn’t get all over a wooden handle!)
Silicone liners for 8” cake (or for 6” cakes)
8” aluminum cake pans or 6” aluminum cake pans (I’ve found nonstick doesn’t bake as evenly)
Offset spatula for frosting the cake


Double Vanilla Cake with Edible Gold Accents
- prep time: 35-40 minutes (includes making frosting)
- bake time: 25-30 minutes
- total time: 1 hour, 10 minutes, plus cooling time
servings: 12-16
Ingredients:
- 2 ¼ cups (306g) all purpose flour, sifted
- ½ teaspoon (3g) baking soda
- 1 teaspoon (4g) baking powder
- ½ teaspoon (3g) fine ground salt
- 2 eggs,room temperature
- 6 ounces (¾ cup or 170g) plain, whole milk Greek yogurt, room temperature (regular yogurt or sour cream would work, too)
- 1 tablespoon (13g) pure vanilla extract
- 1 cup (240g) buttermilk*, room temperature
- ⅔ cup (160g) oil (avocado or grapeseed)
- 1 ½ cups (300g) sugar
- one batch vanilla buttercream
- edible gold leaf
Instructions:
- Preheat the oven to 325F/165C. Grease and flour two or three 8” or 9” cake pans or three to four 6” cake pans (or use baking spray) and line with parchment paper (or use silicone liners). I used four 6” pans to create a taller cake, so consider the aesthetic you want to determine how many of which size pan you should use.
- Using a large fine mesh sieve, sift then whisk flour, baking soda, baking powder, and salt in a small bowl. Set aside.
- In a separate medium mixing bowl, whisk the wet ingredients (eggs, yogurt, vanilla, buttermilk, and oil) until well-blended and no chunks of yogurt remain and oil is emulsified (meaning no oil bubbles form when you stop whisking), about 1 minute. Add sugar and whisk for about 30 seconds to partially dissolve the sugar.
- Add dry ingredients to the wet, stirring gently with a spatula (or the whisk—cause dishes are annoying) until just combined and only small lumps remain. Think muffin mix lumps, but no visibly dry sections.
- Pour evenly into prepared cake pans Bake for 25-30 minutes, or until a toothpick inserted in the middle comes out clean or with a few moist crumbs. Be careful to check frequently toward the end so as not to overbake. Remove from oven and let cool in pan for 5-10 minutes then transfer to a cooling rack until completely cooled.
- While the cakes cool, make the buttercream. You can also make the buttercream ahead of time, chill it, then let it come to room temperature on the counter for 1-2 hours while you make the cake. Just give it a good stir before using.
- Fill and frost the cake in a crumb coat. Refrigerate until very firm. Frost to desired thickness, first smoothing out the top then frosting the sides. This will help create the rustic edges.
- Refrigerate at least 20 minutes, until the frosting is firm.
- Decorate with edible gold leaf. Either use food safe tweezers to apply it (work gently, as the gold can crumble in on itself) or press the paper directly onto the cake. Be cautious using your fingers, as the gold can stick to them.
Enjoy!
Store leftovers in an airtight container. Preserve freshness by placing a piece of plastic wrap directly against cut sides, sealing it against the frosting.
*You can make your own buttermilk by placing 1 tablespoon white vinegar in a 1 cup measuring cup then filling it the rest of the way (so 1 cup total) with room temperature whole milk. Stir well then let sit 5-10 minutes while you prep the rest of the ingredients.
