
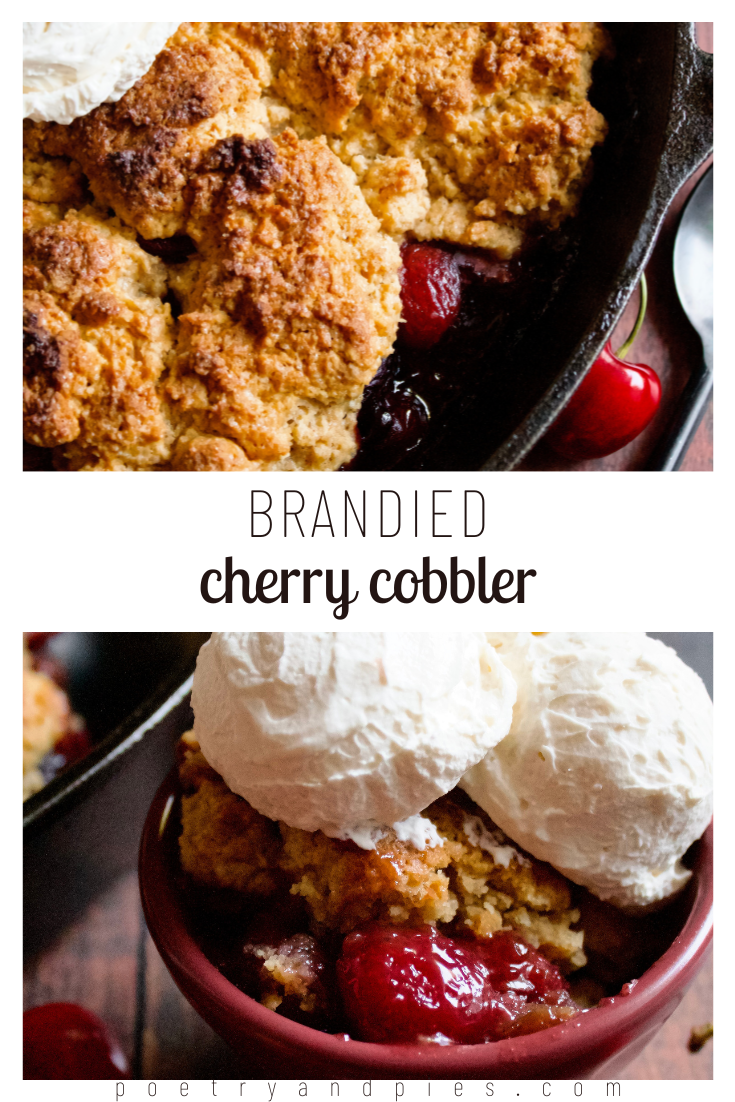
Brandied Cherry Cobbler
Fresh cherries blend perfectly with brandy and brown sugar, topped with a delicate cobbler dough for a perfect summer dessert. This recipe is simple and full of warm, fruity flavors.
This post may contain affiliate links from which, at no additional cost to you, I may earn a small commission to keep this site running. Only products I myself would or do use are recommended.

This was a wing-it-and-see recipe, but I was so happy with how it turned out! I wanted a classic cobbler, but I’d never actually made one before. I usually make crisps (or my crispy oatmeal cobbler, which is really just a cross between a crisp and cobbler). So, to the internets I went. And wow. All ya’ll be making wildly different cobblers. You have “old fashioned” with the butter melted in the pan first and a cake-like batter. You have basically biscuits on top of fruit, which seems to be the Southern preference. And everything in between.
In the end, I went with a biscuit-y style cobbler, and it was a great choice. Not too sweet, so you can add plenty of ice cream. It’s got a bit of a crisp, but is still a bit doughy. The fruit and dough stay mostly separate, which I actually prefer. While I intend to keep exploring the whole cobbler world, I’m a fan of this version!

Key ingredients
Cherries. I used freshly picked cherries for this recipe. If using frozen, you
Brandy. You’ll only use about 1/4 cup in the entire recipe, so feel free to use something you like. This is optional and can be substituted for lemon juice.
Vanilla extract. Use pure extract (or even vanilla bean paste!)
Flour. Be sure to spoon then level this, as you don’t want too much flour here.
Cinnamon. Use a high quality cinnamon, for a more vibrant taste.
Brown sugar. You can use light or dark here.
Butter. Use salted butter, or add 1/8 teaspoon salt if using unsalted butter. Try to use European butter for a better texture.
Heavy cream or buttermilk. I know buttermilk is very classic in biscuits, but I had heavy cream to use up and really liked the texture it created.

How to make brandied cherry cobbler
1. First, pit and halve your washed cherries. I highly suggest a pitting tool. It’s worth every penny.
2. Mix your cherries with the filling ingredients and set aside. Doing this first helps create a perfectly thickened filling.
3. Stir the dry ingredients.
4. Cut the butter in. You can use a pastry blender, but I prefer using my hands. It creates long, thin pieces of butter that make flakey dough.


5. Stir in cream. Just stir until combined. It’ll be a pretty sticky dough.
6. Pour the cherry filling into a greased pie pan or cast iron skillet.
7. Crumble the dough on top. Since it’s a sticky dough, you’re more just trying to evenly distribute it. You can also dollop it onto the cherries.
8. Bake for 45-50 minutes.
9. Let cool at least 30 minutes. This just ensures it’s not too hot and it’s set a bit.
Enjoy with fresh whipped cream or a scoop of vanilla ice cream!

Tips and FAQ’s for this recipe
Can I use frozen cherries?
Yes! You'll get a more liquidy filling, which will just blend in a bit with the topping as it bakes. If you don’t want this, I do recommend one extra tablespoon of flour in the filling to help absorb some of the juices that frozen cherries release.
What type of brandy should I use?
I just used whatever we had, which I think was from making a dessert a few years ago? Or maybe a Christmas cocktail? We don’t really drink a lot of brandy, so we don’t spring for the fancy stuff. The ideal feature of brandy is that it pairs well with cherries, so just about any type will do. I just always suggest not getting the cheapest bottle there is, but anything else will do .
Use a cherry pitter
If you don’t have a cherry pitter, this recipe talks about how to put cherries easily. I actually found it easier to slice each cherry like an avocado then pull it apart and pick out the pit. But it took forever. So, I think a cherry pitter is a worthy investment that makes it 10x as fast.

My cobbler tools
There’s really not much to this, but here are the tools I love that helped me make this cobbler. Affiliate links provided.
Deep pie pan or cast iron skillet
Pastry blender (if you don’t want to use your hands)

Brandied Cherry Cobbler
- prep time: 15-20 minutes (less if using a cherry pitter)
- bake time: 45-50 minutes
- total time: 1 hour, 5 minutes
servings: 8-10
Ingredients:
for the cherry filling
- 5-6 cups pitted, halved cherries (about 2.5-3 pounds whole cherries)
- 4 tablespoons (80g) brandy (or lemon or apple juice)
- 1 tablespoon (13g) pure vanilla extract
- ¼ cup (34g) all-purpose flour
- 1 teaspoon (3g) ground cinnamon
- ½ cup (110g) packed brown sugar
for the cobbler dough
- 1 ½ cups (204g) all-purpose flour
- ¾ cup (150g) lightly packed brown sugar
- 1 teaspoon (2g) ground cinnamon
- 1 ½ teaspoons (6g) baking powder
- ½ cup (113g or 1 stick) salted butter, cold and cubed (if using unsalted butter, add ⅛ teaspoon salt)
- ⅔ cup (160g) heavy cream or buttermilk, cold
Instructions:
- Preheat your oven (or grill--this will work on any grill with easily controlled temperature!) to 350F/175C. Lightly grease a 9” to 10” pie pan or cast iron skillet with butter and set aside.
- First, pit and halve your cherries. You can do this with a cherry pitter or by hand. There are two methods to do this by hand. One is featured here, and the other is to slice them like an avocado around the pit then pull the pit out with your hands.
- Mix halved cherries with the other filling ingredients, stir well, and set aside.
- To make the topping, mix the flour, brown sugar, cinnamon, and baking powder in a medium bowl. Using your (clean) fingers (or a pastry blender, but I think fingers work best here), blend the butter in, smashing the cubes into the flour. You want the pieces to be no larger than small peas or shredded parmesan cheese–but a lot of the butter will be even smaller by this point. Use a rubber spatula to scrape any large bits of dough or butter stuck to your hands back into the bowl.
- Pour the heavy cream into the mixture and mix with a spatula until just blended.
- Stir the cherry filling again and pour into your prepared dish, getting all of the juices in there, too. Spread evenly in your pan.
- Crumble the topping evenly over the filling, making sure to get all the way to the edges. There’s no wrong way to do this, as long as you drop the pieces gently so as not to press it into the filling.
- Bake for 45-50 minutes, or until the topping begins to turn a deep golden brown and you can see the filling bubbling up along the edges and a bit in the middle.
- Let cool at least 30 minutes before serving, ideally with some vanilla ice cream or fresh whipped cream!
Enjoy!
Leftovers can be stored, well-covered, in the fridge for 3-5 days. Reheat in the oven or on the grill at 350 for 10-15 minutes.
Note on cherries: the amount you’ll need can vary depending on your baking dish. I like to pour all of my cherries into the dish and have it pretty much full to the top or even a little over. Between pitting and halving the cherries then the baking, you’ll lose a lot of volume, so this is the best method for ensuring you have a nice and thick cobbler with plenty of cherry filling.
Frozen cherries can be substituted, but they should be thawed and drained first, to help control the amount of liquid in the filling.

