
Vegan Chocolate Coconut Truffles
Three simple ingredients are all you need to make the silkiest, riches vegan chocolate coconut truffles.
This post may contain affiliate links from which, at no additional cost to you, I may earn a small commission to keep this site running. Only products I myself would or do use are recommended.
Happy Earth Day!!! I know that statement might elicit mixed responses, but I hope we can all put aside politics and instead acknowledge that we could be doing more to care for this planet. I wanted to share just a few thoughts and things I’ve learned about the impact each of us has—for good and for bad—on the Earth.
Plastic recycling really doesn’t happen. I’ve read a variety of stats, but far less than half of all “recycled” plastic is actually recycled. Knowing this, I’ve made an effort to periodically eliminate a source single-use plastic from my life. Usually, around Earth Day, I take stock and see what I could change. I now own far more of these reusable bags than I have room for, to avoid Ziplocs. I also use bar soap (that comes in a cardboard box), even though I have very sensitive skin. There are so many options out there! My favorites are from Costco and Whole Foods. I also use bar shampoo. This has been the hardest to change, but my current favorite is Ethique. I love their Professor Curl and Curliosity! I also shared some other ideas last year in this post or this post.
Apart from the trash we create, another source of pollution is using animal products. Don’t get me wrong, I love my steak. But I also try to opt for vegan sometimes, because I know it’s better for the environment.
Which is why I’m sharing this vegan recipe today. It’s SO good. You won’t even notice it’s vegan because you’ll be trying to decide how many you can eat without feeling too guilty. The answer is all of them. You’re helping the environment by using animal-free ingredients, so help yourself to another. :)

Why this recipe works
I’ve spent time experimenting with the ratios of chocolate and coconut cream and find this one to be perfect for truffles. It’s a little messy to roll them out, but afterward the result is a perfectly soft, delicious candy! As well, these can easily be made vegan, with vegan chocolate and vegan caramel sauce.
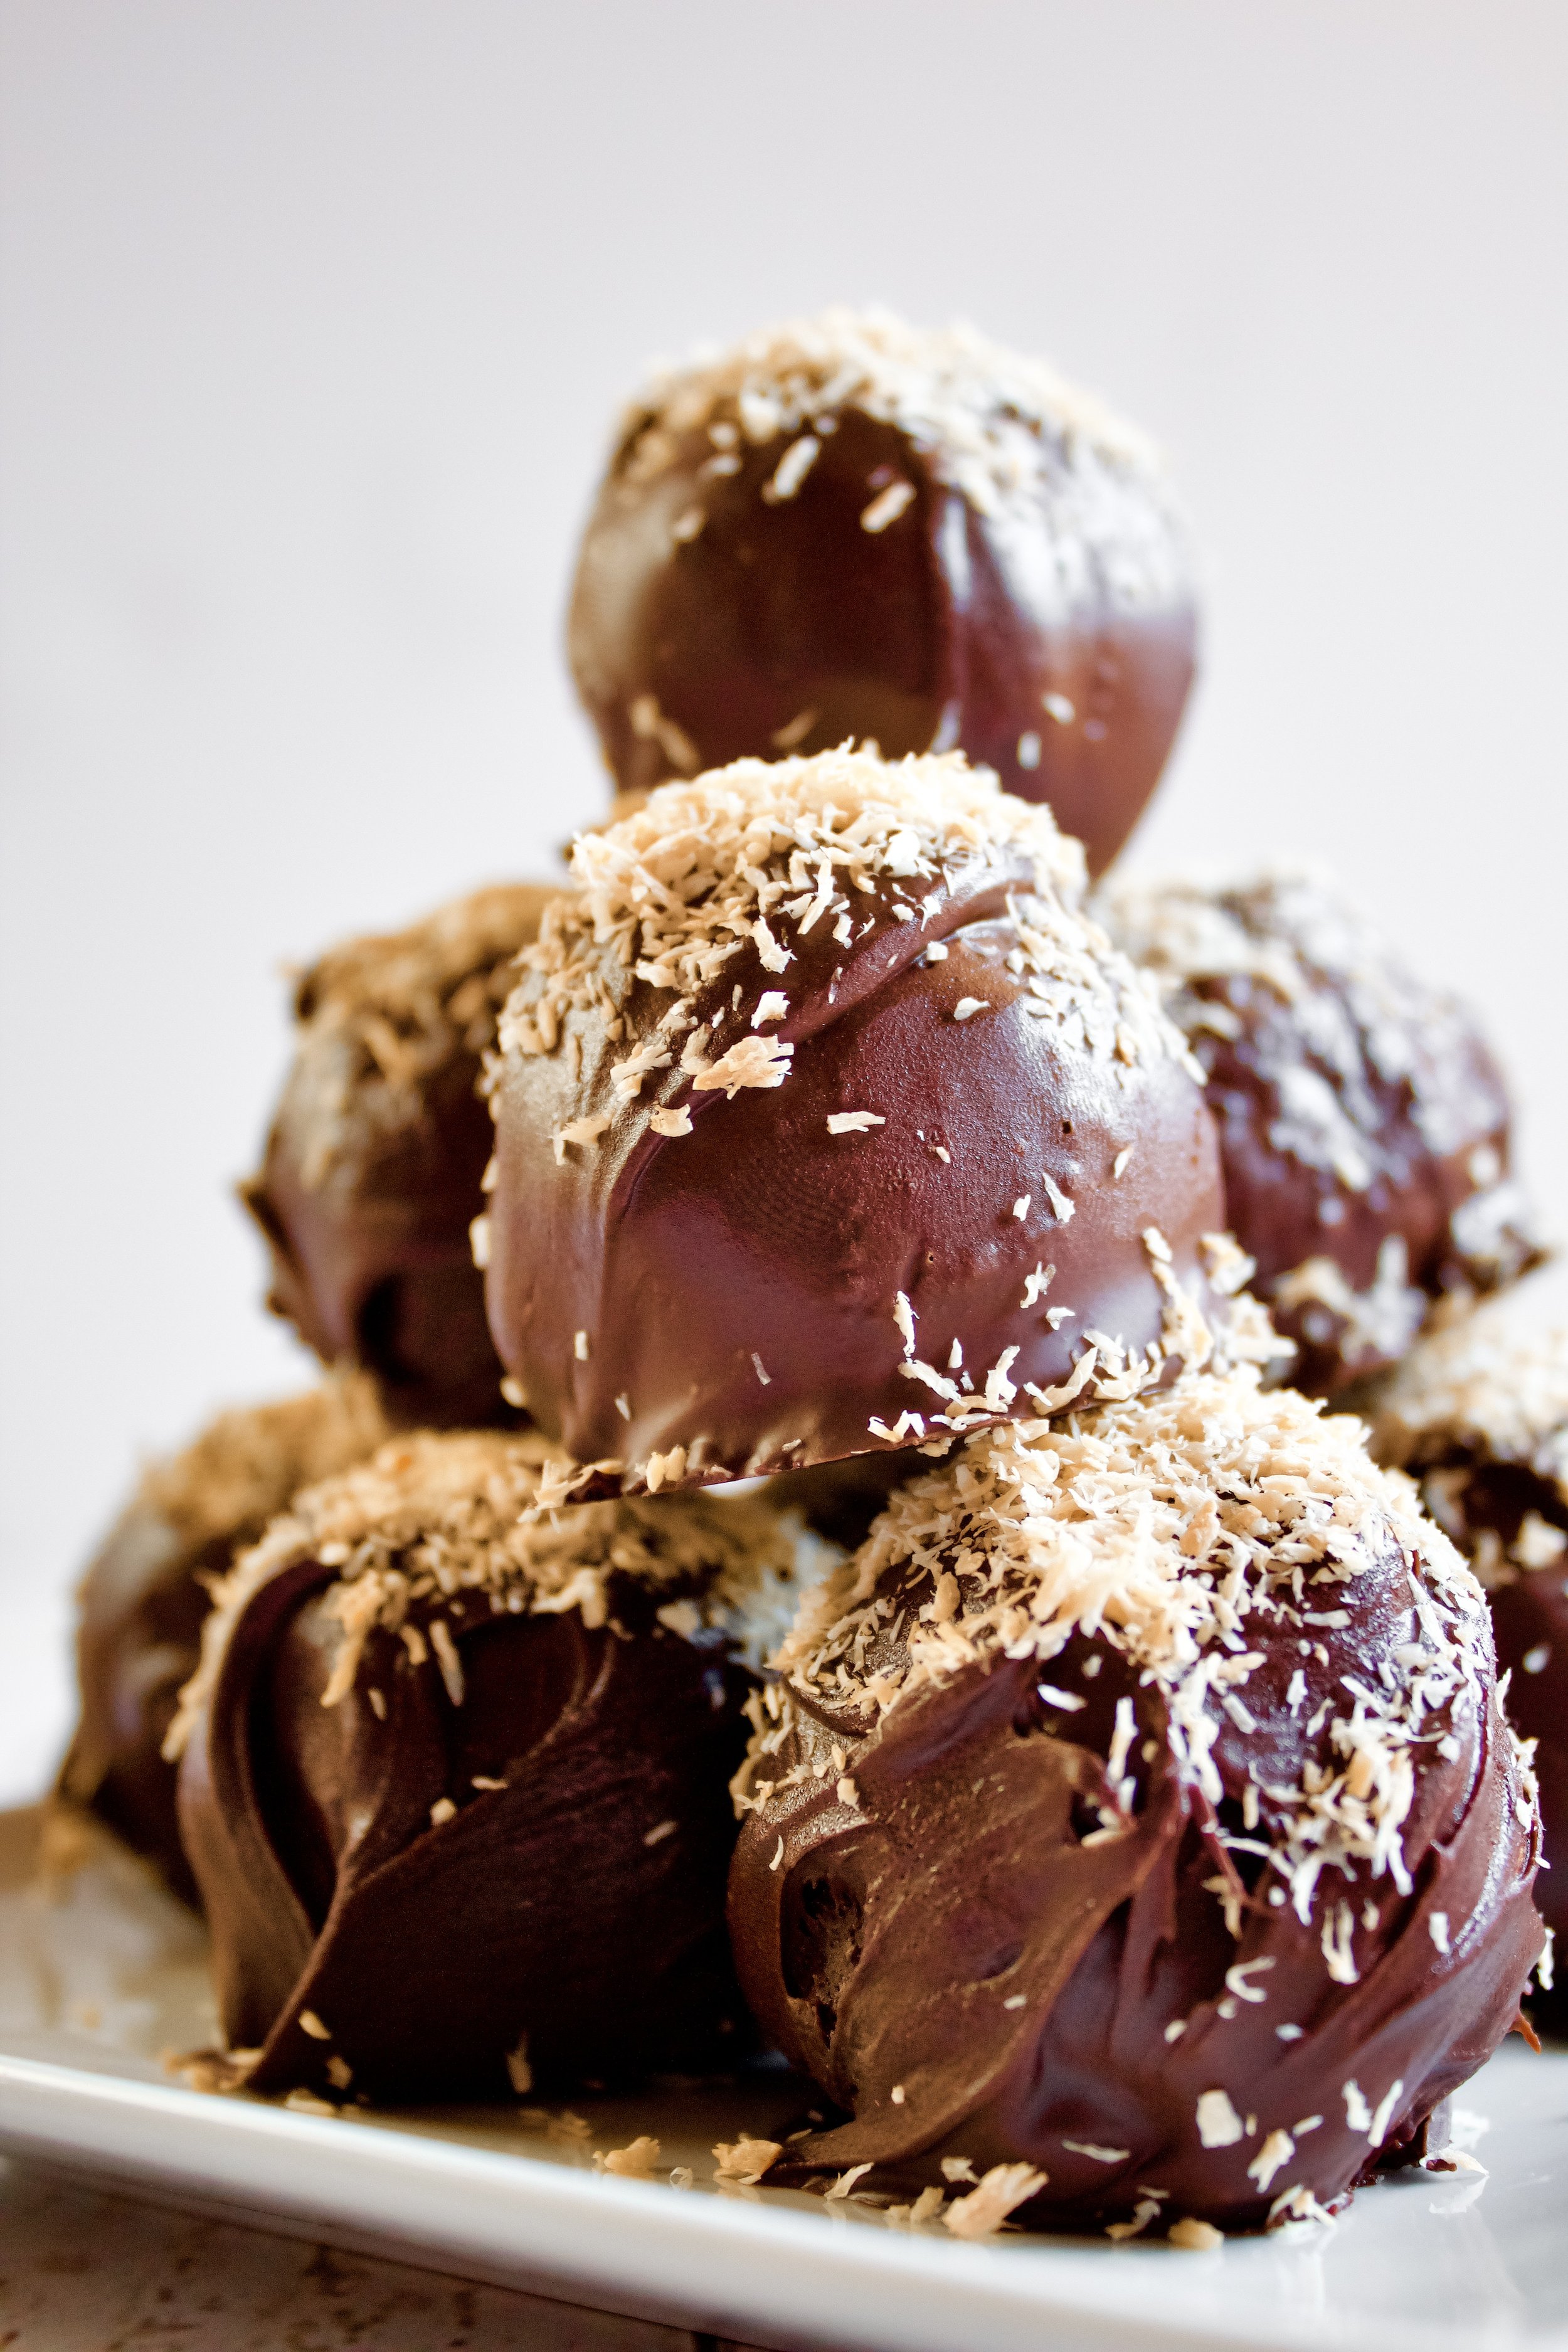
Then there’s the toasted coconut. It gives a bit of texture to the filling and adds such a wonderful coconut taste! Plus, how fun is it to use like sprinkles on top??

Key ingredients
Baking chocolate. Use a high quality one, which will melt better and create a smooth outer coating.
Coconut cream. No milk! Use full fat, canned coconut CREAM to ensure the perfect texture.
Flaked coconut (unsweetened). I prefer toasting mine, but you can leave yours raw. Try to use unsweetened as well.
Coconut extract (optional). This is optional, and I usually don’t use it. However, if you want a vibrant coconut flavor, you can add a bit of extract.
Coconut oil (optional). This is only if your chocolate is on the thicker side once melted and you can’t get a nice coating on the filling.
How to make vegan chocolate coconut truffles
1. Toast flaked coconut. Be careful not to burn it. You can also leave it raw, but I vastly prefer toasted coconut, so that’s what I did.
2. Melt vegan chocolate chips and coconut cream (NOT milk).
3. Stir in toasted coconut. Reserve a little bit for decorating.
4. Chill until firm.
5. Form into truffle-ish shaped balls. Be sure to have a lined tray at the ready for this or things get messier than they already are.


6. Freeze while you melt more vegan chocolate. You may need to add a teaspoon of coconut oil, depending on the chocolate you use. Most vegan baking chocolate should melt to a nice and thin consistency.
7. Dip frozen truffles in the melted chocolate. Let the excess drip off or “guide” it off with a knife.
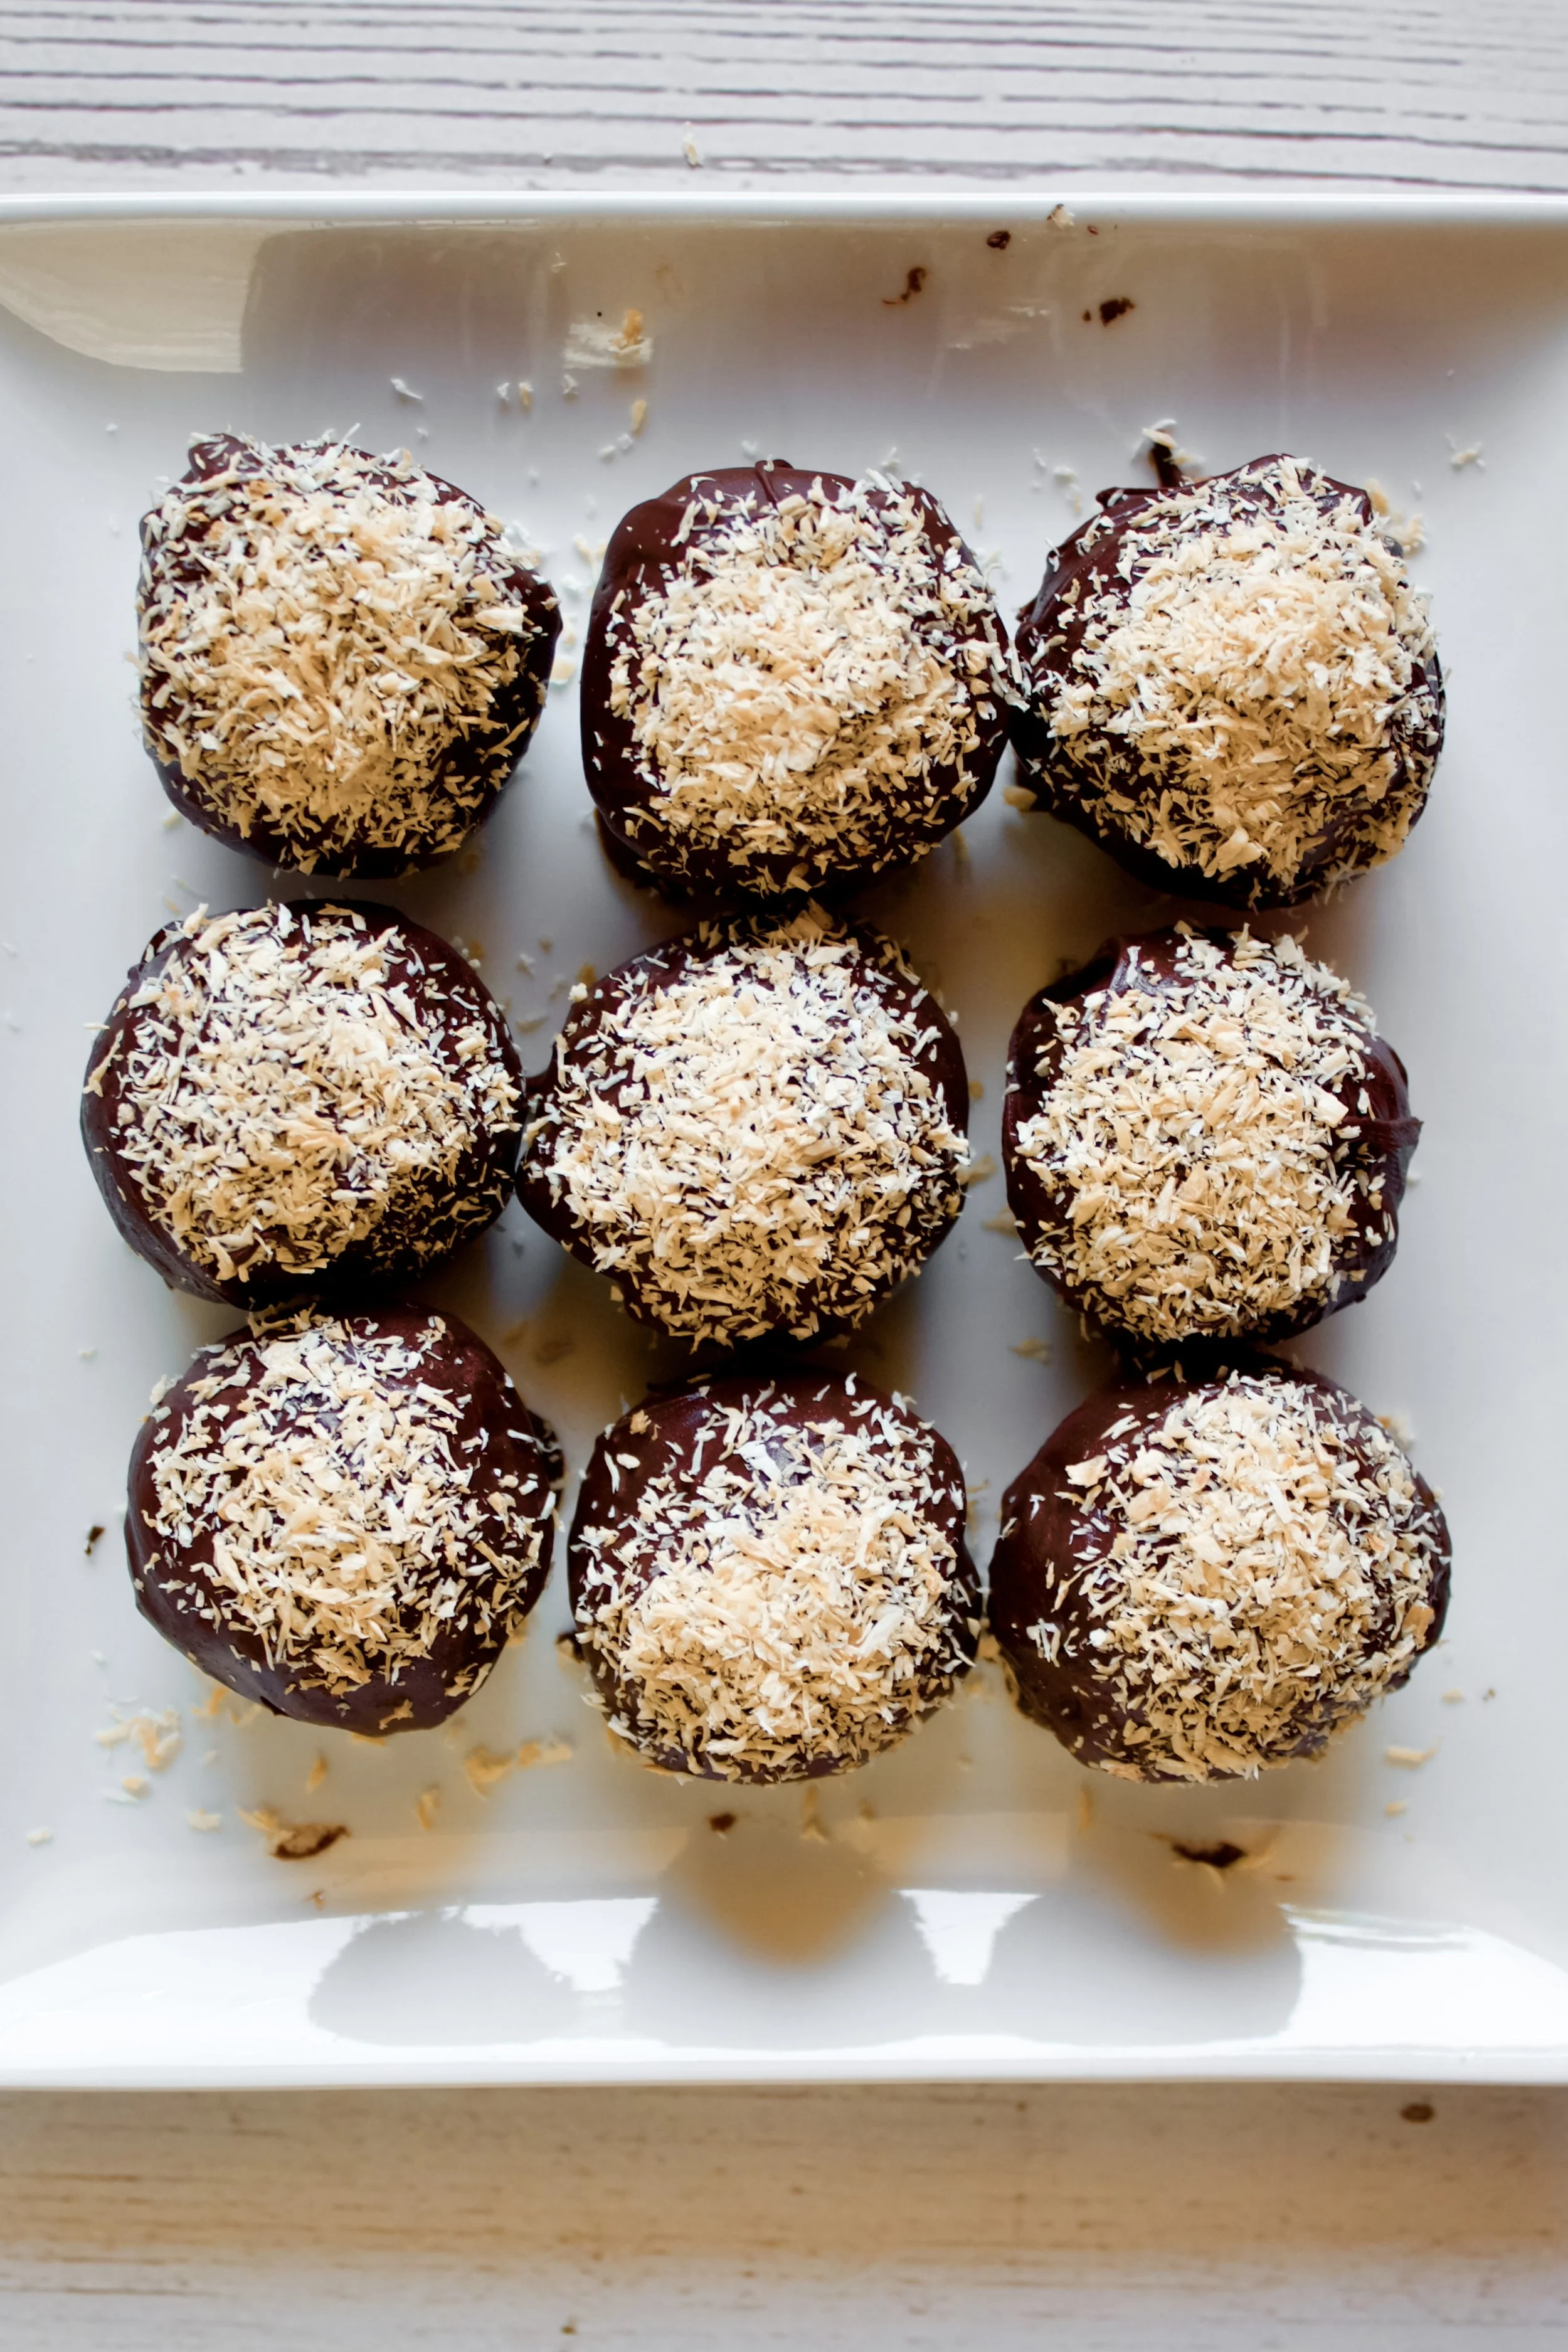
8. Decorate as desired then freeze again to set. I just used the extra toasted coconut, but feel free to decorate however you prefer.
Enjoy!


Tips and FAQ’s for this recipe
Do I have to toast my coconut?
No! I really don’t care for raw coconut, so I always toast mine. Plus, the coconut cream already adds plenty of flavor, so toasting the flaked coconut adds more depth of flavor. However, the recipe will work just the same with raw coconut.

Take your time forming the filling
I made three different flavors (check back in a few months for my vegan toasted coconut truffles!), and some were easier to form into truffle shapes than others. This plain chocolate flavor was fairly easy to mold, but not at first. It took some practice, and depending on how warm your house and/or hands are, you may want to try what I did: roll all of the filling into roughly round shapes. Don’t spend too long on one piece—the goal is just to get it into a solid mass that won’t crack or separate. Set it on your tray. Then, once all the filling is formed, start with the first one you made and go back through, re-shaping each one.

Don’t be afraid to get messy!
Your hand will get messy with this, unless you have a very high-end cookie scoop or melon baller that has a release mechanism. Mine was the perfect size but wasn’t keeping things nicely shaped as I scooped. So, I just used a spoon, grabbed a glob, and embraced the mess. My daughter was helping me and loved the mess, so I went with it.

Don’t worry about perfectly shaped filling
The coating chocolate will help round these out quite a bit, so don’t worry if it’s not perfectly round. Each chocolate brand is different, and some may not be as malleable as others. But between the coating and any decorations you use, you’ll get a pretty round finished truffle.

Refrigerate until serving
These can last on the counter for a few hours at a party, but it’s best to store them in the fridge to avoid them melting. Plus, the coconut milk will eventually spoil at room temperature. Luckily, they can last 1-2 weeks in the fridge!

Where to find vegan chocolate
I lucked out and discovered that Trader Joe’s chocolate chunks (one of my favorite chocolates) is vegan! Guittard is another great brand that’s vegan as well, and can be found at most grocery stores. I’ve found that most vegans already have their favorite brand of choice, so if this is new to you, just check the ingredients and make sure there are no dairy products, including whey.

Only use coconut CREAM!
Coconut milk is too thin to help these set up correctly. If you’re counting calories, just remember that a vegan diet is good for the environment and that moderation is key to any successful diet. Also, know that you are beautiful/handsome/amazing as you are and are allowed to eat truffles. :)

You might also like:
Vegan No-Bake Chocolate Coconut Tart
Salted Caramel Chocolate Truffles (vegan optional!)
White Chocolate Monster Bark (vegan optional!)

Vegan Chocolate Coconut Truffles
- prep time: 25-30 minutes
- chill time: 1-2 hours
- total time: 2 hours, 30 minutes
servings: 36 large or 48 medium truffles
Ingredients:
- 36 ounces vegan semi-chocolate, separated
- 1 can (14 ounces) coconut cream
- ¾ cup (75g) unsweetened flaked coconut
- optional: 1 teaspoon (3g) coconut extract
- optional: 1 teaspoon (5g) coconut oil (only use if needed to thin out the coating chocolate)
Instructions:
- First, toast your coconut. (This is optional, but brings out such a great coconut flavor.) Preheat the oven to 350F/175C. Place the coconut on a rimmed baking sheet and bake for 5-10 minutes, stirring halfway through. Check often, as it can become burned quite quickly.
- Next, you’ll need a double boiler. If you don’t own one (I’ve only ever seen them in the store and never in a person’s house), create one by placing 1” to2” water in a medium to large-ish saucepan and finding a bowl that can sit on top without the bottom touching the water. Bring the water to a boil then turn down to low and place the bowl on top.
- Combine the coconut cream and 24 ounces of the chocolate in your bowl. Stir constantly, until the chocolate is 75% melted. Remove the bowl from the heat and stir vigorously until smooth. If it doesn’t smooth out as it cools, you can place it back on the saucepan for another 30-60 seconds. It’s best to remove it too soon than let it cook too long and ruin the chocolate.
- Stir in ½ to ⅔ cup of the toasted coconut. You want to reserve some for decorating and also don’t want it so thick that you cannot get the truffles to hold together.
- Refrigerate the chocolate until firm, at least 1 hour. If you’re not going to be able to finish the truffles right away, cover with plastic wrap so they don’t dry out or absorb the smells from the fridge.
- Once firm, roll your truffle filling. First, place a piece of parchment paper or a silicone baking mat on a rimmed baking sheet (rimmed is important because these tend to roll around).
- Using a melon baller, small cookie scoop, or spoon, scoop out about 1 ½ to 2 tablespoons of filling. If it’s too hard to scoop out, let it sit 5 minutes. If it’s too soft, place back in the fridge for 30 more minutes, or until firmed up. Work quickly and form into a ball, rolling it firmly between your palms without squishing it. You want to be sure it sticks together but don’t want to melt it or create a pancake. If it starts melting as you roll, just place it on your baking sheet and move on. Once all of the filling is shaped into rough balls, go back to the first one and start re-shaping them a little, fixing any that are wildly not truffle shaped. But don’t worry about perfection.
- Freeze on your tray for at least 30 minutes.
- When ready to coat and decorate, melt the remaining chocolate in in your clean double boiler, just like in steps 1-2. If the chocolate is too thick, add 1 teaspoon coconut oil to thin it out. It should be somewhere between the consistency of chocolate syrup and hot fudge. Let it cool for a few minutes before using.
- Once the coating chocolate is warm but not hot, remove the tray from the freezer. Using a fork, dip each truffle in the coating chocolate. Let the excess chocolate drip off before sliding it back onto your lined tray. If needed, use a knife to do this. Also if needed, use the knife to shape the chocolate a bit, if it’s a bit thick.
- If decorating with coconut flakes, add those immediately so they stick to the warm chocolate.
- Freeze chocolates at least 20 minutes, until firm to the touch.
Enjoy!
Truffles can stand at room temperature for a few hours, but should otherwise be refrigerated in an airtight container. They should last 1-2 weeks, if well-sealed.
