
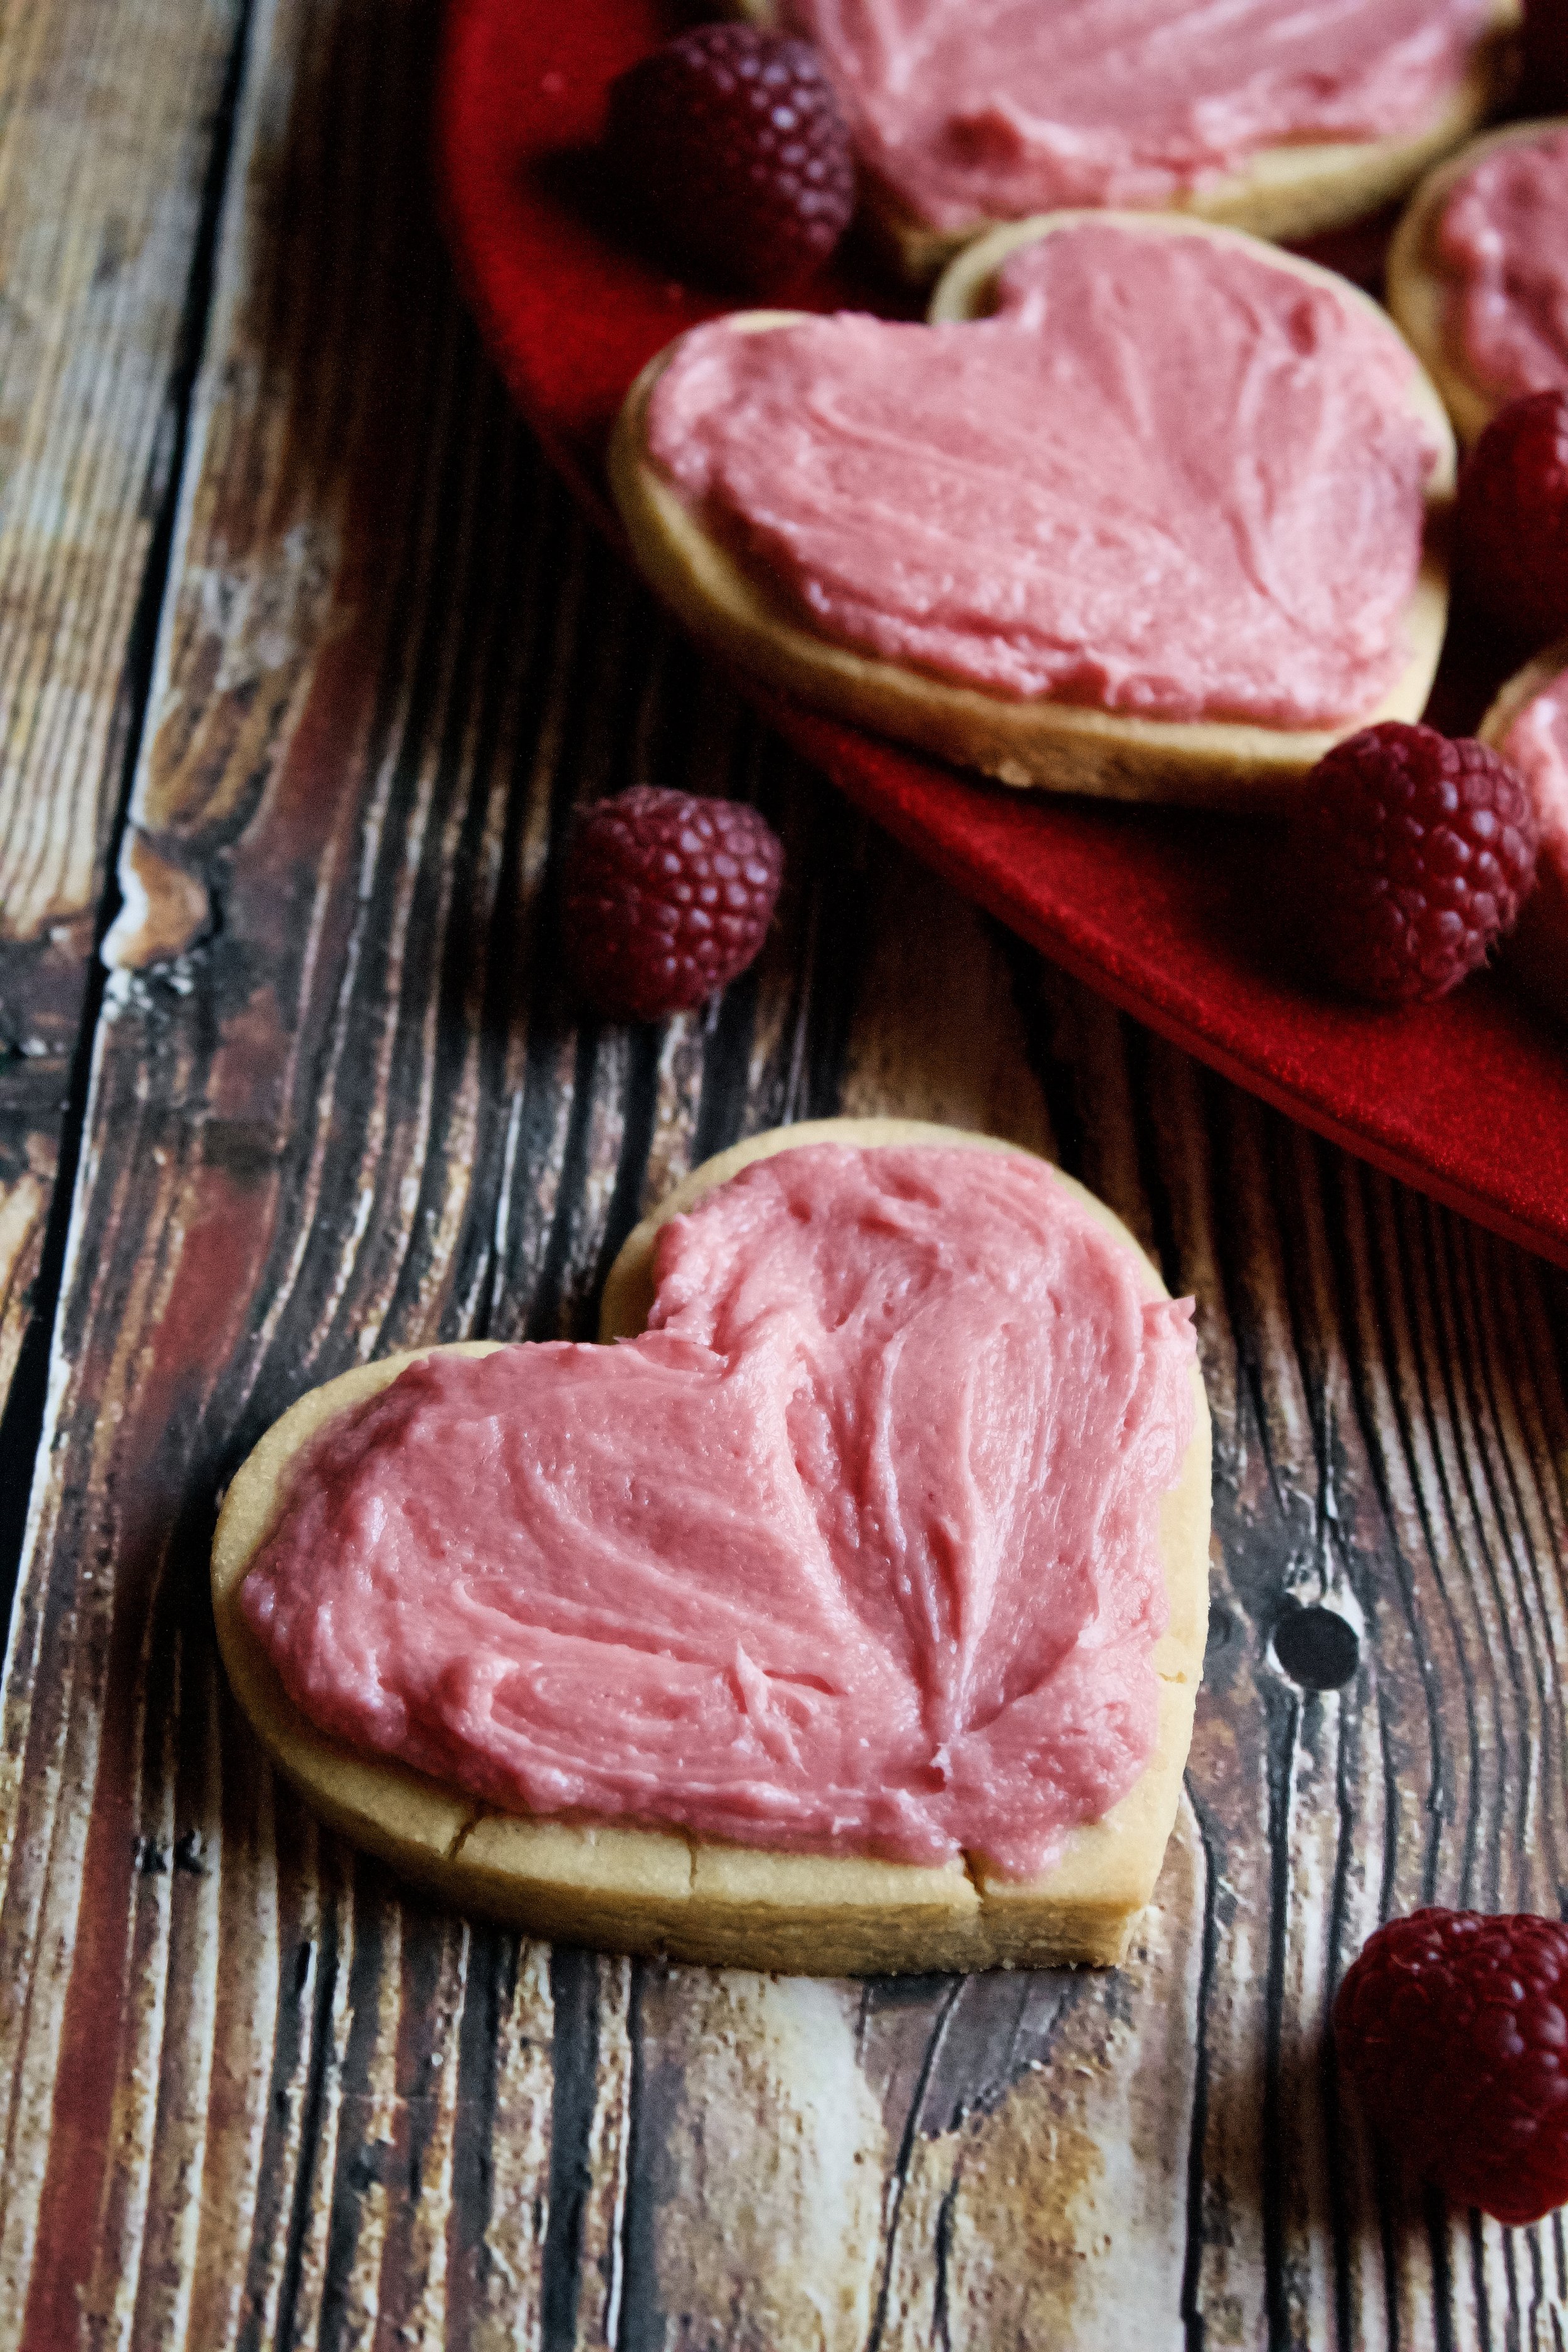
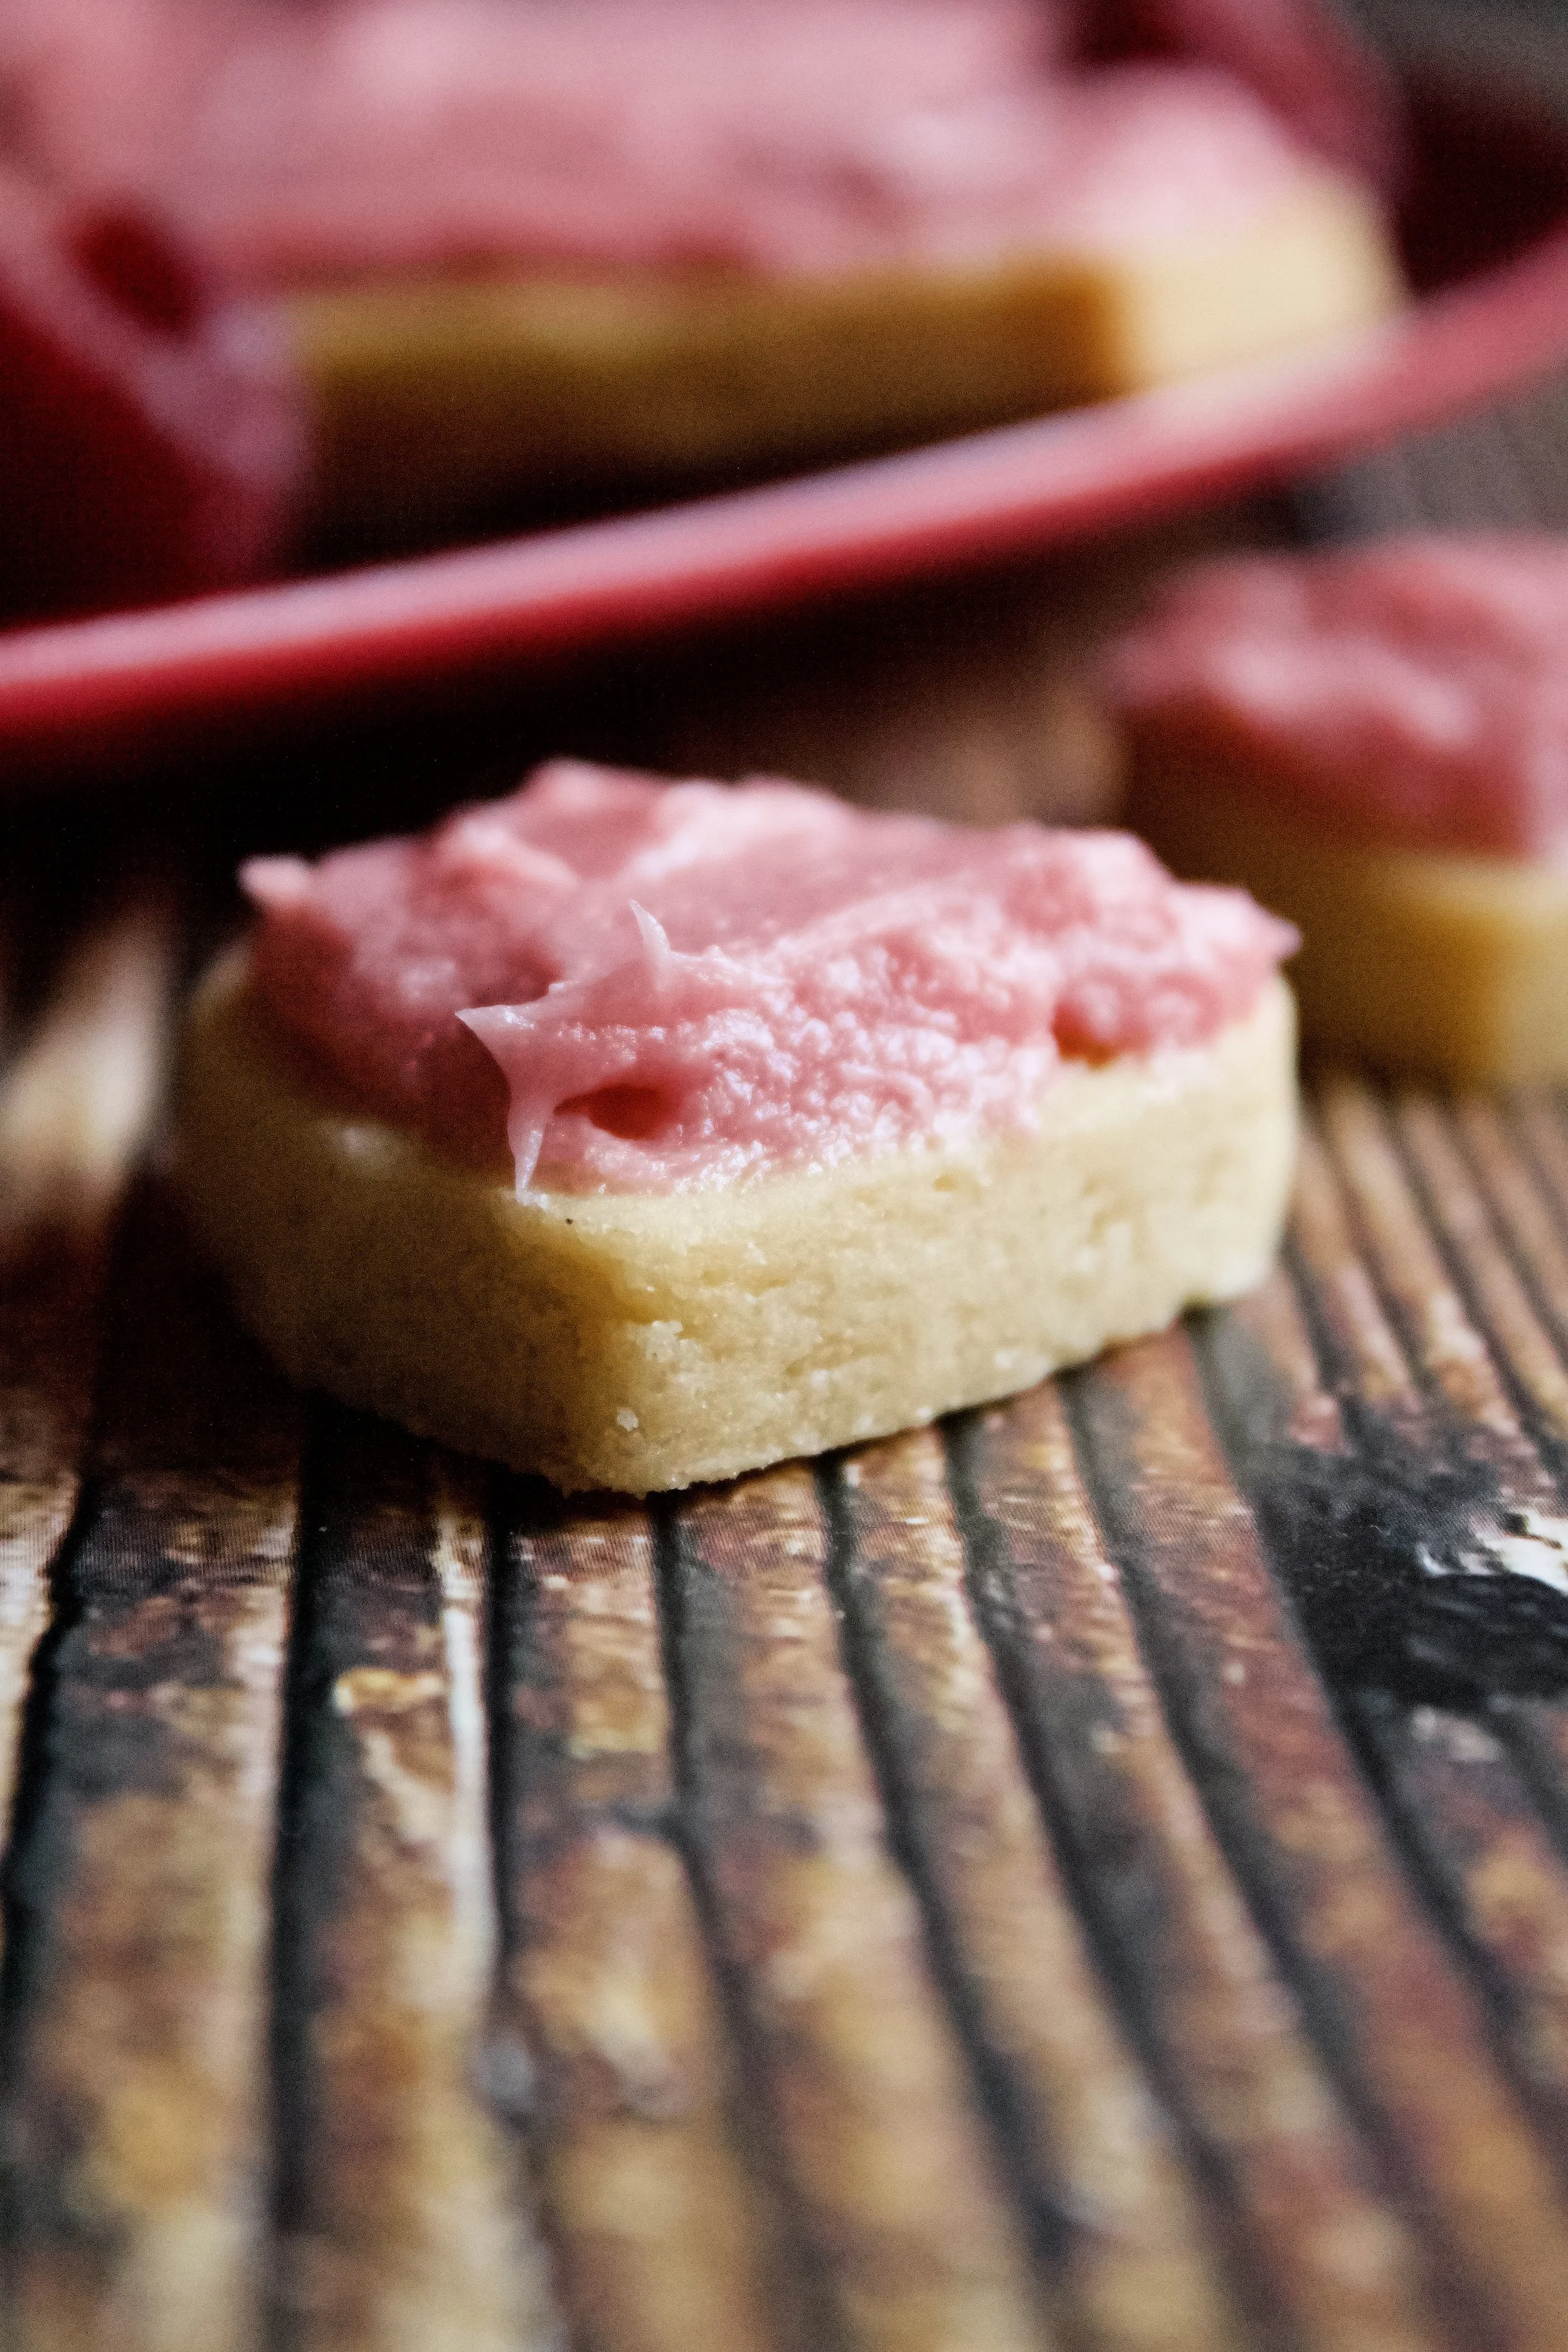
Raspberry Buttercream Sugar Cookies
Soft cutout sugar cookies frosted with fresh raspberry buttercream. These easy sugar cookies are where cute meets tasty!
This post may contain affiliate links from which, at no additional cost to you, I may earn a small commission to keep this site running. Only products I myself would or do use are recommended.

These cookies are for my daughter. One, because she’s obsessed with cookie cutters and it forced me to find a decent sugar cookie recipe so she could use said cookie cutters. Two, because she’s what helped me renew my faith in (or perhaps tolerance of) Valentine’s Day.
I personally feel that romance shouldn’t be obligatory or rigidly scheduled, and certainly not required of all couples on exactly the same day (weird!). Plus, it absolutely sucks when you’re single.
But I can get on board with saying “I love you" to those you love and having a day that reminds us to do just that. And I can certainly get on board with showering those people with candy and cheesy little boxed Valentine’s that have things like Olaf saying, “I’d flurry for you.”
How cute is that?
So here’s to you, baby girl. Happy Valentine’s Day.
P.S. Check out this awesome shot of our cookies that my girl took!
Why this recipe works
First, the cookie. I’ve never been a sugar cookie fan, but my daughter has been begging to make cutout cookies lately. It all started with a Thomas the Tank Engine cookie cutter we got her at a railroad museum in Denver. Of course she wanted to use it. But that meant making bland sugar cookies then letting her made a mess decorating them. If I was going to go through all that effort, I was determined to find a cookie that at least tasted good.

What resulted was a soft-yet-shapable cookie that was just sweet enough to taste amazing when frosted. That’s kind of the point of sugar cookies—you want just enough sweetness to balance the frosting or glaze. And the best part is that these cookies aren’t hard or gross. They’re actually good! They key is using an egg and egg yolk, to get some richness without puffing up. And always—plenty of vanilla.

The frosting is one I’ve used for years but don’t usually decorate with. It’s delicious but sometimes a bit wonky looking. So I gave it a shot here and was actually happy with the result. It’s a simple American buttercream with homemade raspberry jam added in. Because of the natural pectin in raspberries and the added cornstarch, it keeps the buttercream from being too soft or thin. Instead, it’s sturdy and delicious.

Key ingredients
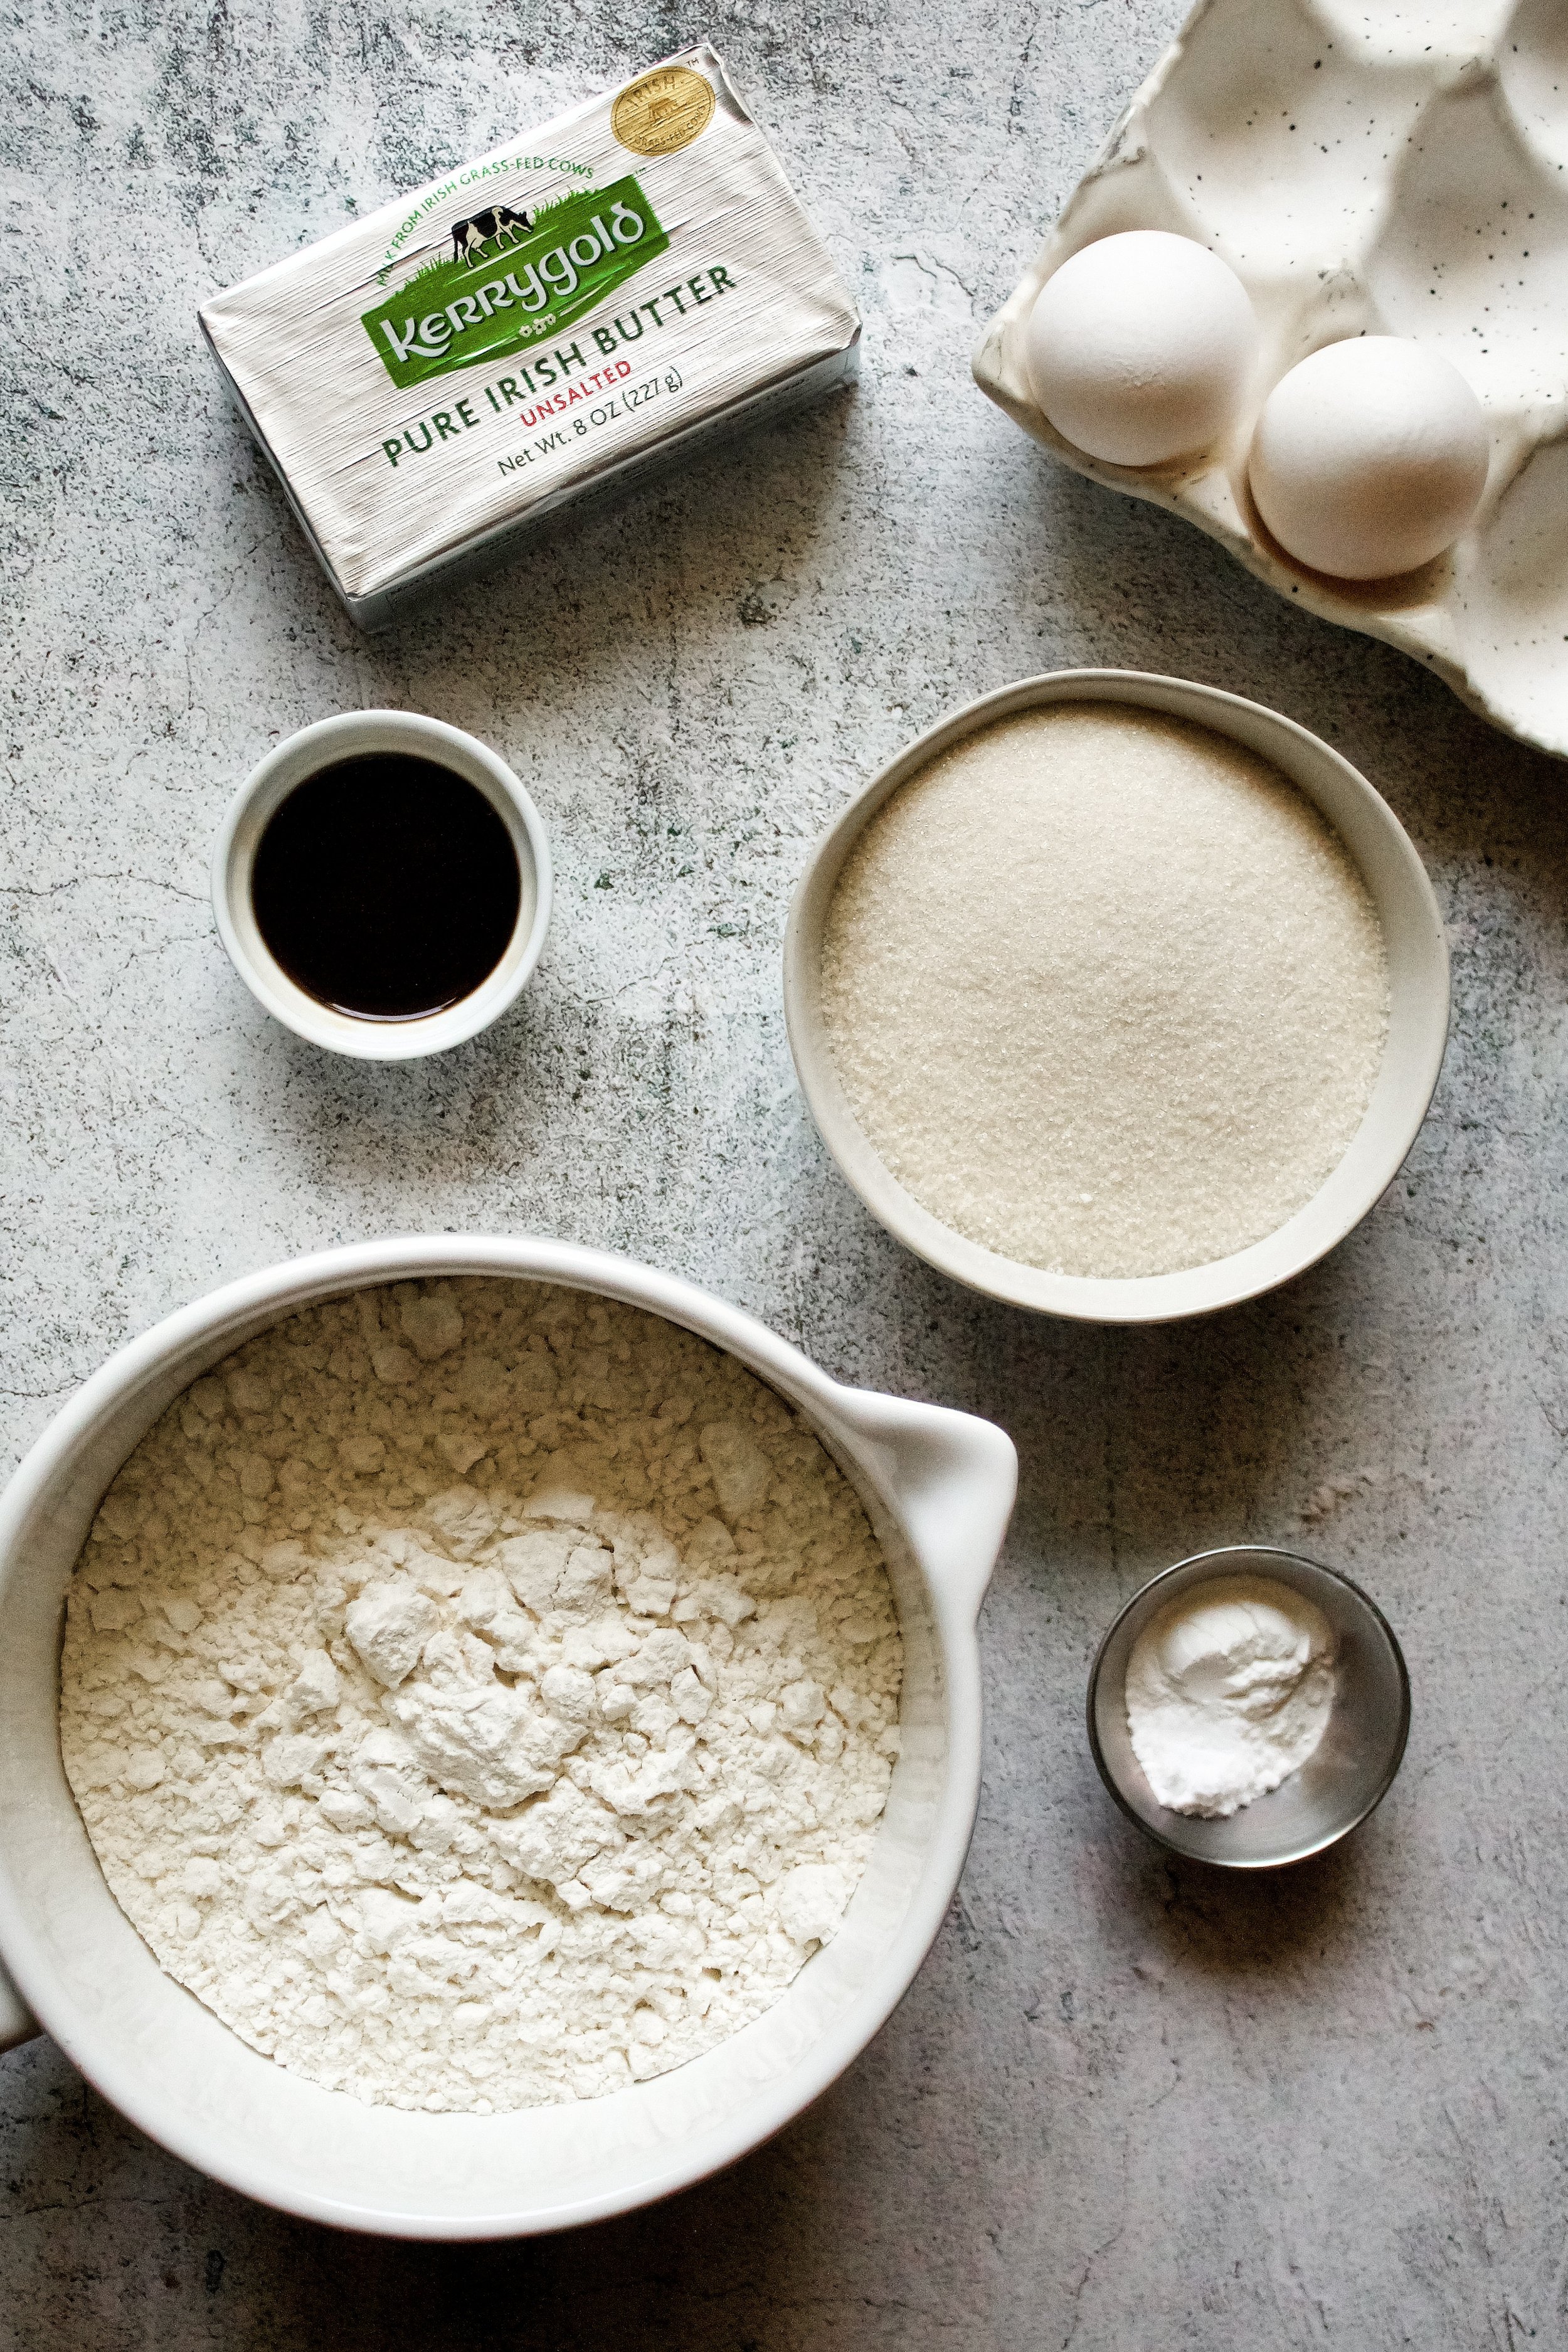
Butter. As mentioned above, always use European style butter in shortbread. It’s creamier and has less water.
Sugar. Use granulated sugar for the classic sugar cookie look and taste.
Eggs. I used one egg and one yolk and it turned out perfectly. They don’t spread or poof up but are still soft.
Vanilla extract. Use pure vanilla extract, not imitation.
Flour. Optionally, you can sift this before using, making the cookies even more tender and delicate.
Baking powder. Instead of baking soda, baking powder is used to ensure a soft texture.
Salt. I used sea salt to help bring out the sweetness.
Raspberry buttercream. I halved the raspberries from this recipe because I wanted a pink frosting. You could actually sub seedless raspberry jam (store bought or homemade) for the freeze dried raspberries, but that can sometimes turn gummy or be too thin. You’d use about 2-4 tablespoons jam (to taste) and omit the heavy cream.
How to make raspberry buttercream sugar cookies
1. Whisk dry ingredients. This is important to ensure the baking powder is evenly distributed.
2. Cream butter and sugar. Be sure it’s very light and fluffy.
3. Add egg, egg yolk, and vanilla. Beat until very well combined.
4. Stir in flour. Mix just until combined—over mixing is one reason sugar cookies are too hard.


Optional: You can chill the dough at this point, for 1 hour or up to 3 days, to make it easier to work with. I’ve rolled it out without chilling and it’s not too different, just a little sticky and in need of a little more flour to roll it.
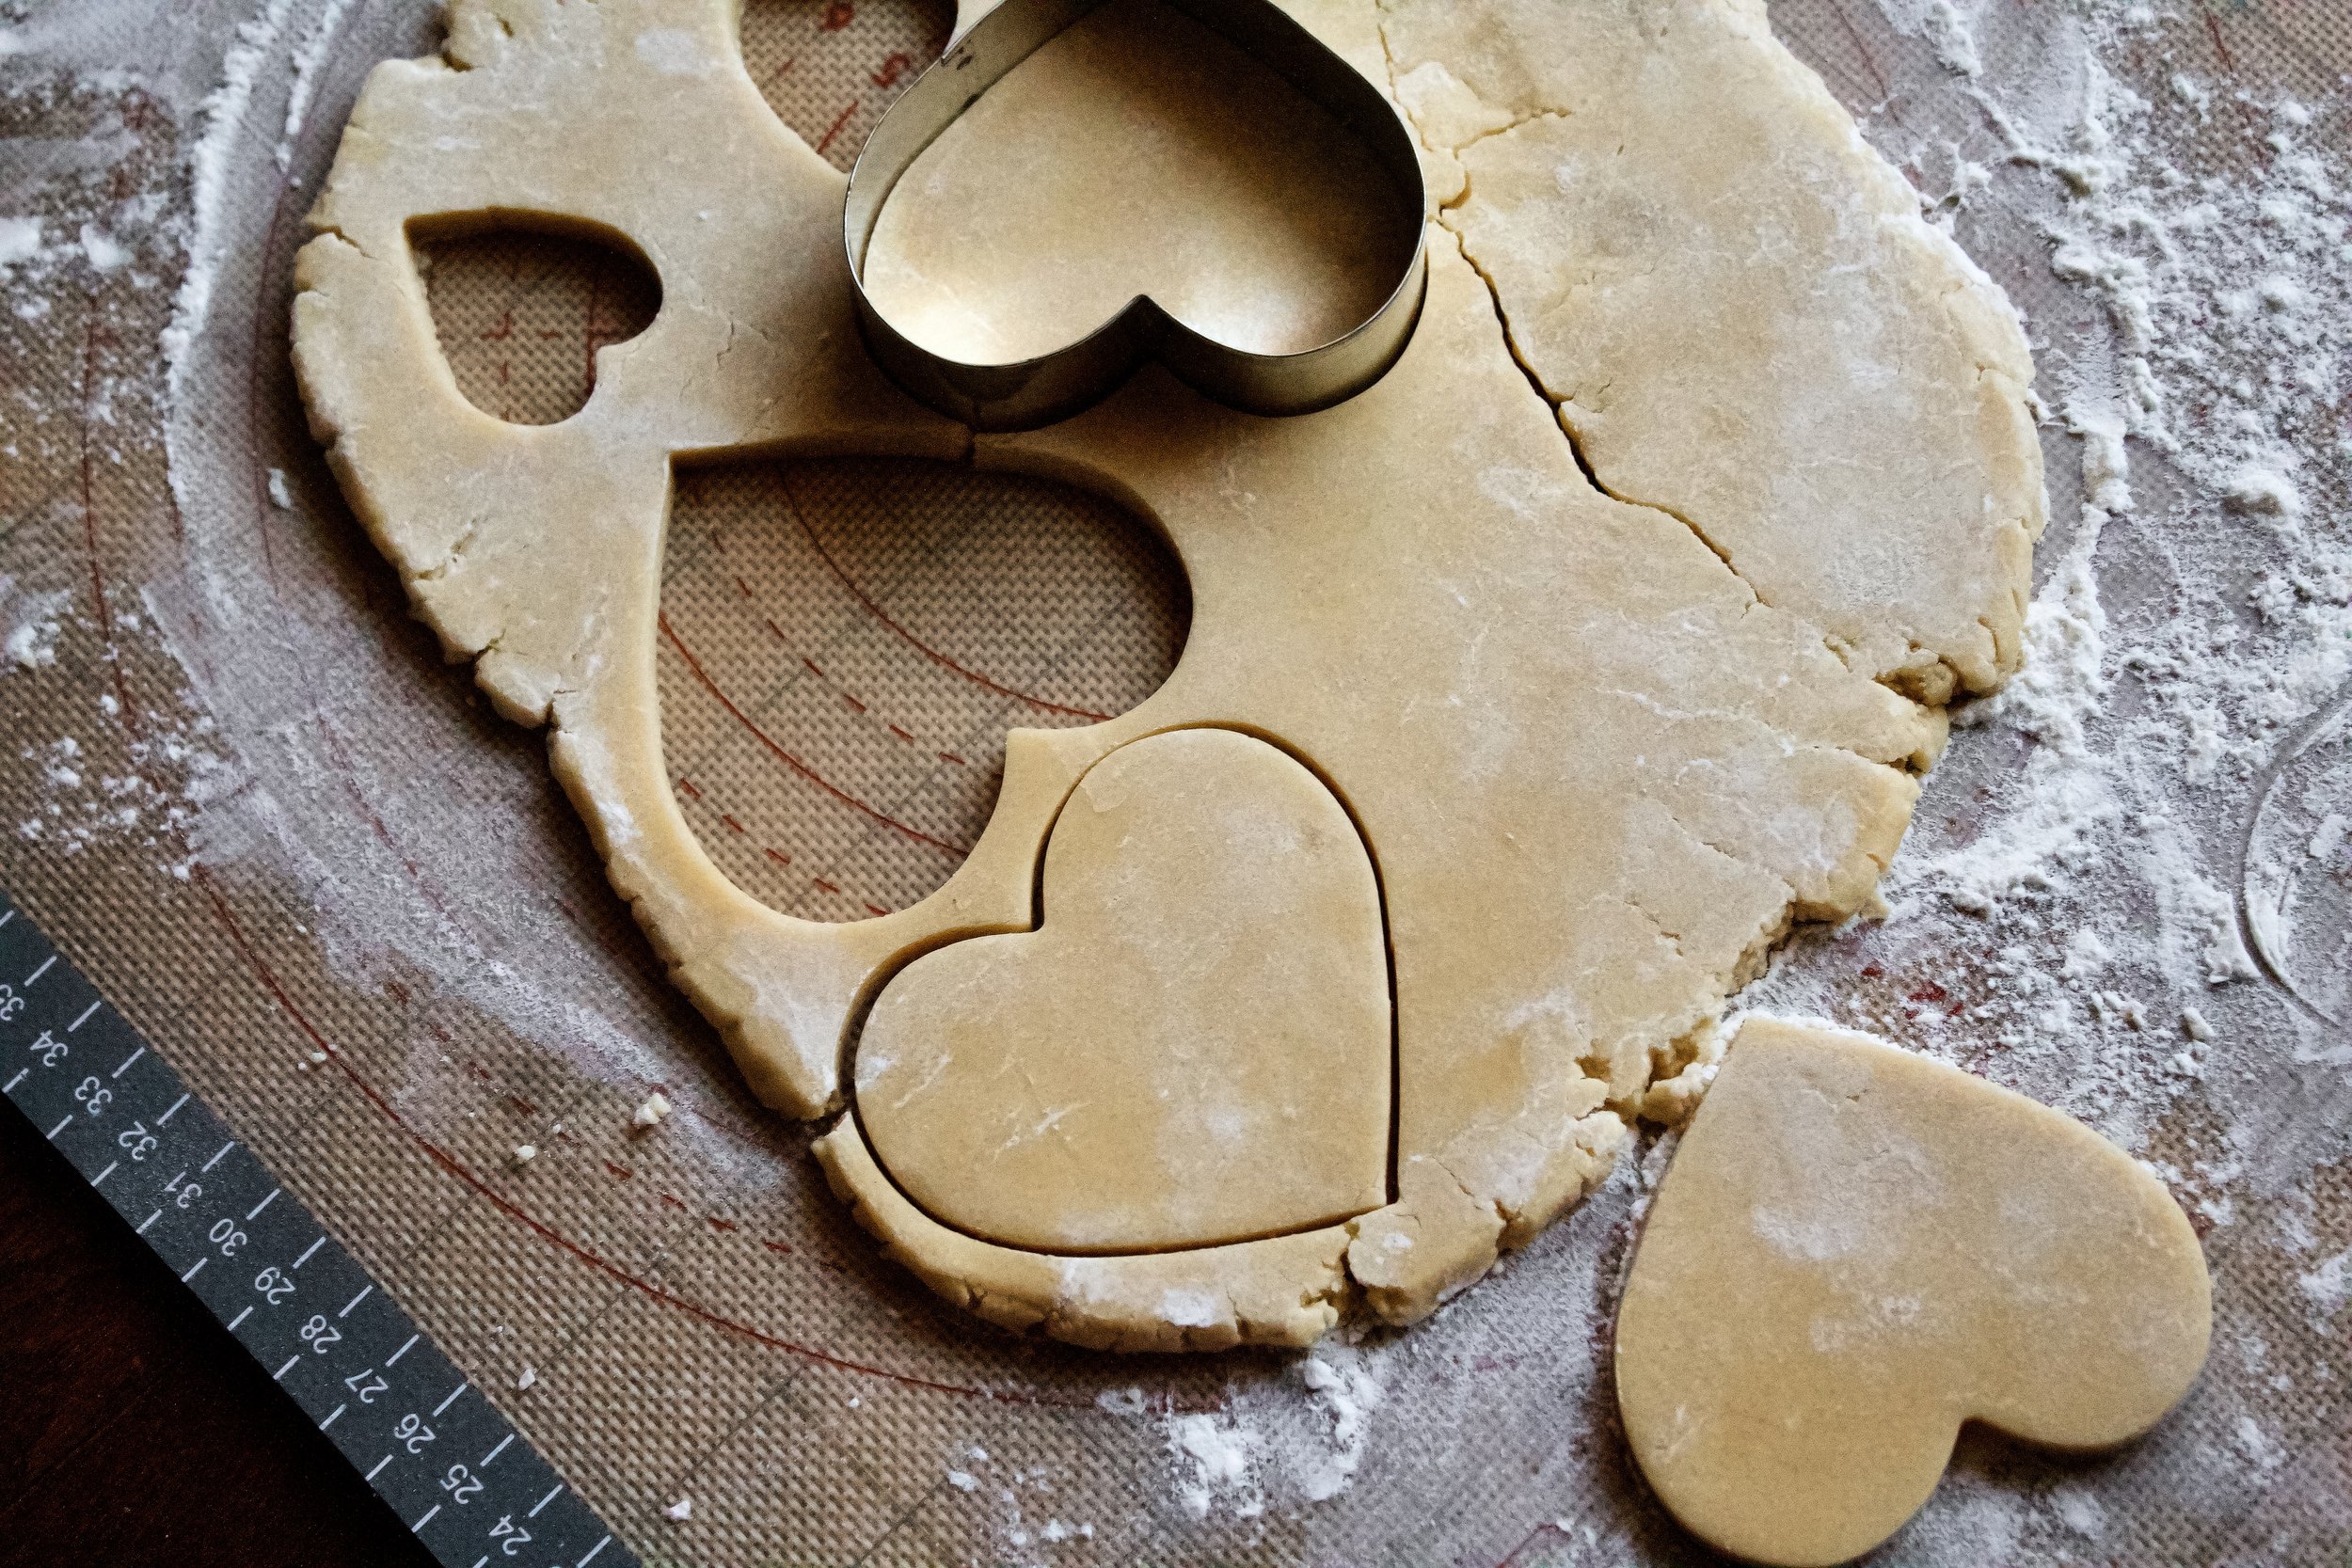
5. Roll out and cut. Be sure to use flour to prevent sticking (or roll it between two pieces of parchment). Don’t roll the dough too thin—about 1/4 inch is perfect.
6. Bake. I froze my dough for a few minutes before baking to ensure the cookies kept their shape.
7. Make the buttercream. You can also make this ahead and keep it well-sealed on the counter overnight or refrigerated up to 1 week. Let it come to room temperature for a few hours before using.
8. Decorate cooled cookies. I just swirled it around, but you can pipe the buttercream if desired.
Enjoy!


Tips and FAQ’s for this recipe
Can I use a different frosting?
Yes! You can use a glaze or classic sugar cookie icing. I just don’t really care for either one. Glaze doesn’t always dry and can be runny and messy if you want to actually decorate and not simply drizzle it on. Icing (which uses meringue powder to help it dry so well) doesn’t usually taste that great. So, I prefer a buttercream for sugar cookies. Other options are this blackberry lavender buttercream, strawberry basil buttercream, or sturdy strawberry buttercream.

What do I serve this with?
Anything! This is perfect with coffee and especially with tea. In fact, if you are hosting a tea or similar luncheon or event, these cookies are a must! Or just to keep on the counter for a quick little something sweet.
Do I have to use European butter?
Personally, I think it makes a huge difference. It’s creamier and has a very different consistency than sweet cream butter. Since you only have a few ingredients here, you want to make sure each one is of the highest quality. But don’t worry—you can often find it at places like Costco on sale!

Do NOT over mix!
These will become tough and lose their tenderness if you mix them too much. Be careful to stir just until the dough comes together then stop. If you find any unmixed flour, you can pat that into the rest of the dough when you roll it out.

Can I make these ahead of time?
Yes! You can make the dough and refrigerate it (well-sealed) for up to three days. If you need to make them further ahead, you can shape them then freeze them. Freeze on a cookie sheet then transfer to a well-sealed container or freezer safe bag once they’re solid. They’ll last in the freezer 2-3 months. You can bake them straight from the freezer then frost them once they’ve cooled.

split up your work!
As noted above, the dough can be made ahead of time. As well, the frosting can be made up to 1 week ahead and kept refrigerated (if tightly sealed). Just let it come to room temperature for a few hours before using and give it a good stir (or a quick beating with a hand mixer) first.
My tools
Here are my must-have tools I use for making these cookies. Affiliate links provided.
Mesh sieve (for the jam and optionally for the flour)
Rimmed cookie sheets (for pre-shaped cookies)
Silicone baking mats or parchment paper (for baking and rolling the dough)


Raspberry Buttercream Sugar Cookies
- prep time: 25-30 minutes (includes making buttercream)
- chill time: 1 hour
- bake time: 8-10 minutes
- total time: 1 hour, 40 minutes
servings: 36-48 cookies
Ingredients:
- 2 ¾ cups (374g) flour, spooned then leveled
- 1 teaspoon (4g) baking powder
- ½ teaspoon (3g) sea salt
- 1 cup (227g) unsalted butter*, room temperature
- 1 ½ cups (300g) granulated sugar
- 1 egg and 1 egg yolk, room temperature
- 1 tablespoon (13g) pure vanilla extract
- one batch of sturdy raspberry buttercream (makes a little extra)
Instructions:
- Preheat oven to 325F/165C (350F/175C if at high altitude). Line a baking sheet with parchment or a silicone mat. Note: If you plant to chill the dough (recommended but not required), you can preheat the oven when ready to roll, cut, and bake the cookies.
- Whisk flour, baking powder, and salt in a medium bowl. Set aside.
- In a stand mixer fitted with the paddle attachment (or with a hand mixer), beat butter and sugar on high until light and fluffy, about 3-5 minutes. Scrape bowl at least twice during this time.
- Add the egg and egg yolk and beat on medium until well combined, about 30 seconds. Add vanilla and beat on medium until well blended.
- Add flour and mix on lowest setting just until it all comes together.
- Optionally, you can chill it at this point. Form into two discs and wrap in plastic wrap. Refrigerate 1 hour or up to 3 days.
- When ready to bake, preheat oven (if not done already–see step 1).
- Sprinkle a rolling mat with flour. If you did not chill the dough, scoop about half of it onto the floured mat and sprinkle the top with flour. Roll cookies gently, rotating after each pass to ensure even rolling. If able, you can also flip the disc, but this can sometimes make it split. Roll to about ¼ to ⅓ inch thick (no thinner than ¼ inch or it will be too dry).
- Cut out into desired shapes (I used two sizes of hearts). Move cut cookies to your prepared cookie sheet. Take remaining dough scraps, form it back into a ball, and roll out again. Continue rolling and cutting until all dough has been used. If it becomes difficult to work with the scraps, you can throw them in the fridge for a few minutes.
- Bake 8-10 minutes, until the cookies are matte in appearance on top and you start to see a bit of light golden on the edge of one or two outer cookies.
- Let cookies cool on the pan 5-10 minutes, then remove to a wire rack to cool completely.
- Make the buttercream. If you didn’t make the buttercream ahead of time, make it while the cookies cool so it’s ready to use when they’re done. If you did make it ahead of time, be sure to let it come to room temperature on the counter (usually 2-3 hours).
- Decorate completely cooled cookies as desired.
Enjoy!
*I highly recommend European style butter! It has less water and makes a richer dessert. If your butter has become shiny or oily, put it back in the fridge for 5-10 minutes until it firms up a bit (not hard) and is matte in appearance.
