
"Italian Wedding" Raspberry Cookies
Light shortbread and jam with a hint of almond gives these cookies a flavor reminiscent of classic wedding cake. They’re are easy to make and addicting!
The story
I’m not a big almond extract fan, mostly because it can be overpowering. Almonds are great and all, but the extract is a bit intense. I tend to omit it when it’s called for or substitute it for another flavor altogether. So when my husband wanted to try out these cookies on Labor Day, I was skeptical. But…I do tend to take over in the kitchen (shocker) and he likes to bake, too. So I decided to go with it.
I’m actually glad I did.
One, they were super easy to throw together. We’ve got a baby and do crazy things like walk two miles to brunch before going to an afternoon barbecue. Inevitably, life happened and I had to make these while alternating between holding the baby and keeping her from dumping out the kitchen trash…again. Thank goodness no eggs are needed and they were easy to make. I’m kinda getting tired of cleaning up dropped eggs from inside my fridge. #momlife
Two, you can make the cookies ahead and bake them later, which meant I didn’t have to heat up our house and was able to bake them at my in-laws’. Free cookies for them, no boiling our house in 100* weather for us. Win-win.
Three, these cookies are light, perfectly sweet, a tiny bit crunchy, and addicting. My father-in-law ate two. That’s pretty much unheard of and is a HUGE stamp of approval.
Four, I love shortbread and raspberry, separately and together. I have a few recipes that use a combination of these two delicious treats. These cookies are a unique, unexpected twist on the classic combination.

Why Italian wedding?
The almond extract and powdered sugar in these cookies create a flavor that reminds me of classic wedding cake and a texture similar to Mexican wedding cookies. And since almond is a classic flavor in Italian dessert, I decided to name these Italian Wedding Cookies.
Tips for this dessert
Consider making your own raspberry preserves
I used jarred jam, because we had it and I was lazy. But I LOVE making my own. For this recipe, you would need about 1-1.5 cups fresh or frozen raspberries, a few tablespoons sugar (optional, I often leave out), and about 1-2 tablespoons cornstarch or flour (I usually do 1 of each). Mix and let it work its magic! After an hour or so of occasional stirring, you should have a usable preserve. You can also heat this over the stove, boiling over low for about 5 minutes.

You can make the dough ahead of time
The dough will last up to 3 days in the fridge. If you want to make them further ahead, you can shape them (including the thumbprints in the middle) and freeze them on a baking sheet for an hour before transferring them to an airtight container. Then, add the jam right before baking. Be sure to keep dough (whether refrigerated or frozen) in something truly airtight, as freezer and fridge smells really can alter the taste of the cookies.
Chill (or freeze) the shortbread
Either before or after filling the cookies, you’ll need to throw them in the fridge for 20-30 minutes or the freezer for 10 minutes. I actually froze them before and after filling them, mostly because it was 2,628 degrees in our house and I wasn’t confident the jam wouldn’t just cause the cookies to to turn into a buttery puddle. I’m sure it was overkill, but if you’re making these in a warm house, I do encourage the same superfluousness.

Store-bought or homemade preserve both work
Obviously, I prefer homemade everything. It’s why I’m currently on a mission to make a key lime pie without sweetened condensed milk. Making homemade raspberry preserve is as easy as cooking some frozen berries with a squeeze of lemon juice, some sugar, and some corn starch.
However, if you’re strapped for time or just don’t feel like that much work (like I felt when I made the cookies photographed here), store bought preserves work just fine.
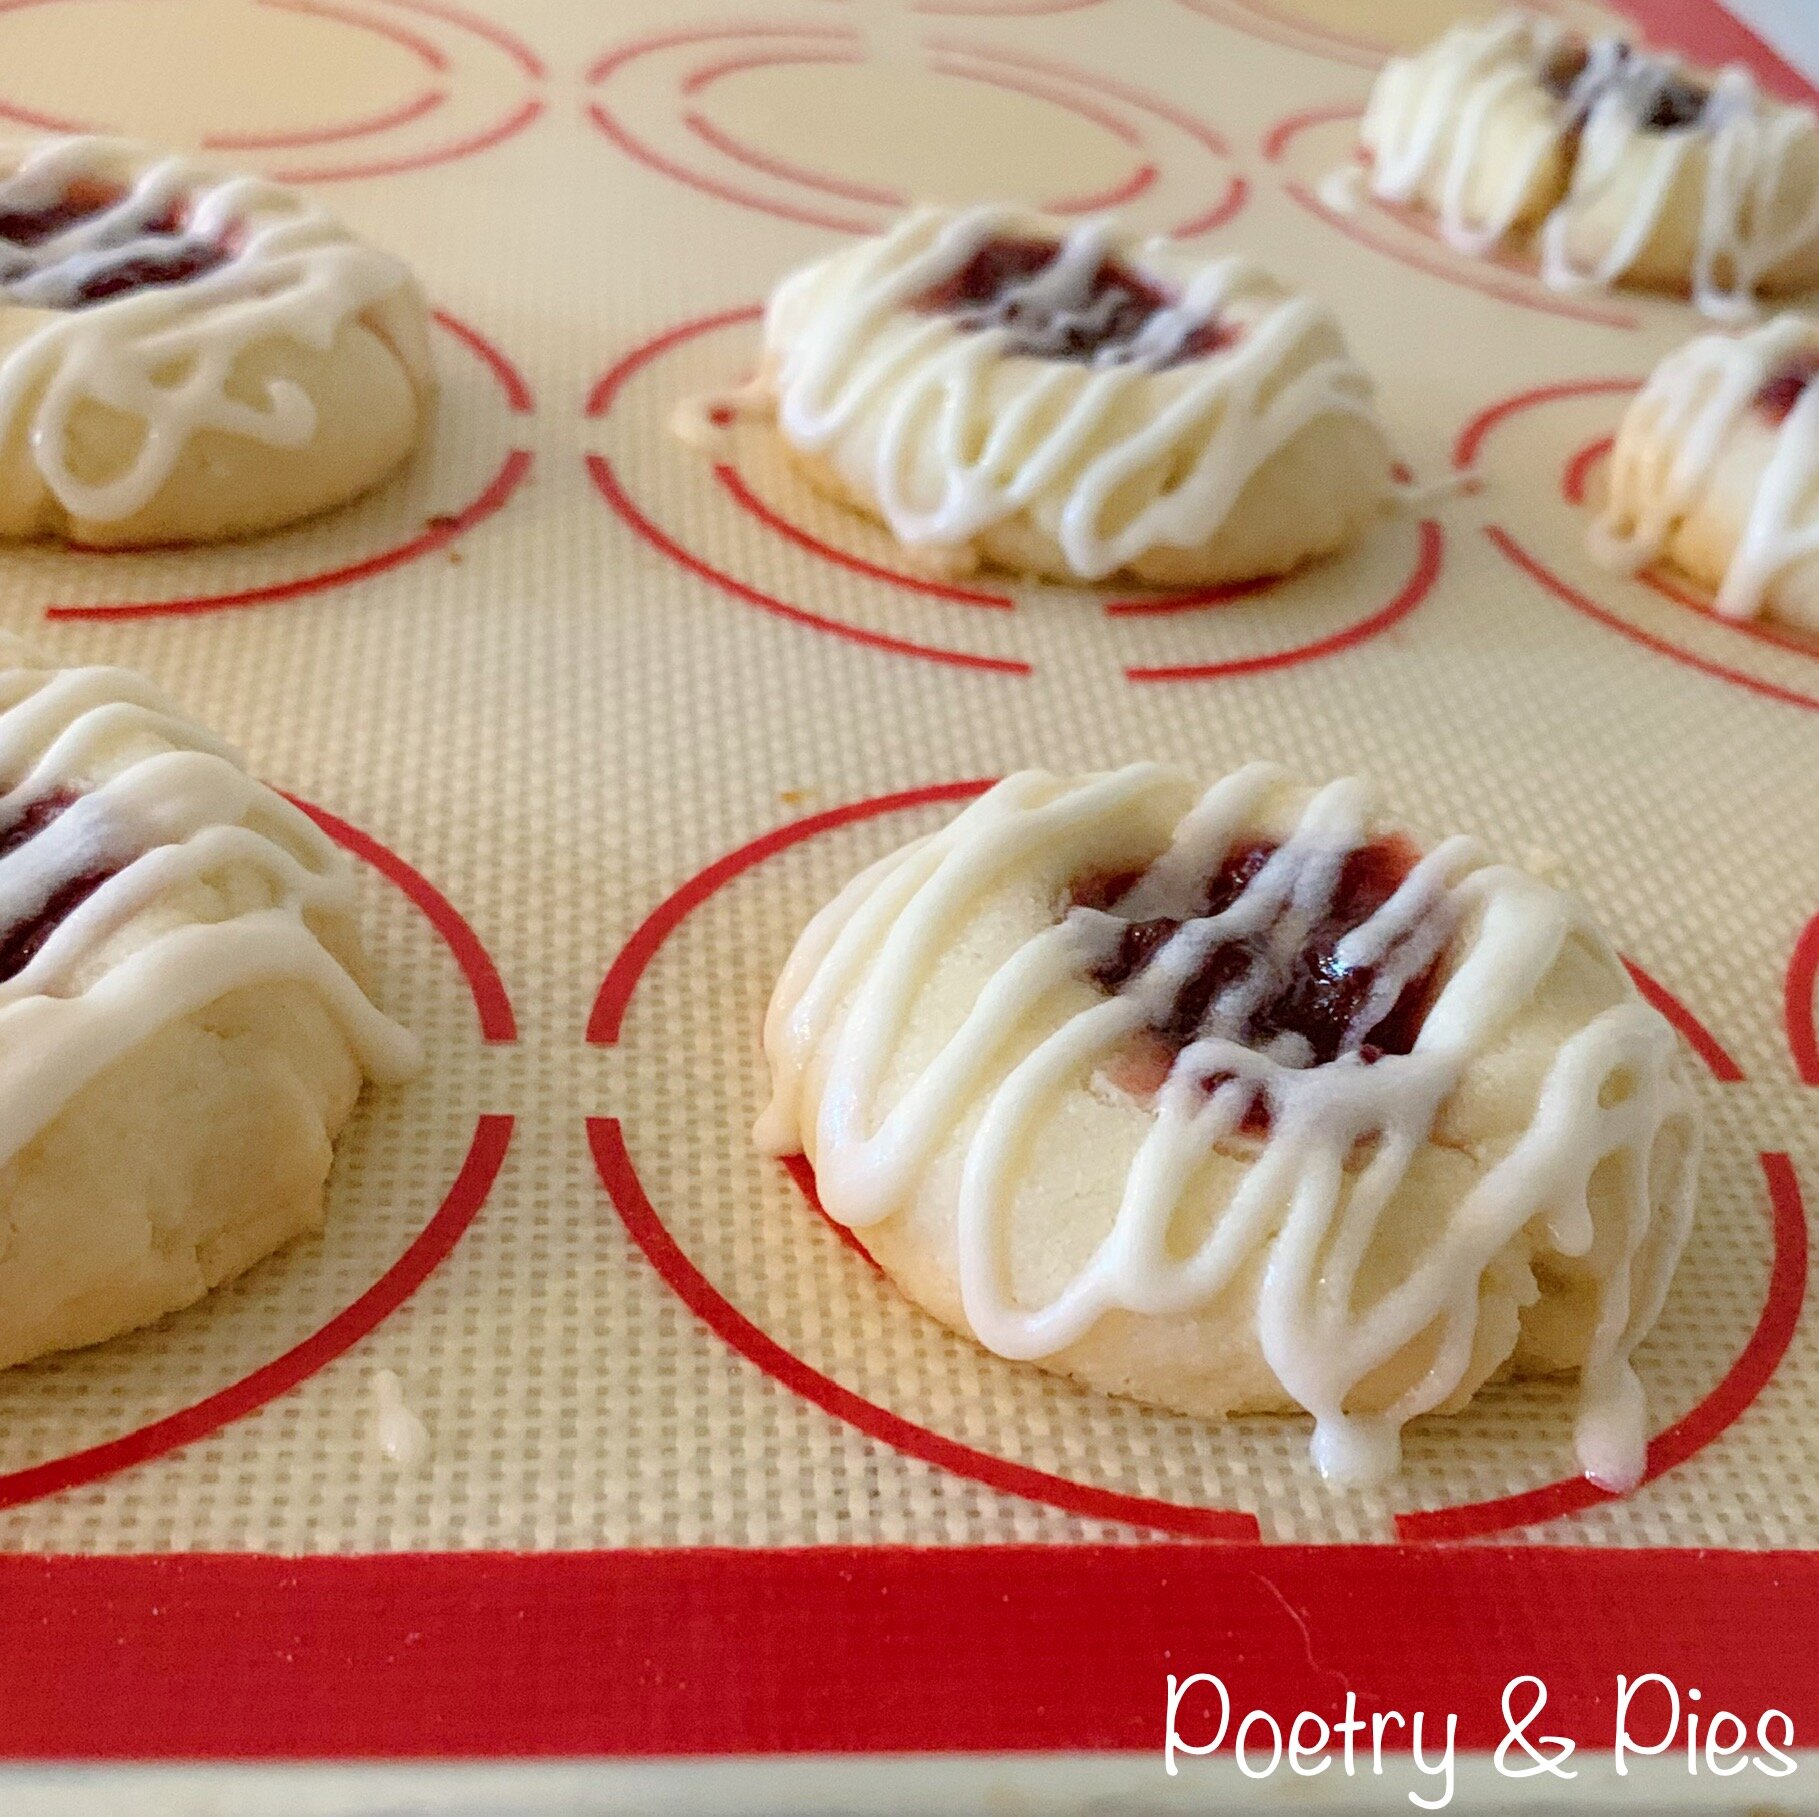
The glaze is optional
The original recipe these are based on is from Cooking Classy. I’ve adjusted several elements of the recipe, including only putting glaze on half my cookies to see if I really needed it. I liked both just fine, but people at our party seemed to prefer the non-glazed cookies.
"Italian Wedding" Raspberry Cookies
- prep time: 10 minutes
- cook time: 12-15 minutes
- total time: 25 minutes, plus chilling time
Servings: 24 cookies
Ingredients:
for the cookies
- 2 cups flour
- 1/4 teaspoon salt
- 1 cup softened unsalted butter (leave out 1 hour)
- 1/2 cup powdered sugar (I used slightly less, about 1/3 cup, for health...)
- 1/4 teaspoon almond extract
- 1/2 teaspoon vanilla extract (optional)
- 1/2 to 3/4 cup raspberry preserves or macerated berries (see note above)
for the glaze
- 1/2 cup powdered sugar
- 1/8 to 1/4 teaspoon almond extract
- 1 tablespoon milk or water (or lemon juice...but the amount may vary)
Instructions:
- If using your own preserves, do that first so they have time to macerate.
- Whisk together flour and salt. Set aside.
- In a medium bowl (or the bowl of a stand mixer--I couldn't use mine because it does best with larger quantities), whip the butter with a handheld electric mixer on high until creamed, about 30 seconds. Add the sugar and mix on high until light and fluffy, about 1 minute (longer if using a shortbread with granulated sugar). Add almond and vanilla (if using) extracts and mix, starting on low then increasing to high to fully incorporate.
- Scrape the bowl then add the flour/salt and mix on low until fully incorporated, scraping the bowl if necessary. Do not overmix.
- Roll into roughly 1 inch balls. Place on a lined cookie sheet, at least 2 inches apart. Once all of your dough is rolled out, press your thumb into the center of each cookie, creating a hole about the size of 1/2 a tablespoon. You can eyeball this part based on how much preserve you want in each cookie. Just don't let the bottom of the well be too thin or it won't hold your preserves.
- Chill shaped cookies at least 20 minutes. I tossed ours in the freezer for an hour since it was 100 degrees outside and we were traveling with them unbaked. But 10 minutes in the freezer or 20 in the fridge is usually plenty. (Alternatively, you can chill or freeze them after filling them--with this recipe either way is fine. However, I don't recommend filling them if you plan to freeze them for an extended period of time, as the jam will dry out over time.)
- When ready to bake: Preheat oven to 350. Spoon desired amount of raspberry preserves into each cookie, filling to the top of the hole but not above. Bake for 12-15 minutes, until cookies aren't shiny/wet looking and a tinge of golden brown appears on the edges. I think I baked ours a little long, but they were still good!
- If using the glaze, mix ingredients in a bowl, adding milk/water as needed until smooth and drizzle-able. Drizzle over cookies once they've cooled completely.
Enjoy!
